
How I Turned My Awkward Hallway Corner Into a Productive Home Office
Let me tell you about the time I nearly gave up on finding a workspace in our 1,200-square-foot house. We have three kids, a dog that thinks the living room is his personal playground, and what felt like zero square footage left for me to actually work. That is, until I looked at that weird 3-foot-wide gap between the staircase and the front door and thought, “What if…?”

After three failed attempts (including a disastrous IKEA Kallax bookshelf that blocked the hallway), I finally created a home office nook that actually works. The key? Stopping to measure twice, embracing vertical space, and accepting that my “office” would need to fold away when company comes over. If I can make this work in our chaotic household, you can too,no matter how small your space.
In this post, I’ll share exactly how I did it, including the tools I used, the mistakes I made (so you don’t have to), and the budget-friendly hacks that saved me hundreds. We’ll cover everything from assessing your space to choosing furniture that won’t make you feel like you’re working in a closet. Spoiler: It’s possible to have a workspace that’s both functional and doesn’t make you want to scream when the kids barge in.
Oh, and if you’re curious about how I styled it once the functional bits were done, check out my post on adding charm to small spaces,because let’s be real, we all need our workspaces to feel a little less like a prison cell.
Why a Dedicated Workspace Actually Matters (Even If You Think You Don’t Need One)
I used to laugh at people who talked about needing a “dedicated workspace.” I mean, I’m a mom,my office is wherever I can find a quiet corner with my laptop, right? Wrong. After about six months of working from the kitchen table (and constantly having to move my laptop when it was time to feed the kids), I realized something: I was less productive when I didn’t have a clear boundary between “work me” and “mom me.”
Here’s what changed when I finally claimed that hallway nook:
- I stopped working late into the night because I wasn’t mentally “done” with work. Before, I’d find myself answering emails at 9 PM just because my laptop was still out.
- I actually finished tasks faster. No more getting distracted by laundry piles or the dog begging for treats.
- I felt less guilty about “not being present” with the kids. When I was in my nook, they knew Mommy was working,and when I stepped out, I was fully there.
Now, I’m not saying you need a full-blown office with a door (though if you have that luxury, take it!). But even a small, defined space makes a huge difference. And the best part? You don’t need much room to make it work.
Take my friend Sarah, for example. She turned her closet into a standing desk station. Yes, you read that right,a closet. She mounted a small desk at counter height, added a pegboard for supplies, and voila: instant workspace. She swears it’s the most productive she’s ever been, and she doesn’t even have to leave her bedroom.
If you’re still not convinced, think about this: How many times have you sat down to work on the couch, only to realize an hour later that you’ve been distracted by the TV, the kids, or the fact that you’re sitting on a pile of laundry? A dedicated space,even a tiny one,helps your brain switch into “work mode” faster.
And if you’re thinking, “But I don’t have any extra space!”,hold on. I’ll show you how to find (and create) a workspace in places you never thought possible. Spoiler: That weird alcove by your front door? Totally doable.
How to Find (or Create) a Workspace in Your Home
First, let’s talk about where to look. You don’t need a spare room or even a whole corner,just a spot that can be yours for a few hours a day. Here’s how I found mine:
1. Look for “Dead Space” You’re Not Using
I’ll be honest: I ignored that hallway nook for years. It was too narrow for furniture, too awkward for decor, and honestly, I just didn’t see the potential. But when I finally pulled out my tape measure (yes, I had to dig it out of the garage), I realized it was actually 3 feet wide,plenty of room for a slim desk.
Where else to look:
- Under the stairs: If you have a staircase, chances are there’s unused space beneath it. I’ve seen people turn these into cozy nooks with built-in desks and even bookshelves.
- Bedroom corners: That empty space by your bed? It might be perfect for a compact desk. Just make sure it’s not in the way of your morning routine.
- Closets: Yes, really. If you have a walk-in closet (or even a deep one), you can turn it into a workspace. Sarah did it, and now she’s a convert.
- Dining rooms: If you don’t use your dining table every day, consider turning it into a workspace. Just make sure it’s not in the way when you actually need the table.
- Hallways: Like mine! If you have a hallway that’s wider than 3 feet, you might be able to squeeze in a desk.
Pro tip: Grab a tape measure and start measuring. You’d be surprised how much space you’re wasting. I measured every “dead zone” in my house, and I found three potential spots I’d never considered before.
2. Prioritize Natural Light (But Not Direct Sunlight)
When I was picking my spot, natural light was a must. I didn’t want to be squinting at my screen all day, and I knew I’d feel better with some sunlight. But here’s what I learned the hard way: Direct sunlight is not your friend. It creates glare on your screen and makes your space feel like a sauna in the summer.
Instead, look for:
- North-facing windows (they provide steady, glare-free light all day).
- East-facing windows (great for morning light, which helps you wake up and focus).
- A spot near a window but not in direct sunlight. If you can’t avoid direct light, consider sheer curtains or a sheer curtain rod to diffuse it.
If your space doesn’t have natural light, don’t worry. You can still make it work with good artificial lighting (more on that later). But if you can find a spot with light, it’ll make a huge difference in how you feel while you’re working.
3. Make Sure It’s Accessible (But Not Too Accessible)
You want your workspace to be easy to get to, but not so easy that the kids (or the dog) can just wander in and distract you. My hallway nook is close enough to the kitchen that I can grab a snack, but far enough away that the kids know it’s “Mommy’s work space.”
Think about:
- Is it near an outlet? If not, can you run a power strip or add one? (I’ll talk more about this later,it’s a bigger deal than you think.)
- Is it near a door or high-traffic area? If so, can you add a room divider or some sort of barrier to create a sense of separation?
- Is it too close to the TV or other distractions? If so, can you rearrange things to minimize distractions?
If your space is too open or distracting, don’t worry. There are ways to create boundaries (like room dividers or even just a well-placed bookshelf) that can help. I’ll share some of my favorite tricks later in this post.
Planning Your Space: What You’ll Need to Get Started
Once you’ve picked your spot, it’s time to plan. This is where I made my first big mistake: I jumped right into buying furniture without measuring anything. Big error. Here’s what I wish I’d known before I started:
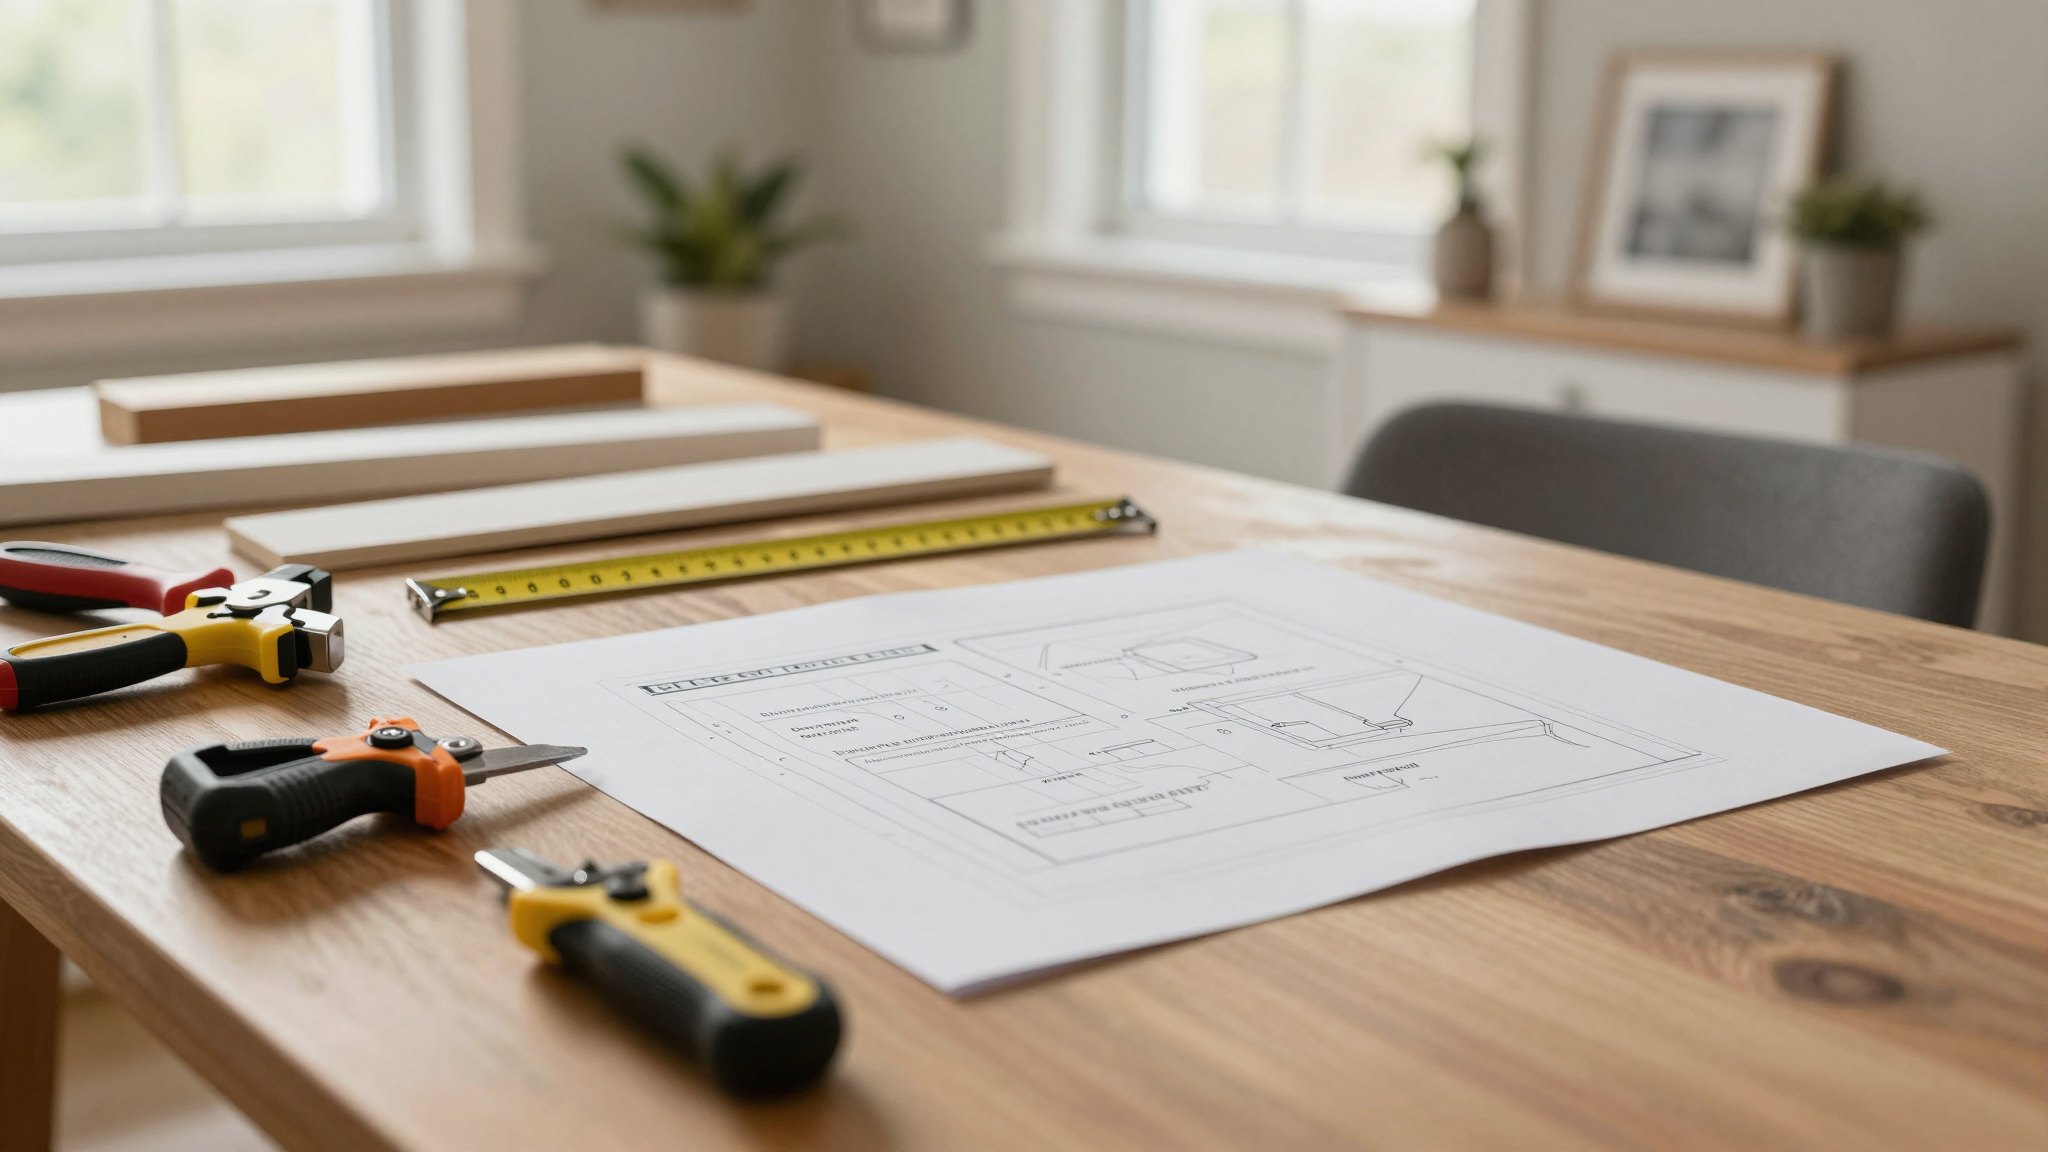
1. Measure Everything (Twice)
I measured my hallway nook once, decided it was 3 feet wide, and then went to buy a desk. Turns out, the desk I picked was 32 inches wide,and it did not fit. I had to return it and start over. Lesson learned: Measure twice, and make sure you account for things like:
- The width of your chair (you’ll need room to roll it in and out).
- The depth of your desk (you don’t want to be crammed against a wall).
- Any obstacles, like doorways, radiators, or baseboards.
Pro tip: Draw a simple sketch of your space. It doesn’t have to be fancy,just a rough outline with measurements. This will help you visualize what will fit and what won’t.
2. Think About Your Workflow
Before you buy anything, ask yourself:
- What do I use most often? (Laptop? Dual monitors? A printer?)
- Where do I like to keep my supplies? (Drawers? Shelves? A caddy?)
- Do I need space for files or reference materials?
- Will I be sitting or standing? (If standing, make sure you have a good mat to reduce foot fatigue.)
For me, I knew I needed:
- A compact desk (I went with a 24-inch-deep desk so I’d have room for my laptop and a notebook).
- Some sort of storage for supplies (I used a small cubby unit I already had).
- A chair that would fit in the space (I ended up with a slim task chair that tucks under the desk).
- Good lighting (more on this in a bit).
If you’re not sure what you need, try “working” in your space for a day or two with just your laptop and a notebook. See what feels awkward or missing, and then build from there.
3. Don’t Forget About Power!
This is a huge one, and it’s something I almost overlooked. Before you commit to a spot, make sure it’s near an outlet,or that you can easily add one. If not, you’ll be dealing with extension cords, which are a tripping hazard and just plain annoying.
If your space doesn’t have an outlet nearby, here are a few options:
- Use a power strip with a long cord (just make sure it’s not a fire hazard!).
- Add a new outlet yourself (if you’re comfortable with basic electrical work) or hire an electrician.
- Use a battery-powered laptop or a portable charger.
I ended up running a power strip from the nearest outlet, but I made sure it was hidden behind the desk so it didn’t look messy. If you’re not sure how to do this safely, check out my post on essential tools every homeowner should have,it includes tips for working with electricity safely.
Choosing the Right Furniture for Small Spaces
Now, let’s talk furniture. This is where a lot of people get stuck because they think they need a big, expensive desk to make a workspace feel “official.” Not true! You can create a functional (and stylish) workspace with budget-friendly, space-saving furniture. Here’s what I learned:
1. Desks: Small but Mighty
When I was shopping for a desk, I had no idea how many options there were for small spaces. Here’s what I found:
- Floating desks: These are wall-mounted and save a ton of floor space. I considered one, but I wasn’t sure if my walls could support it (turns out, they could,but I went with a different option). If you’re handy, you can build your own, or you can buy one pre-made. IKEA has some great options, like the BEKSA, which is 47 inches wide and only 11 inches deep.
- Corner desks: These fit snugly into corners and are great for awkward spaces. I ended up with a corner desk from Wayfair that was 24 inches deep and fit perfectly in my hallway nook.
- Fold-down desks: If you need to maximize space, a fold-down desk is a great option. You can mount it to the wall and fold it down when you’re not using it. IKEA’s NORDEN gateleg table is a great example,it folds flat against the wall when not in use.
Pro tip: If you’re buying a desk, look for one with built-in storage (like drawers or shelves) to keep your workspace clutter-free. I found a desk with a small cubby unit underneath, which was perfect for storing my notebooks and pens.
2. Chairs: Comfort is Key
You might think any chair will do, but trust me,sitting in an uncomfortable chair for hours will make you hate your workspace. Here’s what I learned about chairs:
- Look for a chair with adjustable height (so you can set it to the right level for your desk).
- Make sure it has good lumbar support (your back will thank you after a long day).
- If you’re tight on space, consider a backless stool or a slim task chair (like the HumanTouch Ergonomic Task Chair, which I love).
- If you’re standing a lot, get a standing mat to reduce foot fatigue.
I ended up with a simple task chair that tucks under my desk when I’m not using it. It’s not fancy, but it’s comfortable, and that’s what matters.
3. Storage: Keep It Off the Floor
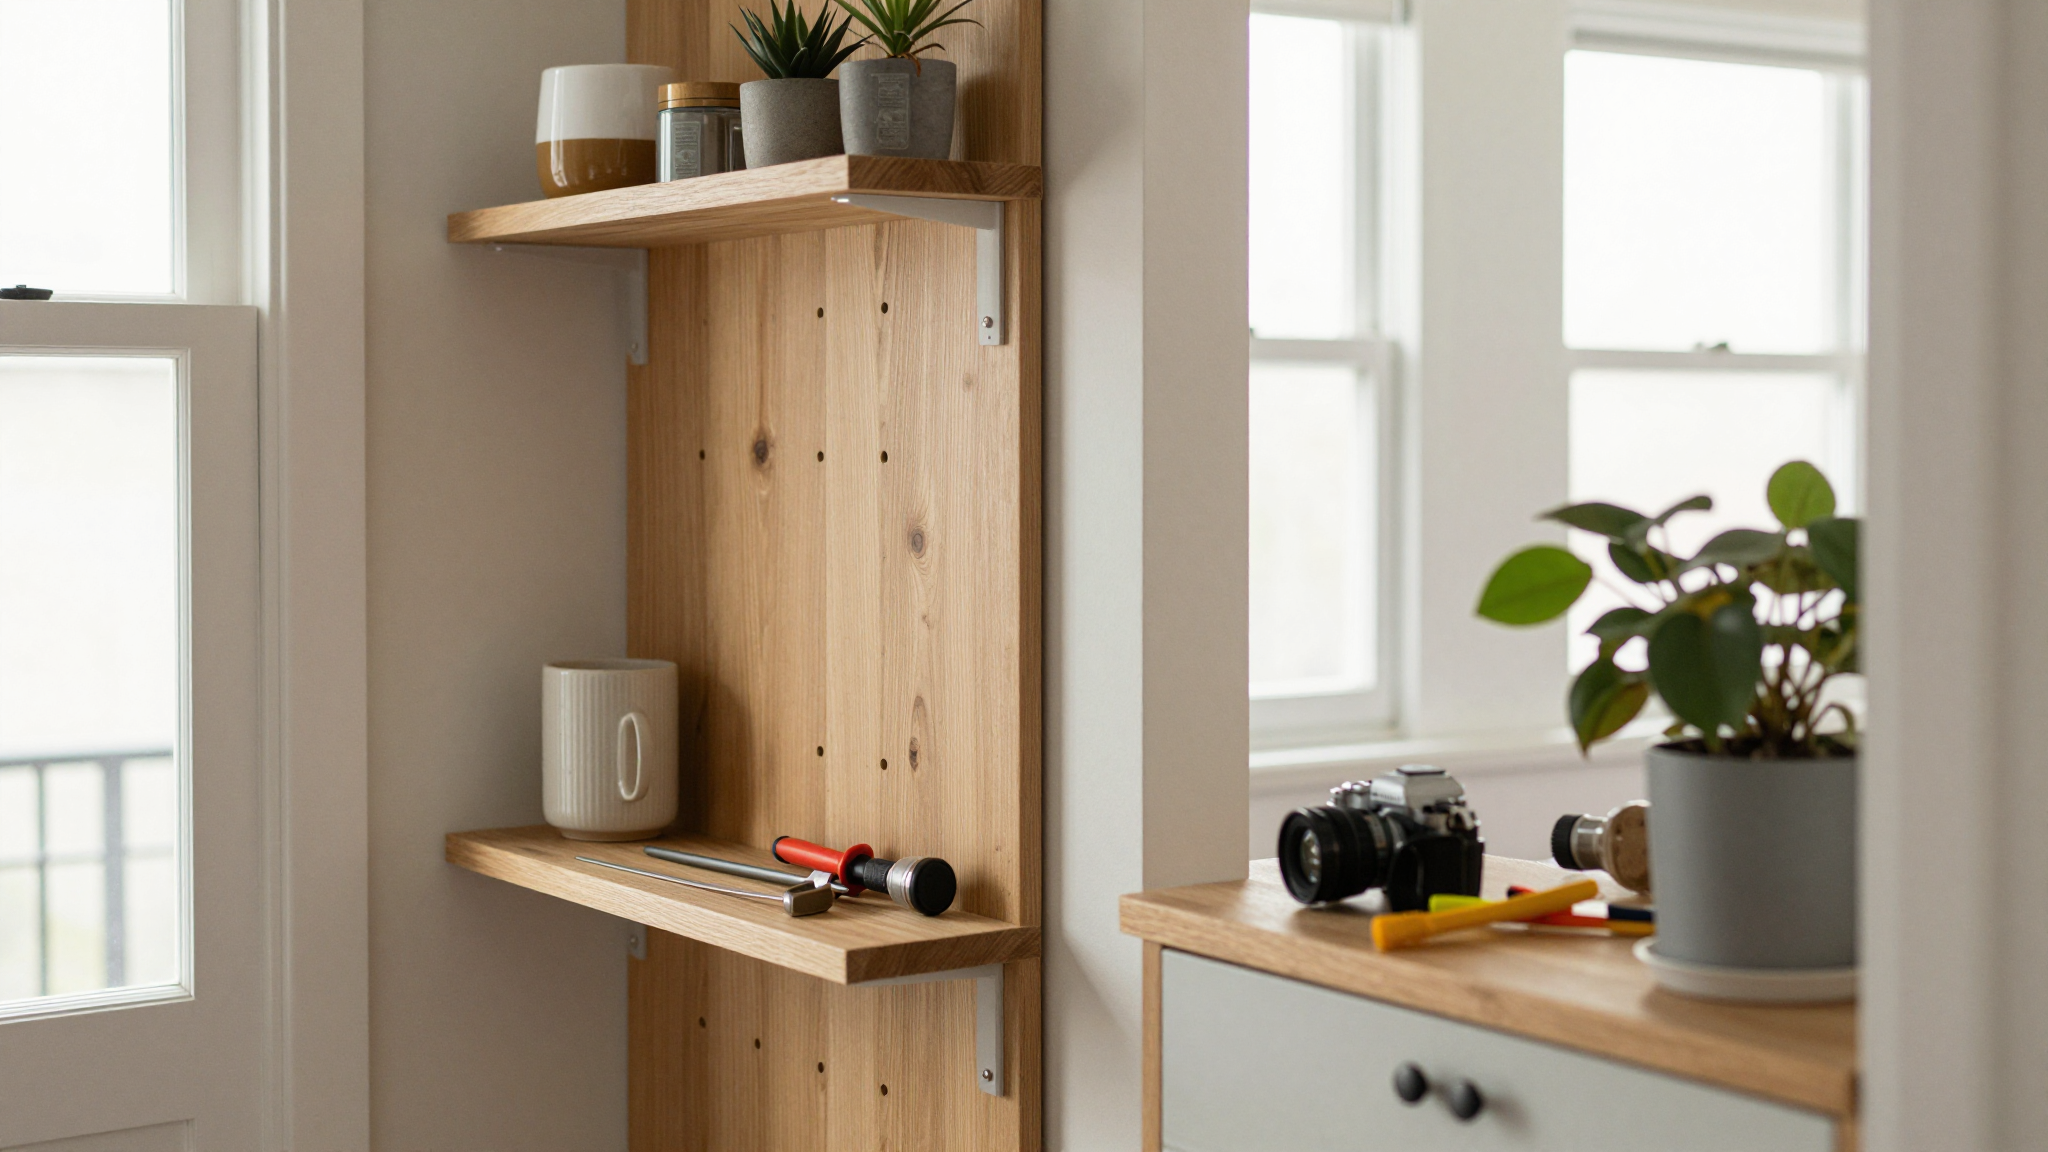
In small spaces, floor space is precious. That’s why I focused on vertical storage,things that go up on the walls or hang from the ceiling. Here’s what worked for me:
- Floating shelves: I used a set of IKEA SKÅDIS pegboards to hang above my desk. They’re great for storing supplies like pens, notebooks, and even my phone charger.
- Wall-mounted cabinets: If you need more storage, consider a wall-mounted cabinet. IKEA’s MAXIMER cabinet is a great option,it’s shallow but deep, so it doesn’t take up much space.
- Over-the-desk shelves: If you need extra surface area, consider a shelf that mounts above your desk. I used a simple floating shelf from Home Depot to hold my printer and some reference books.
Pro tip: If you’re short on space, think vertically! Use the walls, the space above your desk, and even the ceiling (if you’re feeling ambitious) to maximize storage.
Lighting: The Secret to a Productive (and Happy) Workspace
Lighting is one of the most important (and often overlooked) parts of a good workspace. Bad lighting can give you headaches, make it hard to see your screen, and just generally make you miserable. Here’s what I learned about lighting:
1. Layer Your Lighting
You don’t want just one type of light,you want a mix of ambient, task, and accent lighting. Here’s how I did it in my nook:
- Ambient lighting: This is your overall light, like a ceiling fixture or a floor lamp. I used a dimmable LED bulb in the overhead light so I could adjust the brightness depending on the time of day.
- Task lighting: This is the light you use for specific tasks, like reading or typing. I used a adjustable desk lamp with a bright LED bulb to light up my workspace.
- Accent lighting: This is light that adds depth and warmth to your space. I used a small LED strip light behind my desk to create a soft glow.
Pro tip: If you’re working with natural light, position your desk so the light comes from the side (not from behind or in front of you). This reduces glare on your screen and makes it easier to see what you’re doing.
2. Avoid Glare (Trust Me, It’s a Game-Changer)
Nothing is more annoying than glare on your screen. It’s hard to see, it gives you a headache, and it just makes working miserable. Here’s how I avoided it:
- Position your desk so the light comes from the side (not from behind or in front of you).
- Use a matte screen protector to reduce glare.
- If you’re working with natural light, use sheer curtains or a sheer curtain rod to diffuse the light.
- If you’re using a desk lamp, make sure it’s not shining directly into your eyes.
I also added a small anti-glare screen protector to my laptop, which made a huge difference.
Making It Work: Real-Life Tips from My Own Space
Now, let’s talk about how I actually made my hallway nook work. Because let’s be real,it wasn’t perfect right away. I had to tweak a few things, and I made some mistakes along the way. Here’s what I learned:
1. Cable Management: Keep It Tidy (or Go Crazy)
Cables are the bane of every small workspace. If you don’t manage them, they’ll take over and make your desk look like a rat’s nest. Here’s how I kept mine under control:
- I used Velcro cable organizers to bundle my cables together.
- I mounted a USB hub under my desk to keep my cables out of sight.
- I used Command strips to mount my power strip to the wall (so it didn’t take up desk space).
Pro tip: If you’re really struggling with cables, consider a USB-C hub with a built-in cable management system. They’re a lifesaver!
2. Personalizing Your Space (Without Going Overboard)
Your workspace should feel like you, not like a generic office. Here’s how I added personality to my nook without making it look cluttered:
- I hung a few framed prints above my desk (nothing too busy,just a few simple line drawings).
- I added a small plant to my desk for a pop of green.
- I used a desk mat with a fun pattern to add a little color.
Pro tip: If you’re short on space, stick to small decor items. A single plant, a framed photo, or a fun desk accessory can make a big difference without taking up too much room.
3. Making It Work for Your Routine
Your workspace should work for you, not against you. Here’s how I made mine fit my routine:
- I kept my most-used supplies (like my notebook and pens) within arm’s reach.
- I used a desk organizer to corral my sticky notes, paper clips, and other small items.
- I added a small desk caddy to hold my phone and headphones.
Pro tip: If you’re not sure what you need, try “working” in your space for a day or two with just your laptop and a notebook. See what feels awkward or missing, and then build from there.
Final Thoughts: Your Space, Your Rules
Creating a functional home office nook in a small space is all about intentionality. It’s not about having a huge, expensive desk or a dedicated room,it’s about making the most of what you’ve got and creating a space that works for you.
Remember: There’s no “right” way to do this. My hallway nook might not work for you, but that’s okay! The key is to find a spot that fits your space, your budget, and your needs. And if it’s not perfect right away? That’s okay too. I had to tweak my setup a few times before it felt just right.
So, grab a tape measure, pick a spot, and start planning. And if you’re feeling overwhelmed, just remember: I turned a weird hallway corner into a workspace, and so can you.
Now, go claim that corner,and happy working!
FAQs
How do I start designing a functional workspace in a tight area?
Start by measuring your available space and noting natural light sources. Prioritize essentials like a compact desk, ergonomic chair, and vertical storage. Brands like IKEA offer space-saving furniture tailored for corners or underutilized walls. For inspiration, check out my post on adding charm to small spaces,it’s packed with ideas for making tight areas feel intentional.
What’s the best way to add storage without cluttering a small desk setup?
Opt for floating shelves, wall-mounted pegboards, or cabinets above the desk. Built-in drawers or fold-down desks,like the IKEA Norden,maximize floor space while keeping supplies organized and within reach. If you’re short on space, think vertically! Use the walls, the space above your desk, and even the ceiling to maximize storage. For more ideas, check out my post on upcycling furniture,it includes tips for adding hidden storage to existing pieces.
Can a dining table double as a workspace without looking messy?
Absolutely! Use decorative trays or baskets to corral work essentials. Add a sleek desk lamp and stylish organizers, such as Poppin’s acrylic trays, to maintain a polished look. Store items in a rolling cart when not in use. For more tips on styling small spaces, check out my post on bedroom makeovers,the principles apply to any multi-use room!
How do I balance style and practicality in a minimalist design?
Stick to neutral tones for furniture and walls, then inject personality with bold art or textured accents. Multifunctional pieces, like West Elm’s media cabinets, hide tech gear while blending seamlessly with living areas. For more minimalist inspiration, check out my post on DIY accent walls,it includes tips for creating clean, functional spaces.
What lighting works best for productivity in compact zones?
Layer ambient and task lighting. Pair overhead fixtures with adjustable desk lamps,the Philips Hue Go offers customizable brightness. Position lights to reduce glare and shadows, especially near monitors. For more lighting tips, check out my post on winterizing your home,it includes ideas for maximizing natural light in small spaces.
Are built-in desks worth the investment for small corners?
Absolutely. Custom built-ins, like those from Pottery Barn, optimize awkward nooks. They provide ample surface area and hidden storage, ensuring every inch serves a purpose without sacrificing aesthetics. If you’re handy, you can even build your own! For more DIY desk ideas, check out my post on building a farmhouse coffee table,the same principles apply to desks.
How can I make a closet-turned-workspace feel less cramped?
Remove closet doors and use light-reflective paint. Install a shallow desk, under-cabinet lighting, and open shelving. Add a mirror to visually expand the area and keep supplies in matching bins for cohesion. For more closet organization tips, check out my post on patching drywall,it includes ideas for maximizing small spaces.
What’s a budget-friendly hack for soundproofing an urban nook?
Use thick curtains, plush rugs, or acoustic panels from Auralex. Place bookshelves filled with books or plants near the workspace to absorb noise and create a focused environment. For more soundproofing tips, check out my post on HVAC maintenance,it includes ideas for reducing noise in small spaces.
How do I personalize a corporate-looking built-in desk area?
Add pops of color with framed prints, patterned chair cushions, or a vibrant desk mat. Incorporate greenery like succulents or a small fiddle-leaf fig. Display curated decor, such as vintage bookends or a Sonos speaker. For more personalization tips, check out my post on gallery walls,it includes ideas for adding personality to functional spaces.
What’s the easiest way to reconfigure a shared living room workspace?
Use room dividers like the Room & Board Screen or a tall bookcase. Choose foldable furniture, such as the FLISAT table from IKEA, and tuck it away when not in use. Stick to a cohesive color palette to unify the space. For more living room ideas, check out my post on fireplace makeovers,it includes tips for creating multi-functional spaces.