
How I Built a Gallery Wall That Actually Feels Like *Me*
Let me tell you,my first attempt at a gallery wall was a disaster. I spent $200 on frames, hung everything crooked, and ended up with a wall that looked like a kindergartener’s art project. (My husband still teases me about the “abstract modern” phase.) But after a few tries,and a lot of YouTube tutorials,I figured out how to make a gallery wall that’s actually cohesive, personal, and (dare I say) stylish.
This isn’t one of those “10 steps to transform your space” posts. It’s the real, unfiltered way I’ve created gallery walls in our home,from the living room (where I finally got the spacing right) to the kids’ playroom (where I let them hang their own artwork, crooked edges and all). If you’re ready to turn a blank wall into something that tells your story, let’s get started.
Why a Gallery Wall? (Beyond Just “Making It Pretty”)
I used to think gallery walls were just for people who had fancy art degrees or Pinterest-perfect homes. Then I realized: they’re for anyone who wants to fill their walls with the things they love. Mine isn’t about expensive prints or perfect symmetry. It’s about the memories, the quirks, and the little details that make our house feel like ours.
Take the wall in our entryway. It’s a mix of:
- Black-and-white photos from our trip to Italy (yes, the one where I lost my passport and we ate gelato for breakfast)
- A vintage map of our neighborhood, framed in a thrifted gold frame
- Our kids’ handprint art from preschool (because sentimentality wins every time)
- A few abstract prints I found at a local market,nothing fancy, just colors that make me happy
It’s not “perfect,” but it’s us. And that’s the point.
Here’s what a good gallery wall does for your space:
- Makes it personal. No more generic wall art from Target. This is your chance to show off the things that matter to you,whether it’s family photos, travel souvenirs, or even your kid’s “masterpiece” finger painting.
- Adds character. A blank wall is boring. A gallery wall? It’s a conversation starter. (Pro tip: Mine gets more compliments than my coffee table, and that thing took me months to build. See? I’m not kidding.)
- Balances the room. If your space feels off,maybe your couch is too big, or your TV is the only focal point,a gallery wall can pull everything together. It’s like the glue for your decor.
And the best part? It’s flexible. Tired of the same old photos? Swap them out. Want to try a new layout? Go for it. Unlike paint colors or furniture, a gallery wall is easy to change when your style (or your mood) does.
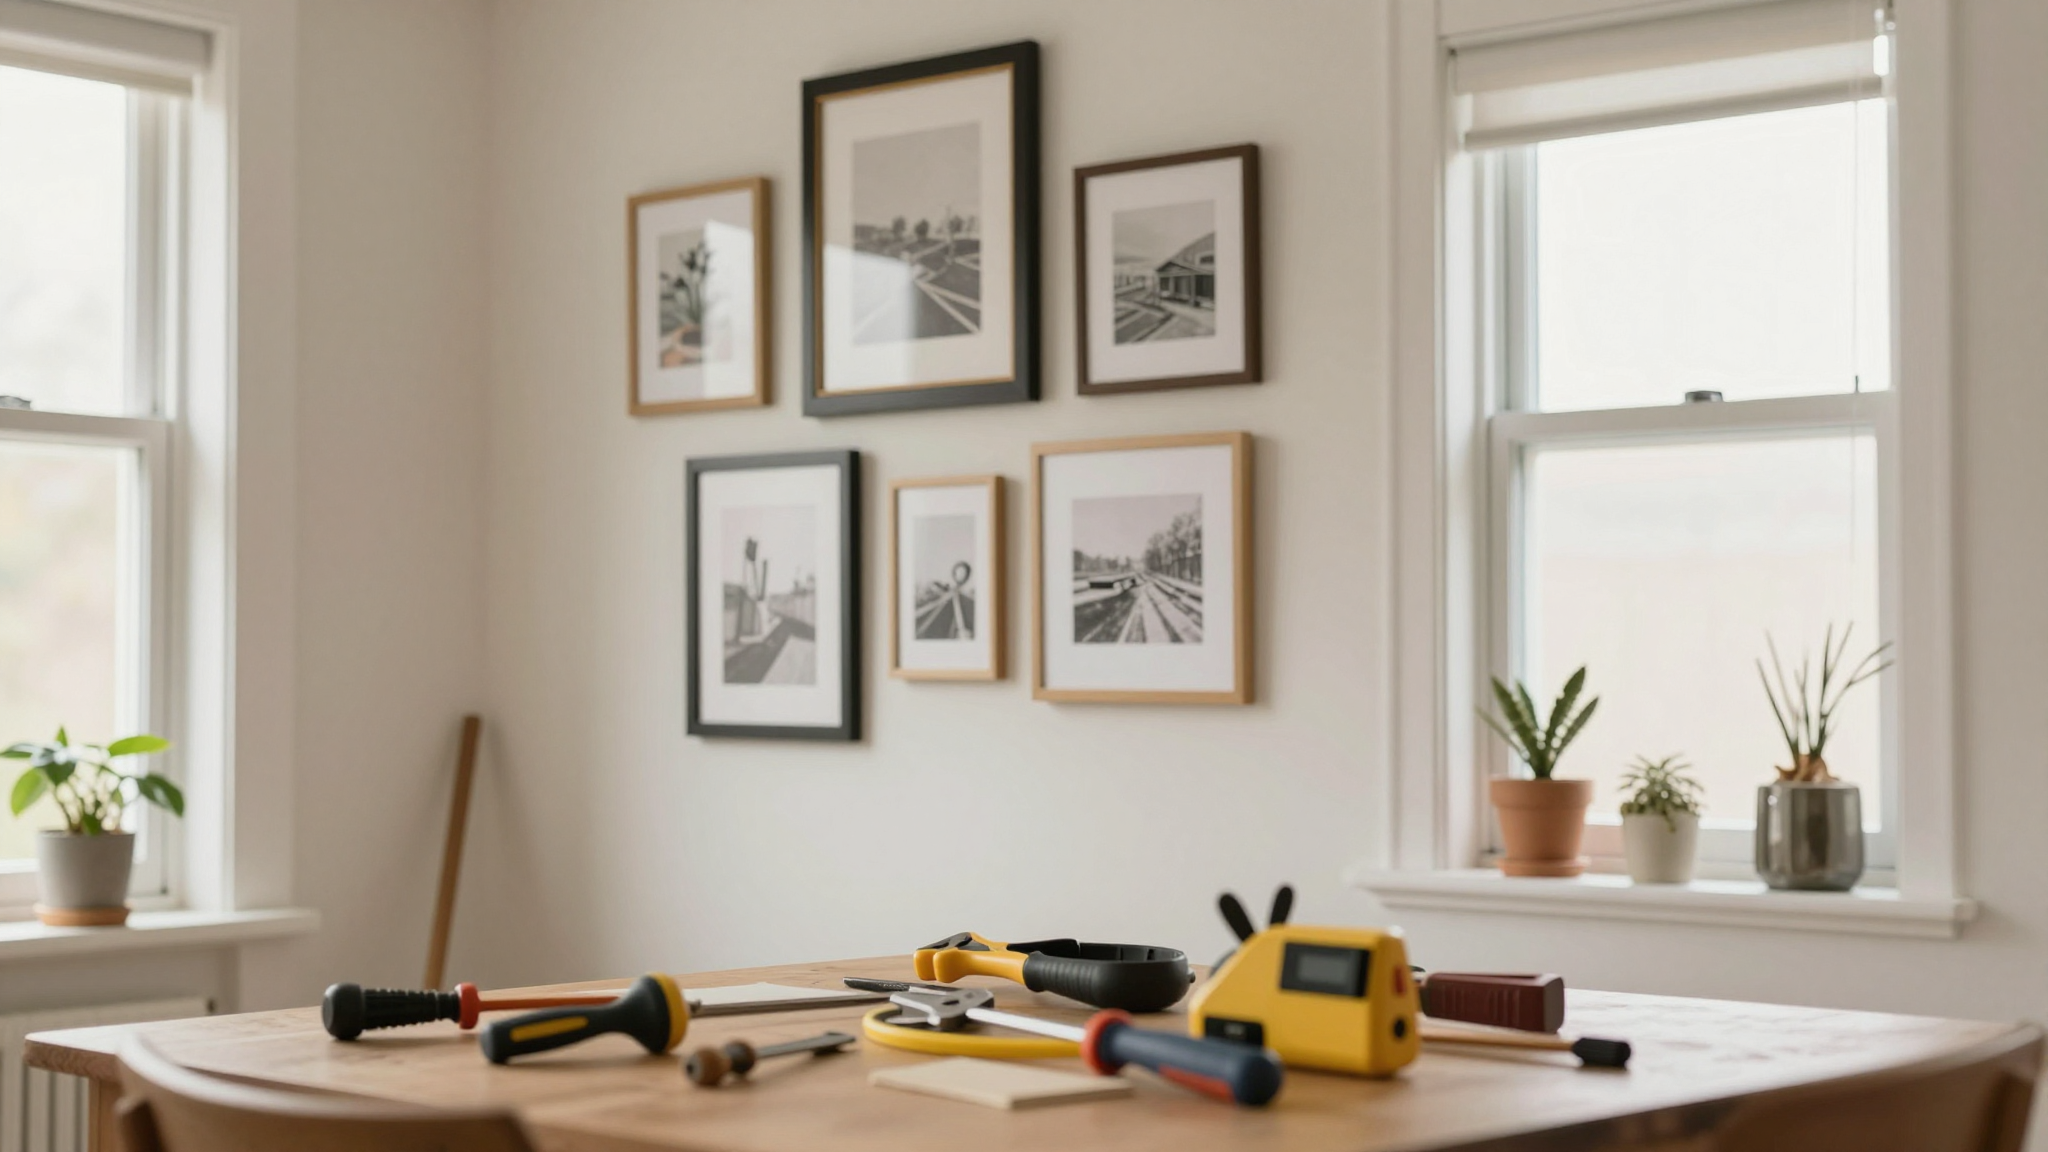
Tools and Supplies: What You’ll Actually Need
Before you run to the store, let me save you some money. You don’t need a fancy toolkit to hang a gallery wall. Here’s what I actually use (and what I’ve learned the hard way):
The Essentials
- Frames. I swear by a mix of thrifted finds and IKEA’s RIBBA frames (they’re cheap, lightweight, and come in a million styles). Pro tip: If you’re mixing metals, stick to one finish,all gold, all black, or all brass. Trust me, my “eclectic” phase with mismatched frames looked like a junk drawer exploded.
- Hanging hardware. Command Strips for drywall (I use the Command Large Picture Hanging Strips,they hold up to 16 lbs each, and I’ve never had one fail). For heavier frames, I use stud finders and screws. (Yes, I’ve learned to find studs the hard way,more on that in a minute.)
- Measuring tools. A tape measure (the kind with a lock so it doesn’t roll up mid-measure), a level (I love the Stabila Spirit Classic,it’s pricey but worth it), and a pencil. Oh, and a friend. Hanging a gallery wall alone is a recipe for frustration.
- Extras that help. Painter’s tape (for marking layouts), a drill (if you’re hanging into studs), and a step stool (or a tall husband, if you’re lucky).
Now, the mistake I made the first time? I bought all the frames in one style,same color, same width,because I thought it would look “clean.” Spoiler: It looked boring. Now I mix it up. Some frames are thin black, others are wide gold, and a few are even wood. The key is to keep the colors or themes cohesive, even if the styles vary.
And about those studs? I once hung a heavy frame using just drywall anchors. Guess what happened when my toddler decided to “help” and leaned on it? Crash. Now I always find the studs,even if it means moving the couch and crawling around with a stud finder like a detective.
Planning Your Layout: How I Avoid the “Kindergarten Art Project” Look
This is where most people get stuck. You don’t want your gallery wall to look like a bunch of frames were thrown at the wall and stuck there. (Been there.) Here’s how I plan mine so it actually looks intentional:
Method 1: The Floor Layout (My Favorite)
I lay all my frames on the floor in the general area where I want them to go. I rearrange, step back, and adjust until it feels right. Then I take a photo with my phone so I can reference it while hanging. Pro tip: Use painter’s tape to mark the outline of each frame on the floor. It helps you visualize the spacing.
I also use a free Canva template sometimes if I’m feeling fancy. But honestly? The floor method works just as well.
Method 2: The Paper Template (For Overthinkers Like Me)
If I’m really nervous about getting it right (like when I was hanging a wall in our guest room), I trace the outline of each frame onto paper, cut them out, and tape them to the wall. It’s tedious, but it lets me tweak the layout without making a million holes in the drywall.
I learned this trick from my sister, who’s an interior designer. She swears by it, and after my first disaster, I do too.
Method 3: Digital Tools (For the Tech-Savvy)
If you’re more comfortable on a screen, apps like Canva or HomeStyler let you drag and drop frames to plan your layout. I used Canva for a gallery wall in our dining room, and it saved me from a lot of guesswork.
No matter which method you choose, here’s my golden rule: Step back often. Your eyes get used to what’s in front of you, and suddenly, everything looks “off” when you’re up close. Take a break, come back, and look at it from across the room.
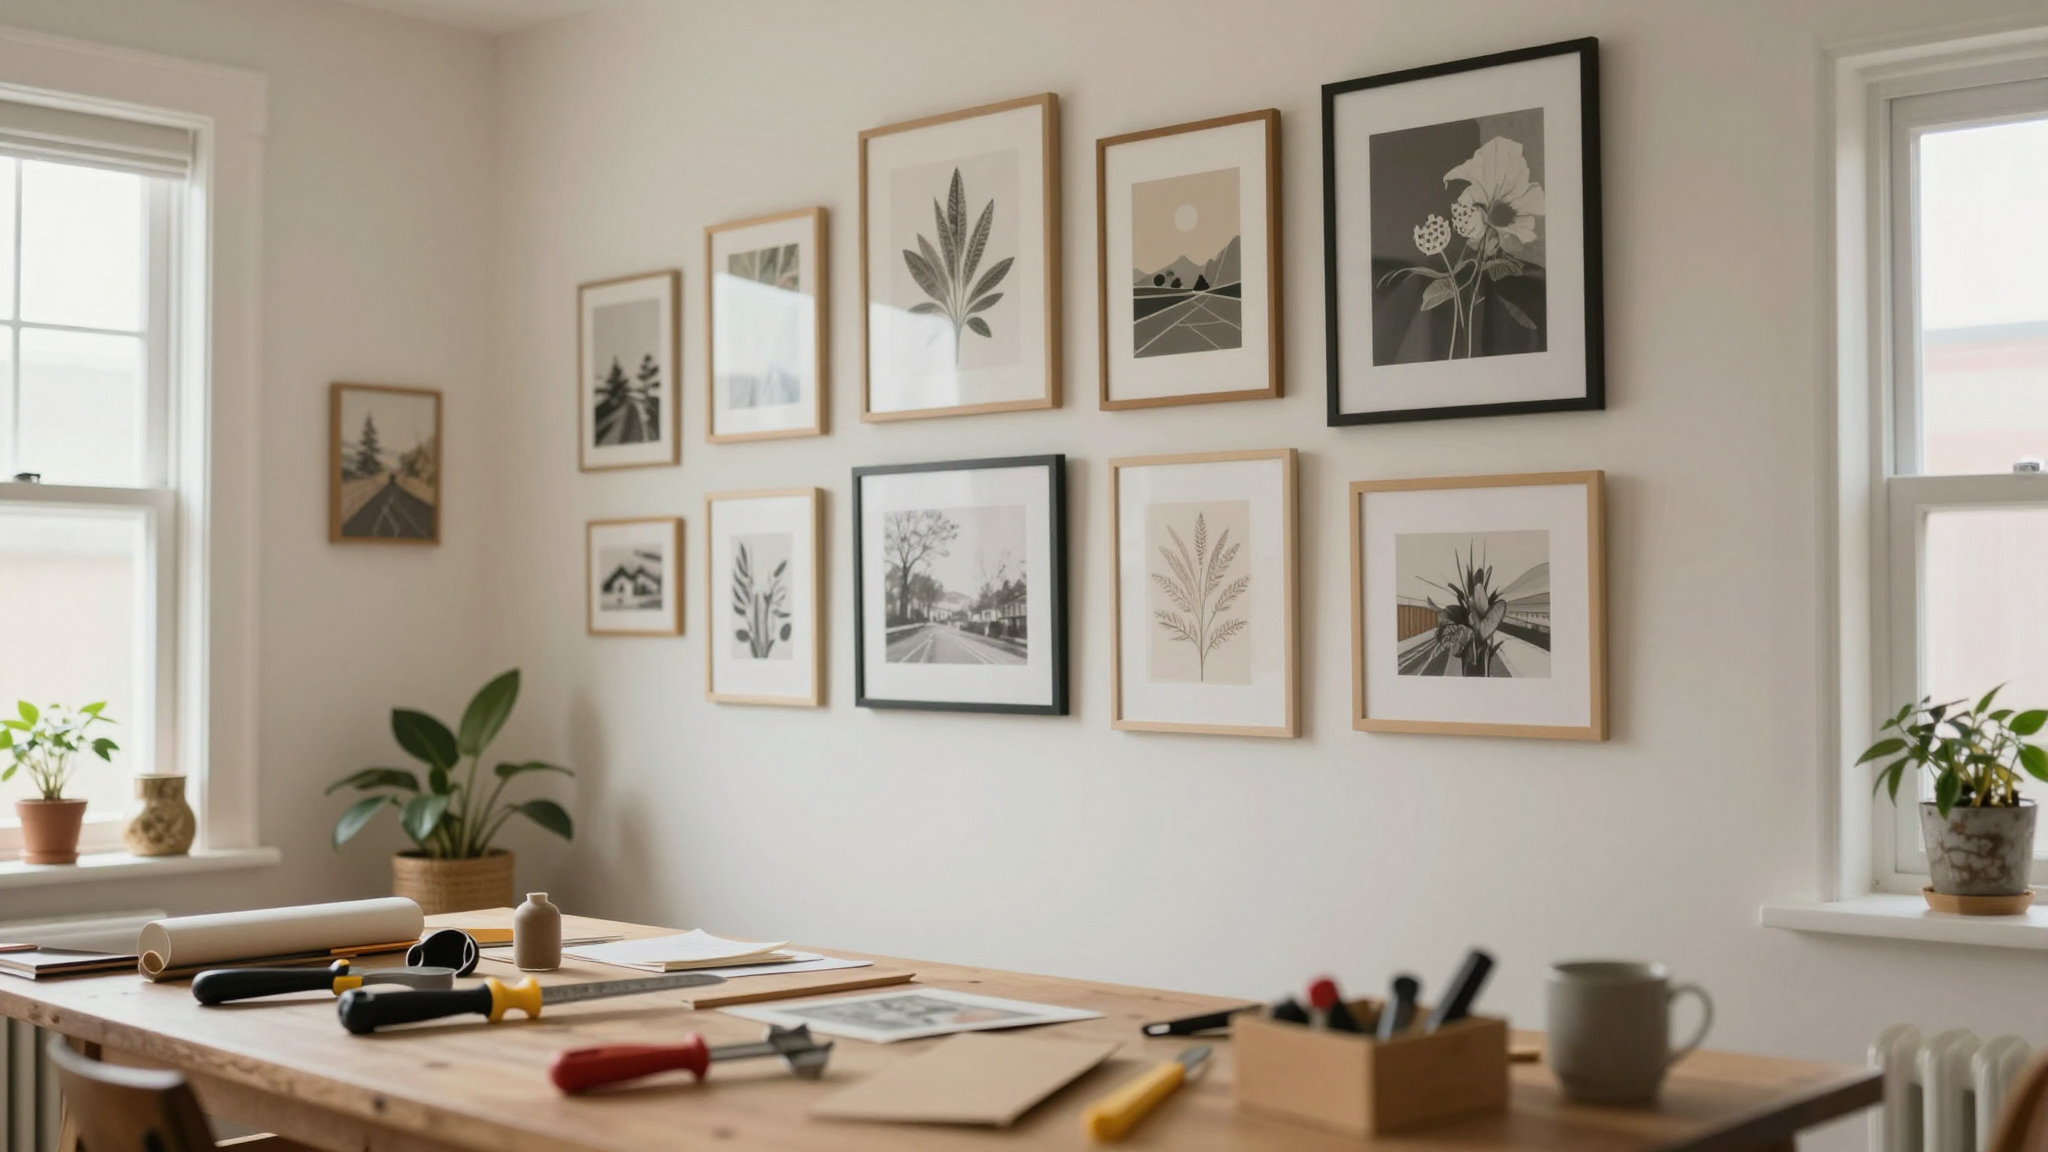
Choosing Frames: How to Mix and Match Without Looking Chaotic
This is where I see a lot of people go wrong. They either:
- Pick all the same frames (boring), or
- Grab whatever’s on sale (chaos).
The sweet spot? A mix of frames that feel intentional.
My Frame Rules
- Stick to a color palette. I usually pick 2-3 colors max. For our living room, it’s black, gold, and natural wood. For the kids’ room, it’s bright primary colors. The colors don’t have to match the frames exactly,just coordinate with the art inside.
- Vary the sizes. A wall full of 8×10 frames looks like a collage. Mix in some larger pieces (like 11×14 or 16×20) to create visual interest. I like to have at least one “statement” frame that’s bigger than the rest.
- Play with textures. Wood, metal, acrylic,mixing materials adds depth. Just don’t go overboard. I once had a wall with gold, black, wood, and white frames. It looked like a thrift store exploded.
- Consider the art inside. If you’re framing photos, the mat color matters. For our family photos, I use black mats with white borders. For kids’ art, I skip the mat and just use a simple frame.
Where I went wrong? I once bought a bunch of frames in different widths (some were 1.5 inches, others were 3 inches). The result? A wall that looked like it was designed by a toddler. Now I stick to 2-3 frame widths max.
And if you’re on a budget? Thrift stores and Facebook Marketplace are goldmines. I’ve found gorgeous vintage frames for $2 each. Just spray-paint them if they’re not the right color.
Hanging It Up: The Spacing Tricks No One Tells You
This is where the magic (and the frustration) happens. Here’s how I get the spacing just right:
Step 1: Find Your Vertical Starting Point
Most people hang their gallery wall too high. Here’s my trick: Stand with your arms at your sides. The bottom of your frames should align with the middle of your outstretched hand. For me, that’s about 60 inches from the floor. (Yes, I measured.)
Step 2: Space the Frames
I use the “eye level” rule for horizontal spacing:
- For frames of similar size, leave 1-2 inches between them.
- For mixed sizes, use the “bottom edge” method: Align the bottom edges of all frames so they’re even. This creates a clean, intentional look.
- For a more organic layout, stagger the frames so they look like they’re floating. (This is harder but looks amazing.)
I also use a laser level to keep everything straight. No laser? A regular level and a lot of patience work too.
Step 3: Hang One Frame at a Time
This is where I used to rush and regret it. Now I:
- Hang the largest frame first (this is your “anchor”).
- Use a level to make sure it’s perfectly straight. (I’ve had to rehang frames three times because I was lazy with the level.)
- Hang the next largest frame, checking the spacing.
- Repeat until all frames are up.
Pro tip: If you’re using Command Strips, press them into place for 10 seconds before hanging the frame. It gives the adhesive time to grip.
And if you mess up? Don’t panic. I once hung an entire wall crooked and had to take everything down and start over. (My husband still brings it up at family dinners.) Just use a spackle kit to patch the holes and try again.
Mixing It Up: How to Add Dimension (Without Overdoing It)
One of the things I love about gallery walls is how you can mix different types of art and objects. Here’s how I do it without making it look cluttered:
What to Mix
- Photos + Prints. I love combining family photos with vintage travel posters or abstract prints. It keeps the wall from feeling too personal (or too generic).
- Dimensional Objects. A small sculpture, a piece of driftwood, or even a 3D shadow box can add texture. I have a wall in our sunroom with a mix of framed photos and a few floating shelves holding small plants and ceramic pieces.
- Textiles. A woven wall hanging, a macramé piece, or even a quilt can soften the look. I used a small tapestry in our kids’ playroom to add color and warmth.
- Unexpected Elements. I once used a vintage suitcase as a “frame” for a collage of old postcards. It’s not traditional, but it’s me.
Where I went wrong? I once tried to mix too many textures,metal, wood, fabric, and glass,and it looked like a flea market. Now I stick to 2-3 textures max.
If you’re unsure, start with 70% photos/prints and 30% mixed media. That gives you enough variety without overwhelming the wall.
Lighting: How to Make Your Gallery Wall Glow (Literally)
Good lighting can make or break your gallery wall. Here’s how I light mine:
Option 1: Picture Lights
I love clip-on picture lights for a soft, even glow. They’re easy to install and don’t require wiring. I use them in our living room to highlight our family photos.
Option 2: LED Strip Lights
For a modern look, I used LED strip lights behind some of the frames in our dining room. It gives a cool backlit effect, especially at night. (Pro tip: Use warm white lights,cool white can make colors look weird.)
Option 3: Spotlights
If you have a few statement pieces, consider track lighting or adjustable spotlights. I used them in our hallway to highlight a few larger prints.
Where I went wrong? I once used bright white LED lights in our bedroom. It made the colors in our photos look washed out. Now I stick to warm white (2700K-3000K) for a cozy feel.
And if you’re on a budget? A well-placed IKEA RANARP lamp can work in a pinch. Just angle it toward the wall.
Keeping It Fresh: How I Update My Gallery Walls Without Starting Over
One of the best things about gallery walls? They’re easy to update. Here’s how I keep mine feeling new:
Seasonal Swaps
I rotate a few pieces every season. For example:
- Spring: Bright florals and pastel prints.
- Summer: Beachy photos and tropical prints.
- Fall: Warm neutrals and autumn leaf prints.
- Winter: Cozy textures and holiday photos.
It’s a small change, but it keeps the wall feeling current.
Kid-Proofing (Because Real Life Happens)
In our kids’ playroom, I use removable adhesive hooks so they can hang their own artwork. It’s not perfect (I’ve had to rehang things more times than I can count), but it teaches them to take pride in their space.
Rotating Favorites
I have a few pieces I love but don’t want to see every day. I’ll swap them out with others for a few months, then bring them back. It’s like giving your wall a little refresh.
And if something gets damaged? I’ve learned to embrace the imperfections. A chipped frame or a slightly crooked photo? It’s part of the charm.
Troubleshooting: When Your Gallery Wall Looks… Off
Even with the best planning, things can go wrong. Here’s how I fix the most common issues:
Problem: The Wall Looks Crooked
Solution: Use a level for every single frame. I know it’s tedious, but trust me,it’s worth it. If you’re really struggling, step back and look at the wall from across the room. Your eyes will catch the crookedness faster than the level will.
Problem: The Spacing Feels Off
Solution: Take a photo of the wall and zoom out. Sometimes you can’t tell what’s wrong until you see it from a distance. If the spacing is uneven, adjust the frames that are too close together or too far apart.
Problem: The Wall Looks Cluttered
Solution: Remove 1-2 frames and see if it helps. I once had a wall with 20 frames, and it looked like a mess. I took out 5, and suddenly, it felt balanced.
Problem: The Colors Don’t Flow
Solution: Add a neutral frame (like black or white) to tie everything together. It’s like a visual reset.
And if all else fails? Take a deep breath and remember: It’s your wall. It doesn’t have to be perfect,it just has to be you.
FAQs: Your Gallery Wall Questions, Answered
What’s the easiest way to plan a gallery wall layout?
Lay your frames on the floor and rearrange until it feels right. Take a photo, then hang them one by one using that as a guide. (I’ve done this for every wall, and it’s saved me from so many mistakes.)
How do I choose frames that match my decor?
Pick 2-3 colors or finishes (like black, gold, and wood) and stick to them. If you’re unsure, start with neutral frames (black, white, or natural wood) and add color with the mats or artwork inside.
What’s the best way to hang heavy frames?
Find the studs with a stud finder and use screws. For drywall, use Command Large Picture Hanging Strips (they hold up to 16 lbs each). I’ve learned the hard way,don’t trust drywall anchors for anything over 10 lbs!
Can I mix different types of art on one wall?
Absolutely! Mix photos, prints, textiles, and even 3D objects. Just keep the colors or themes cohesive. For example, I have a wall with black-and-white photos, a woven tapestry, and a small ceramic sculpture. They don’t match, but they belong together.
How often should I update my gallery wall?
As often as you want! I like to swap out a few pieces every season, but you can do it as little or as often as you like. The key is to keep it feeling fresh and personal.
Now it’s your turn. Grab those frames, find a friend to help, and start playing. And if your first attempt isn’t perfect? Welcome to the club. Mine looked like a disaster before it looked like a dream.
Want more DIY inspiration? Check out how I added charm to our home with simple projects or how I gave our bedroom a makeover on a budget. Happy hanging!