
5 Weekend Kitchen Upgrades That Actually Make a Difference
Let me tell you,there’s nothing worse than staring at a kitchen that feels tired, outdated, or just… *off*. The kind of kitchen where the cabinets look like they’ve seen better decades, the lighting makes everything look like a crime scene at midnight, and the backsplash (if there even is one) is straight out of a 1998 time capsule. Sound familiar?

Here’s the good news: You don’t need to drop thousands on a full renovation to make your kitchen feel fresh, functional, and *finally* like a space you actually want to cook in. I’ve spent the last five years tackling one DIY kitchen project after another,some successes, a few disasters (looking at you, that time I sanded through my cabinet door), and a whole lot of lessons learned. If I can do it, so can you. And the best part? Most of these upgrades can be done in a long weekend, with tools you already own and a budget that won’t make you sweat.
So grab your measuring tape, round up the kids (or at least one willing spouse), and let’s get to work. Your kitchen,and your sanity,will thank you.
Why Weekends Are the Perfect Time for Kitchen DIYs
I used to think DIY projects were for people with endless free time, a Pinterest-perfect life, and zero kids underfoot. Then I realized: Weekends are *made* for this stuff. No, you won’t have 48 hours of uninterrupted peace (unless your kids are miraculously at a sleepover), but you *will* have a solid block of time to focus,no work emails, no school pickup lines, just you, your tools, and a kitchen begging for an upgrade.
Here’s why weekends work so well for kitchen projects:
- Family bonding (yes, really). My 10-year-old, Jake, “helped” me paint our cabinets last year. By “helped,” I mean he dipped his fingers in the paint and left tiny handprints on three drawers. But he also learned how to use a brush, and we had a blast blasting his favorite music while we worked. Pro tip: Give kids a small, low-stakes task,like taping off edges or organizing hardware,so they feel involved without derailing the project.
- No time constraints. During the week, I’m lucky if I can squeeze in 20 minutes to fold laundry. But on a Saturday? I can block out four hours to sand cabinets or install a backsplash without feeling guilty. (Okay, fine, I still feel guilty. But less guilty.)
- Budget-friendly wins. Swapping out cabinet hardware? $30. Painting cabinets? $200–$500, depending on paint quality. Updating lighting? $50–$100 for a new fixture. These are the kinds of projects that give you a big payoff without requiring you to take out a second mortgage.
And here’s a secret: Small changes add up. I didn’t overhaul my entire kitchen at once. I started with the backsplash (a peel-and-stick tile that took me way longer to install than the box promised), then moved to the cabinets, then lighting. Each project made the space feel a little brighter, a little more “me.”
If you’re ready to dive in, here’s how to tackle it,without the stress, the tears, or the “why did I think I could do this?” moments.
Setting a Realistic Budget (And Where to Splurge)
Let’s talk money, because I know it’s the elephant in the room. My first DIY kitchen project was a disaster,not because I messed up, but because I didn’t budget properly. I thought, “Oh, I’ll just grab some paint and new knobs, and I’ll be done!” Spoiler: I forgot to account for primer, sandpaper, painter’s tape, and,most importantly,the emergency pizza delivery when I realized I’d bitten off more than I could chew in one afternoon.
Here’s how I plan my budget now, and where I allocate my dollars:
- 30% on materials. This is where you get the fun stuff: paint, tiles, hardware, lighting. I like to shop sales at Home Depot or Lowe’s and stock up on basics like paint when they’re on clearance. (Pro tip: Their “oops” paint section is a goldmine for discounted colors.)
- 20% on tools. If you don’t already own them, you’ll need a few key items: a cordless drill (I swear by my DeWalt,it’s worth the investment), a level, a tape measure, and a paint roller set. Skip the cheapo brushes,they shed bristles everywhere.
- 50% on finishing details. This is where the magic happens. A clear protective topcoat for cabinets, caulk for a seamless backsplash, or LED puck lights under cabinets can elevate a project from “meh” to “wow.” Trust me, this is where you’ll see the biggest impact.
Here’s a quick breakdown of costs for some of my favorite weekend-friendly upgrades:
| Upgrade | Cost Range | Impact Level |
|---|---|---|
| Painting cabinet fronts | $200–$500 | High |
| Peel-and-stick backsplash (10 sq. ft.) | $80–$150 | Medium-High |
| New cabinet hardware (knobs + pulls) | $50–$150 | Medium |
| LED under-cabinet lighting | $40–$120 | High |
My biggest mistake? Not buying 10–15% extra of everything. I ran out of paint halfway through my cabinets and had to rush to the store,with a half-painted kitchen and a cranky toddler in tow. Never again.
If you’re really pinching pennies, here are my top three budget hacks:
- Paint only the cabinet fronts and leave the sides and interiors as-is. It saves paint, time, and your sanity.
- Use contact paper (yes, the stuff you used in middle school) for drawer liners or even as a temporary backsplash. It’s not permanent, but it’s a cheap way to test colors and patterns.
- Reuse existing hardware if it’s still in decent shape. A fresh coat of spray paint can make old knobs look brand new.
Now, let’s talk about the projects themselves,starting with one of my personal favorites.
Backsplash DIY: How to Upgrade Your Kitchen in a Weekend
I’ll be honest: My first backsplash attempt was a hot mess. I picked a mosaic tile pattern because it “looked easy” on Pinterest. Spoiler: It was not easy. The tiles were tiny, the adhesive dried too fast, and I ended up with gaps so wide you could fit a grape in them. (Yes, I tried. No, it did not work.)
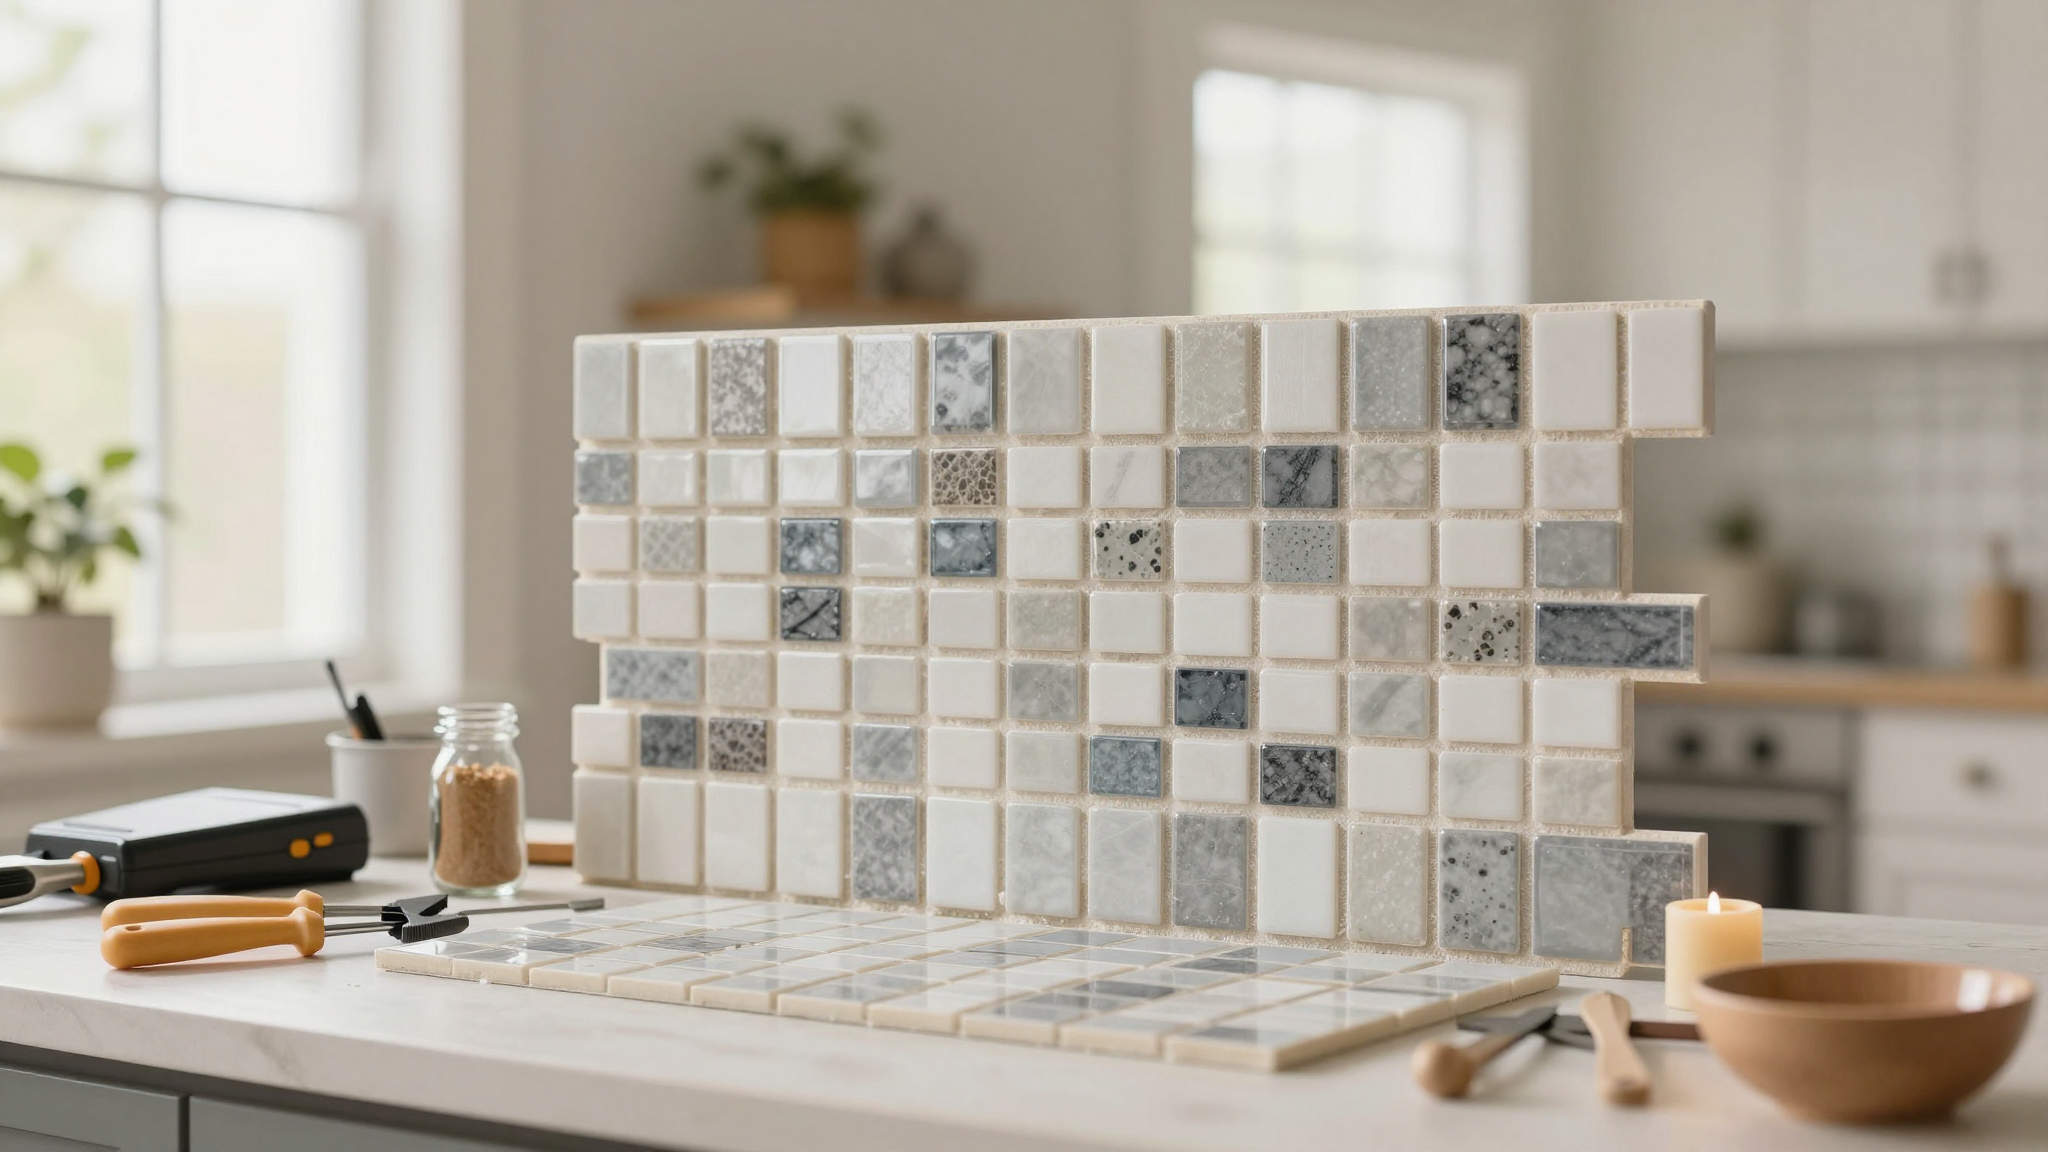
But here’s the thing: I learned. And now? I can install a backsplash in a weekend,without crying. Here’s how.
Choosing the Right Backsplash Material
Not all backsplashes are created equal. Here’s what I’ve tried (and what I’d recommend):
- Peel-and-stick tiles. My go-to for beginners. They’re forgiving, easy to cut, and,if you pick a good brand,actually stay put. I used Shower Wall Pro tiles in my kitchen, and they’ve held up for three years. Just make sure to clean the wall thoroughly before applying (I learned this the hard way when my first attempt bubbled up after a week).
- Painted wood or MDF. If you want a custom look without the tile hassle, paint a medium-density fiberboard (MDF) panel and mount it as a backsplash. It’s lightweight, easy to cut, and you can paint it any color. (I did this in my fireplace makeover and loved it.)
- Subway tile. Classic, timeless, and,if you pick the right adhesive,not as fussy as mosaic tiles. I used Home Depot’s 12×24-inch subway tiles for my second attempt, and it went so much smoother.
Whatever you choose, avoid anything too porous (like unsealed stone) if your kitchen gets steamy. Trust me, moldy grout is not a good look.
Step-by-Step Backsplash Installation (Without the Tears)
Here’s how I do it now,after three attempts, two failures, and one “why did I think I could do this?” meltdown:
- Measure twice, cut once. I used to skip this step. Big mistake. Lay out your tiles (or peel-and-stick sheets) on the floor first to plan your layout. For subway tile, I start from the center of the wall and work outward. For peel-and-stick, I start from the bottom up so I can press the seams tightly.
- Clean like your life depends on it. Grease, dust, and grime will cause your backsplash to peel or bubble. I use TSP (trisodium phosphate) cleaner to degrease the wall, then wipe it down with a damp cloth. (No, vinegar is not strong enough,learned that the hard way.)
- Work in sections. If you’re using tile, apply adhesive to a 3×3-foot section at a time. For peel-and-stick, peel off the backing in 12-inch strips and press firmly. I use a rubber grout float to smooth out bubbles.
- Let it dry (and don’t rush!). This is where I went wrong the first time. I “helped” the adhesive dry by blasting the wall with a hairdryer. Do not do this. Let it cure for at least 24 hours before sealing (if needed) or using the space.
If you’re new to this, watch a YouTube tutorial first. I learned more from HowToLou than I did from my own mistakes (though, let’s be honest, my mistakes taught me more).
And if you mess up? It’s fixable. I had to remove and redo a section of my first backsplash, and it turned out better the second time. (Also, if you’re really stuck, check out my post on DIY accent walls,some of those techniques work for backsplashes too!)
Painting Cabinets: How to Do It Without Regrets
I painted my kitchen cabinets twice. The first time? I used regular latex paint because I thought, “How hard can it be?” Spoiler: It was very hard. The paint chipped after a month, and the doors looked streaky. The second time? I did my research, bought the right supplies, and,finally,got a smooth, durable finish that’s held up for years.
Here’s what I wish I’d known the first time around.
Choosing the Right Paint (And Why It Matters)
Not all paint is created equal. I learned this the hard way when my “cabinet paint” peeled after a few weeks of use. Here’s what to look for:
- Use cabinet-specific paint. Brands like Benjamin Moore (their Advance paint is my holy grail) or Sherwin-Williams (their Emerald Urethane Trim Enamel) are made to handle the wear and tear of a kitchen. They’re self-leveling, durable, and,most importantly,not water-based (which means they won’t peel when you wipe down your cabinets).
- Go for a satin or semi-gloss finish. Flat paint looks pretty, but it’s a nightmare to clean. Satin is my favorite,it’s durable, wipeable, and hides imperfections better than gloss.
- Prime everything. Even if your cabinets are already painted, use a bonding primer like 3M’s Super 77. It sticks to anything and prevents peeling. (I skipped this the first time. Never again.)
If you’re on a budget, Rust-Oleum’s Cabinet Transformations Kit is a solid option. It includes primer, paint, and topcoat in one, and it’s way easier than mixing your own.
Step-by-Step Cabinet Painting (The Right Way)
Here’s my foolproof method for painting cabinets,without the regret:
- Remove all hardware. I used a drill with a nut driver bit to take off the knobs and pulls. (Pro tip: Label each door/drawer with painter’s tape so you know where everything goes back.)
- Clean and sand. I wipe down the cabinets with TSP cleaner to remove grease, then lightly sand with 120-grit sandpaper to rough up the surface. This helps the primer stick.
- Apply painter’s tape. I tape off the walls, countertops, and any areas I don’t want to paint. FrogTape is my go-to,it’s cheap and actually doesn’t peel paint when you remove it.
- Prime, then paint. I use a high-quality angled brush (like the Purdy XL Angled Sash Brush) for edges and a mini foam roller for the flat surfaces. Two thin coats are better than one thick one. Let each coat dry completely (usually 4–6 hours).
- Add a protective topcoat. This is non-negotiable. I use a water-based polycrylic like Minwax’s Polycrylic. It’s clear, durable, and dries fast. Apply two thin coats, letting each dry for 2–4 hours.
- Reattach hardware. Wait at least 24 hours before putting the knobs and pulls back on. (I know, it’s tempting to rush. Don’t.)
If you’re short on time, focus on just the cabinet fronts. You can leave the sides and interiors as-is,no one will know!
And if you’re really ambitious, check out my guide to upcycling furniture for more painting tips (including how to fix mistakes!).
5 More Weekend-Worthy Kitchen Upgrades
Not ready to commit to a full backsplash or cabinet overhaul? No problem. Here are five super simple upgrades that make a huge difference,and can be done in a weekend (or even a few hours).
1. Swap Out Cabinet Hardware (The Easiest $30 Upgrade)
I did this first in my kitchen, and it made the biggest impact for the least amount of work. Old, boring knobs? Out. New, modern pulls? In. Instant upgrade.
Here’s how to do it right:
- Measure your existing holes. Most cabinets have 1.5-inch centers, but check before buying new hardware.
- Pick a finish that matches your faucet and lighting. I went with matte black in my kitchen, and it looks so much more modern than the old brass knobs.
- Use a drill with a nut driver bit to remove old knobs. If the holes are stripped, fill them with wood filler and redrill.
- Screw in the new hardware. That’s it! No paint, no mess, just instant gratification.
My favorite places to shop for hardware:
- Anthropologie (for unique, artistic designs)
- Wayfair (for budget-friendly options)
- Home Depot (for basic, durable knobs)
2. Update Your Lighting (Brighter = Better)
My kitchen used to feel like a cave at night. The overhead fluorescent lights were awful, and the pendant light over the island was so dim I could barely see to chop vegetables. Then I swapped in LED puck lights under the cabinets and a bright, modern pendant, and,boom,instantly brighter and more inviting.
Here’s what to do:
- Replace old incandescent bulbs with LED bulbs (they use less energy and last longer). I love Philips Hue bulbs because they’re dimmable and change colors.
- Add under-cabinet lighting. I used IKEA’s SKÅDIS puck lights, which are cheap and easy to install.
- Upgrade your pendant or recessed lighting. I found a modern farmhouse-style pendant at Lamps Plus for under $100.
Pro tip: If you’re not comfortable with wiring, hire an electrician for lighting upgrades. It’s not worth the risk of shocking yourself (trust me, I’ve seen it happen).
3. Paint Your Walls (But Pick the Right Color)
I painted my kitchen walls three times before I got it right. The first color? Too dark. The second? Too yellow. The third? Finally a warm, inviting white that made the space feel bigger and brighter.
Here’s how to pick a kitchen wall color that won’t make you regret it:
- Test colors in different lighting. I bought sample pots of Benjamin Moore’s “Chantilly Lace” and Sherwin-Williams’ “Alabaster” and painted swatches on the wall. Then I checked them at morning, noon, and night. (The “Chantilly Lace” looked gray in the evening. Nope.)
- Avoid high-gloss paint. It shows every imperfection and requires constant touch-ups. I use satin finish in my kitchen,it’s durable and hides flaws.
- Use a low-VOC paint (like Behr’s Premium Plus) to avoid fumes. Trust me, you don’t want to be breathing in chemicals while you cook.
If you’re not sure about color, go with a warm white or soft gray. They’re neutral, timeless, and make the space feel bigger. (I also have a guide to accent walls if you want to add a pop of color without committing to the whole room!)
4. Reorganize Your Layout (Small Changes, Big Impact)
Sometimes, the best “upgrade” isn’t adding anything new,it’s rearranging what you already have. I moved my coffee maker from the counter to a shelf, swapped out deep shelves for pull-out pantry organizers, and added a pegboard above the stove to hang my most-used tools.
Here are my favorite no-cost, no-tools-required layout tweaks:
- Move your most-used appliances to eye level. No one should have to bend down to grab the toaster.
- Group like items together. Keep baking supplies in one cabinet, snacks in another, and tools near the stove.
- Add hooks or racks to free up drawer space. I used Overstock’s magnetic knife strips to mount my knives on the wall, which cleared up a whole drawer.
- If you have the space, add a rolling island. I found a butcher block cart at Wayfair for under $150, and it’s become my favorite prep station.
For more layout ideas, check out my post on rearranging small spaces,some of those tips work in kitchens too!
5. Add Open Shelving (For a Custom Look)
I was tired of my upper cabinets taking up space and hiding my pretty dishes. So I removed two doors and added open shelving instead. It made the kitchen feel so much more open and airy,and it was way easier than I thought.
Here’s how to do it:
- Remove the cabinet doors. If you’re not sure how, watch a YouTube tutorial. (I used a screwdriver and a little muscle.)
- Sand and paint the inside of the cabinet (if needed). I used the same paint as my other cabinets for a cohesive look.
- Add shelving. I used Home Depot’s 1×12 pine boards and stained them to match my cabinets.
- Style with dishes, plants, or decor. I displayed my white ceramic mugs and a few small potted herbs, and it instantly felt more put-together.
If you’re not ready to commit to permanent shelving, try a freestanding ladder shelf (I love the ones from Etsy).
Tools and Materials You’ll Actually Need
Before you start, let’s talk tools. I’ve learned the hard way that skipping the right supplies leads to frustration (and sometimes, tears). Here’s what I always have on hand for kitchen DIYs:

Essential Tools
- Cordless drill (I swear by my DeWalt DCD771,it’s worth the investment).
- Level (A 24-inch level is perfect for backsplashes and cabinets).
- Tape measure (I keep a 16-foot Stanley in my kitchen drawer).
- Paintbrushes and rollers (I use Purdy’s angled sash brush for edges and a 3/8-inch nap roller for smooth surfaces).
- Utility knife (A Olfa is my go-to for cutting tile or contact paper).
- Caulk gun (For sealing edges,DAP Alex Flex is my favorite).
- Safety gear (Gloves, goggles, and a dust mask for sanding).
If you don’t already own these, check out my guide to must-have tools for more recommendations.
Materials to Have on Hand
- Paint and primer (I always buy a little extra,trust me.)
- Peel-and-stick backsplash or tile adhesive (I like Shower Wall Pro for peel-and-stick).
- Cabinet hardware (I keep a stash of matte black knobs for quick swaps).
- LED lighting (IKEA’s SKÅDIS puck lights are a game-changer).
- Wood filler and sandpaper (For fixing dents or stripped holes).
Pro tip: Buy a small tool organizer (like this one from Amazon) to keep everything in one place. I keep mine under the sink, and it’s a lifesaver.
Your Weekend Kitchen Makeover Checklist
Okay, let’s get organized. Here’s how I plan my weekend projects so I don’t end up with half-finished cabinets and a kitchen that’s unusable for three days.
Day 1: Prep and Prep Some More
- Morning (2 hours): Clear out the kitchen. Move everything to the dining room or garage. (Yes, this is the worst part. Just do it.)
- Afternoon (3 hours): Prep your project. If you’re painting cabinets, sand and clean them. If you’re doing a backsplash, measure and cut your tiles. Watch a tutorial if you’re unsure.
- Evening (1 hour): Set up your workspace. Lay down drop cloths, organize your tools, and,most importantly,order pizza so you don’t have to cook in a half-destroyed kitchen.
Day 2: Execute (And Don’t Panic)
- Morning (4 hours): Work on your main project. If you’re painting cabinets, start with the doors. If you’re installing a backsplash, start from the bottom and work up.
- Afternoon (2 hours): Let things dry (this is where patience comes in). Use this time to tackle smaller tasks, like swapping out hardware or painting walls.
- Evening (2 hours): Finish up, clean your mess, and,finally,put everything back where it belongs.
Pro Tips to Stay on Track
- Set a realistic timeline. If you’re painting cabinets, account for drying time. If you’re installing tile, plan for cutting and fitting.
- Take before and after photos. Not only will they make you feel accomplished, but they’re great for remembering what worked (and what didn’t).
- Don’t skip steps. I once tried to paint cabinets without sanding first. Big mistake. The paint peeled after a week.
- Celebrate small wins. Finished one cabinet door? High-five. Installed half the backsplash? Take a break and enjoy it.
And if something goes wrong? It will. I’ve had paint drips, misaligned tiles, and a moment where I accidentally glued a cabinet door shut. (Yes, really.) But here’s the thing: DIY is about learning. Every “oops” moment makes the next project easier.
FAQs: Your Weekend Kitchen Makeover Questions Answered
What are the easiest (and cheapest) kitchen upgrades I can do in a weekend?
If you’re short on time or budget, start with these:
- Swap out cabinet hardware ($20–$50, 1 hour). Instant upgrade, zero paint required.
- Paint your walls ($50–$100, 2 days). A fresh coat of paint makes a huge difference.
- Add under-cabinet lighting ($30–$80, 2 hours). Brightens the workspace and makes cooking easier.
- Reorganize your layout ($0, 1 hour). Sometimes, moving things around is all you need.
For more easy upgrades, check out my post on quick DIY projects.
What’s the best backsplash material for a beginner?
If you’re new to backsplashes, I recommend:
- Peel-and-stick tiles (easiest, most forgiving). I used Shower Wall Pro in my kitchen, and it’s held up for years.
- Painted MDF or wood (customizable, budget-friendly). I did this in my fireplace makeover and loved it.
- Subway tile (classic, timeless). It’s a little more involved, but the results are worth it.
Avoid anything too porous (like unsealed stone) if your kitchen gets steamy. Trust me, mold is not a good look.
What type of paint should I use for kitchen cabinets?
Not all paint is created equal. Here’s what I use (and what I’ve learned the hard way):
- Use cabinet-specific paint (like Benjamin Moore’s Advance or Sherwin-Williams’ Emerald). Regular latex paint will peel.
- Go for satin or semi-gloss finish. Flat paint looks pretty, but it’s a nightmare to clean.
- Prime everything, even if the cabinets are already painted. I use 3M’s Super 77 for a strong bond.
If you’re on a budget, Rust-Oleum’s Cabinet Transformations Kit is a solid option. It includes primer, paint, and topcoat in one.
How long will these DIY projects actually take?
Here’s a realistic timeline for common kitchen upgrades:
- Painting cabinets: 2 days (includes drying time).
- Installing a peel-and-stick backsplash: 1 day.
- Swapping out hardware: 1 hour.
- Painting walls: 2 days (with drying time).
- Adding under-cabinet lighting: 2–3 hours.
Pro tip: If you’re short on time, focus on one big project (like cabinets) and save the smaller tasks (like hardware or lighting) for another weekend.
Can I really transform my kitchen in a long weekend?
Absolutely! I’ve done it multiple times. The key is:
- Plan ahead. Know what you’re doing before you start.
- Break it into steps. Don’t try to do everything at once.
- Don’t rush. Let paint dry, let adhesive cure, and take your time.
- Embrace imperfections. No one’s kitchen is perfect,and that’s okay!
If you’re overwhelmed, start with one project (like hardware or lighting) and build from there. Small changes add up!
What tools do I *actually* need for kitchen DIYs?
You don’t need a full workshop, but these tools will make your life so much easier:
- Cordless drill (for hardware, shelves, etc.).
- Level (for backsplashes, cabinets, lighting).
- Tape measure (measure twice, cut once!).
- Paintbrushes and rollers (for cabinets and walls).
- Utility knife (for cutting tile or contact paper).
- Caulk gun (for sealing edges).
- Safety gear (gloves, goggles, dust mask).
If you’re missing tools, check out my guide to must-have tools for recommendations.
How do I stick to my budget?
Here’s how I keep my kitchen projects affordable:
- Shop sales. Home Depot and Lowe’s often have paint, lighting, and hardware on sale.
- Reuse what you have. Can you keep your existing cabinets but just paint them? Can you reuse hardware?
- DIY where you can. Installing peel-and-stick tile or painting cabinets yourself saves hundreds compared to hiring a pro.
- Budget 10% extra for unexpected costs (trust me, there will be some).
And if you’re really pinching pennies, check out my post on budget-friendly home upgrades for more money-saving tips.
What if I make a mistake?
Here’s the truth: You will make mistakes. I’ve painted over hardware I forgot to remove, glued a cabinet door shut, and accidentally cut a tile the wrong size. But here’s what I’ve learned:
- Most mistakes are fixable. Peeling paint? Sand and repaint. Crooked tile? Carefully remove and reapply.
- DIY is a learning process. Every “oops” moment makes the next project easier.
- Sometimes “mistakes” lead to better results. I once accidentally painted a cabinet door the wrong color,and ended up loving the two-tone look!
And if you’re really stuck, check out my guide to fixing drywall or my post on creative fixes.
Ready to Get Started?
Your kitchen doesn’t have to stay stuck in 2010 (or whenever it was last updated). With a little planning, the right tools, and a willingness to embrace the process, you can make real changes in just a weekend.
So pick one project,whether it’s painting cabinets, installing a backsplash, or just swapping out hardware,and get started. And if you hit a snag? That’s okay. I’ve been there, and I’m still here to tell the story.
Now, go grab that paintbrush (or that drill, or that peel-and-stick tile). Your kitchen,and your sanity,will thank you.
Happy DIYing! 🛠️💛
P.S. If you’re feeling overwhelmed, start small. Swap out one cabinet knob, paint one wall, or add a single string of under-cabinet lights. Small changes add up,and they’ll give you the confidence to tackle bigger projects later.
And if you need more inspiration, check out my bedroom makeover guide or my furniture upcycling tips for more ideas!