
How to Build Simple (and Sturdy!) Bookshelves for Kids’ Rooms
Let me tell you,building bookshelves for my kids’ rooms was one of those projects that started with good intentions and nearly ended in tears. My first attempt with pre-cut plywood from the hardware store? Let’s just say I learned the hard way that “pre-sanded” doesn’t always mean “smooth enough for tiny fingers.” But after three tries (and one very patient husband holding the level), I finally got it right. Now I’ve got shelves that actually stay level, hold all the books, and,most importantly,haven’t been turned into a jungle gym by my 6-year-old.
If you’re looking to create a space where your little readers can actually find their favorite books (instead of tripping over piles on the floor), you’re in the right place. I’ll walk you through exactly how I built durable, kid-friendly bookshelves that double as toy storage, look cute, and,bonus,won’t collapse when my son tries to climb them (yes, I’ve tested this).
We’ll cover:
- Why accessible storage matters more than you think (spoiler: it’s not just about looks)
- Materials that won’t fall apart after six months of “play testing”
- My exact tool list (including the one tool I wish I’d bought first)
- How to anchor everything so it actually stays put
- Creative ways to organize books and toys so cleanup isn’t a daily battle
And if you’re short on time? Skip to the step-by-step guide,I’ve made it as simple as possible with real photos of my (sometimes messy) process.
Why Simple Storage Solves Big Problems
I used to think bookshelves were just about holding books. Then I had kids. Now I know they’re actually life savers. Here’s what I’ve learned the hard way:
- Low shelves = independence. My daughter can now grab her own books for bedtime without waking me up at 10 PM. (This alone was worth the project.)
- Rotating displays keep things fresh. We swap out books every few weeks, and suddenly the ones she “hated” last month are exciting again.
- Multipurpose designs hide the chaos. That “bookcase” in her room? It’s actually 60% books, 30% stuffed animals, and 10% whatever she’s currently obsessed with (this week: dinosaur fossils).
- It’s not just about storage,it’s about routine. Labeling bins with pictures taught my 4-year-old to put toys away. Yes, really. (The sock drawer with a dinosaur sticker? Genius.)
And the best part? You don’t need fancy tools or a Pinterest-perfect space. My first attempt used:
- A $20 sheet of plywood from Home Depot (I cut it myself,badly at first)
- Some 1×2 pine boards I had left over from that coffee table project that went sideways
- A drill, screws, and a lot of patience
If you’re feeling overwhelmed, start small. Even a single floating shelf can make a difference. I’ll show you exactly how I turned my kids’ cluttered corners into organized (well, mostly organized) spaces.
Designing Bookshelves That Actually Work for Kids
Before you grab any materials, let’s talk about what won’t work in a kids’ room. I learned this the hard way:
- Glass doors = disaster waiting to happen. My son “helped” organize his books by throwing them against the glass. (The door survived. The books? Not so much.)
- Sharp edges are an accident magnet. I sanded everything after my daughter got a splinter from a “smooth” MDF edge.
- Wobbly units get climbed. Yes, even the “sturdy” ones from IKEA. (I now anchor everything to the wall.)
Here’s what I do recommend based on three years of trial and error:
Choosing Materials That Last (Without Breaking the Bank)
I’ve tested enough materials to know what holds up,and what doesn’t. Here’s my ranking:
| Material | Best For | What I Learned the Hard Way | Cost |
|---|---|---|---|
| Plywood (½” or thicker) | Custom shapes, sturdy frames | Cheaper plywood warps if it gets wet. I learned this when my son “helped” clean up a spill with his entire water cup. | $25/sheet |
| MDF (Medium-Density Fiberboard) | Painted finishes, smooth surfaces | It’s heavy but not waterproof. I cried when the edge of my first MDF shelf swelled after a “bath time accident.” | $35/panel |
| Solid Wood (Pine, Oak, or Reclaimed) | Heavy-duty frames, heirloom pieces | Expensive, but worth it if you’re building something that needs to last. My oak shelves? Still perfect after five years. | $40-$100+ |
| Metal Frames | Industrial look, heavy loads | Can be cold to touch. I added fabric bins to the metal shelves in my son’s room for a softer feel. | $50-$120 |
My current favorite? Plywood with a birch veneer. It’s affordable, easy to cut, and,when sealed properly,holds up to everything from crayon marks to the occasional LEGO brick “accidentally” thrown against it. I buy mine from Home Depot because they cut it for free, which saves me from my husband’s “helpful” but very uneven cuts.
Pro tip: If you’re using plywood, get the sanded one side variety. It’s only a few dollars more, and you won’t spend an hour sanding every edge by hand (ask me how I know).
Measuring Your Space (So You Don’t End Up with a Bookshelf That Doesn’t Fit)
This is where I went wrong the first time. I eyeballed the space and ended up with a bookshelf that was 2 inches too wide for the corner. Here’s how to do it right:
- Use painter’s tape to map your layout. I lay it out on the floor first so I can see exactly where everything will go. (This also helps me visualize how it’ll look with the existing furniture.)
- Leave 12-18 inches of clearance. Kids need room to move around, and you don’t want the bookshelf blocking the door when they’re dragging out all their stuffed animals for a “sleepover.”
- For small rooms, go vertical. Tall, narrow shelves take up less floor space. I used this trick in my daughter’s room to fit a bookshelf in a space that was technically just a hallway.
- Check the height. If the top shelf is above your child’s head, they won’t use it. I made this mistake with my son’s first bookshelf,now the top shelf is just for decor.
Here’s a photo of my measurement setup,I use a laser level now (after my husband’s “eyeballing” nearly cost us a window). It’s worth the $20 to avoid mistakes!
Planning and Safety: Because Kids Will Test Your Furniture
Safety isn’t just about preventing accidents,it’s about making sure your bookshelves can actually handle what kids throw at them. (Literally. My son once tried to climb his bookshelf to “see the clouds.”)
Childproofing Your Bookshelves (So They Don’t Become a Jungle Gym)
I’ve had to relearn this lesson three times. Here’s what actually works:
- Anchor everything to wall studs. I use these furniture straps from Home Depot ($10 for a pack). They’re easy to install and actually hold when my kids decide to hang from the shelves.
- Round those edges. I sand everything with 120-grit sandpaper, then hit the sharp corners with a router bit. (Yes, I bought a router just for this. It was worth it.)
- Avoid protruding hardware. Screw heads and brackets should be flush or covered. I’ve had too many owies from my kids running into exposed screws.
- Use soft-close hinges. If your bookshelf has doors, these prevent little fingers from getting pinched. I got mine from Amazon for $15 and they’ve saved me from many tears.
- Put heavy items on the bottom. This lowers the center of gravity so the shelf is less likely to tip. I keep my kids’ heaviest books (the encyclopedias they never read) on the bottom shelf.
And if you’re worried about tipping? Test it. I seriously pushed on my son’s bookshelf while he was climbing on it. (Don’t judge me.) It didn’t budge. Now I sleep better at night.
Safe Finishes: Because Kids Put Everything in Their Mouths
I made the mistake of using a cheap paint that chipped after two weeks. Now I only use:
- Water-based paints (like Behr Premium or Sherwin-Williams). They’re non-toxic and dry fast.
- Natural wood finishes (like Minwax Polyurethane). I use the “satin” finish,it’s durable but not too slippery.
- GREENGUARD-certified products. These have low VOCs (that’s science-speak for “won’t make your kid sick”). I check the label every time now.
Pro tip: If you’re painting, do it before assembling. I learned this the hard way when I had to touch up three shelves because I couldn’t fit the whole thing in my garage. Now I paint everything in the driveway with a drop cloth.
And if you’re worried about stains? I keep a Magic Eraser handy. It removes crayon, marker, and even the occasional glue stick “art project” from the shelves.
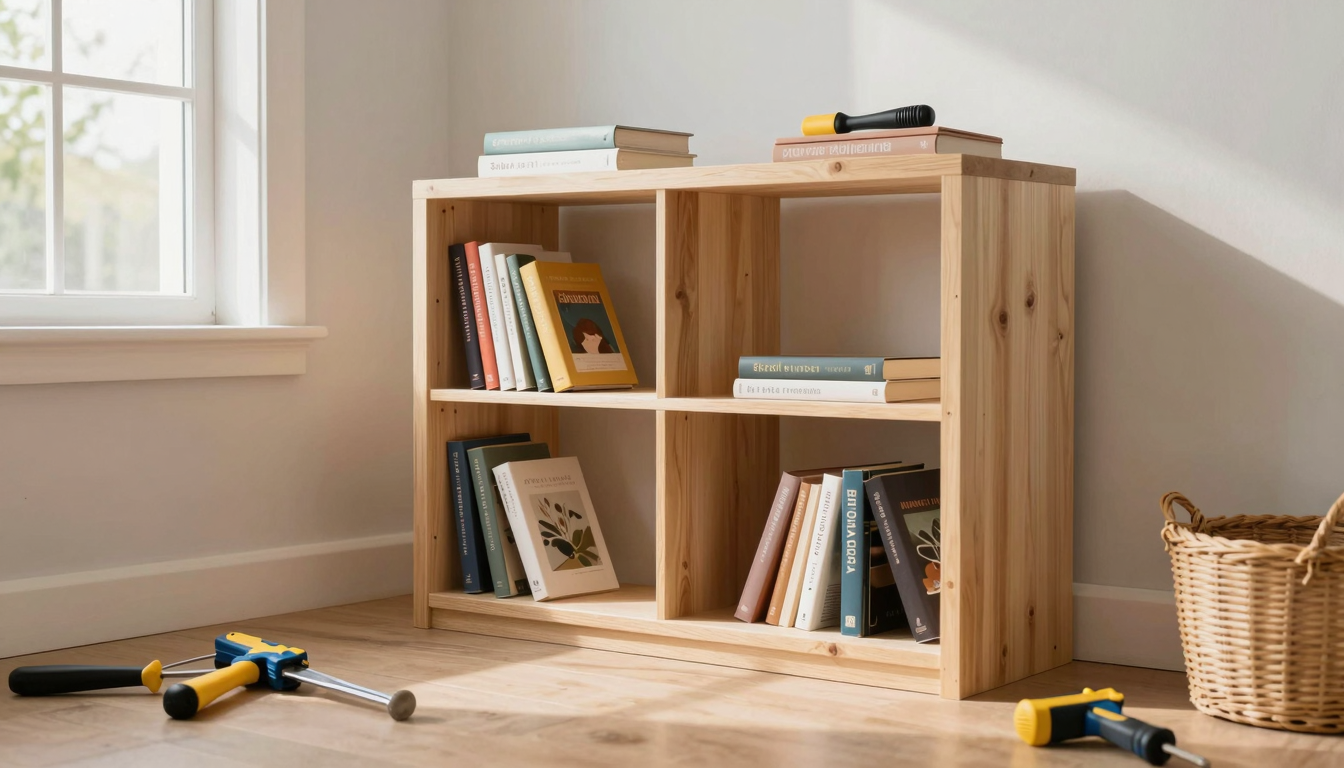
Step-by-Step: How to Build a Simple (But Sturdy) Bookshelf
Alright, let’s build something that’ll actually last. I’ll walk you through the exact steps I used to make my kids’ bookshelves,including the mistakes I made so you don’t have to repeat them.
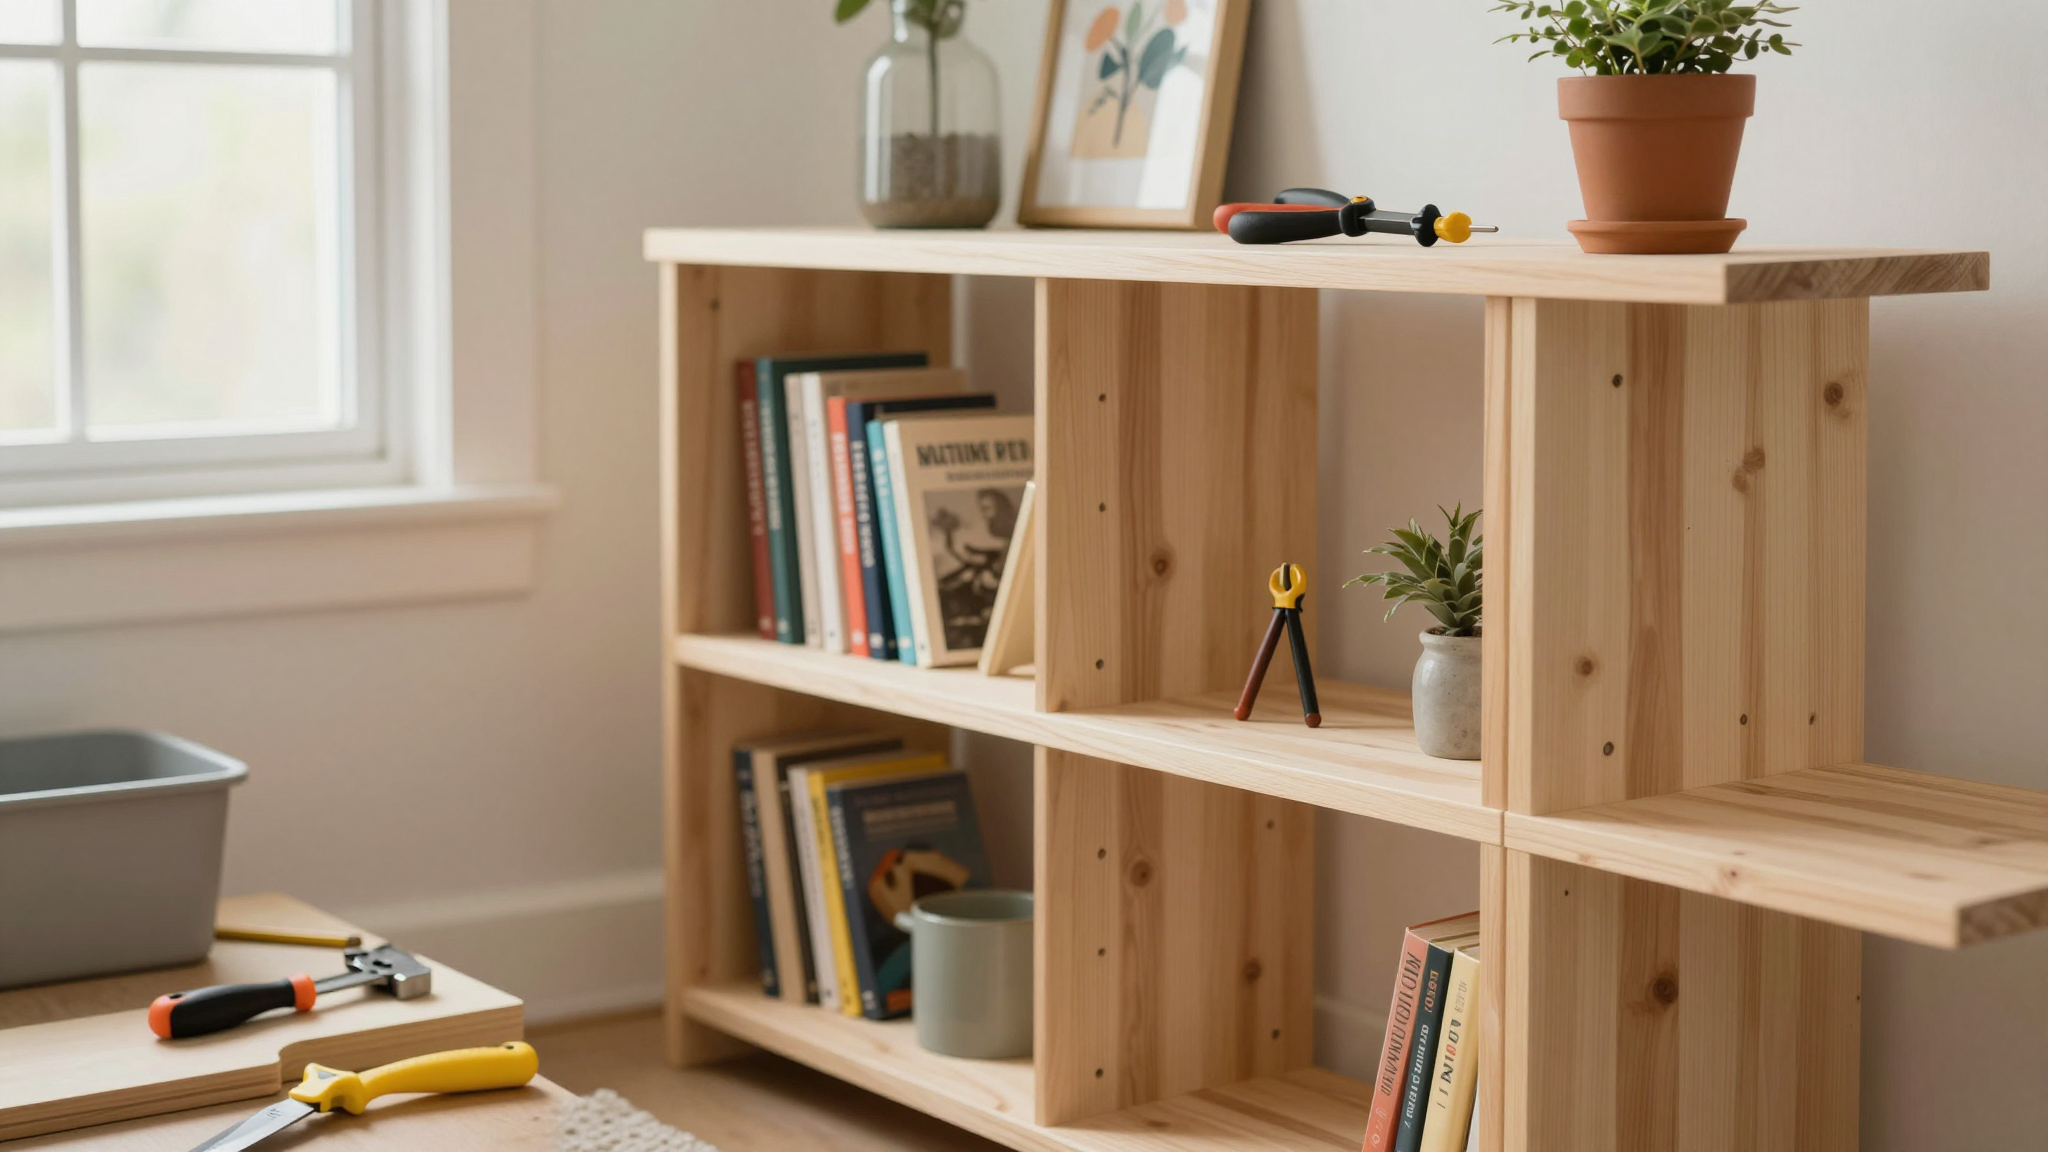
Tools and Materials: What You’ll Actually Need
Here’s what I used for my most recent bookshelf (and what I wish I’d had the first time):
| Tool | What It’s For | My Pro Tip |
|---|---|---|
| Power drill (I use a DeWalt DCD771) | Driving screws, pre-drilling holes | Get one with a clutch setting. It saved me from stripping screws when the wood was too hard. |
| Clamps (I have these Harbor Freight clamps) | Holding pieces together while glue dries | Cheap clamps work fine. I’ve used the same ones for 10 years. |
| Tape measure (and a laser measure if you’re serious) | Accurate measurements (so you don’t end up with a wonky shelf) | Measure twice, cut once. I say this every time, and I still mess up sometimes. |
| L-brackets (I like these Everbilt brackets) | Securing shelves to the frame | Pre-drill holes in the brackets so they don’t split the wood. |
| Wood glue (I use Titebond III) | Reinforcing joints | It’s waterproof and dries clear. Don’t skimp,cheap glue won’t hold. |
| Sandpaper (80 and 120 grit) | Smoothing edges (so no splinters!) | Wear a mask. Sanding creates a lot of dust. |
| Paint or stain (your choice!) | Finishing touches | If you’re painting, do it before assembling. Trust me. |
And if you’re on a budget? Here’s what I’d do differently on my first try:
- Skip the fancy wood and use upcycled furniture (like an old dresser). I turned my son’s hand-me-down dresser into a bookshelf with just $20 in supplies.
- Use pocket holes instead of visible screws. It looks cleaner and is easier to assemble. (I wish I’d known about this tool sooner!)
- Buy pre-cut wood. It’s more expensive, but it saves hours of measuring and cutting. I now get my wood pre-cut at Home Depot.
Assembly: How to Actually Build It (Without Crying)
Here’s the step-by-step process I follow now. I’ve included photos of my actual process (warts and all) so you can see what to expect.
- Cut your wood to size. I use a circular saw for this, but you can also have it done at the hardware store. Just double-check your measurements!
- Pre-drill holes. This prevents the wood from splitting when you screw everything together. I pre-drill all my holes now after my first attempt left the wood looking like Swiss cheese.
- Assemble the frame. Start with the sides and bottom. Use wood glue and screws for extra strength. I clamp everything together while the glue dries.
- Attach the shelves. I use L-brackets on the inside of the frame so they’re hidden. If you’re using pocket holes, now’s the time to add them.
- Check for level. Use a level (or your phone’s level app) to make sure everything is straight. I’ve had to redo shelves twice because I “eyeballed” it.
- Sand everything. I mean everything. Edges, corners, even the inside of the frame. Sanding takes the longest, but it’s worth it for smooth surfaces.
- Paint or stain. If you’re painting, do it now. I use a foam roller for large areas and a brush for edges. Let it dry completely (I usually wait 24 hours).
- Add the finishing touches. This is where I add:
- Felt pads on the bottom so it doesn’t scratch the floor
- Decorative knobs or handles (my daughter picked out these rainbow knobs from Etsy)
- Labels for the bins (I use chalkboard paint so we can change them as her interests do)
- Anchor it to the wall. I use these furniture straps and attach them to wall studs. If you’re not sure where the studs are, use a stud finder.
And if you’re worried about the shelves wobbling? I use these adjustable shelf pins ($10 for a pack). They let me tweak the height as my kids grow.
Pro tip: If you’re building multiple shelves, test fit one first. I learned this the hard way when I built four shelves only to realize the last one was ½ inch too short. Now I always build one as a prototype.
Kids’ Bookshelves: Top Picks for Stylish (and Functional) Storage
If you’d rather not build from scratch, here are the bookshelves I’ve tested and actually like. I’ve included the ones that survived my kids’ “play testing.”
What to Look for When Shopping
After testing (and returning) several bookshelves, here’s what I prioritize now:
- Reinforced corners. I’ve had two bookshelves collapse because the corners weren’t properly braced. Now I check for metal corner brackets.
- Non-toxic finishes. I avoid anything with strong chemical smells. I look for GREENGUARD certification or “low VOC” labels.
- Easy assembly. I’ve spent way too much time trying to figure out IKEA instructions. Now I look for:
- Pre-drilled holes
- Numbered parts
- Included tools (yes, some brands actually do this!)
- Weight capacity. I look for shelves that hold at least 50 pounds. My son’s bookshelf now holds his entire LEGO collection (and then some).
Here are the ones that passed my “torture test” (aka my kids using them as a jungle gym):
| Bookshelf | Best For | What I Love | What to Watch Out For |
|---|---|---|---|
| IKEA KALLA ($69) | Small spaces, modern look | Easy to assemble, lightweight but sturdy | Shelves aren’t as deep as I’d like (harder for picture books) |
| Pottery Barn Kids Wooden Bookshelf ($249) | Heirloom quality, custom colors | Beautiful finish, holds a ton of weight | Expensive, but worth it if you want something that lasts |
| Target Brightroom Bookshelf ($79) | Budget-friendly, cute designs | Affordable, comes in fun colors | Not as sturdy as IKEA,anchor it well |
| KidKraft Wooden Bookshelf ($129) | Durable, classic look | Holds a lot, easy to clean | Heavy,hard to move once assembled |
My current favorite? The IKEA KALLA. It’s affordable, easy to assemble, and,most importantly,my kids haven’t been able to tip it over (even when they climb on it, which they do). I did add extra straps just to be safe.
And if you’re on a budget? I love these cube organizers from Amazon ($45 for a 4-cube set). They’re not as pretty, but they’re:
- Easy to move around
- Great for small spaces
- Customizable with bins and labels
I use them in my daughter’s room to store her stuffed animals and books.
Multipurpose Designs: Bookshelves That Do Double (or Triple!) Duty
Why build a single-purpose bookshelf when it can do so much more? Here’s how I’ve turned bookshelves into:
- A reading nook + toy storage combo
- A desk + bookshelf hybrid
- A display case for their “treasures” (read: rocks, feathers, and random toys)
Here’s what I’ve learned from my own experiments:
Innovative Storage Solutions That Actually Work
I’ve tried (and abandoned) a lot of “clever” storage ideas. Here’s what actually works in a kids’ room:
- Cube organizers with fabric bins. I use these Target cubes ($20 for a 4-pack) to store:
- Stuffed animals (one bin per “family” of toys)
- Art supplies (crayons, markers, paper)
- Dress-up clothes (because why not?)
The fabric bins are machine-washable, which is a lifesaver after juice spills.
- Ladder-style shelves. I made one from wooden planks and it’s now my daughter’s favorite “reading ladder.” She climbs up to grab books from the top shelf (which I’ve anchored very securely).
- Cabinet hybrids. I combined a closed cabinet with open shelves for a bookshelf that hides the messy stuff (like her toys that make noise) while displaying her favorite books.
Pro tip: If you’re short on space, try a fold-down desk that attaches to the bookshelf. I found plans for one on Ana White and it’s been a game-changer for homework time.
Space-Saving Tips for Small Rooms
I’ve had to get creative in my kids’ rooms (which are not big). Here’s what I’ve learned:
- Use vertical space. I added floating shelves above my son’s bed to hold his favorite books. Now he can reach them without climbing.
- Foldable designs. I made a fold-down bookshelf that tucks against the wall when not in use. It’s perfect for his playroom.
- Multi-functional furniture. I combined a bench with storage underneath for books and toys. Now it’s a reading spot and extra seating.
- Rotating displays. I use a lazy Susan ($15) on the bottom shelf to rotate her books. She loves “discovering” new ones.
And if you’re really short on space? Try a pegboard wall. I used it to hang:
- Books with clips
- Toy bins
- Art supplies
It’s not pretty, but it works. (And I covered it with a chalkboard paint so it’s at least functional.)
Choosing the Right Size and Style for Your Space
Here’s where I went wrong the first time: I picked a bookshelf based on how it looked in the store, not how it would fit in my kid’s room. Now I measure everything first.
Matching Your Room’s Decor (Without Breaking the Bank)
I’ve tried to match bookshelves to my kids’ rooms, and let me tell you,it’s hard. Here’s what I’ve learned:
- Start with a neutral base. I used a white bookshelf in my daughter’s room because it goes with everything. Then I added colorful bins and labels to match her current obsession (this month: unicorns).
- Use removable decals. I found these custom decals on Etsy ($10) that match her room’s theme. When she gets bored, I just peel them off and replace them.
- Add texture with baskets. Woven baskets (like these ones from Target) add warmth and hide clutter.
And if you’re not sure about colors? I always test paint samples on the shelves before committing. I’ve had to repaint two bookshelves because the color looked different in the room than it did in the store.
Budget-Friendly Options That Actually Last
I’ve spent anywhere from $20 to $200 on bookshelves, and here’s what I’ve learned about value:
| Option | Price | What I Like | What to Watch Out For |
|---|---|---|---|
| DIY with plywood | $20-$50 | Customizable, sturdy if built right | Takes time and tools |
| IKEA KALLA | $69 | Affordable, easy to assemble | Shelves are shallow |
| Target Brightroom | $79 | Cute designs, good quality | Not as sturdy as IKEA |
| Upcycled dresser | $0-$30 (if you already have a dresser) | Free if you repurpose furniture | Requires sanding/painting |
My best budget tip? Buy secondhand and repurpose. I found a dresser at a thrift store for $10, sanded it down, and turned it into a bookshelf. It’s now one of my favorite pieces in my daughter’s room.
And if you’re painting? I always use a sample-sized paint first. It’s $5 and saves me from buying a whole gallon of a color I don’t like.
Maintaining Your Bookshelves (So They Last Longer Than a Year)
Here’s how I keep my bookshelves looking good and functioning well, even with two kids who treat them like a jungle gym.
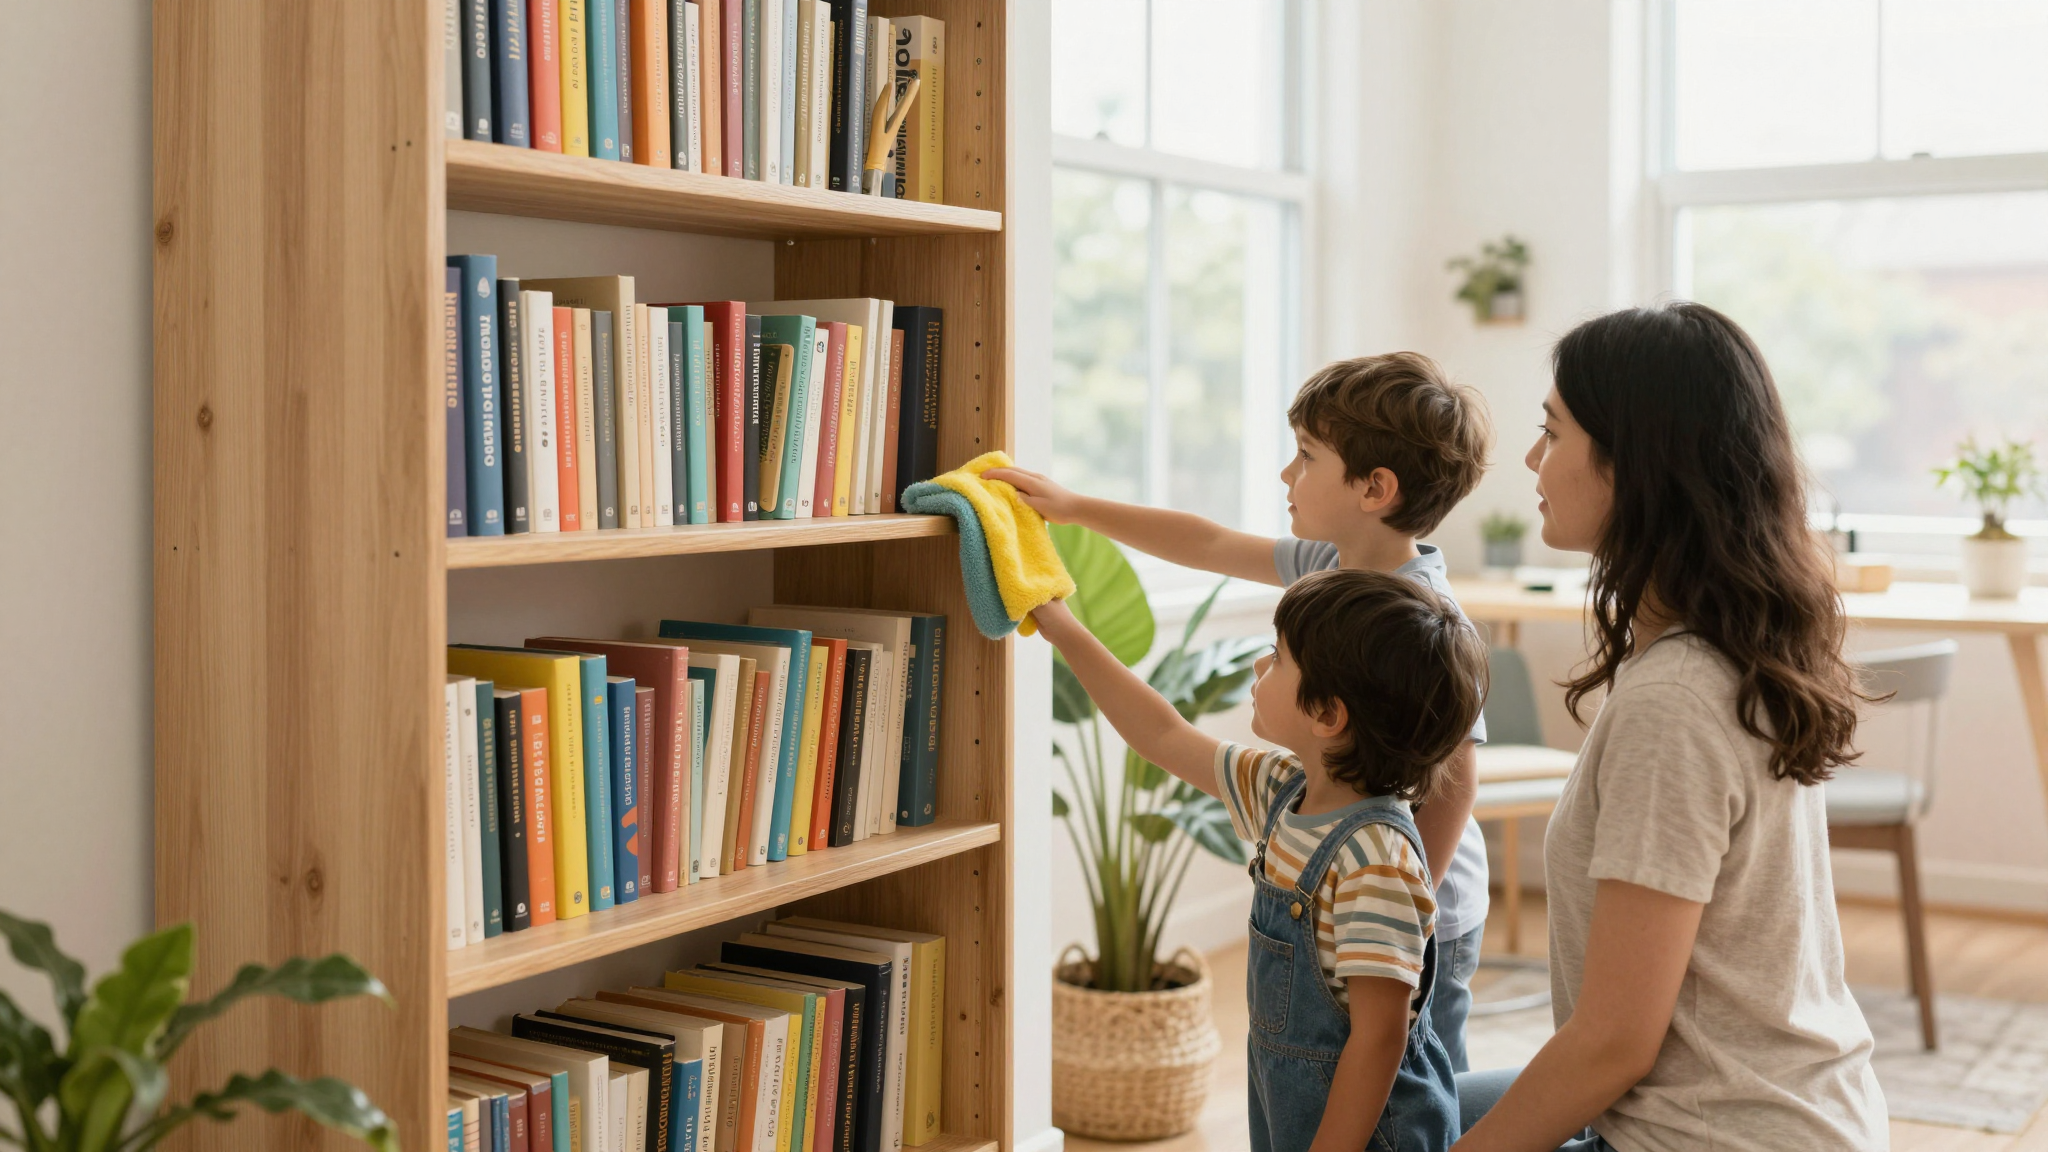
Cleaning and Upkeep: The 5-Minute Routine That Saves Me Hours
I used to spend hours cleaning up after my kids. Now I have a 5-minute routine that keeps everything in check:
- Weekly dusting. I use a microfiber cloth to wipe down shelves and books. (Yes, I dust the books too,my daughter notices when they’re dusty.)
- Monthly deep clean. I take everything off the shelves, wipe them down with a damp cloth, and reorganize. It’s amazing how much “junk” accumulates in just a month.
- Spot cleaning stains. I keep a Magic Eraser handy for crayon marks and a non-toxic cleaner for spills.
- Tightening screws. I check all the screws and brackets once a month. Kids are hard on furniture, and things loosen over time.
Pro tip: If you have wooden shelves, I use Minwax Polyurethane every 6 months to protect the finish. It’s worth the $10 to keep everything looking new.
Organization Hacks That Actually Work (And Don’t Take Forever)
I’ve tried so many organization systems, and most of them failed. Here’s what actually works in my house:
- Label everything. I use chalkboard labels so my kids can “read” where things go. (Even my 4-year-old can recognize the sock drawer icon.)
- Use clear bins for small items. I keep puzzle pieces and LEGO in clear bins so my kids can see what’s inside without dumping everything out.
- Rotate toys and books. I store 30% of my daughter’s toys and books in a plastic bin under her bed. Every month, I swap out a few items to keep things fresh.
- Add hooks for hanging items. I installed over-the-door hooks on the side of her bookshelf for backpacks and dress-up clothes.
And if you’re short on space? I use the top of the bookshelf for items I don’t need to access often, like:
- Seasonal decor
- Extra blankets
- Board games we don’t play as much
Pro tip: If your kids are young, use picture labels instead of words. My daughter can’t read yet, but she knows the dinosaur sticker means “dinosaur toys.”
Creative Ways to Showcase Books and Toys (So It Doesn’t Look Like a Cluttered Mess)
Here’s how I make my kids’ bookshelves look intentional instead of like a storage disaster.
Display Ideas That Spark Joy (Not Just Storage)
I’ve tried (and abandoned) a lot of “Pinterest-perfect” displays. Here’s what actually works in a real kids’ room:
- Group by theme. I keep all my son’s dinosaur books together with his dinosaur toys. It makes cleanup easier and looks way more organized.
- Use risers for depth. I found these wooden risers ($15) and use them to create “steps” on the shelves. Now his books and toys have more visual interest.
- Add personal touches. I let my kids display their “treasures” (rocks, feathers, random toys) on the top shelf. It makes them feel proud of their space.
- Rotate seasonal displays. In the fall, I swap out summer books for autumn-themed ones. It keeps the shelves feeling fresh without buying new decor.
And if you’re short on space? Try a gallery wall above the bookshelf. I used floating frames to display my kids’ artwork. It’s a great way to add personality without taking up shelf space.
Scannable Shopping List for Your Project
Here’s what I’d grab if I were starting from scratch today:
Tools:
- Power drill (DeWalt DCD771)
- Clamps (Harbor Freight)
- Tape measure (or laser measure if you’re fancy)
- Level
- Sandpaper (80 and 120 grit)
- Safety glasses
Materials:
- Plywood (½” thick) (or pre-cut shelves from Home Depot)
- Wood glue (Titebond III)
- L-brackets
- Furniture straps
- Paint or stain (your choice!)
- Felt pads (for the bottom of the shelf)
Extras (Optional but Helpful):
- Decorative knobs (for a personal touch)
- Chalkboard paint (for labels)
- Clear bins (for small items)
- Woven baskets (for texture)
Final Thoughts (and What I’d Do Differently Next Time)
Building bookshelves for my kids has been a journey,one with a lot of mistakes, but also a lot of wins. If I could go back, I’d:
- Start with a smaller project. My first attempt was too ambitious, and I ended up frustrated. Now I build one shelf at a time.
- Invest in a better drill sooner. My cheap drill stripped so many screws before I upgraded.
- Use pocket holes from the beginning. It makes assembly so much easier and looks cleaner.
- Anchor everything to the wall. I learned this the hard way when my son’s bookshelf tipped over (thankfully, he wasn’t hurt).
- Let my kids help personalize their shelves. My daughter picked out the rainbow knobs, and now she’s so proud of her bookshelf.
If you’re feeling overwhelmed, start small. Even a single floating shelf can make a difference. And if you make a mistake? That’s okay. My first bookshelf had so many problems, but it taught me what not to do next time.
Ready to get started? Grab your tools and check out the step-by-step guide. And if you hit a snag, remember: I’ve been there too. Just take it one step at a time.
Happy building! And if you end up with a bookshelf that’s almost level, don’t worry,mine was too the first time.