
Easy Pallet Projects to Make with the Whole Family (No DIY Experience Needed!)
Let me tell you,there’s nothing quite like the feeling of building something with your hands and your kids. I’ve spent years turning scrap pallets into everything from rustic wall art to kid-friendly garden planters, and I can promise you this: pallet projects are the ultimate family bonding activity. They’re beginner-friendly, budget-conscious, and,most importantly,they make your home feel uniquely yours.

I’ll be honest: my first pallet project was a disaster. I grabbed a pallet from behind the hardware store, assumed it was “safe,” and spent an hour wrestling with rusted nails that nearly took my thumb off. (Lesson learned: not all pallets are created equal.) But after a few trial-and-error sessions, I figured out how to spot good wood, prep it safely, and turn it into something my kids would actually brag about to their friends. Now? We do at least one pallet project a month,rain or shine.
If you’re new to this, don’t worry. I’ll walk you through everything: how to find safe pallets, prep the wood without losing a finger, and pick projects that’ll keep the whole family engaged (even the kid who’d rather be on their tablet). And if you’re a seasoned DIYer? Trust me, you’ll find fresh inspiration here too.
Why Pallet Projects Are Perfect for Families (And Where to Start)
Here’s the thing: pallet wood is free (or close to it), it’s eco-friendly, and it’s the ultimate blank canvas. My kids,ages 8 and 12,love that they can “build” something from scratch, and my husband? He finally has a reason to use that fancy new power drill he got for Christmas.
But before you drag home a stack of pallets, you’ve got to know a few key things:
- Not all pallets are safe. Avoid ones stamped with “MB” (methyl bromide) or “HT” (heat-treated). Look for the “HT” stamp without chemicals,those are the gold standard. Pro tip: Hit up local farms, breweries, or hardware stores. They often have clean pallets just sitting around.
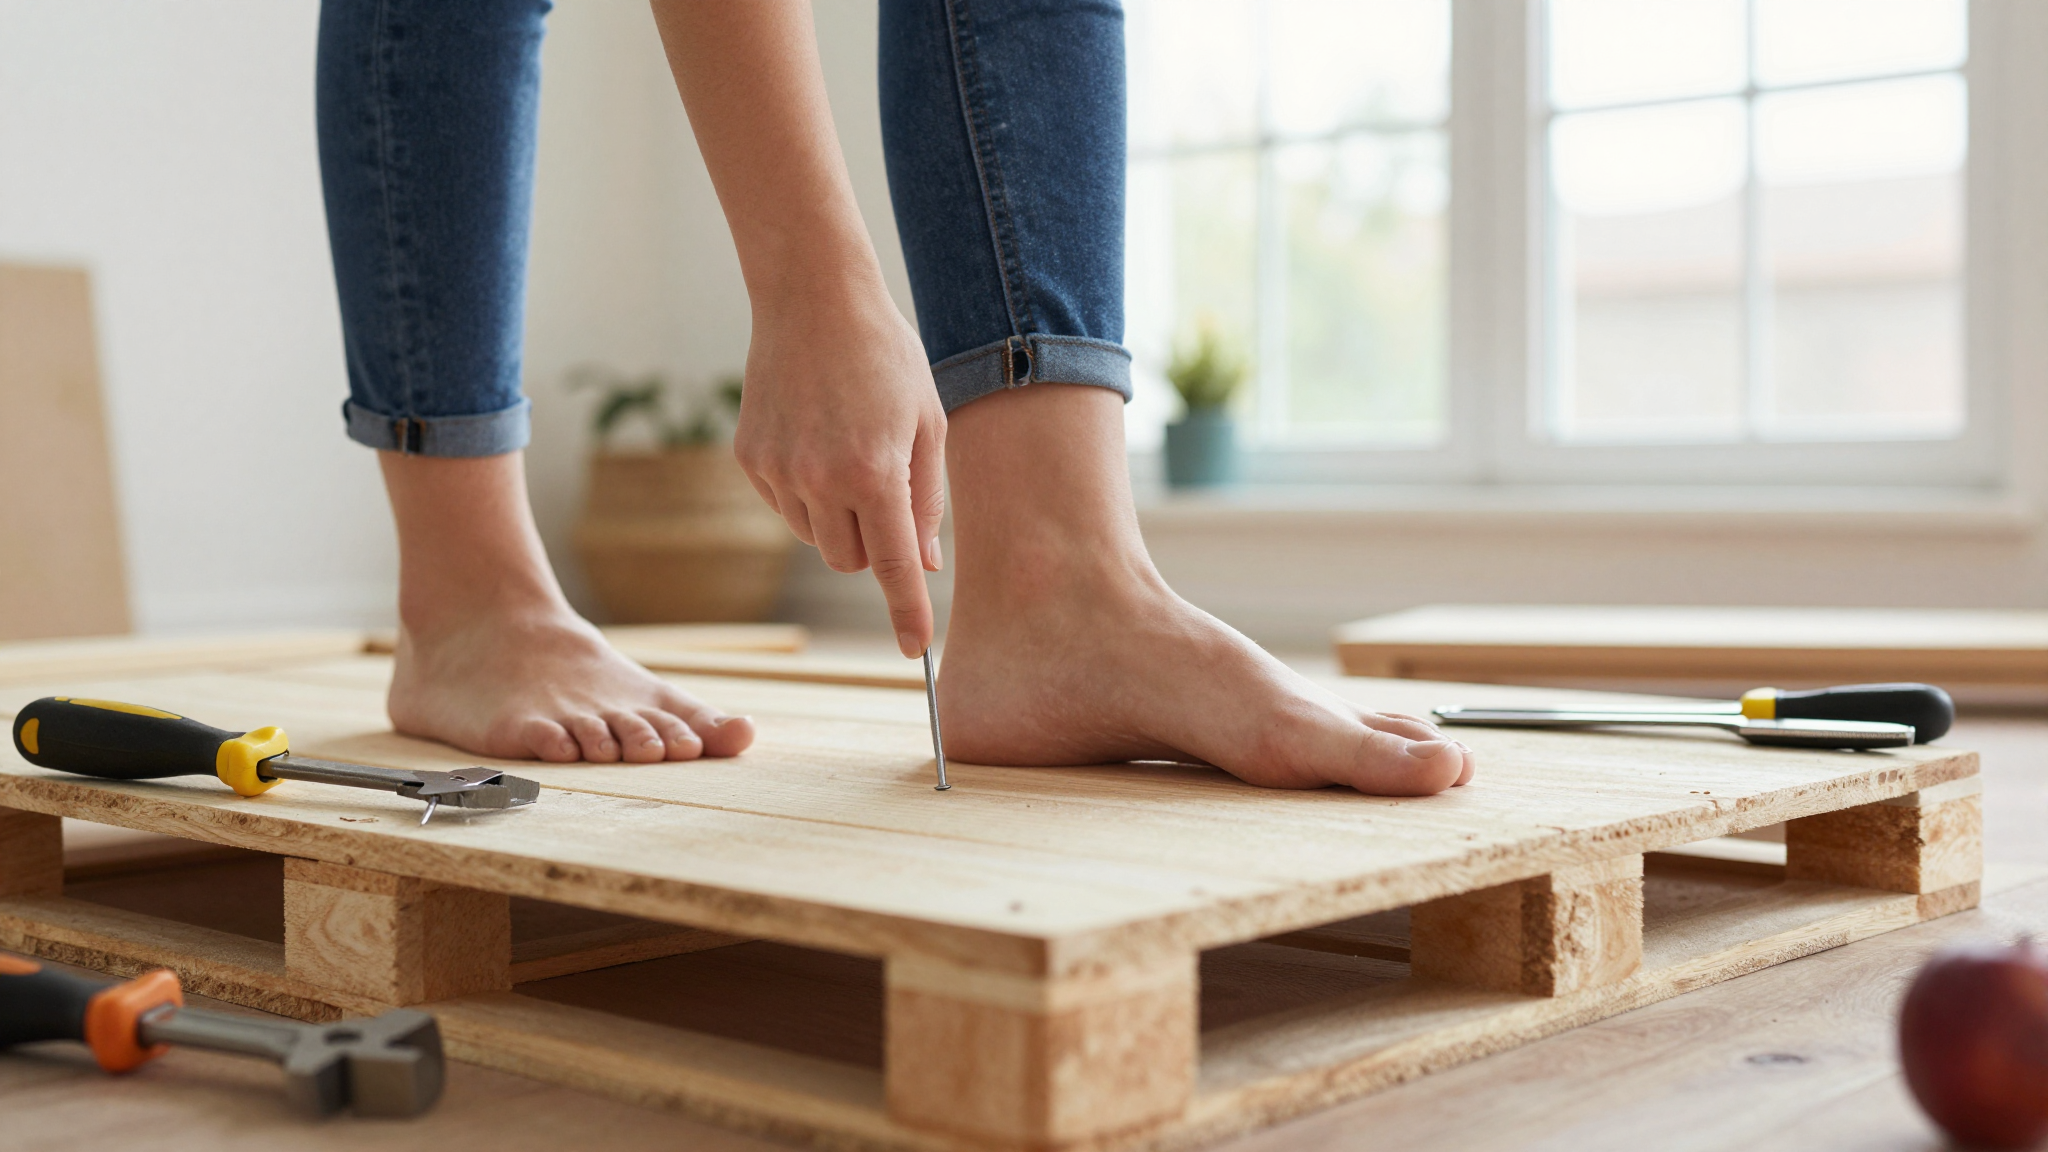
- Kids + sharp objects = supervision. My rule? No one under 10 touches nails or power tools. The 8-year-old’s job is sanding (with a very close eye on her) and painting. The 12-year-old? She’s graduated to hammering,with gloves and goggles.
- Start small. Your first project shouldn’t be a pallet sofa. (Trust me, I tried. It’s still in pieces in the garage.) Begin with something simple like a rustic picture frame or a planter box. Small wins build confidence.
Oh, and if you’re worried about splinters or rough edges? A little sandpaper and a coat of non-toxic paint work wonders. (I swear by Rust-Oleum’s Zero VOC paints,they’re safe for kids and smell like fresh air, not a chemistry lab.)
How to Prep Pallet Wood (Without Losing a Finger)
This is where most people give up. Disassembling a pallet sounds easy,until you’re prying apart nails that haven’t budged since 1998. Here’s how I do it now:
- Grab the right tools. You’ll need:
- A crowbar (the 18-inch one,trust me, the small ones snap).
- A hammer (my favorite is the Estwing Big Blue,it’s indestructible).
- Pliers (for stubborn nails).
- Safety glasses (non-negotiable. I learned this the hard way when a nail flew up and nearly took out my eyebrow).
- Work gloves (the thick ones, not the flimsy dishwashing kind).
- Disassemble carefully. Start by prying up the boards with the crowbar. If a nail won’t budge, don’t force it,tap it with the hammer to loosen it first. And for the love of all things holy, do not use your hands to hold the board while pulling nails. (Yes, I’ve done this. No, I don’t recommend it.)
- Sand like your life depends on it. Pallet wood is rough. I mean, splinter-you-in-three-places rough. Use an orbital sander (I love the DEWALT DWE6423) with 80-grit sandpaper first, then switch to 120-grit for a smooth finish. Wipe it down with a damp cloth to remove dust,kids will touch everything, and you don’t want them getting a mouthful of sawdust.
- Let it dry. If your wood is damp (common with outdoor pallets), let it sit in the sun for a day or two. Wet wood warps, and nobody wants a crooked coffee table.
Pro tip: If you’re short on time, planer rental kits from your local hardware store can save you hours of sanding. Just set the depth to 1/16 inch and run the wood through a few times. It’s a game-changer.
5 Beginner-Friendly Pallet Projects to Start With Today
Alright, let’s get building. These projects are simple, safe for kids, and,most importantly,actually useful. No useless decor here (unless you count the “world’s worst dad” sign my kids made me for Father’s Day. It’s hanging in my office with pride.).
1. Rustic Wooden Picture Frames
This was our first project, and it’s still my favorite because it’s foolproof. You’ll need:
- 4-6 pallet boards (sanded and prepped).
- A miter box and hand saw (or a jigsaw if you’re feeling fancy).
- Wood glue and a clamp.
- Stain or paint (let the kids pick the color,mine went with neon green. Regrets? Zero.)
Cut the boards to your desired frame size, glue the corners, clamp them, and let dry. Add a backing board (another pallet piece) to hold the photo. Boom,instant gallery wall material.
2. Kid-Made Garden Planters
This project taught my kids about sustainability (and why we don’t throw away “useless” wood). Here’s how:
- Find a shallow pallet box (the kind with slats,it’s already a planter shape!).
- Sand the inside and outside smooth.
- Let the kids paint it (we used acrylic paint because it’s easy to clean up).
- Drill drainage holes in the bottom (adult job only!).
- Fill with soil and let them plant herbs or flowers.
Pro tip: Add small wheels to the bottom so they can roll it around the yard. Mine “helped” me move it 17 times in one afternoon.
3. Outdoor Pallet Bench
This is the project that finally convinced my husband that pallet wood isn’t just “a hobby.” We built a two-seater bench for the backyard, and now it’s his favorite spot to drink his coffee. Here’s the shortcut:
- Use two long pallet boards as the seat (sand them really well,splinters on your butt are no fun).
- Find four sturdy legs (cut from pallet blocks or buy 2x4s from the hardware store).
- Screw everything together with outdoor-rated screws (no cheapo hardware here!).
- Stain it with TWP 100 (it’s waterproof and kid-safe).
Bonus: Add cushions (we used outdoor fabric from Joann Fabrics) to make it comfy.
4. Pallet Wood Headboard
I’ll be honest,this one took three tries to get right. But now? It’s the centerpiece of our bedroom. Here’s how to avoid my mistakes:
- Measure your mattress width and add 6 inches on each side for overhang.
- Use vertical slats (they’re easier to attach than horizontal ones).
- Pre-drill holes to avoid splitting the wood.
- Stain it dark walnut (it hides imperfections like a champ).
- Attach it to the wall with L-brackets (screw them into wall studs,no drywall anchors!).
Want more bedroom ideas? Check out my DIY bedroom makeover guide,it’s got 10 more pallet-inspired projects.
5. Pallet Coffee Table
This was our biggest project yet, and it’s still holding up after two years of kids jumping on it. (Yes, I said jumping. Don’t ask.) Here’s the secret:
- Use a large pallet base (the kind with a flat top).
- Cut four legs from 2x4s (or use pallet blocks if you’re lazy like me).
- Add wheels to one side so you can roll it out of the way for movie night.
- Stain it light oak and add a glass top (I got mine at IKEA for $30).
For a full tutorial, check out my step-by-step coffee table guide. It’s got photos of every step, including my “oops” moments.
Setting Up an Outdoor Family Workspace (So You’re Not Tripping Over Tools)
After our third pallet project ended with me stepping on a nail (in my bare foot,not recommended), I decided we needed a designated workspace. Now, we’ve got a covered corner of the backyard with:
- A sturdy workbench (I built it from 2x6s and pallet wood,tutorial here).
- A pegboard for hanging tools (my kids “helped” organize it. It’s color-coded. Don’t ask.).
- A tarp to cover everything when it rains (trust me, pallet wood + water = a soggy mess).
- A small fridge for snacks (non-negotiable after the Great DIY Hangry Incident of 2024).
Pro tip: If you don’t have outdoor space, set up a foldable table in the garage. Just keep a shop vac nearby for cleanup,sawdust gets everywhere.
Want more outdoor ideas? Check out my DIY fireplace makeover,it’s got pallet wood accents that’ll make your patio pop.
Kid-Friendly Pallet Projects That Actually Teach Them Something
Here’s the thing: kids love feeling like they “built” something. But if you want them to learn while they play, try these:
1. Mini Birdhouses (With Math Lessons)
We turned this into a geometry project. The kids had to:
- Measure the angle of the roof (we used a protractor).
- Calculate how much paint we’d need to cover it (spoiler: they used way more than the estimate).
- Figure out weight distribution so it wouldn’t tip over (mine did. Twice.).
We hung them in the backyard, and now we’ve got a bird-watching station. (The kids take turns “being the ornithologist.” It’s adorable.)
2. Decorative Signs (With Handwriting Practice)
This was a writing and creativity project. The kids:
- Chose a phrase or quote (mine picked “Home Sweet Home” in glitter paint. I regret nothing.).
- Practiced lettering on paper first (we used paint pens so they could erase mistakes).
- Transferred it to the wood with transfer paper (genius hack,more tips here).
Now, they’ve got signs in their rooms, and I’ve got zero complaints about homework.
3. Pallet Wood Tool Organizer (For Future DIYers)
This one was all about problem-solving. We had to:
- Figure out how to attach hooks without splitting the wood.
- Decide on compartments for different tools (screwdrivers vs. wrenches vs. “mystery small parts”).
- Paint it bright colors so it’s easy to find in the garage.
Now, my husband actually puts his tools away. Victory.
Indoor Decor Ideas Using Reclaimed Wood (That Don’t Look Like a Barn)
I’ll admit it: my first pallet project inside the house was a disaster. I built a massive pallet headboard, stained it dark brown, and hung it up,only to realize it looked like a log cabin threw up in our bedroom. Lesson learned: less is more.
Here are the indoor projects that actually work:
1. Floating Shelves (For Books or Plants)
These are easy, cheap, and customizable. Here’s how:
- Cut pallet wood into 12-inch-wide strips (sand like your life depends on it).
- Stain or paint them (we did whitewash for a farmhouse look).
- Attach L-brackets to the back and mount them to the wall.
- Style with books, plants, or framed photos.
Pro tip: If you want a rustic look, leave the wood natural and add black metal brackets. Instant charm.
2. Pallet Wood Accent Wall
This is my favorite way to use pallet wood indoors. Here’s the hack:
- Lean vertical pallet slats against the wall (no nails needed!).
- Space them 1-2 inches apart for a modern look.
- Add fairy lights or LED strips behind them for a glow.
It looks expensive, takes zero permanent changes, and hides imperfect walls. Win.
3. Reclaimed Wood Coffee Table (The Good Kind)
If you want something sleek (not barn-core), try this:
- Use thin pallet slats (about 1-inch wide).
- Arrange them in a herringbone pattern (or just random if you’re lazy like me).
- Glue them down with wood glue and clamp.
- Stain it dark gray or black for a modern look.
- Add a tempered glass top to protect the wood.
For the full tutorial, check out my coffee table guide. It’s got before-and-after photos so you can see the transformation.
Weekend Pallet Projects the Whole Family Will Love
If you’ve got a free weekend and a stack of pallets, here are the projects that’ll keep everyone engaged (and maybe even not argue):
1. Patio String Light Backdrop
This is easy, pretty, and instantly cozy. Here’s how:
- Build a large pallet frame (like a giant picture frame).
- Wrap it with fairy lights (we used warm white for a cozy vibe).
- Lean it against the house or fence.
- Add pillows and blankets for a backyard hangout spot.
Pro tip: If you want it permanent, screw it into the wall. If not, just prop it up,it’s that easy.
2. Garden Tool Organizer
This was a lifesaver after I spent 20 minutes digging through a bin to find the one trowel I needed. Here’s the fix:
- Build a vertical pallet board (about 4 feet tall).
- Attach hooks and pockets (I used leather straps for a rustic look).
- Hang it on the garage wall or shed door.
- Let the kids decorate it with paint or stencils.
Now, everything has a home, and I never lose the pruners again.
3. Seasonal Decor (Because Why Not?)
This is where the kids really shine. We make:
- Spring: Painted pallet flower planters (shaped like butterflies).
- Summer: A pallet wood chalkboard for the backyard (we write silly jokes on it).
- Fall: Pumpkin-shaped pallet signs (yes, they’re lopsided. No, I don’t care.).
- Winter: A pallet wood sled (we drag it to the hill,safety first, kids!).
It’s cheap, fun, and teaches them that decor doesn’t have to be store-bought.
Painting, Staining, and Decorating: The Fun Part!
This is where the magic happens. But before you grab the paintbrush, here’s what I’ve learned:
Child-Safe Finishes (Because No One Wants a Toxic Nightmare)
Kids will touch everything, so skip the harsh chemicals. Instead, use:
- Milk paint (it’s non-toxic and comes in fun colors).
- Acrylic paint (washes off skin and clothes,mostly).
- Beeswax or tung oil for a natural sealant.
- Avoid polyurethane if kids will be near it (it’s not kid-safe).
Pro tip: If you’re really worried, let the kids paint with watercolors first on paper. Once they’ve got the design down, transfer it to the wood with transfer paper.
Creative Decorating Ideas (Because Boring Wood Is Just… Wood)
Here’s how to make your pallet project uniquely yours:
- Stencils: We used alphabet stencils to spell out our last name on a farmhouse sign. (It’s crooked. We love it.)
- Stamps: Dip potato stamps in paint for a handmade look.
- Twine or jute: Wrap it around edges for a rustic touch.
- Chalkboard paint: Turn a pallet into a chalkboard for kids’ drawings.
- Metallic accents: Add gold or copper leaf for a fancy (but easy) upgrade.
Want more decor ideas? Check out my DIY accent wall guide,it’s got pallet wood inspiration for every room.
Keeping Your Pallet Creations Looking New (So They Last Years)
Here’s the hard truth: if you don’t maintain your pallet projects, they’ll fall apart. (I speak from experience. My first pallet bench is now firewood.)
To keep yours looking fresh:
- Seal it right. If it’s outdoor, use a waterproof sealant like TWP 100. If it’s indoor, polycrylic works great.
- Clean regularly. A damp cloth and mild soap keep dirt from building up.
- Reapply finish every 1-2 years. Sun and rain will wear it down.
- Store it properly. If it’s not in use, keep it in a dry, covered area (like the garage).
Pro tip: If you see mold, scrub it with a vinegar-water mix (1:1 ratio) and let it dry in the sun.
Troubleshooting Common Pallet Project Problems (So You Don’t Pull Your Hair Out)
Let’s be real: pallet projects will go wrong. Here’s how to fix the most common issues:
1. Nails That Won’t Budge
This is the #1 frustration. Here’s what works:
- Spray the nail with WD-40 and let it sit for 10 minutes.
- Use a nail remover tool (or a drill with a nail bit).
- If it’s really stuck, cut the board around it and sand the rest.
I keep a nail remover tool in my garage now. Life-changer.
2. Splitting Wood
This happens when you screw too close to the edge. Fix it by:
- Filling the split with wood filler (I like Minwax).
- Sand it smooth once it’s dry.
- Next time, pre-drill holes to avoid splitting.
3. Warped Wood
If your wood is bending, it’s probably wet. Here’s how to fix it:
- Let it dry in the sun for a few days.
- If it’s really warped, use it for a curved project (like a rustic shelf).
- Prevent it by storing wood indoors before building.
4. Paint or Stain Won’t Stick
This usually means the wood wasn’t sanded well enough. Here’s the fix:
- Sand it again with 220-grit paper.
- Wipe it down with a tack cloth to remove dust.
- Use a bonding primer before painting.
Remember: Mistakes happen. My first pallet project looked like a kindergartener built it (because, well, my kids helped). But that’s the fun of DIY,it’s imperfect, and that’s what makes it yours.
FAQs: Your Pallet Project Questions, Answered
What are the advantages of using reclaimed wood from pallets for family projects?
Reclaimed pallet wood is free (or cheap), eco-friendly, and endlessly customizable. It’s a great way to teach kids about sustainability while making something useful. Plus, no two pallets are the same,so your project will always be unique. (Unlike that identical IKEA shelf everyone has.)
What essential tools do I need to get started with pallet projects?
You don’t need a full workshop, but these tools will make your life so much easier:
- Crowbar (for disassembling pallets).
- Hammer (I swear by the Estwing Big Blue).
- Saw (a jigsaw or hand saw works).
- Drill (a cordless one is a game-changer).
- Sandpaper (start with 80-grit, finish with 220-grit).
- Safety gear (gloves, goggles, dust mask,non-negotiable).
For a full tool list, check out my essential tools guide.
How can I make sure my kids are safe while working on pallet projects?
Kids + sharp objects = supervision city. Here’s how I keep mine safe:
- Assign age-appropriate tasks (e.g., sanding for little ones, painting for older kids).
- Make them wear gloves and goggles (even if they complain).
- Keep power tools for adults only.
- Do projects in a well-ventilated area (no enclosed garages!).
- Teach them basic first aid (like how to clean a cut).
Safety first, fun second. (Okay, fine,fun first, but safety is a close second.)
What are the simple pallet projects that are suitable for beginners?
Start with these easy wins:
- Picture frames (great for first-timers).
- Garden planters (kids love painting them).
- Simple shelves (floating or lean-to).
- Decorative signs (let the kids design them).
- Outdoor bench (sturdy and useful).
For more beginner ideas, check out my 5 easy DIY projects.
How can I make my pallet projects more educational for my children?
Turn your project into a mini science/math lesson:
- Teach measurements (e.g., “How long should the shelf be?”).
- Explain wood types (e.g., “This is pine,it’s soft and easy to sand!”).
- Discuss sustainability (e.g., “We’re reusing wood to help the planet!”).
- Let them problem-solve (e.g., “How can we make this stronger?”).
Bonus: They’ll actually remember the lesson because they built it.
Can you put forward a few difficulties I might encounter while doing pallet projects and the possible methods to get over them?
Here are the top 3 headaches and how to fix them:
- Stubborn nails: Use a nail remover tool or WD-40 to loosen them.
- Splitting wood: Pre-drill holes and avoid screwing too close to the edge.
- Warped wood: Let it dry in the sun or use it for a curved project.
Remember: No project is perfect. Mine have crooked nails, uneven paint, and one shelf that wobbles. But that’s what makes them ours.
Ready to start your next pallet project? Grab a pallet, round up the kids, and get building. And if it doesn’t turn out perfect? That’s okay,we’ll just call it “rustic charm.”
What’s the first project you’re trying? Let me know in the comments,I’d love to see your creations!