
DIY Water Heater Inspection: What to Look For (And What to Do Next)
I’ll never forget the morning my water heater decided to stage a mutiny. One minute, I was enjoying my coffee; the next, I was standing in a puddle of lukewarm water while my husband fumbled with the shutoff valve. Turns out, a slow leak had been brewing for months,something I could’ve caught with a quick inspection. That’s why I’m sharing my hard-earned lessons here: a little time now can save you from a soggy, expensive disaster later.

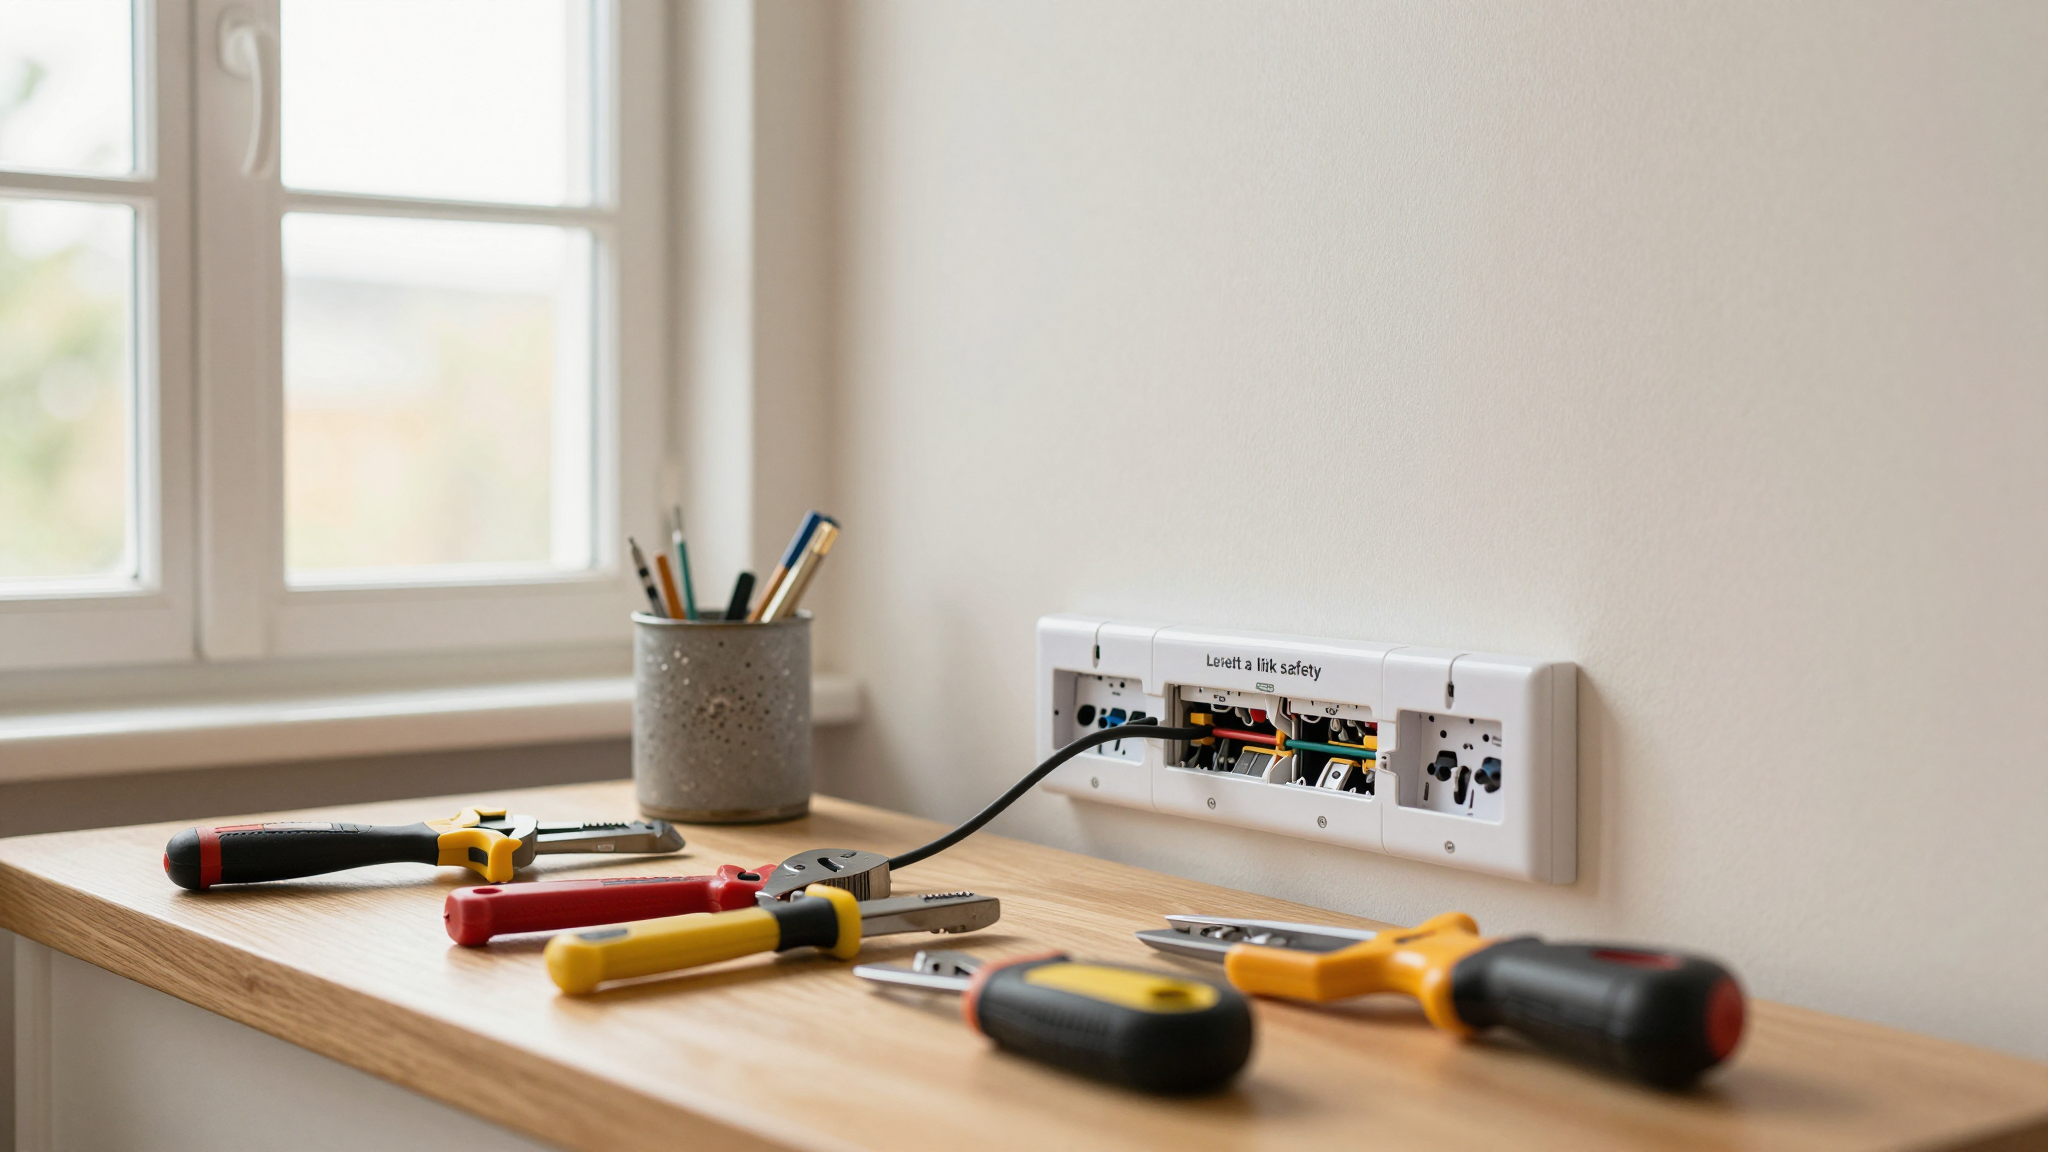
This isn’t about turning you into a plumber. It’s about teaching you how to spot early warning signs, test basic functions, and know when to call in the pros. I’ll walk you through what to check, what tools to use (spoiler: you probably already own them), and how to handle the most common issues,like the time I accidentally turned my water heater into a percussion instrument thanks to sediment buildup. Grab my go-to toolkit first, then let’s get started.
Why Bother Inspecting Your Water Heater?
Here’s the thing: water heaters don’t just wear out,they degrade. And when they do, it’s rarely a quiet affair. I’ve had units that groaned like a haunted house, others that leaked like a sieve, and one that somehow managed to turn my laundry room into a sauna. The good news? Most of these issues have early warning signs. The bad news? Ignoring them usually means a bigger (and pricier) problem down the road.
My gas water heater, for example, started making a noise like a rock tumbler last winter. I ignored it for weeks, assuming it was just “settling in” (yes, I know,classic homeowner denial). By the time I finally flushed it, the sediment had built up so much that the heating element was working overtime. My energy bill spiked by $40 that month. Moral of the story? A 20-minute inspection every few months could’ve saved me time, money, and a lot of head-scratching.
And let’s talk numbers for a second. Heating water accounts for nearly 18% of your home’s energy use. If your unit is struggling, you’re basically flushing cash down the drain,literally. A little maintenance can stretch its lifespan from the average 10 years to 15, which means delaying a $1,000+ replacement. Not to mention, catching leaks early can prevent water damage that might otherwise require a drywall overhaul or worse.
So, what’s the bottom line? A yearly inspection is your best defense. If your unit is older than 8 years or you’ve got a big family (or, let’s be honest, a teenager who showers for 45 minutes straight), I’d check it twice a year. And if you smell gas, see soot, or hear anything that sounds like it belongs in a horror movie? Drop everything and call a pro. No questions asked.
Safety First: How to Inspect Without Turning Your Home Into a Hazard Zone
Before you lift a finger, let’s talk safety. I learned this the hard way when I once forgot to turn off the circuit before poking around my electric water heater. (Spoiler: Nothing exploded, but I did get a very stern lecture from my husband, who’s a licensed electrician. Thanks, babe.) Here’s what you must do before you start:
Step 1: Know Your Water Heater’s Personality
Not all water heaters are created equal. Mine is a gas tank model, but I’ve also dealt with electric and tankless units. Here’s how to tell them apart:
- Tank models: Big, bulky, and usually tucked in a closet or laundry room. They hold 30–80 gallons of water and take 20–40 minutes to recover after a big draw.
- Tankless models: Slim, wall-mounted, and about the size of a microwave. They heat water on demand but can struggle if you run too many fixtures at once (ask me how I know).
- Gas vs. electric: Gas units have a burner and vent pipe. Electric ones have wiring and no vent (unless it’s a hybrid).
Pro tip: If you’re buying a home, ask for a water heater inspection during the walkthrough. A good inspector will check for corrosion, proper venting, and signs of past leaks,things sellers might not disclose.
Step 2: Gas Unit Safety Check (If Applicable)
If you’ve got a gas water heater, start by locating the shutoff valve. Mine’s behind a panel near the unit, but yours might be elsewhere. Clear any clutter around it,trust me, you don’t want to be fumbling for it in an emergency.
Next, scan the vent pipe. It should be:
- Securely connected (no gaps or loose collars).
- Free of soot or rust. If you see black streaks, that’s a red flag for poor combustion.
- Properly sloped upward (condensation should drain out, not into your home).
And here’s the big one: smell for gas. I know it sounds obvious, but I’ve had neighbors who thought, “Eh, it’s probably just the pilot light,” only to later find out their unit was leaking. If you smell even a hint of gas (which, by the way, is odorless but companies add a rotten-egg scent so you’ll notice), leave the house and call your gas company or a licensed plumber immediately. No inspections, no heroics.
Step 3: Electric Unit Safety Check
For electric water heaters, the biggest risks are faulty wiring and overheating. Here’s what to do:
- Turn off the circuit at the breaker. Yes, even if the unit feels “off.” I learned this after getting a mild shock from a loose wire. (Not fun.)
- Inspect the access panel. If the screws are rusted or the panel won’t close properly, that’s a sign of moisture damage.
- Check the wiring. Look for frayed insulation, burn marks, or loose connections. If anything looks questionable, do not touch it. Call an electrician.
While you’re at it, test the GFCI outlet (if it has one) by pressing the “Test” button. It should trip. If it doesn’t, that’s another call for a pro.
Step 4: Tankless Unit Safety Check
Tankless water heaters are efficient, but they’re also finicky. Mine once shut off in the middle of my shower because the inlet filter was clogged. Here’s what to check:
- Test the flow rate. Turn on a hot faucet and time how long it takes to get steady hot water. If it’s slower than usual, sediment or scale might be building up.
- Inspect the inlet filter. If it’s dirty, clean or replace it. (I use a simple mesh filter,cheap and effective.)
- Listen for unusual noises. Tankless units should be quiet. If yours sounds like a jet engine, it’s time for a flush or a pro visit.
And if you’ve got hard water? Flush it annually. I learned this the hard way when my tankless unit started acting up after two years. A $20 flush kit and an hour of my time saved me $800 in repairs.
Step 5: General Safety Rules (For All Units)
Before you do anything, set your water heater’s thermostat to 120°F. Any higher, and you risk scalding (especially dangerous if you’ve got kids or elderly family members). I keep mine at 120°F year-round,it’s hot enough for showers but safe for the grandkids when they visit.
Other must-dos:
- Keep the area dry. Water and electricity (or gas) don’t mix. If you see standing water near the unit, address it now.
- Use a flashlight, not your phone light. I once dropped mine into a bucket of water while inspecting the relief valve. (Thankfully, it was an old phone.)
- Keep kids and pets away. Water heaters aren’t playgrounds, and curious fingers can turn knobs they shouldn’t.
Your DIY Water Heater Inspection Checklist
Grab your toolkit, a notebook (or your phone), and let’s get to work. I’ll walk you through each step, including the mistakes I’ve made so you don’t have to.
Step 1: Test Hot Water Performance
Start by turning on a hot faucet (I use the one in the kitchen because it’s easy to monitor). Time how long it takes to get hot water. If it’s slower than usual, that’s your first red flag.
Next, check the temperature. Use a infrared thermometer (I keep one in my toolbox) or a meat thermometer to test the water at two different fixtures. If there’s a big difference,say, 130°F at the kitchen sink but only 100°F in the shower,that means your unit isn’t distributing heat evenly. Could be sediment, a failing heating element, or a thermostat issue.
Pro tip: If your water heater takes forever to recover after a big draw (like back-to-back showers), it might be undersized for your household. When we renovated our bathroom, we had to upgrade to a larger unit to handle the new soaking tub and double showerheads.
Step 2: Inspect the Base and Surrounding Area
Get down on your hands and knees (or use a flashlight if you’d rather not) and check the area around the base of the unit. Look for:
- Damp spots or puddles. Even a little moisture can mean a slow leak. I once found a tiny drip under my unit that turned out to be a loose connection. Tightening it stopped the leak before it became a bigger problem.
- Rust or corrosion on the tank or pipes. If the tank itself is rusting, it’s time to start shopping for a replacement.
- Mineral buildup. If your water is hard, you’ll see white, chalky deposits around the fittings. These can restrict flow and cause overheating.
If you see any of these, jot down the date and take a photo. Tracking changes over time helps you decide when to call a pro.
Step 3: Check Fittings and Connections
Visually inspect all the pipes, valves, and connections for:
- Leaks. Even a slow drip can lead to big problems. I once ignored a tiny leak for months, only to come home to a flooded laundry room. (Lesson learned: address leaks immediately.)
- Corrosion or rust. If the pipes look like they’re from the 1970s, they probably are,and they’re likely failing.
- Loose fittings. If anything wiggles when you touch it, tighten it with a pipe wrench. (Just don’t overtighten,you don’t want to crack a pipe.)
If you see active leaks or corroded pipes, stop and call a plumber. This isn’t a DIY fix.
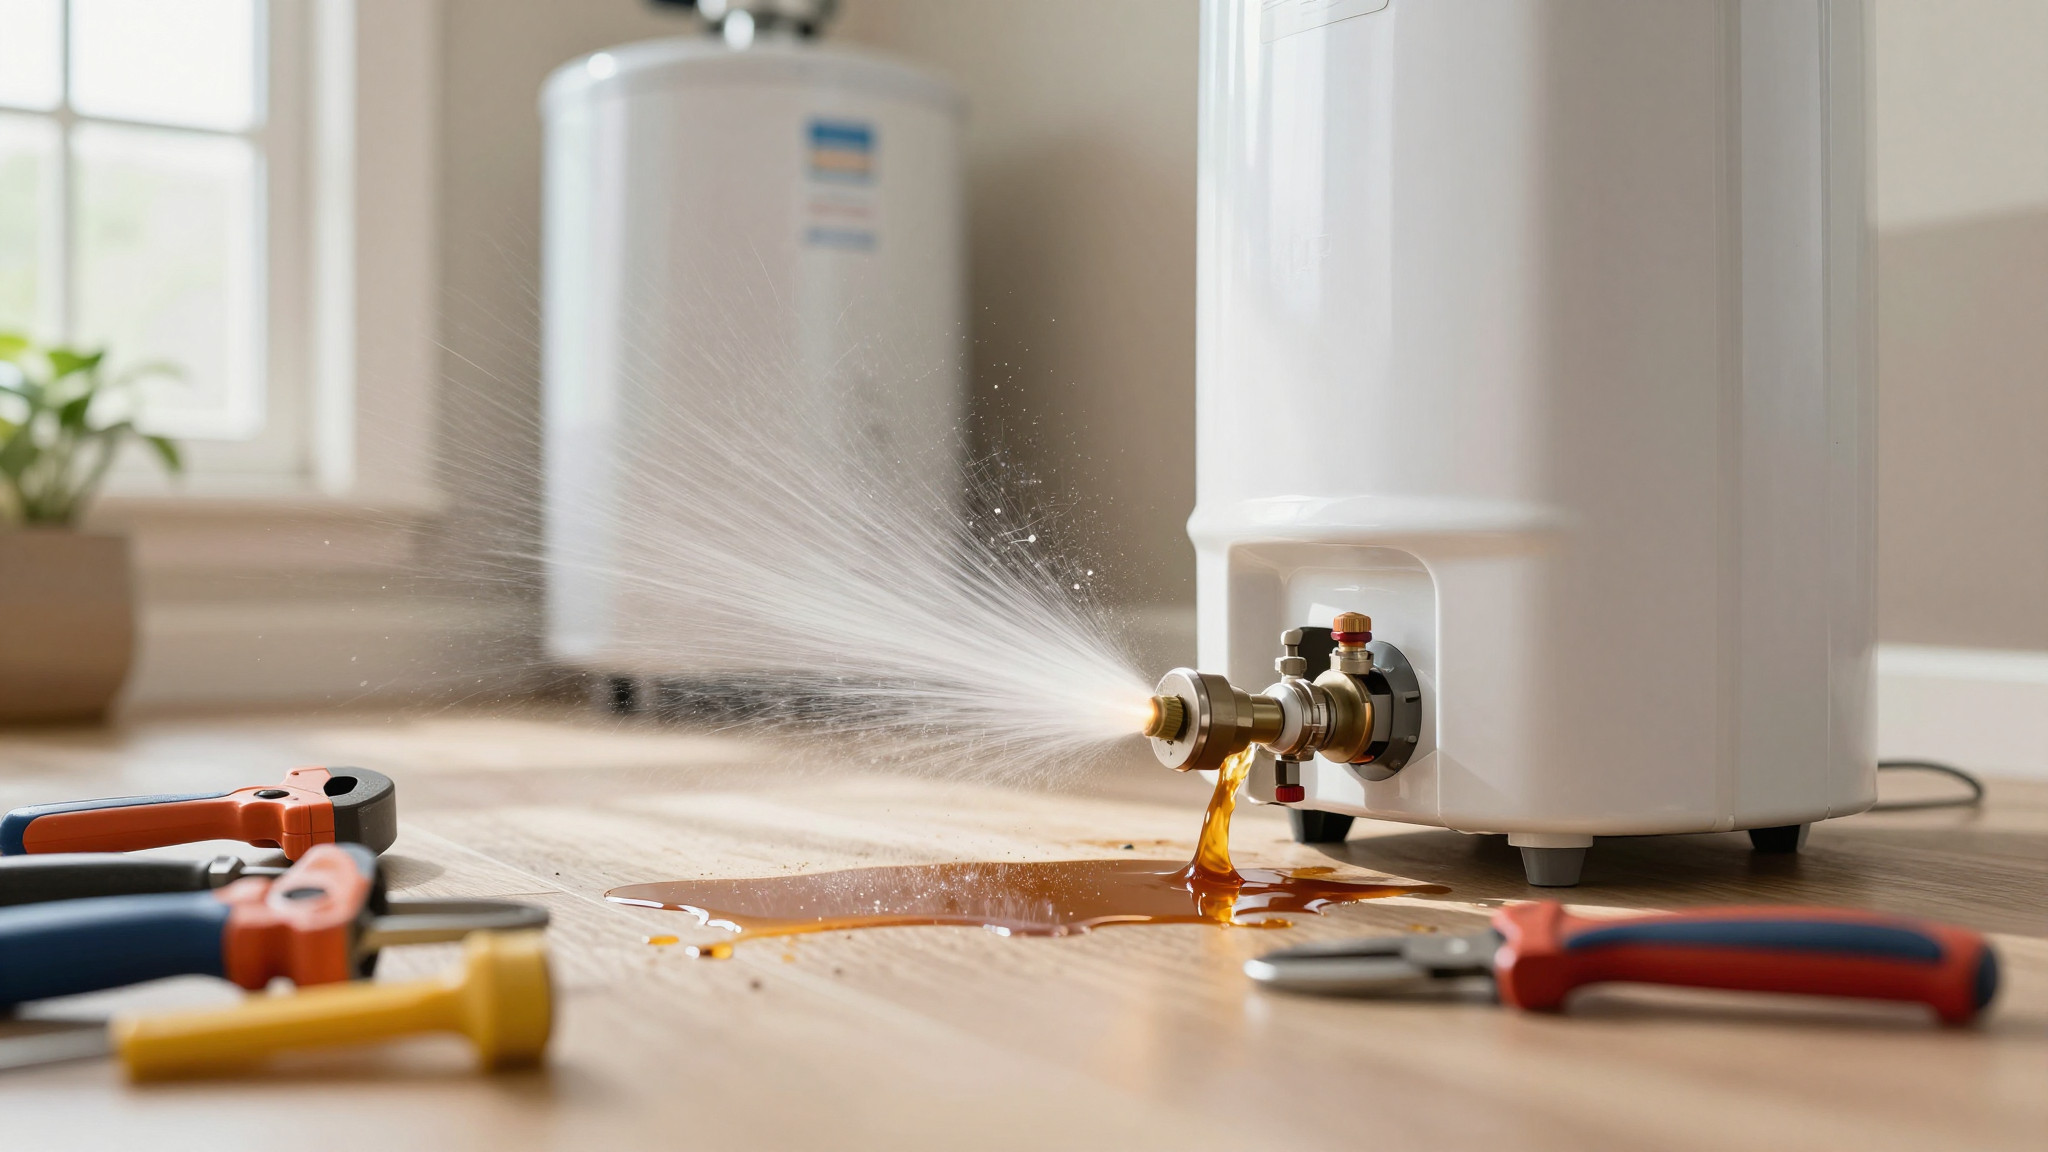
Step 4: Test the Pressure Relief Valve
This is one of the most important (and often overlooked) safety features on your water heater. Here’s how to test it:
- Place a bucket under the discharge pipe.
- Lift the lever gently (don’t yank it). You should hear water flowing into the bucket.
- Release the lever. The flow should stop immediately. If it keeps dripping, the valve is faulty and needs replacement.
I learned this the hard way when my relief valve started leaking constantly. I ignored it for weeks, thinking it was no big deal,until the day it failed completely and sprayed water all over my laundry room. Replace it ASAP if it’s not working right.
Step 5: Listen for Noises (And What They Mean)
Turn on a hot faucet and listen closely to your water heater. Here’s what different noises mean:
| Noise | Likely Cause | What to Do |
|---|---|---|
| Rumbling or popping | Sediment buildup at the bottom of the tank | Flush the tank (I’ll show you how in a sec) or call a pro if it’s severe. |
| Hissing or squealing | Loose or failing parts, or a problem with the gas valve (for gas units) | Check connections and call a pro if it persists. |
| Clicking or ticking | Normal expansion/contraction (usually not a problem) | Monitor it, but don’t stress unless it gets louder. |
If your water heater sounds like a haunted boiler, it’s time to flush it. Sediment buildup is the #1 killer of water heaters, and it’s way easier to prevent than repair. I flush mine once a year, and it’s saved me hundreds in repairs. Here’s how:
- Turn off the power (gas or electric).
- Attach a garden hose to the drain valve.
- Place the other end in a floor drain or bucket.
- Open the drain valve and let it run until the water is clear.
- Close the valve, refill the tank, and restore power.
Pro tip: If your water is super hard, you might need to flush it more often. I use a brass adapter to make the process easier.
Step 6: Inspect the Vent (Gas Units Only)
If you’ve got a gas water heater, grab a flashlight and check the vent pipe. Look for:
- Soot or rust. If the vent is dirty, your unit might not be burning fuel efficiently.
- Gaps or loose connections. A proper vent should be sealed tight.
- Condensation or water inside the vent. This can mean poor draft or a blocked flue.
And here’s the big one: check for backdrafting. Light a match or incense near the vent. The smoke should rise. If it blows into the room, your vent is blocked or improperly installed,and that’s a carbon monoxide risk. Evacuate and call a pro immediately.
Warning Signs Your Water Heater Is About to Quit (Or Worse)
I’ve had water heaters die in dramatic fashion,one burst like a piñata, another leaked slowly for months before giving out. The key is spotting the warning signs before they turn into disasters. Here’s what to watch for:
1. Leaks (The Silent Killer)
Leaks are the #1 reason water heaters fail early. I once had a unit leak so slowly that I didn’t notice until the drywall in my laundry room started bubbling. By then, the damage was done,and I had to replace a section of drywall.
Where to look:
- Around the base of the tank.
- At the fittings and connections.
- Near the drain valve.
If you see even a tiny drip, mark the date and check it again in a week. If it’s growing, call a plumber. And if you see standing water? That’s an emergency.
2. Strange Noises (Your Water Heater Is Trying to Tell You Something)
As I mentioned earlier, rumbling or popping usually means sediment buildup. But if your water heater starts screaming, that’s a sign of a serious problem. I had a unit once that sounded like a jet engine,turns out, the heating element was failing.
Other noises to worry about:
- Hissing (could mean a gas leak).
- Squealing (could mean a loose part or failing valve).
- Constant running (could mean the thermostat is stuck).
If your water heater sounds like it’s in pain, don’t ignore it. Flush it first, but if the noise persists, call a pro.
3. Rust or Discolored Water
If your hot water is rusty or brown, that’s a sign of internal corrosion. I once had a unit that turned my white towels orange. Turns out, the anode rod had failed, and the tank was rusting from the inside.
What to do:
- Check the anode rod. If it’s heavily corroded, replace it.
- Test the water at multiple fixtures. If it’s rusty everywhere, your tank is failing.
- Call a plumber if you see rust flakes in the water.
Pro tip: If your water heater is over 10 years old and you see rust, start shopping for a replacement. It’s not worth the risk of a catastrophic failure.
4. Scorch Marks or Soot
If you see black soot or scorch marks near your gas water heater, that’s a sign of incomplete combustion. It’s dangerous because it can produce carbon monoxide,a silent, deadly gas.
What to do:
- Turn off the gas supply immediately.
- Open windows and leave the house.
- Call your gas company or a licensed plumber right away.
Do not try to fix this yourself. Carbon monoxide poisoning is no joke.
5. Inconsistent Temperature or Pressure
If your hot water is lukewarm one minute and scalding the next, that’s a sign of a failing thermostat or heating element. I had this happen with my electric water heater,turns out, one of the elements had burned out.
What to do:
- Test the temperature at multiple fixtures.
- If it’s inconsistent, the thermostat or heating element might be failing.
- Call a plumber to diagnose the issue.
And if your water pressure is suddenly low? That could mean a failing pressure relief valve or a leak in the system.
Tank vs. Tankless: What You Need to Know
Not all water heaters are created equal. I’ve lived with tank, tankless, and even a heat pump model. Each has its own quirks,and its own inspection needs.
Tank Water Heaters: The Classic Choice
Most homes have a traditional tank water heater, and for good reason: they’re reliable, affordable, and easy to maintain. But they do have a few key considerations:
- Size matters. If your unit is too small for your household, it’ll struggle to keep up,especially during peak times (like when the kids are home from school and everyone’s showering back-to-back). When we renovated our bathroom, we had to upgrade to a 50-gallon tank to handle the new fixtures.
- Pressure is key. Tank water heaters operate under constant pressure, so it’s important to check the pressure relief valve regularly. I test mine every six months.
- Flushing is a must. Sediment buildup is the #1 enemy of tank water heaters. I flush mine once a year, and it’s saved me hundreds in repairs.
Pro tip: If you’re buying a home, ask for the water heater’s first-hour rating. This tells you how many gallons it can heat in an hour,critical info for big families or homes with multiple bathrooms.
Tankless Water Heaters: The Space-Saving Option
Tankless water heaters are great for small spaces or homes where energy efficiency is a priority. But they’ve got their own set of challenges:
- Flow rate is everything. Tankless units heat water on demand, but they can only handle so much at once. If you run the dishwasher, washing machine, and shower all at the same time, you might end up with cold water. When we installed ours, we had to upgrade our gas line to handle the demand.
- Hard water is the enemy. If you’ve got hard water, you must flush your tankless unit annually. I learned this the hard way when mine started acting up after two years. A $20 flush kit and an hour of my time saved me $800 in repairs.
- Venting is critical. Tankless units need proper venting to work safely. If yours is gas-powered, make sure the vent pipe is sealed and free of blockages.
Pro tip: If you’re considering a tankless unit, calculate your peak demand. Add up the flow rates of all the fixtures you might use at once (a shower is ~2.5 GPM, a dishwasher is ~3 GPM, etc.). If the total exceeds your unit’s capacity, you’ll need to upgrade or stagger usage.
When to Call a Pro (Instead of DIY-ing)
I’m all for DIY, but some jobs are best left to the professionals. Here’s when to pick up the phone and call a licensed plumber or HVAC tech:
- If you smell gas. No questions asked,evacuate and call the gas company.
- If you see soot, scorch marks, or signs of backdrafting. Carbon monoxide is silent and deadly.
- If the unit is leaking from the tank itself (not just a fitting). That’s a sign of internal corrosion, and the tank is likely failing.
- If the pressure relief valve is stuck or leaking constantly. This is a safety critical component.
- If you’re uncomfortable with electrical or gas work. Better safe than sorry!
And if your water heater is over 10 years old and showing multiple signs of wear? It might be time to start planning a replacement before it fails completely.
Final Thoughts (And What to Do Next)
There you have it,everything I’ve learned (the hard way) about inspecting a water heater. The good news? Most of these checks take less than 30 minutes, and they can save you thousands in repairs. The bad news? If you ignore the warning signs, your water heater will fail,usually at the worst possible moment (like when you’ve got houseguests or it’s 20 degrees outside).
So, what’s your next step? Grab your notebook, set a reminder on your phone, and schedule a quick inspection this week. Start with the basics: check for leaks, listen for noises, and test the pressure relief valve. If everything looks good, great! If not, jot down what you find and call a pro if needed.
And if you’re like me and tend to procrastinate, set a recurring reminder in your calendar to check your water heater every six months. Trust me,your future self will thank you.
Got questions? Drop them in the comments,I’m happy to help! And if you found this useful, check out my guide to winterizing your home next. Stay warm, stay safe, and happy DIY-ing!