
Picture Ledges: My No-Hole, No-Stress Way to Display Art
I’ll be honest,I used to dread redecorating my living room. Every time I wanted to swap out a few prints or rearrange my gallery wall, I’d end up with a new constellation of nail holes in the drywall. My husband would groan every time I pulled out the stud finder, and I’d spend an hour patching and repainting just to cover up the damage. Then I discovered picture ledges, and everything changed.
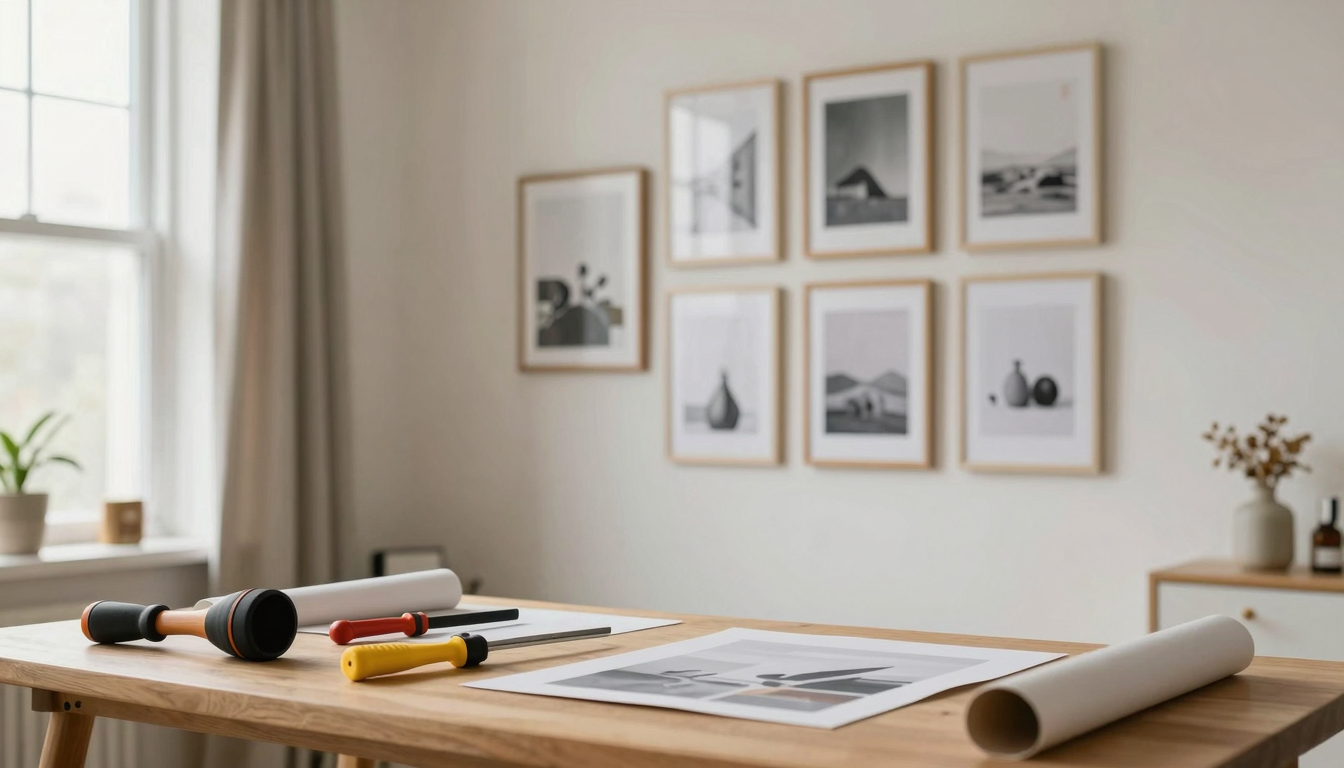
These simple wooden shelves gave me the freedom to display my art, photos, and even a few quirky collectibles without turning my walls into Swiss cheese. Best of all? I can rearrange everything whenever I feel like it,no drilling required. If you’ve ever wanted a dynamic, damage-free way to showcase your favorite pieces, keep reading. I’ll walk you through exactly how I did it, including the mistakes I made along the way (like the time I almost dropped a $200 vase because I didn’t secure the shelf properly,more on that later).
Whether you’re a renter who can’t risk damaging walls or a homeowner tired of patching holes, picture ledges are a game-changer. They’re perfect for renters, small spaces, or anyone who loves to refresh their decor seasonally. And trust me, once you see how easy they are to install and style, you’ll wonder why you didn’t try them sooner.
Why I Switched to Picture Ledges (And Why You Should Too)
Before I get into the how-to, let me tell you why I fell in love with picture ledges. After years of dealing with crooked frames, uneven spacing, and the never-ending cycle of patching drywall, I was ready for a better solution. Picture ledges gave me:
- No more nail holes. I can finally rearrange my art without leaving a trail of damage behind. My landlord (and my husband) are thrilled.
- Flexibility. Want to swap out your summer prints for fall decor? No problem. Need to make space for a new sculpture? Just slide it right in. Unlike traditional frames, these ledges let you mix and match 2D and 3D items,prints, photos, small vases, even my kids’ handmade art projects.
- A cohesive look. Instead of a scattered gallery wall, the ledges create a clean, continuous display. It’s like having a built-in shelf that doubles as art storage.
- Hidden storage. I keep a few of my favorite books and a small plant on the ledge in my bedroom. It’s functional *and* stylish.
I’ve used them in my living room, bedroom, and even my home office. They’ve become one of my go-to solutions for adding personality to a space without the hassle. If you’re curious about other easy ways to refresh your home, check out my five favorite DIY projects for instant charm,some of them pair perfectly with picture ledges!
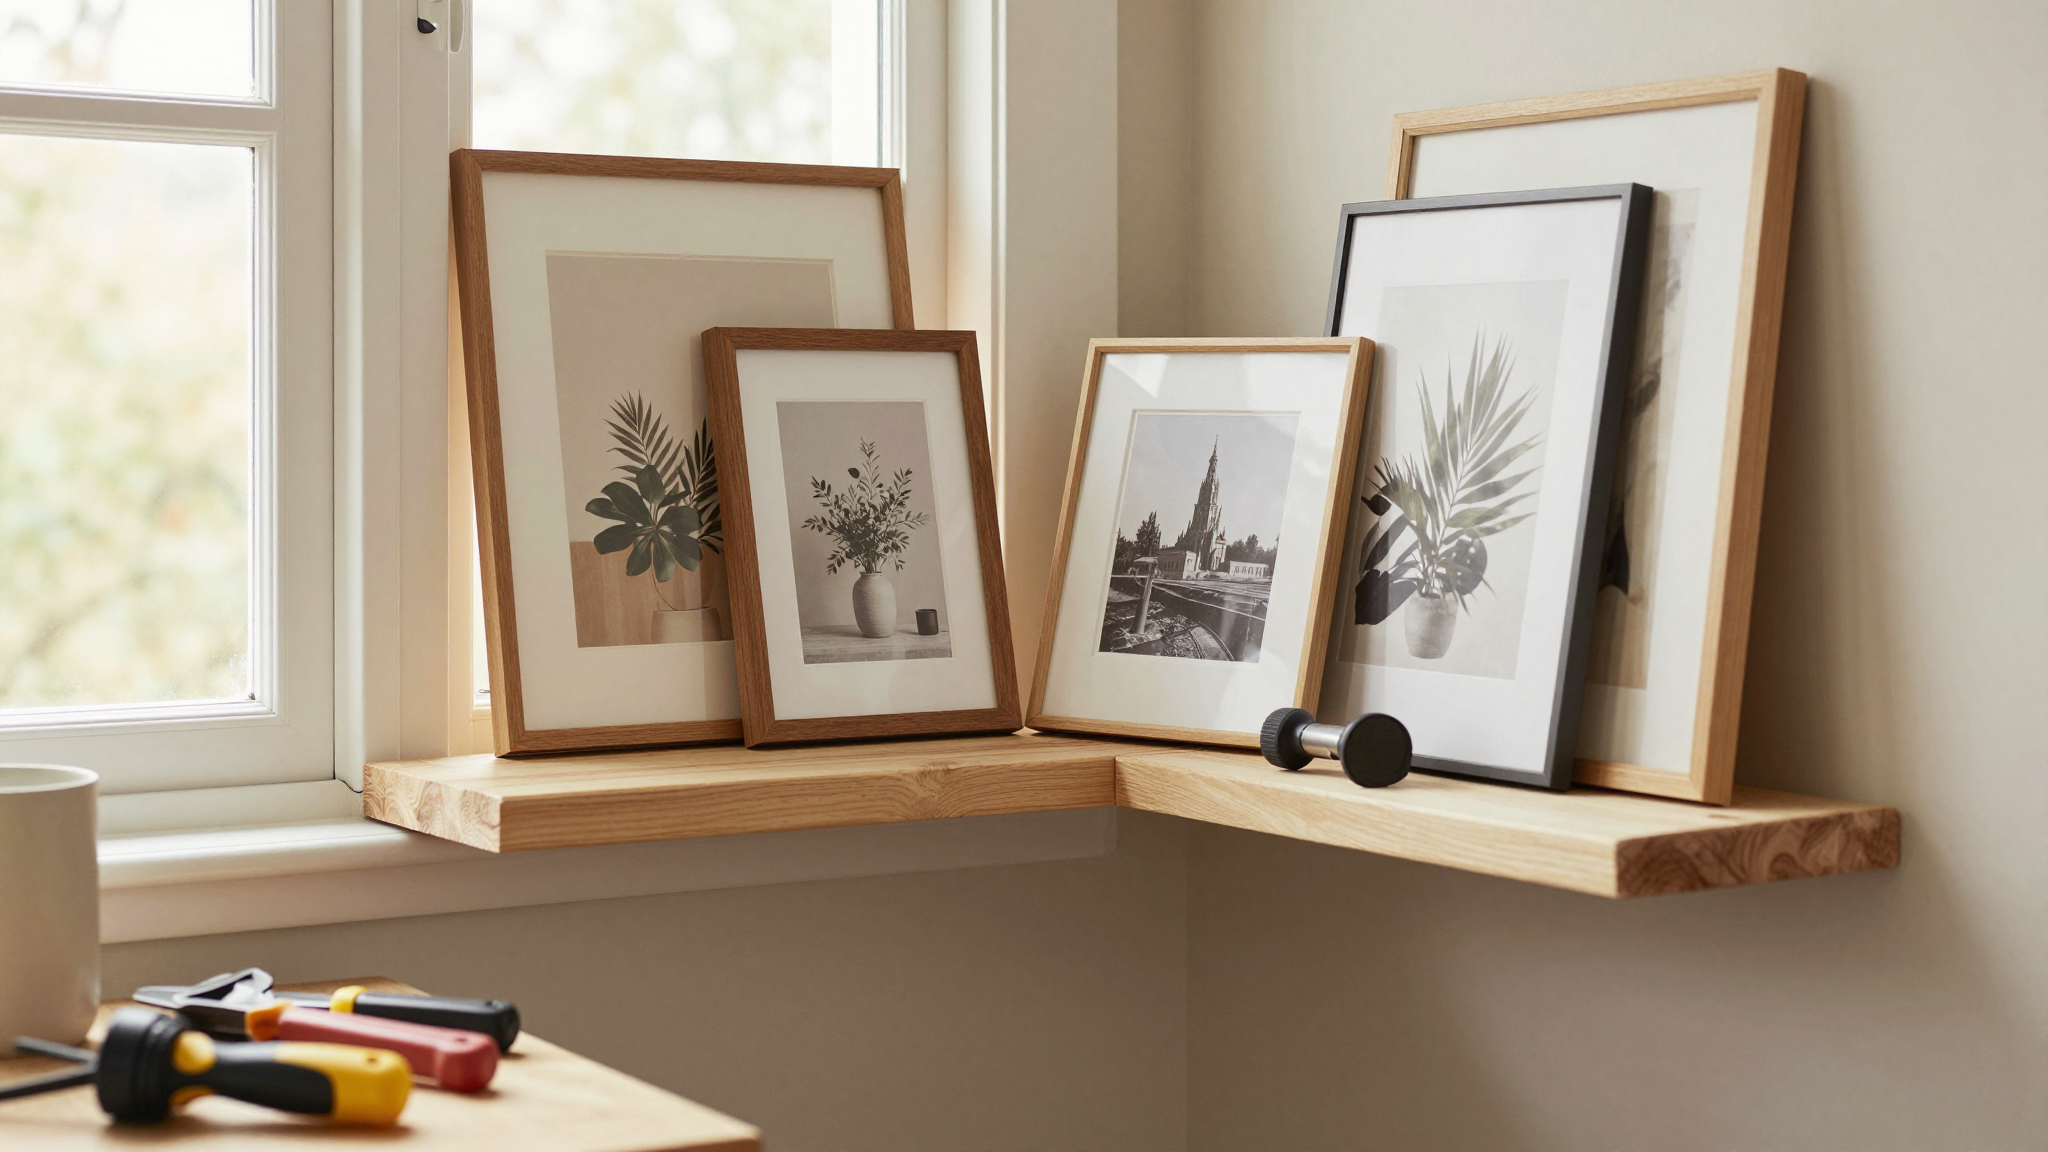
The Charm of Picture Ledges (And How I Use Them)
Why I Love Them (Even After My First Mistake)
Let me set the scene: I was excited to install my first picture ledge above our sofa. I’d picked a sleek black walnut finish to match our furniture, and I couldn’t wait to display my favorite abstract prints. I followed the instructions, anchored it into the studs (or so I thought), and carefully placed a few frames on top. Then I stepped back to admire my work,only to watch as one of the frames wobbled dangerously. Turns out, I’d missed the stud entirely on one side. Lesson learned: always double-check your stud finder readings and use a level to ensure everything is straight.
But once I got the hang of it, I realized how much these ledges offer:
- Damage-free installation. No more stressing over patching holes or worrying about damaging my walls. I can move them around as much as I want without leaving a trace.
- Versatility. They’re not just for art. I’ve used them to display my kids’ school projects, a small succulent garden, and even a rotating collection of vintage postcards I’ve picked up over the years.
- Layered displays. Unlike flat frames, ledges let you mix 2D and 3D items. I love how a small sculpture or a framed photo can sit next to a print, creating depth and visual interest.
- Practical storage. In my bedroom, I use a ledge to hold my current read and a few small decor pieces. It’s the perfect spot to keep things within reach without cluttering my nightstand.
If you’re looking for more ways to add character to your home without the hassle, my guide to DIY wainscoting is another great option. It’s a project I tackled last year, and I still get compliments on how it transformed our living room!
Creating a Focal Point That Actually Feels Like *You*
One of the things I love most about picture ledges is how they turn a blank wall into a story. Instead of a static gallery wall, I can change up my displays with the seasons or my mood. Right now, my living room ledge has a mix of family photos, a few small plants, and a vintage camera I inherited from my grandpa. It’s personal, functional, and always evolving.
I’ve also used them to:
- Highlight a collection of travel souvenirs in my entryway.
- Create a cozy reading nook in my daughter’s bedroom (she loves having her books face-out so she can pick them easily).
- Display my husband’s favorite vinyl records in our home office.
If you’re inspired to try a gallery wall but want something more dynamic, my step-by-step guide to creative gallery walls has tons of ideas,including how to use ledges for a modern twist.
How to Choose the Right Picture Ledge for Your Space
Not all picture ledges are created equal, and I’ve learned that the hard way. My first attempt with a cheap, flimsy shelf ended with it sagging under the weight of a few heavy frames. Now, I know exactly what to look for,and what to avoid. Here’s what I’ve discovered:
Finish Matters: Walnut, White, or Black?
I’ve tried ledges in all three finishes, and each one has its own vibe:
- Walnut. This is my go-to for a warm, cozy feel. It pairs beautifully with mid-century modern furniture and adds depth to traditional spaces. I used walnut ledges in my living room, and they’ve become a focal point that ties the whole room together.
- White. If you want a clean, gallery-like look, white ledges are the way to go. They let your art and decor take center stage. I used them in my daughter’s bedroom, and they keep the space feeling bright and airy.
- Black. Black ledges add a bold, modern touch. They’re great for creating contrast, especially in rooms with light-colored walls. I used a black ledge in my home office, and it gives the space a sleek, put-together look.
Pro tip: If you’re unsure which finish to choose, grab a few paint samples or small wood samples from a hardware store. Tape them to your wall and see how they look in different lighting. I did this before buying my walnut ledges, and it saved me from a potential mistake.
Size and Depth: What Works (and What Doesn’t)
I made the mistake of buying a shallow ledge for my living room, only to realize it couldn’t hold the larger frames I wanted to display. Now, I pay close attention to both length and depth:
- Length. For a large wall, like the one above my sofa, I went with an 84-inch ledge. It gives me plenty of space to mix and match different-sized frames and decor. If you’re working with a smaller wall, a 60-inch ledge is a great starting point.
- Depth. A deeper ledge (3 inches or more) is better for holding larger items, like thick books or small sculptures. I use a 3-inch-deep ledge in my bedroom to display a few of my favorite hardcovers. For a minimalist look, a shallower ledge (1.5 inches) works well for smaller frames and photos.
If you’re looking for more ways to maximize small spaces, my DIY stair makeover guide has some great tips for adding storage and style to tight areas.
Creative Ways to Style Your Picture Ledge
Once you’ve got your ledge installed, the fun part begins: styling it! I’ve experimented with all kinds of arrangements, and I’ve learned that there’s no wrong way to do it,as long as it feels like *you*. Here’s how I’ve styled mine over the years:
Gallery Walls and Mixed Media Displays
One of my favorite setups is a trio of ledges above my sofa. I mix framed prints, family photos, and a few small decorative objects (like a vintage camera or a ceramic bowl). The key is to vary the sizes and textures to keep it interesting. I also like to group items in odd numbers,three frames together, or a cluster of five small objects. It feels more natural than even groupings.
For a cohesive look, I stick to a consistent color palette. In my living room, I used a mix of black-and-white prints and a few pops of color from small decor pieces. It ties in with the rest of the room’s decor and makes the whole wall feel intentional.
If you’re new to gallery walls, my step-by-step guide breaks down all the basics, from spacing to framing. It’s a great resource if you’re just starting out!
Personal Accents and Art Pieces
I love using picture ledges to showcase the things that matter most to me. In my bedroom, I have a ledge with a mix of family photos, a small potted plant, and a few pieces of jewelry I don’t wear often but don’t want to store away. It’s a little slice of my life on display, and I love how it changes over time.
If you’re looking for more ways to personalize your space, my guide to bedroom makeovers has tons of ideas for adding character to your most private space.
DIY Installation Tips (And What I Learned the Hard Way)
Installing picture ledges is easier than it looks, but there are a few things I wish I’d known before I started. Here’s what I’ve learned from my own trial and error:
Tools and Techniques for a Secure Fit
Before you start, gather these tools (I keep mine in my essential home toolkit for quick access):
- A stud finder (trust me, this is non-negotiable).
- A level (I use a small 12-inch level for ledges).
- A drill and bits (I prefer a cordless drill for easy maneuvering).
- A measuring tape and pencil.
- Screws or wall anchors (depending on your wall type).
Here’s my step-by-step process for a secure installation:
- Find the studs. Use your stud finder to mark the locations of the studs on the wall. If your ledge spans multiple studs, make sure to anchor into each one for maximum support.
- Mark the ledge position. Hold the ledge against the wall and use a pencil to mark where the screws will go. I like to measure from the ceiling or floor to ensure everything is straight.
- Drill pilot holes. Use a bit that’s slightly smaller than your screws to drill pilot holes. This prevents the wood from splitting when you screw it in.
- Attach the ledge. Line up the ledge with your marks and screw it into the wall. I like to start with the middle screws and work my way out to keep everything aligned.
- Check for level. Use your level to make sure the ledge is perfectly horizontal. If it’s not, adjust the screws until it is.
Pro tip: If you’re hanging a ledge above a sofa or bed, make sure to leave enough space for people to sit comfortably. I learned this the hard way when I installed a ledge too low in my daughter’s room,she kept bumping her head when she sat up in bed!
If you’re not confident about drilling into studs, don’t worry. I’ve used heavy-duty wall anchors for ledges in areas without studs, and they’ve held up just fine. Just make sure to choose anchors that are rated for the weight of your ledge and decor.
Where to Use Picture Ledges in Your Home
Picture ledges aren’t just for living rooms,they’re versatile enough to work in almost any space. Here’s how I’ve used them in different rooms:
Living Room and Bedroom Ideas
In my living room, I used a long walnut ledge above the sofa to display a mix of family photos, a few small plants, and a vintage clock. It’s become a conversation piece, and I love how it changes with the seasons. In the winter, I swap out the summer prints for cozy fall decor, and in the spring, I bring in fresh botanical prints.
In my bedroom, I installed a white ledge above the headboard. It’s the perfect spot for a few framed photos, a small potted plant, and a stack of books I’m currently reading. It’s functional *and* stylish, and it gives the room a polished look.
If you’re looking for more ways to refresh your bedroom, my guide to bedroom makeovers has tons of ideas for adding personality to your most private space.
Kitchens, Bathrooms, and Nooks
I was skeptical about using ledges in the kitchen at first, but they’ve been a game-changer. I installed a slim white ledge above my stove to display a few decorative plates and a small herb garden. It’s functional (I can grab fresh basil for cooking) and stylish (the plates add a pop of color).
In my bathroom, I used a black ledge to display a few small prints and a few rolled-up towels. It’s a great way to add personality to a space that’s often overlooked. Plus, it keeps my towels within easy reach.
If you’re looking for more ways to add character to small spaces, my fireplace makeover guide has some great tips for maximizing vertical space.
Picture Ledge Buyer’s Guide: What to Look For
Not all picture ledges are created equal, and I’ve learned that the hard way. Here’s what I look for when I’m shopping for a new ledge:
Budget and Quality
Picture ledges range in price from around $60 for a basic model to over $500 for a high-end hardwood ledge. I’ve found that mid-range options (around $100–$200) offer the best balance of quality and affordability. My favorite is the DENVER Display ledge, which comes in walnut, white, and black finishes. I’ve used it in multiple rooms, and it’s held up beautifully.
If you’re on a budget, I’ve also had good luck with the Wave and Mountain styles, which start around $62. They’re a great way to experiment with the look without breaking the bank.
When comparing options, I always check:
- The wood thickness (thicker is better for stability).
- The finish durability (I’ve had issues with cheaper ledges where the finish chipped easily).
- The weight capacity (make sure it can hold your decor without sagging).
Durability and Design
I’ve had ledges with simple rectangular profiles, as well as more architectural designs like the Fat Lippie (which has a front lip to prevent items from sliding off). The Fat Lippie is a bit pricier at $98, but I love how it adds a little extra style to the wall.
If you’re looking for a high-end option, the Glenn Floating Mantels are beautiful but pricey (around $1,000). I haven’t splurged on these yet, but they’re on my wish list for a future project!
| Collection | Length Options | Price Range | Key Features |
|---|---|---|---|
| DENVER Display | 60″, 72″, 84″ | $138–$189 (for a 2-piece set) | Walnut, white, or black finish; sturdy construction |
| Wave/Mountain/Bubble | Various | Starting at $62 | Budget-friendly; creative profiles |
| Fat Lippie | Standard sizes | $98 | Architectural interest; front lip to prevent sliding |
| Glenn Floating Mantels | Custom lengths | $1,066–$1,140 | Premium hardwood; high-end look |
If you’re looking for more ways to update your home without breaking the bank, my guide to upcycling furniture has tons of budget-friendly ideas.
Showcase Versatility: Art, Photos, and More
One of the things I love most about picture ledges is how versatile they are. They’re not just for displaying art,they can hold so much more. Here’s how I’ve used mine beyond traditional frames:
Multi-Use Displays
In my daughter’s room, I used a ledge to create a forward-facing book display. She loves being able to see all her favorites at a glance, and it’s made her more excited about reading. I also keep a small basket on the ledge for her hair clips and headbands,it’s the perfect spot to keep them organized and within reach.
In my home office, I use a ledge to display a mix of art prints, a few small plants, and a rotating collection of vintage postcards I’ve picked up over the years. It’s a little slice of my personality on display, and it makes the space feel more like me.
If you’re looking for more ways to add personality to your workspace, my guide to DIY accent walls has some great ideas for making your home office feel like a sanctuary.
Seasonal and Thematic Displays
One of the things I love most about picture ledges is how easy they are to update. I can swap out my summer prints for fall decor, or switch in a few holiday-themed pieces for the winter. It’s a great way to keep my home feeling fresh without a ton of effort.
For example, in the fall, I swap out a few of the prints on my living room ledge for a mix of autumnal botanical prints and a few small pumpkins. In the winter, I bring in a few holiday-themed pieces and a small garland. It’s a small change that makes a big difference!
If you’re looking for more ways to refresh your home for the seasons, my guide to winterizing your home has some great tips for making your space cozy and energy-efficient.
Styling with Accessories and Personal Touches
The secret to making your picture ledge look like it was designed by a pro? It’s all about the details. Here’s how I style mine to make them feel intentional and put-together:
Curating a Cohesive Look
I’ve found that the key to a cohesive display is consistency. Whether it’s matching frames, a consistent color palette, or a shared theme, finding a unifying element makes everything feel intentional.
For example, in my living room, I used a mix of black-and-white prints and a few pops of color from small decor pieces. The black frames tie everything together, and the pops of color keep it from feeling too stark. In my bedroom, I stuck to a neutral color palette with a few warm wood tones to keep it feeling cozy.
If you’re looking for more ways to add cohesion to your decor, my guide to DIY wainscoting has some great tips for creating a polished look.
Personal Touches
One of the things I love most about picture ledges is how personal they can be. They’re the perfect spot to display the things that matter most to me,family photos, travel souvenirs, or even a few quirky collectibles.
For example, in my entryway, I have a ledge with a mix of family photos, a small potted plant, and a vintage camera I inherited from my grandpa. It’s a little slice of my life on display, and I love how it changes over time. In my daughter’s room, I have a ledge with a mix of her artwork, a few small stuffed animals, and a rotating collection of her favorite books.
If you’re looking for more ways to add personality to your home, my fireplace makeover guide has some great ideas for making your space feel like yours.
Inspiration from Real Homes
I love browsing real-life examples of how other people use picture ledges. It’s amazing to see how versatile they are and how different they can look depending on the space and the decor. Here are a few of my favorite setups:
Real-Life Examples
In one stunning dining room I saw, the homeowner used white ledges against black walls to create a dramatic gallery effect. The contrast was gorgeous, and the white frames made the art pop. It’s a look I’m definitely stealing for a future project!
In a cozy children’s room, the ledges were used to create a forward-facing book display. The books were arranged by color, and it made the wall feel like a rainbow. It’s such a simple idea, but it’s so effective,and it makes reading feel like a game!
In another home, the ledges were used to display a mix of family photos, small plants, and a few pieces of vintage pottery. It was a perfect blend of personal and decorative, and it made the wall feel like a story.
If you’re looking for more real-life inspiration, my gallery wall guide has tons of before-and-after examples to spark your creativity.
Final Thoughts (and What to Do Next)
Picture ledges have been a game-changer for me. They’ve given me the freedom to display my art and decor without damaging my walls, and they’ve made it so easy to refresh my spaces whenever I feel like it. Plus, they’re just plain fun to style!
If you’re ready to give them a try, here’s what I recommend:
- Start with one ledge. Pick a spot in your home where you’d love to display some art or decor, and give it a try. I started with my living room, and it was such a hit that I’ve since added ledges to my bedroom, kitchen, and even my bathroom.
- Experiment with styling. Don’t be afraid to mix and match different items. Try grouping a few frames with a small plant or a decorative object. See what feels right to you.
- Have fun with it! One of the best things about picture ledges is that they’re so easy to change. If you don’t love something, just swap it out. It’s all about creating a space that feels like *you*.
If you’re ready to dive in, grab your stud finder and a measuring tape, and get started! And if you hit any snags along the way, don’t hesitate to reach out,I’m always happy to help. Happy decorating!
FAQs About Picture Ledges
Can I install a picture ledge without putting large holes in my wall?
Absolutely! Many picture ledges are designed for easy, low-impact installation. Use the right anchors and tools, and you can create a secure display with minimal damage to your walls. It’s a great alternative to traditional nails for hanging frames, especially if you’re a renter or just don’t want to deal with patching holes.
What kind of items can I display on a shelf like this besides photo frames?
The possibilities are nearly endless! You can showcase small plants, favorite books, cherished trinkets, or even a combination of art prints and magazines. This flexibility allows you to create a unique and personal look for any room in your home. I’ve even used mine to display a few small pieces of pottery and a vintage camera I inherited from my grandpa.
How do I choose the right depth for my photo ledge?
Consider the size of the items you plan to display. A deeper ledge offers more stability for larger pieces like thick books or tall vases. For a display focused on standard prints and smaller family photos, a shallower depth often provides a cleaner, more streamlined look. I use a 3-inch-deep ledge in my bedroom for books and a 1.5-inch ledge in my living room for smaller frames.
Are these ledges suitable for rooms like the bathroom or kitchen?
Yes, they can be a wonderful addition! In a bathroom, they’re perfect for holding toiletries or small accents. For a kitchen, they can display cookbooks or herbs. Just ensure the material, like a sealed wood, can handle the humidity in those spaces. I used a sealed walnut ledge in my kitchen, and it’s held up beautifully.
What’s the best way to create a cohesive gallery wall look with multiple ledges?
Start by arranging your ledges at varying heights to add visual interest. Then, mix and match your decor,combine black-and-white prints with colorful family photos and small green plants. Layering items of different sizes and textures will give your wall art a dynamic and curated feel. I like to group items in odd numbers (three or five) for a more natural look.
Can I use these shelves for heavy items like large art pieces or pottery?
While they are excellent for a variety of decor, it’s important to check the weight limit specified by the manufacturer. For heavier paintings or pottery, ensure the shelf is securely mounted into wall studs using robust tools and hardware to guarantee safety and durability. I’ve used my ledges for medium-weight items like framed prints and small sculptures, but I’d be cautious with anything too heavy.