
Floating Shelves: How I Installed Them (And Why They’re Worth the Effort)
I’ll be honest,when I first saw floating shelves in a magazine, I thought they looked like magic. How do they just hang there without brackets? Turns out, it’s not magic,it’s just really good hidden hardware. After installing three sets in my own home (and making a few mistakes along the way), I can confidently say these shelves are one of the easiest ways to add modern storage without cluttering your walls.
They’re especially great if you’re working with small spaces, like our narrow hallway where we needed extra storage but didn’t want to sacrifice style. I’ll walk you through exactly how I did it,including the tools I used, the wood I picked, and the one time I almost drilled into a pipe (more on that later).
Why I Fell in Love with Floating Shelves
Before I get into the how-to, let me tell you why I think these shelves are a game-changer (yes, I know that’s a cliché, but it’s true). They give you that clean, minimalist look without the bulk of traditional shelving. And unlike those heavy wooden units my husband and I struggled to assemble in our first apartment, these are lightweight, easy to install, and,most importantly,don’t take up extra space with visible brackets.
I used them in three spots in our house:
- Our bathroom,where I display rolled-up towels and a few small plants. The white oak shelves I chose match the vanity we refinished last year (check out my tips on upcycling furniture if you’re curious how we did it).
- The hallway,where we needed a place to corral the kids’ backpacks and shoes. I went with a lighter maple here because the space is small, and I didn’t want it to feel too heavy.
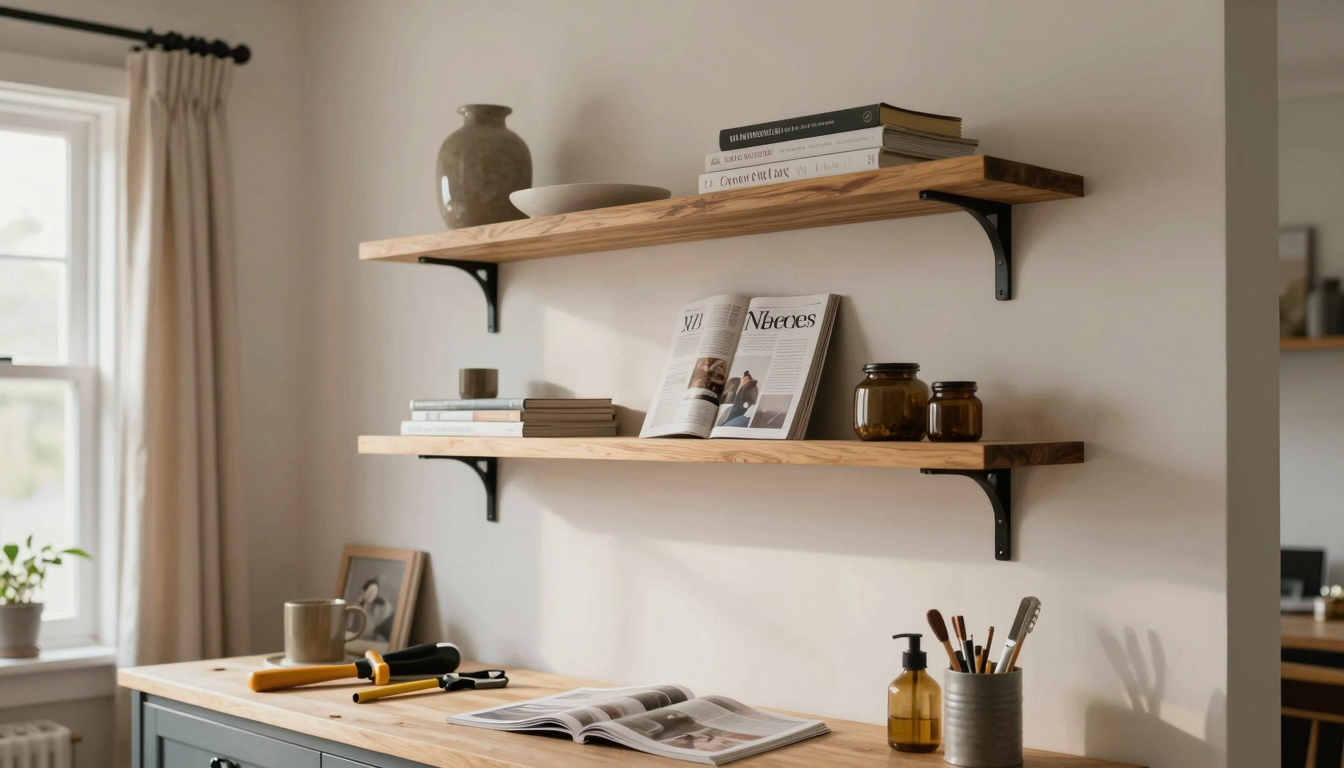
- Our living room,above the couch, where I display a few books and a small gallery of family photos. (Pro tip: If you’re doing this, make sure your shelves are actually level. I learned this the hard way when my first attempt looked like it was about to slide off the wall.)
Here’s what I love most about them:
| What I Love | Why It Matters |
|---|---|
| No visible brackets | They look sleek and modern, which is exactly what I wanted in our living room. No bulky hardware ruining the aesthetic. |
| Space-saving | In our hallway, every inch counts. These shelves give us storage without eating up floor space. |
| Customizable | I ordered them in specific lengths to fit between our studs, and the company didn’t charge extra for the custom cut. (More on that later.) |
| Easy to install | No assembly required,just mount the brackets, slide the shelf on, and you’re done. (Okay, fine, it’s a little more involved than that, but it’s still easier than building a farmhouse coffee table from scratch.) |
If you’re sold on the idea but aren’t sure where to start, don’t worry,I’ll walk you through everything, including the tools you’ll need, how to pick the right wood, and how to avoid my biggest mistake (which involved a stud finder that gave me very conflicting readings).
Picking the Right Shelves (And Wood) for Your Space
Not all floating shelves are created equal. The wood you choose affects both how it looks and how much weight it can hold. Here’s what I learned after ordering three different sets:
Wood Options: What I Chose and Why
I started by measuring the spaces where I wanted the shelves. For the bathroom, I went with white oak because it’s durable and has a warm, natural look that pairs well with the white subway tile we installed last year. (If you’re curious how we prepped the walls for tile, check out my guide on patching drywall,it’s a game-changer for DIYers.)
For the hallway, I opted for maple because it’s lighter in color and didn’t overwhelm the small space. Maple is also budget-friendly, which was important since we were doing this project on a tight budget. (I found a great deal on pre-finished maple shelves at Home Depot,they had a sale that weekend, and I grabbed them before they sold out.)
In the living room, I splurged on walnut because I wanted something richer and more dramatic. Walnut has a beautiful dark grain that adds warmth to the room, and it pairs perfectly with the neutral tones in our decor. The only downside? It’s heavier than oak or maple, so I had to be extra careful during installation.
If you’re not sure which wood to pick, here’s a quick breakdown of what I’ve learned:
| Wood Type | Best For | What I Like About It | What to Watch For |
|---|---|---|---|
| White Oak | High-traffic areas (like bathrooms or hallways) | Super durable, resists moisture, and has a classic look. | Can be pricey, and the grain is more pronounced (which I love, but some people find it too busy). |
| Maple | Small spaces or budget-friendly projects | Lightweight, affordable, and has a clean, modern look. | Can scratch easily, so it’s not ideal for heavy use. |
| Walnut | Living rooms or accent walls | Rich, dark color adds sophistication. Feels luxurious without being over-the-top. | Heavier than oak or maple, so it requires more support during installation. |
| Metal/Steel | Industrial-style spaces or modern kitchens | Super sleek and can hold a lot of weight. Great if you’re going for a minimalist vibe. | Can feel cold or sterile in cozy spaces. Also, it’s not as easy to customize as wood. |
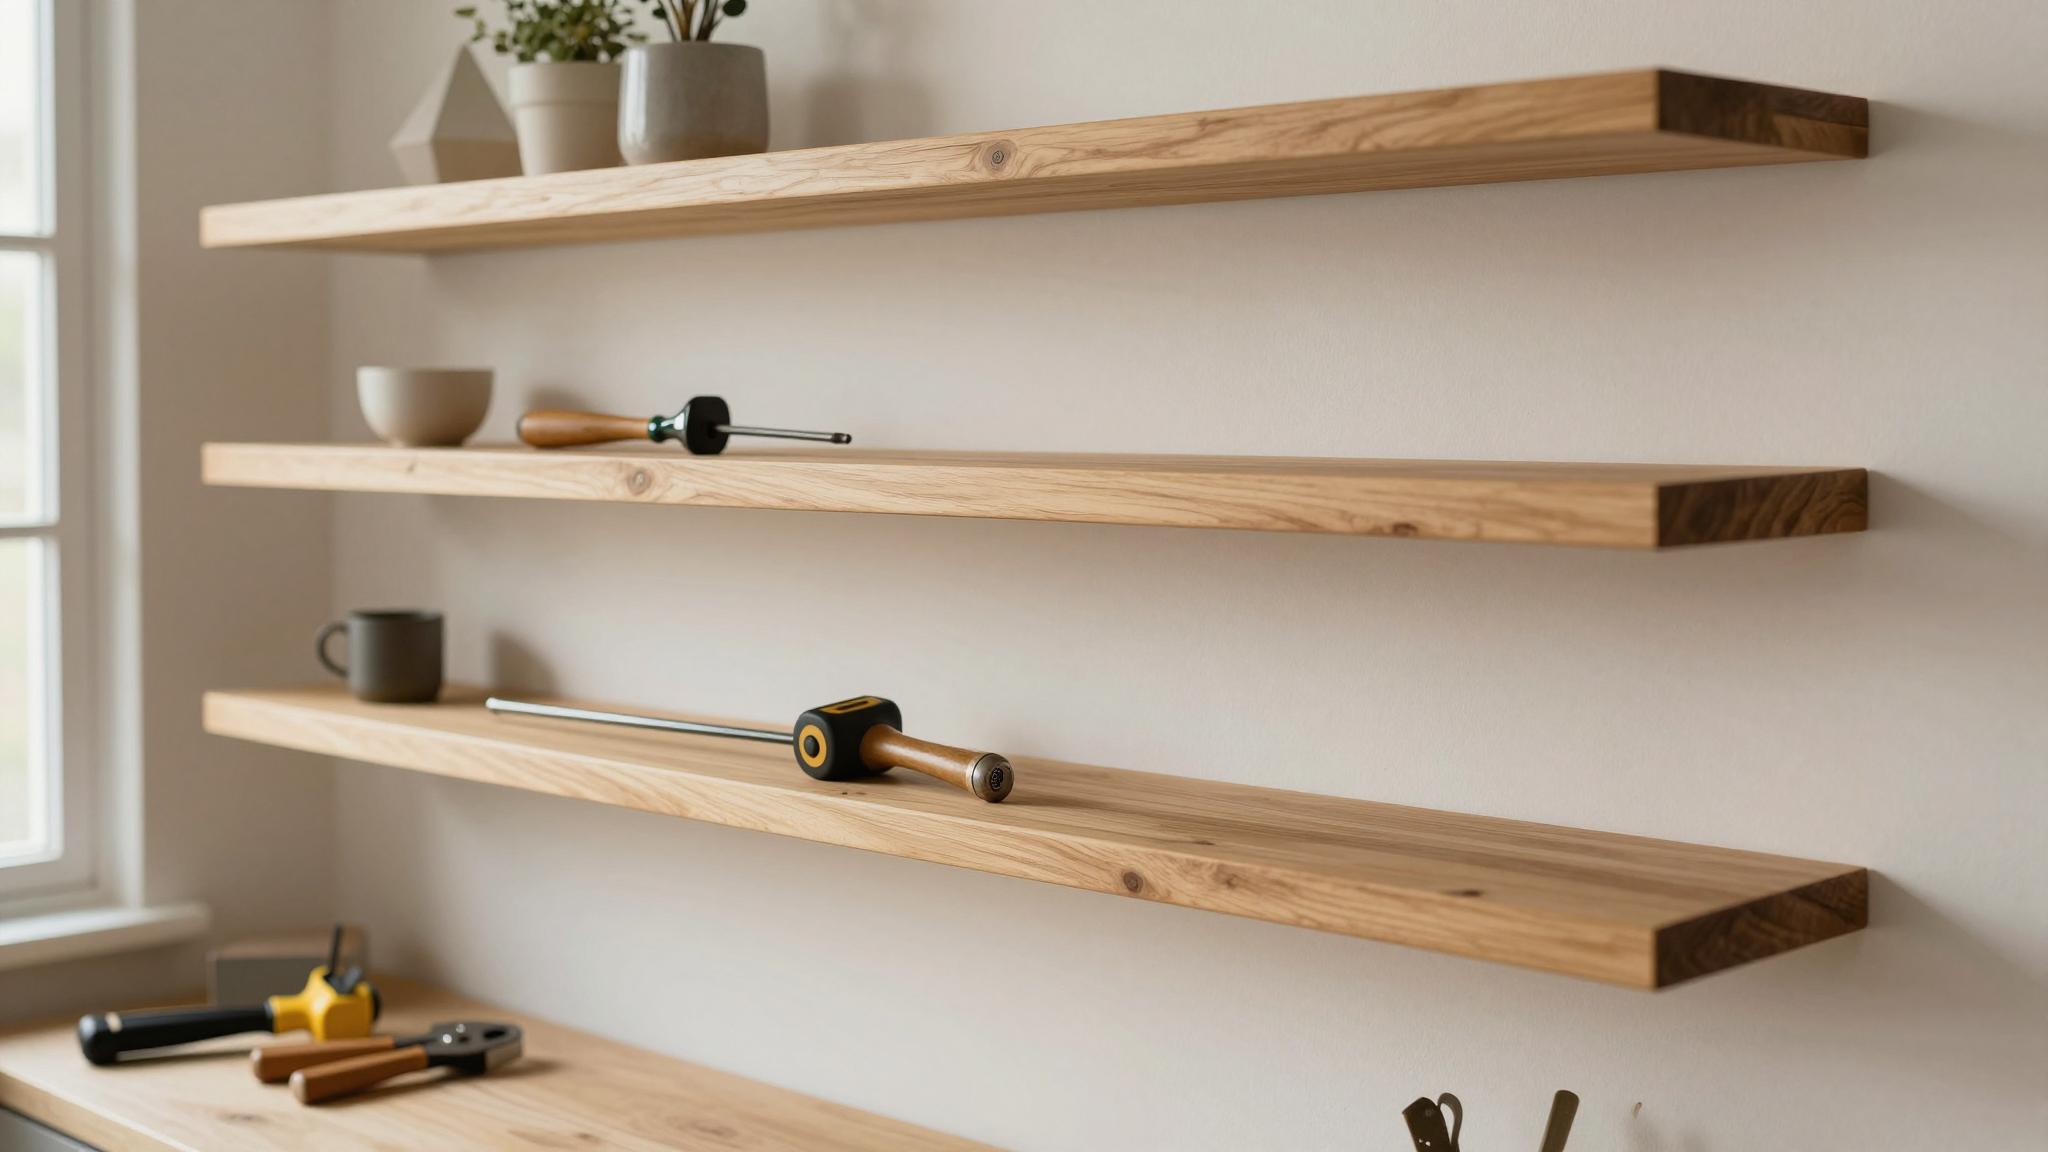
One thing I wish I’d known before ordering? The thickness of the wood matters. I went with ¾-inch thick shelves for the living room because I wanted them to feel substantial, but the ½-inch ones in the bathroom work just as well and were lighter to hang. If you’re unsure, err on the side of thicker,it just feels more solid when you’re loading it up with books or decor.
Tools You’ll Actually Need (No Fancy Stuff Required)
Before you start, gather these tools. I’ll be honest,I didn’t have all of them at first, and I had to make a last-minute run to the hardware store. (Pro tip: If you don’t already own a stud finder, check out my list of must-have tools,it’ll save you a lot of headaches.)
- Stud finder,This is non-negotiable. I tried skipping it once and nearly drilled into a pipe. (Thankfully, I double-checked with a small nail first,always do this!) I use a Zircon stud finder because it’s affordable and reliable.
- Measuring tape,You’ll need this to mark where the studs are and to ensure your shelves are level.
- Pencil,For marking stud locations and drilling points.
- Level,This is crucial. My first attempt at hanging shelves looked crooked because I didn’t use one. (I had to take them down and start over,embarrassing.) I swear by the Staples magnetic level because it’s easy to read and sticks to metal brackets.
- Drill,A cordless drill makes this job so much easier. I use a DeWalt 20V Max because it’s powerful but lightweight.
- Screwdriver,For tightening screws if your drill doesn’t have a screwdriver bit.
- Screws,Most shelf kits come with these, but if yours doesn’t, grab some drywall screws (they’re cheaper and work just as well for this project).
Oh, and one more thing,if you’re hanging shelves in a bathroom or kitchen, make sure you’re using rust-resistant screws. I learned this the hard way when a screw in our bathroom shelf started rusting after a few months. (I had to replace the whole bracket,don’t make my mistake!)
Step-by-Step: How I Installed My Floating Shelves (Without Calling My Husband for Help)
Alright, let’s get to the good stuff. Installing floating shelves is simpler than it looks, but there are a few key steps you cannot skip. Here’s exactly how I did it, including the mistakes I made (so you don’t have to).
Step 1: Measure Twice, Cut Once (Or Just Order the Right Size)
Before you buy anything, measure the space where you want the shelves. I used a tape measure to mark the width of the wall between studs. (If you’re not sure where the studs are, that’s what the stud finder is for,more on that in a second.)
I wanted my bathroom shelves to span the entire width of the wall, so I measured 48 inches. The company I ordered from (Ultrashelf) let me customize the length for free, which was a huge plus. If you’re not ordering custom, make sure the shelves you buy fit within your stud spacing,otherwise, they won’t be as stable.
Pro tip: If your wall doesn’t have studs where you want the shelves, you’ll need to use alternative mounting solutions, like toggle bolts or heavy-duty drywall anchors. But trust me, it’s worth the extra effort to find studs if you can.
Step 2: Find the Studs (And Double-Check Them)
This is where I almost made a huge mistake. I used my stud finder to mark the locations, but I didn’t double-check them. When I went to drill, the bit went in way too easily,turns out, I’d marked a spot where the stud used to be, but the drywall had been patched. (Thanks, previous homeowners.)
Here’s how to avoid this:
- Run your stud finder along the wall, and mark the edges of the studs with a pencil. Most studs are 16 or 24 inches apart, so they should line up nicely.
- Use a small nail or screw to test the marked spots. If it goes in easily, you’re not hitting a stud. If it’s tough to drive in, you’ve found the right spot.
- If you’re still unsure, try knocking on the wall. Studs sound solid; empty drywall sounds hollow.
Once you’ve confirmed the stud locations, use your level to draw a straight line where you want the top of the shelf. This is your drilling guideline,do not skip this step. (I did, and my first shelf looked like it was about to slide off the wall.)
Step 3: Attach the Brackets (The Secret to the “Floating” Look)
Most floating shelf kits come with hidden brackets that mount to the wall. These are usually metal rods or L-shaped brackets that slide into the shelf. Here’s how to install them:
- Hold the bracket against the wall where you’ve marked the studs. Use your level to make sure it’s straight.
- Pre-drill holes into the studs (this prevents the wood from splitting). I used a ⅛-inch bit for my screws.
- Attach the bracket to the wall with screws. Make sure they’re tight,you don’t want the shelf wobbling later.
- Repeat for the other end of the shelf. If your shelf is longer than 48 inches, you’ll need to add a center bracket for extra support.
I used drywall screws for this step, but if you’re hanging heavy shelves (like walnut), upgrade to longer, heavier-duty screws for extra security.
One thing I wish I’d known? The brackets can be a little tricky to align. I had to take mine off and reattach them twice before they were perfectly level. Don’t rush this step,it’s worth taking the time to get it right.
Step 4: Slide the Shelf On (And Celebrate)
This is the easiest part. Once the brackets are securely mounted, simply slide the shelf onto them. Most shelves have a channel on the back that fits over the bracket, hiding it completely. (That’s the magic I was talking about earlier!)
Give the shelf a little wiggle to make sure it’s secure. If it feels loose, tighten the screws on the brackets. Once it’s snug, you’re done!
I’ll admit, I did a little happy dance after I hung my first shelf. It looked so much better than I expected, and it only took about 20 minutes. (The second and third shelves went even faster.)
Weight Capacity, Maintenance, and What to Avoid
Now that your shelves are up, let’s talk about how to keep them looking great and what to avoid. I’ve learned a few things the hard way, so I’ll share those with you.
How Much Weight Can They Hold?
This depends on a few things: the wood, the brackets, and how well they’re attached to the studs. Here’s what I’ve found:
- White oak shelves (with proper brackets) can hold 30–50 pounds per stud connection. That means if your shelf is attached to two studs, it can hold up to 100 pounds. (I tested this in my living room by loading mine up with books,it didn’t even budge.)
- Maple shelves are lighter, so they typically hold 20–40 pounds per stud. I keep mine in the hallway pretty minimal,just a few small decor items and the kids’ backpacks.
- Walnut shelves are heavier but also more stable. They can hold 40–60 pounds per stud, but you’ll need to use longer screws to secure them properly.
- Metal shelves are the strongest and can hold 50–100+ pounds per stud, depending on the thickness of the metal.
If you’re unsure, err on the side of caution. I once saw a friend’s floating shelf collapse because she overloaded it with heavy ceramic vases. (Let’s just say it was not a pretty sight.) Stick to lighter decor, books, or rolled-up towels, and you’ll be fine.
Maintenance: Keeping Them Looking New
Wooden shelves are low-maintenance, but they do need a little TLC to keep them looking their best. Here’s how I keep mine in good shape:
- Dust regularly,I use a microfiber cloth to wipe them down every couple of weeks. Dust builds up faster than you’d think, especially in the hallway where we track in a lot of dirt.
- Avoid water exposure,In the bathroom, I make sure to wipe up any condensation from the shower. Wood can warp if it gets too wet, and I don’t want to deal with that mess.
- Reapply finish if needed,If you have unfinished wood, you’ll want to apply a polyurethane finish to protect it. I did this with my maple shelves, and it’s made them much easier to clean.
- Check the brackets occasionally,Give them a little tug every few months to make sure they’re still tight. If they feel loose, tighten the screws.
One thing I didn’t expect? The shelves can shift slightly over time, especially if you have kids (or, let’s be honest, if you’re just not the most careful person when loading them). If yours start to feel wobbly, take them down, recheck the brackets, and reattach them. It’s a pain, but it’s better than dealing with a shelf that falls off the wall.
What I’d Do Differently (And What You Should Avoid)
If I could go back, here’s what I’d change:
- I wouldn’t skip the level,My first attempt at hanging shelves looked crooked because I didn’t use one. I had to take them down and start over, which was frustrating. Always use a level!
- I’d double-check stud locations,I mentioned this earlier, but it’s worth repeating. I almost drilled into a pipe because I didn’t test the studs first. Always use a nail or screw to confirm you’re hitting wood.
- I’d choose thicker wood for heavy items,In the living room, I went with ¾-inch thick walnut because I knew I’d be putting books on it. If you’re displaying heavy decor, do the same.
- I wouldn’t overload the shelves,I learned this the hard way when one of my maple shelves sagged a little under the weight of a large plant. Stick to lighter items, or reinforce the brackets if you need to hold more.
Oh, and one more thing,if you’re hanging shelves in a rental, check with your landlord first. I know a friend who had to pay to repair the drywall after she removed hers. (Not worth the hassle!)
Final Thoughts (And What to Do Next)
Floating shelves are one of the easiest ways to add modern storage to your home without sacrificing style. They’re customizable, easy to install, and,once you get the hang of it,super satisfying to put up. Plus, they’re a great way to display your favorite decor, books, or even plants.
If you’re still not sure where to start, here are a few ideas to get you inspired:
- Use them in your bedroom to create a cozy reading nook.
- Add them to your accent wall for a bold statement.
- Install them in your fireplace surround to display seasonal decor.
- Use them in the kitchen to hold spices or small appliances.
Now, if you’ll excuse me, I’ve got a new project to tackle,refinishing our stairs. Wish me luck!