
Why I Can’t Stop Turning Wine Corks Into Home Decor (And Neither Should You!)
Let me tell you about the time I almost threw out a box of wine corks after our annual holiday party. My husband looked at me like I’d lost my mind when I suggested recycling them. “Christina,” he said, “those are from the 2024 Bordeaux we got in Napa!” Turns out, he’d been saving them for years,just like I’d been unknowingly collecting them from every dinner party, girls’ night, and spontaneous “let’s open a bottle” moment.
That was the day I discovered wine corks aren’t just for keeping wine in bottles,they’re blank canvases waiting for your creativity. I’ve since turned them into everything from rustic wall art that hangs in our living room to practical items like the coasters my sister-in-law still uses (and complains about not having enough of). The best part? Most of these projects take less time than it takes to finish a glass of wine,and cost next to nothing.
If you’ve got a stash of corks gathering dust (or worse, ending up in the recycling bin), stick around. I’ll walk you through exactly how to turn them into pieces you’ll actually use and love,no fancy skills required. And if you make a mistake? Trust me, I’ve glued corks to the wrong side of things more times than I’d like to admit. The key is to start small, have fun, and remember: every “oops” moment is just a story waiting to be told.
The Real Reason I Started Collecting Wine Corks (Spoiler: It Wasn’t Just for Crafts)
I’ll be honest,my cork collection started as an accident. After our first big dinner party where we opened five bottles of wine, I tossed the corks in a jar “just in case.” That “just in case” turned into a habit, and before I knew it, I had a mason jar full of memories. Some were from our trip to Sonoma, others from the night my best friend announced her pregnancy, and a few from those “we survived another week of parenting” bottles of rosé.
What I didn’t realize at the time was that I was building more than a collection,I was creating a visual timeline of our lives. Now, when I pull out a cork from a 2023 Pinot Noir, I can almost taste the rain that poured during our anniversary dinner that year. It’s not just a cork; it’s a tiny time capsule.
If you’re anything like me, you’ve got a drawer or jar somewhere filled with these little stoppers. Instead of letting them take up space, let’s give them a purpose. Whether you’re an experienced crafter or someone who can barely glue a picture frame together (guilty as charged on that one), these projects are designed to be approachable. And if you’re short on corks? No worries,I’ll tell you exactly where to find more without begging your friends for theirs.
Why This Hobby Quickly Became My Favorite Way to Unwind
Here’s the thing about wine cork crafts: they’re the perfect blend of creativity and relaxation. There’s something incredibly satisfying about taking something that was “just a cork” and turning it into something functional and beautiful. Plus, it’s a great way to enjoy a glass of wine while you work,because let’s be real, any project that pairs well with a cabernet is a winner in my book.
I’ve hosted more than a few “cork craft nights” with my girlfriends, and it’s become one of our favorite ways to catch up. We’ll sit around the table with a bottle of wine, some glue guns, and whatever project we’re tackling that week. Last month, we made wine cork memory boards for each other, and I still get a kick out of seeing mine hanging in my office. It’s not just decor,it’s a conversation starter and a keepsake all in one.
And if you’re worried about the environmental impact? Repurposing corks is one of the easiest ways to reduce waste. Natural cork is biodegradable, but it can take years to break down in a landfill. By giving them a second life, you’re keeping them out of the trash while creating something unique. It’s a win-win.
The Eco-Friendly Perk No One Talks About (But Should)
I’ll admit, I didn’t start collecting corks because I’m some kind of eco-warrior. I just didn’t want to throw them away. But the more I learned about cork harvesting and the environmental benefits, the more I realized how much of a difference even small changes can make.
Cork oak trees are harvested in a way that doesn’t harm the tree,it’s actually good for them. The bark regrows, and the trees can live for hundreds of years. But when corks end up in landfills, they don’t decompose quickly. By repurposing them, you’re not just being creative; you’re also reducing waste in a way that’s easy and fun.
One of the first projects I did was a cork bulletin board for my home office. I used a mix of natural and synthetic corks (more on that later), and it turned out better than I expected. Now, every time I pin something to it, I’m reminded that I’m not just organizing my to-do list,I’m also doing something good for the planet. Small victories, right?
And here’s a pro tip I learned the hard way: if you’re using synthetic corks (the ones that look like cork but aren’t), they’re not as easy to cut or glue. Stick with natural corks for projects where you’ll be modifying them,trust me, your glue gun will thank you.
How I Accidentally Turned My Cork Collection Into a Conversation Starter
Last summer, my in-laws visited, and my mother-in-law noticed the cork wreath I’d made for our front door. She asked if it was store-bought, and when I told her I’d made it from our wine corks, she was fascinated. She ended up taking a bunch of corks home with her and made her own version,now she’s the one hosting cork craft nights with her friends!
That’s the thing about these projects: they’re personal. Whether it’s a cork trivet from a bottle shared with old friends or a cork planter from a solo “treat yourself” night, each piece has a story. And people love hearing those stories. It’s like giving a little piece of your life to someone else.
If you’re new to this, start with something simple like cork coasters. They’re quick, practical, and a great way to dip your toes into the world of cork crafts. Plus, they make great gifts,who doesn’t need more coasters?
The Tools I Actually Use (No, You Don’t Need a Fancy Kit)
Before we dive into the projects, let’s talk tools. I’ll be honest,I’m not one of those people who has a fully stocked craft room. I use what I have, and I’ve learned a few tricks along the way to make things easier. Here’s what I keep on hand:
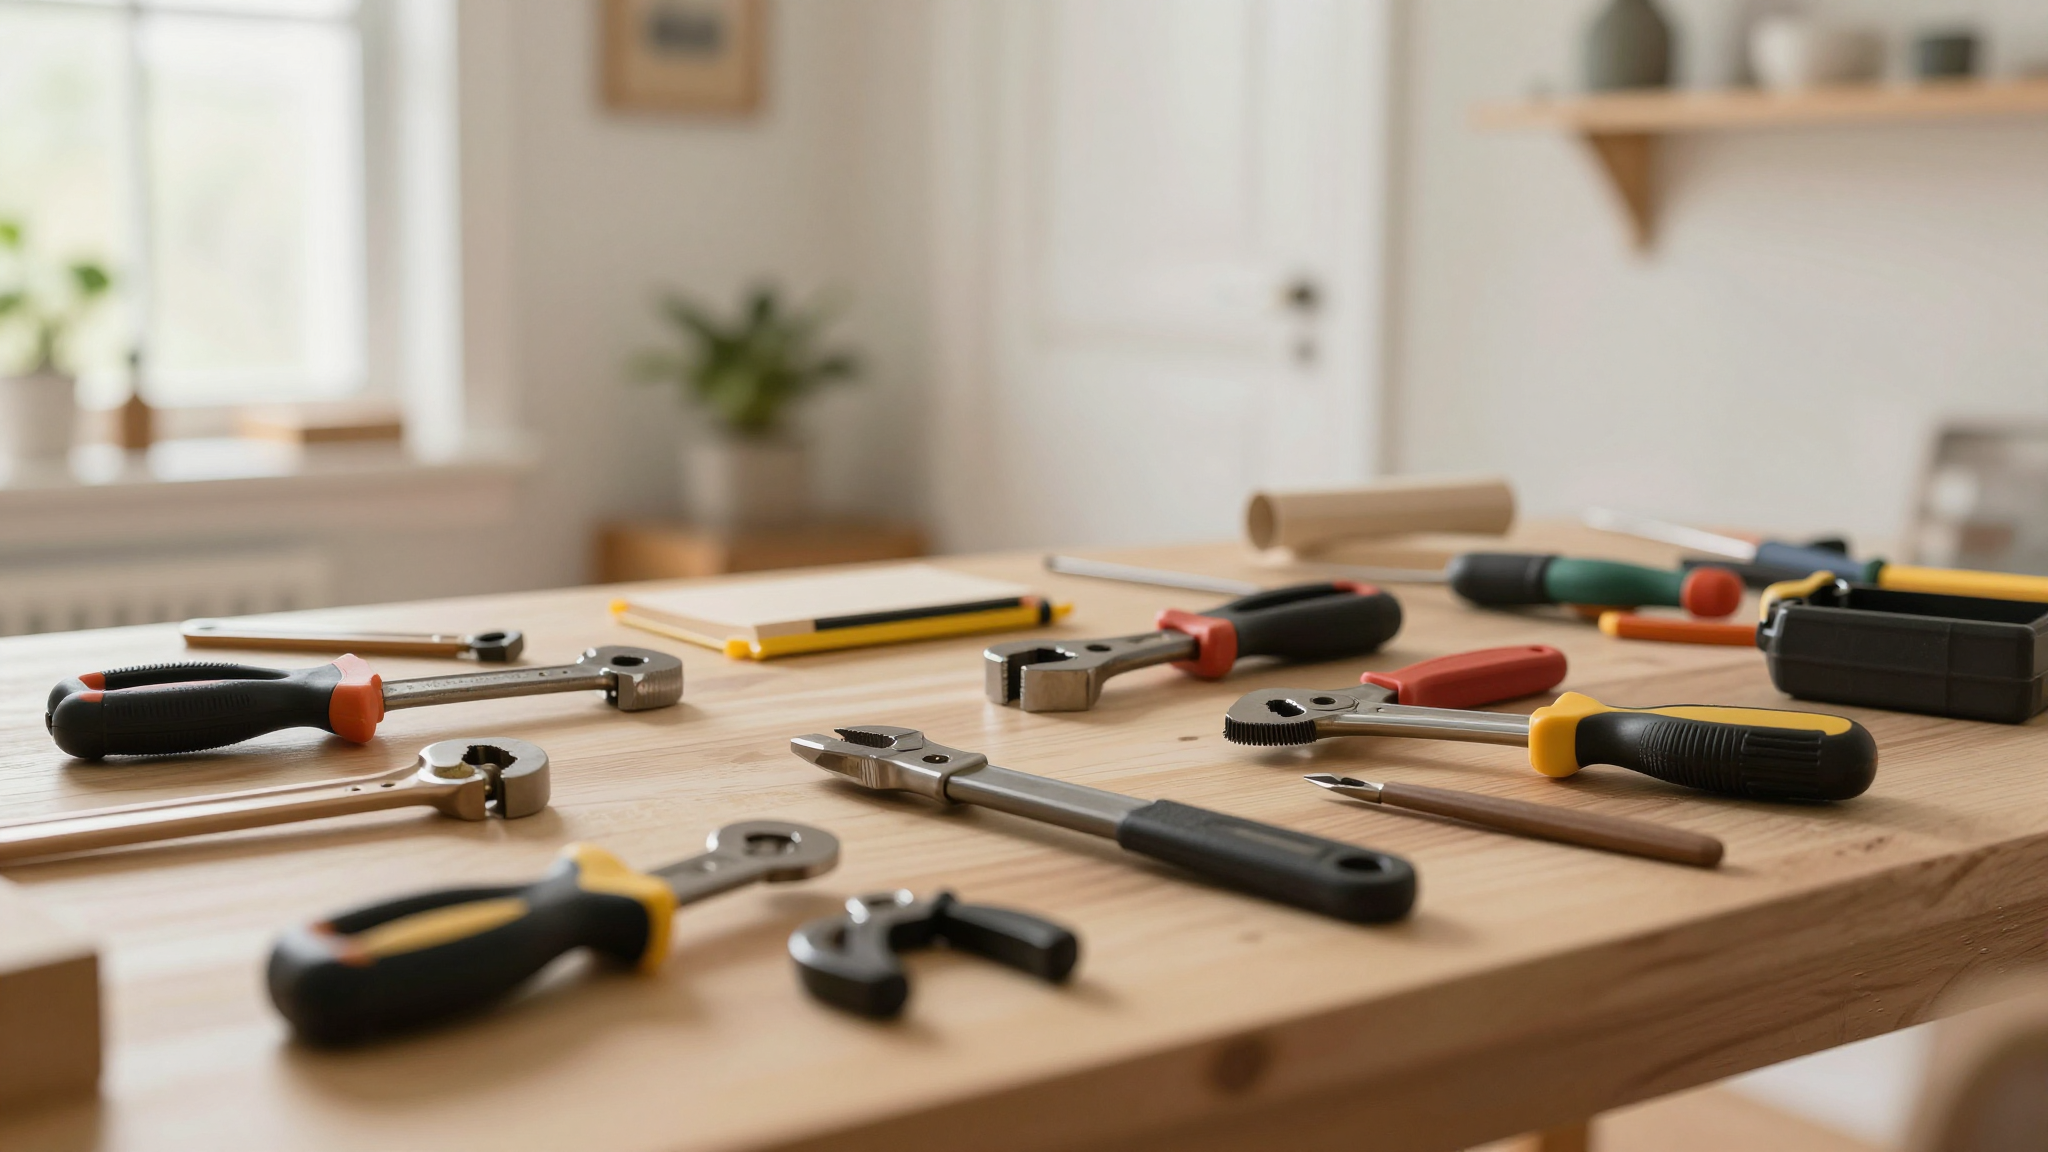
- Hot glue gun: This is my holy grail. I use a high-temperature one because it holds better, especially for heavier projects. Pro tip: If you’re working with a lot of corks, get a glue gun with a larger glue stick,you’ll go through them faster than you think.
- Craft knife: A sharp one. I learned this the hard way when I tried to cut corks with dull scissors. It’s like trying to cut butter with a spoon,messy and frustrating. A good craft knife makes all the difference.
- Sandpaper: I keep a small piece of 120-grit sandpaper handy for smoothing out rough edges. It’s amazing how much better a project looks after a little sanding.
- Drill with small bits: This came in handy when I made a cork and wood coffee table (yes, really,it’s stunning). A small drill bit lets you create clean holes for screws or dowels.
- Tweezers or needle-nose pliers: These are great for placing small corks or picking up glue gun drips before they set.
Oh, and one more thing: patience. I’m not naturally a patient person, but cork crafts have taught me to slow down. Glue needs time to set, cuts need to be precise, and sometimes a project just needs a little extra love. It’s a good reminder that not everything has to be rushed.
The Time I Ruined a Perfectly Good Cork Board (And What I Learned)
Let me tell you about the cork board I made for my son’s room. I was feeling ambitious and decided to cover a whole corkboard with corks,like a giant, textured version of the ones you see in offices. I spent hours gluing them on, only to realize too late that I hadn’t sanded them first. The result? A lumpy, uneven mess that looked like a cork monster had exploded on the wall.
Instead of tossing it (which was my first instinct), I turned it into a “chalkboard” by painting the entire thing with chalkboard paint. Now it’s one of my son’s favorite things,he loves the texture, and I love that it hides all his little doodles. Moral of the story? Even “mistakes” can become something cool if you’re willing to adapt.
Where to Find Corks (Without Begging Your Friends)
If you’re just starting out, you might not have a stash of corks like I do. No worries,here’s how to build your collection without feeling like you’re mooching off everyone you know.
- Ask local restaurants and wine bars: Many places are happy to save corks for you. I’ve got a standing arrangement with a few spots near my house,they save them in a bag, and I pick them up every few months. It’s a win-win: they don’t have to throw them out, and I get free materials.
- Check online marketplaces: Sites like Etsy and Amazon sell bags of natural corks for cheap. A 5-pound bag costs less than $20, and it’ll last you a while. I’ve bought a few bags when I needed a specific type of cork for a project.
- Look for synthetic corks: If you’re not planning to cut or modify the corks much, synthetic ones work fine for projects like wreaths or bath mats. They’re usually cheaper and easier to find in bulk.
- Save your own: Duh. But seriously, start a jar or bin in your kitchen. Every time you open a bottle, toss the cork in there. You’ll be surprised how quickly it adds up.
One thing to watch out for: not all corks are created equal. Natural corks (the ones from wine bottles) are easier to work with because they’re softer and hold glue better. Synthetic corks (often used in cheaper wine or sparkling water bottles) are denser and harder to cut. If you’re new to this, stick with natural corks,they’re more forgiving.
5 Projects to Try This Weekend (No Experience Needed!)
Alright, let’s get to the fun part,the projects! I’ve picked five ideas that are easy enough for beginners but still look amazing. And if you mess up? Hey, that’s part of the process. Here’s what I’ve made (and loved) in my own home:
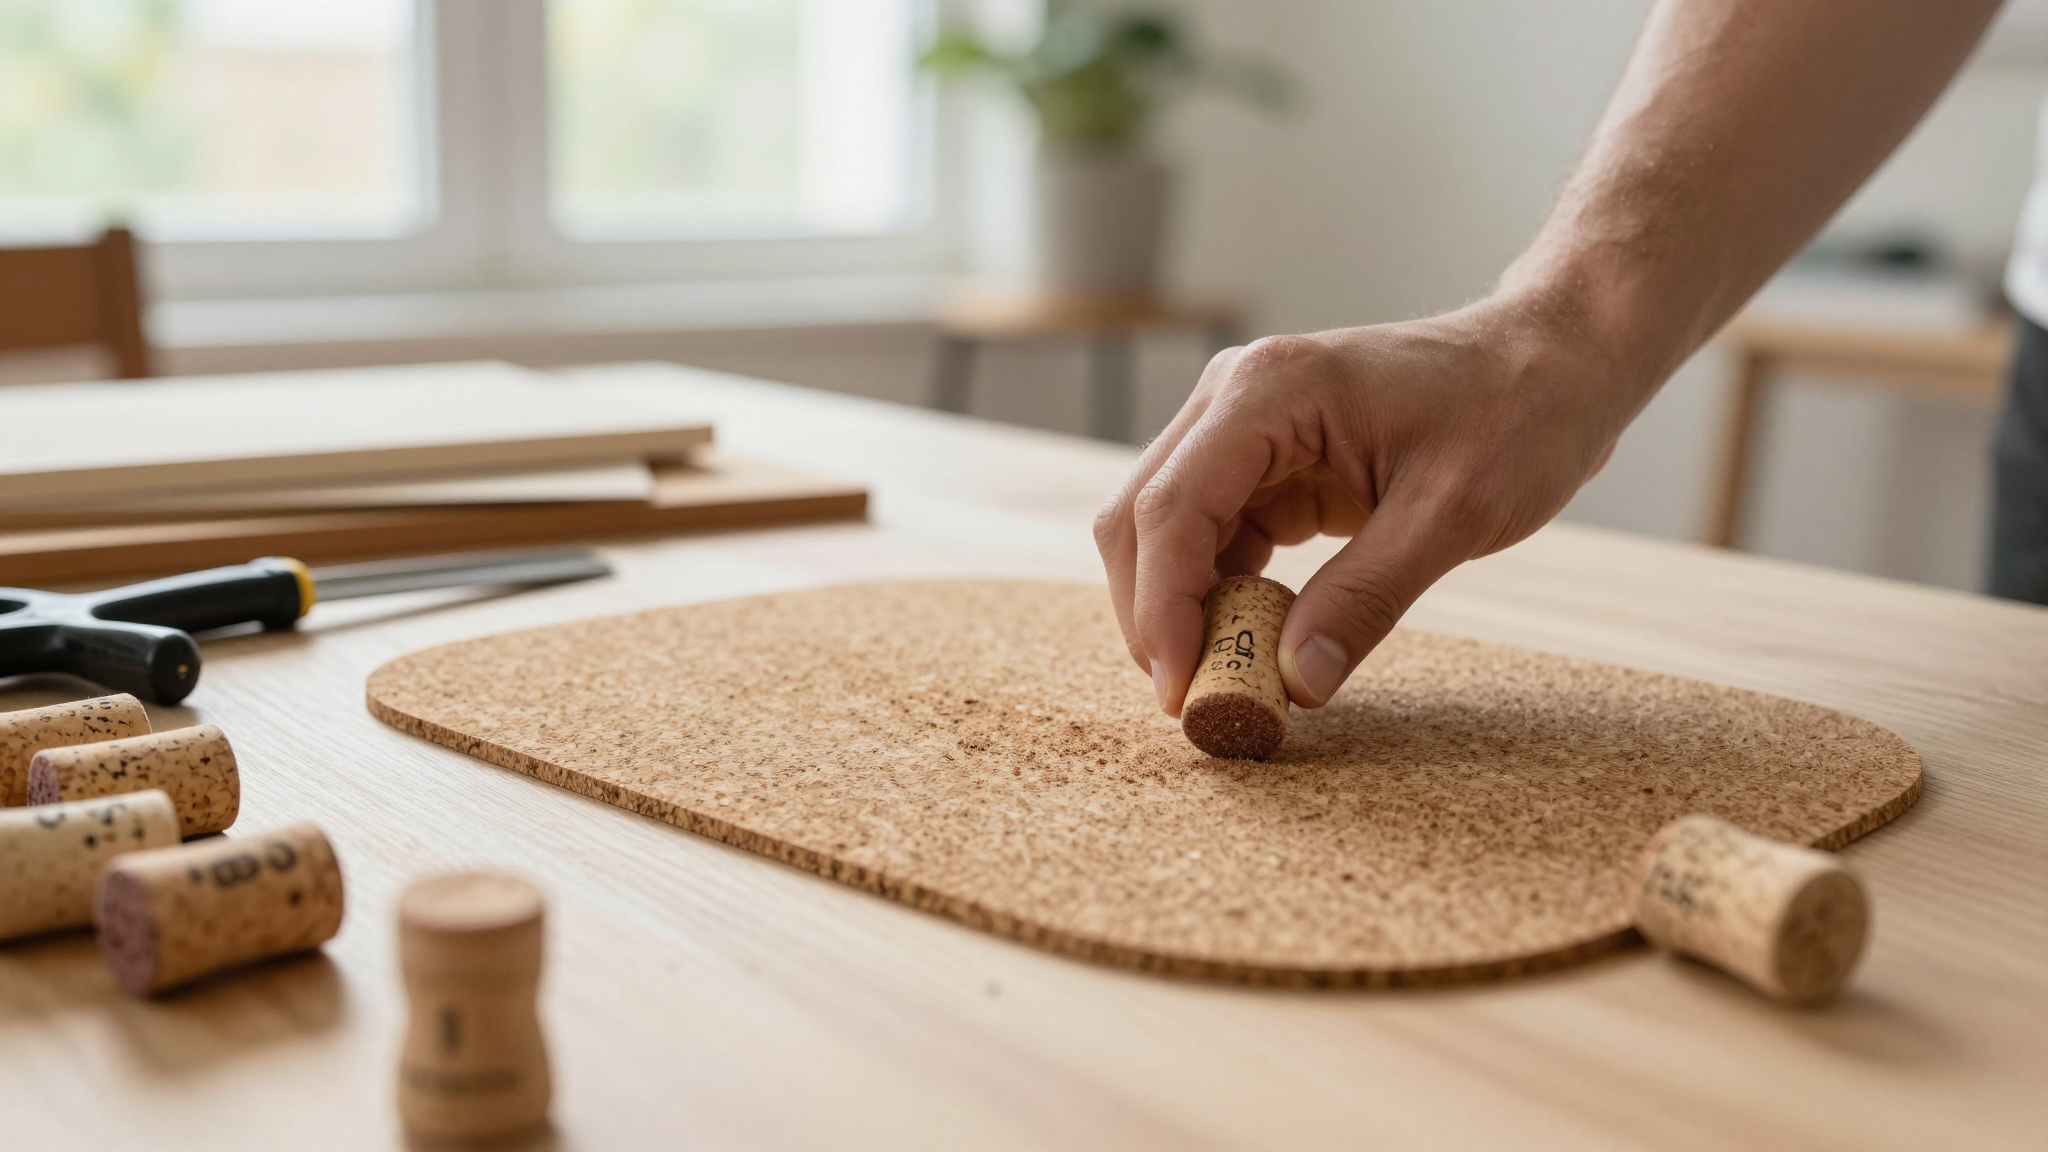
1. Wine Cork Coasters (The Perfect Starter Project)
This was my first cork project, and it’s still one of my favorites. All you need is a hot glue gun, some corks, and a little bit of time. I used a mix of natural and synthetic corks for texture, and I even added a few corks with winery logos for a personal touch.
Here’s how I did it:
- Cut the corks into even slices (about ½ inch thick). If you don’t have a sharp knife, boil the corks for 10 minutes first,they’ll soften and cut more easily.
- Arrange the slices in a square or rectangle on a piece of cardboard. Play around with the pattern until you like it.
- Glue the corks to the cardboard, working in small sections so the glue doesn’t dry out before you can position the corks.
- Let the glue dry completely (I usually wait 24 hours to be safe), then flip the coaster over and glue the back.
- Trim any excess cardboard, and you’re done! For extra durability, I sealed mine with a clear acrylic spray.
I made a set of four for my coffee table, and they’ve held up beautifully. Plus, every time I use them, I think of the night I made them,it was a rare “me time” evening with a glass of wine and a true crime podcast. Good times.
2. Cork Trivets (Because Burnt Fingers Are the Worst)
I made these after burning my hand on a hot baking sheet,once was enough. Cork trivets are heat-resistant, stylish, and super easy to make. I used a mix of whole corks and sliced corks for a textured look.
Here’s my method:
- Cut a piece of cardboard or thin wood to your desired trivet size (mine are about 6×6 inches).
- Glue whole corks to the cardboard, leaving small gaps between them. I like to mix in a few sliced corks for variety.
- Let the glue dry, then flip the trivet over and glue the back. This gives it extra stability.
- For a polished look, I sealed mine with Mod Podge. It gives them a nice finish and protects the corks.
These trivets are now a staple in my kitchen. They’re not just functional,they’re a conversation starter. My mom-in-law asked if I’d bought them at a boutique, and I got a huge kick out of telling her I’d made them myself.
3. Cork Planters (For Your Desk or Windowsill)
I made these for my office because I wanted something green but low-maintenance. Succulents are perfect for cork planters because they don’t need much water, and the corks give them a rustic, earthy look.
Here’s how I did it:
- Glue corks around the outside of a small mason jar or tin can. I used a mix of whole corks and half-corks for a layered effect.
- Let the glue dry completely, then fill the jar with soil and add your succulent.
- Water lightly, and you’re done! I kept mine on my desk, and it’s become one of my favorite little touches in the room.
Pro tip: If you want to make a hanging planter, glue corks to a small basket or colander. Just make sure it’s sturdy enough to hold the weight of the soil and plant.
4. Cork Memory Board (For Photos, Notes, or Just Because)
This was a labor of love, but it was totally worth it. I made a memory board for my son’s room using a mix of whole corks and sliced corks. It’s where he pins his favorite drawings, school photos, and little notes from friends.
Here’s how I approached it:
- Find a wooden board or canvas at a craft store. Mine was a plain wooden board I picked up at Michaels.
- Glue the corks to the board in a pattern. I did a mix of horizontal and vertical rows for a textured look.
- Let the glue dry completely, then seal the board with a clear acrylic spray to protect it.
- Add hooks or pins so you can hang things on it. I used small nails and twine for a rustic look.
This project took me a few hours, but it was so satisfying to see it come together. Plus, my son loves it,he’s always adding new things to it, and it’s become a little time capsule of his childhood.
5. Cork Wreath (For Your Door or Wall)
I made this for our front door last Christmas, and it’s become a tradition. Every year, I add a few new corks to it, and it’s grown into this beautiful, textured wreath that welcomes guests.
Here’s how I did it:
- Start with a foam or wire wreath base. Mine was a simple grapevine wreath I found at a craft store.
- Glue corks to the base, starting from the outside and working your way in. I mixed in a few pinecones and dried flowers for extra texture.
- Let the glue dry completely, then add a ribbon or bow to hang it.
- For a festive touch, I added a few battery-operated fairy lights. It looks amazing at night!
This wreath is one of my favorite projects because it’s so versatile. I’ve made smaller versions for my kids’ rooms, and I even made one for my best friend as a housewarming gift. It’s a great way to add a personal touch to any space.
The One Mistake I Keep Making (And How to Avoid It)
If I had to pick one mistake I keep making with cork crafts, it’s this: not sanding the corks before gluing them. I know, I know,it’s a simple step, but I always seem to skip it in my excitement to get started. The result? Lumpy, uneven projects that look like they were made by a toddler.
Here’s how I’ve learned to fix it:
- After gluing the corks, let them dry completely.
- Gently sand the surface with fine-grit sandpaper (120-grit works well). This smooths out any rough edges and gives the project a more polished look.
- Wipe away any dust with a damp cloth, then seal the project with a clear acrylic spray or Mod Podge.
Trust me, sanding makes a huge difference. It’s the difference between a project that looks like it was made with love and one that looks like it was thrown together in five minutes (even if it was!).
Final Thoughts (And What to Do Next)
So, there you have it,my favorite wine cork projects, along with a few hard-learned lessons. The best part about cork crafts? They’re endlessly customizable. You can make them as simple or as elaborate as you want, and every project tells a story.
If you’re just starting out, I recommend grabbing a few corks and trying the coasters or trivets first. They’re quick, practical, and a great way to get comfortable with the materials. Once you’ve got the hang of it, you can move on to bigger projects like the memory board or wreath.
And if you’re feeling really ambitious, check out my guide to upcycling furniture. I used corks to create a textured accent on a side table, and it turned out even better than I expected. The key is to experiment and have fun,there’s no wrong way to do it!
Now, if you’ll excuse me, I’ve got a glass of wine and a fresh batch of corks calling my name. Who knows? Maybe I’ll make something new tonight. Cheers!
Frequently Asked Questions
What are some easy starter crafts for beginners?
If you’re new to cork crafts, start with something simple like coasters or trivets. They’re quick, practical, and a great way to get comfortable with the materials. I also love making cork plant markers,they’re fun, easy, and add a personal touch to your garden or houseplants. Just cut the corks into small pieces, write the plant names on them with a permanent marker, and stick them in the soil. No glue required!
Where can I find a good supply for my creations?
You don’t need to buy anything fancy to start. Ask friends and family to save their corks for you,most people are happy to do it. I’ve also found great deals on bulk corks online. A 5-pound bag of natural corks costs less than $20 on Amazon, and it’ll last you a while. If you’re in a hurry, check your local craft store for small bags of corks. They’re usually in the scrapbooking or paper crafts section.
How do I clean and prepare them before crafting?
First, give them a good wipe with a damp cloth to remove any dust or residue. If they’re stained, a little bit of sandpaper or a vinegar soak will help. Let them dry completely before you start your project,this ensures the glue will stick properly. I also like to sort them by size and type before I begin. It makes the process so much smoother!
Can I use synthetic stoppers for these activities?
You can, but they’re not as easy to work with as natural corks. Synthetic corks are denser and harder to cut, so they’re better suited for projects where you won’t be modifying them much, like wreaths or bath mats. If you’re new to cork crafts, stick with natural corks,they’re more forgiving and easier to glue. Plus, they have that classic cork look and feel that I love.
What is the best adhesive to use?
For most projects, a good hot glue gun is your best friend. I use a high-temperature one because it holds better, especially for heavier pieces. For projects that need to be more durable, like a tabletop or a large wreath, I recommend a clear-drying craft glue or wood glue. Just make sure to follow the instructions on the package, and let the glue dry completely before handling your project. Patience is key!