
DIY Floating Shelves: My Real-Life Guide to Installing Them Like a Pro
I’ll be honest,when I first saw floating shelves in a magazine, I thought they looked like magic. How could something so sleek actually hold my kids’ heavy LEGO bins? Turns out, they’re not magic, but they are one of the easiest ways to add storage and style to any room. I’ve installed them in our living room, kitchen, and even my craft room (where they now hold my ever-growing collection of washi tape).
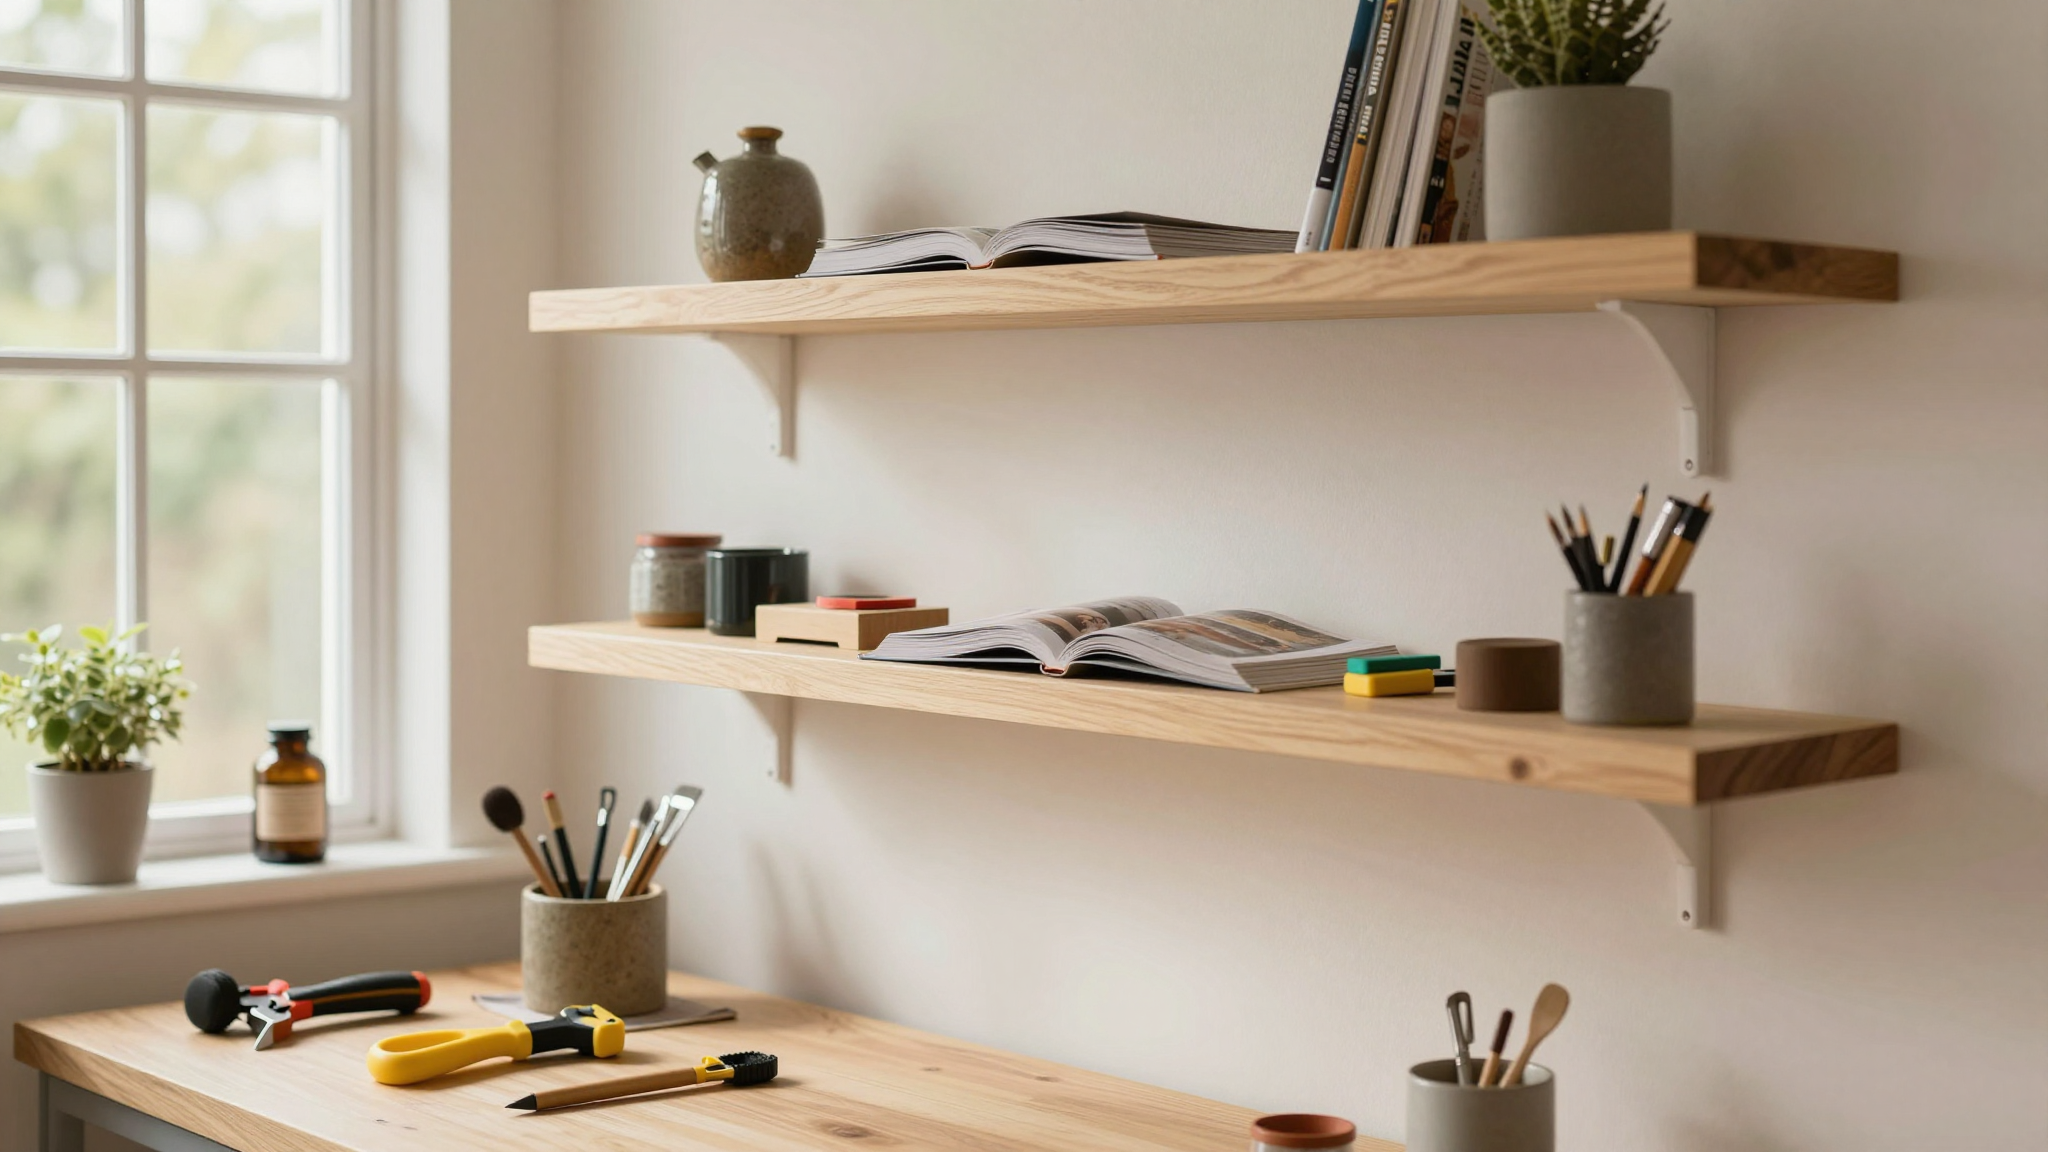
What I love most about floating shelves is how they make small spaces feel bigger. Our apartment has limited cabinet space, so these shelves have become my secret weapon for keeping things organized without cluttering up the floors. And the best part? They’re actually simpler to install than most people think,even if you’ve never held a power drill before.
I’ve made my share of mistakes along the way (like the time I didn’t use a level and ended up with a shelf that looked like it was leaning in a strong wind), but I’ve also learned exactly what works. This guide is everything I wish I’d known before my first attempt, plus all the tips I’ve picked up over the years.
What You’ll Actually Need (No Fluff, Just the Essentials)
Before we get started, let me save you some frustration. I used to think I needed a whole workshop’s worth of tools for projects like this, but the truth is, you only need a few key items. Here’s exactly what I grab from my DIY tool stash:
- Measuring tape – The 16-foot one I got from Home Depot for $12 has lasted me years. Don’t skimp on this!
- Pencil and a good level – I learned the hard way that the “eyeballing it” method doesn’t work. Get a magnetic level if you can,it stays put while you mark.
- Power drill – My trusty DeWalt has seen me through countless projects. If you’re just starting, a basic cordless drill will do.
- Stud finder – This $10 tool has saved me from so many headaches. Trust me, you want to find those studs!
- Wood for your shelves – I recommend kiln-dried hardwood like oak or maple. It won’t warp like cheaper plywood. For my kitchen shelves, I used pre-finished white oak from Home Depot because I knew I’d never get around to staining it myself.
- Heavy-duty brackets – Don’t cut corners here. I use Ultrashelf brackets because they hold up to 50 lbs each and look clean.
- Wall anchors and screws – If you can’t hit a stud, these are your backup plan. I like the TOGGL PLUS anchors because they’re easy to install and hold well.
Pro tip: If you’re like me and tend to lose small hardware, grab a magnetic screwdriver organizer. I keep mine in my toolbox, and it’s saved me from many frustrating searches for that one missing screw.
Planning Your Shelves (So You Don’t End Up Like Me)
Okay, here’s where I made my biggest mistake the first time: I didn’t plan enough. I picked a spot that looked good but turned out to be right where my husband walks by every day. Now he bumps his head on it at least twice a week. Learn from my pain!
Before you even think about drilling, ask yourself these questions:
- Where will this shelf actually be useful? In my kitchen, I put one above the coffee maker for mugs and tea bags. In the living room, I have one for books and another for my kids’ favorite toys. Think about what you use daily and put it within easy reach.
- How much weight will it hold? If you’re displaying heavy books or kitchenware, go for thicker wood and stronger brackets. My kitchen shelf holds my stand mixer (yes, really), so I used extra-long screws into the studs.
- Will it look good empty? Floating shelves aren’t just for storage,they’re decor too. I like to style mine with a mix of functional items and a few decorative pieces. My living room shelf has a stack of books, a small plant, and a framed photo of my kids.
I also recommend sketching a quick layout. Grab a piece of paper and draw your wall space to scale. This helps you visualize how the shelves will look and where they’ll fit best. I keep a notebook just for these kinds of plans,it’s saved me from so many “oops” moments.
One thing I wish I’d known earlier: leave at least 12 inches of clearance in high-traffic areas. That means near doorways, hallways, or any spot where someone might walk by frequently. Trust me, you don’t want to create a hazard in your own home.
Step-by-Step Installation (With My Real-Life Tips)
Alright, let’s get to the good stuff. Here’s exactly how I install floating shelves, including the mistakes I’ve made and how to avoid them.
Step 1: Mark Your Spot (And Double-Check!)
First, find your studs. I know, I know,it’s boring, but it’s the most important part. Use your stud finder and mark the centers with a pencil. If you can’t hit a stud where you want the shelf, that’s okay,we’ll use wall anchors as a backup.
Now, grab your level and mark where the top of your shelf will go. I like to hold the shelf up against the wall first to make sure it looks good at that height. For my kitchen shelf, I put it about 6 inches above the countertop so it’s out of the way but still easy to reach.
Here’s a tip I learned the hard way: use a pencil to mark where your brackets will go. I used to just eyeball it, but that led to crooked shelves. Now I mark the exact spots and connect the dots with a straight line. It takes two extra minutes but saves so much frustration later.
Step 2: Drill the Holes (Safety First!)
Put on your safety glasses,yes, even for this. I’ve had drywall dust fly into my eyes more times than I can count.
Start with your pilot holes. If you’re screwing into studs, drill just a little deeper than your screws will go. For wall anchors, follow the package instructions (usually a hole slightly smaller than the anchor).
Pro tip: If you’re like me and tend to drill at an angle, use a magnetic drill bit holder. It keeps your bit straight and makes the whole process easier.
Step 3: Attach the Brackets (The Moment of Truth!)
This is where I used to get nervous. What if the brackets don’t hold? What if the shelf looks crooked? Take a deep breath,you’ve got this.
Screw your brackets into the wall. If you’re using studs, make sure the screws go in at least 1.5 inches deep for a secure hold. For wall anchors, follow the instructions on the package. I like to use a cordless drill for this step because it’s easier to control the torque.
Before you attach the shelf, give the brackets a good tug downward. If they feel wobbly, add another screw or use a larger wall anchor. This is your last chance to fix any issues before the shelf goes on!
Step 4: Slide On the Shelf (And Celebrate!)
Now for the fun part! Slide your shelf onto the brackets. If it’s a tight fit, you might need to gently tap it with a rubber mallet. Don’t force it,if it’s not going on easily, double-check that your brackets are level and spaced correctly.
Once it’s on, give it a little shake. If it wiggles, take it off and add more screws or use longer wall anchors. My first attempt wobbled like a Jell-O mold, but after I added a few more screws, it’s been rock-solid for years.
Finally, wipe away any pencil marks with a damp cloth. I like to use a microfiber towel because it doesn’t leave lint behind.
And there you have it! Step back and admire your handiwork. I still remember the first time I installed a floating shelf,it felt like such a grown-up accomplishment. Now I have them all over the house, and I can’t imagine living without them.
Material Matters: What I’ve Tried (And What I’d Recommend)
One of the best things about floating shelves is how customizable they are. You can match them to your decor or go for a completely different look. Here’s what I’ve used in my own home and what I’d recommend for different spaces.
Wood: My Go-To for Strength and Style
I’ve used three main types of wood for my shelves, and each has its pros and cons.
- White oak – This is my absolute favorite for heavy-duty shelves. It’s dense, resists warping, and looks gorgeous in any room. I used it for my kitchen shelf because it holds up to the stand mixer and heavy pots. The only downside? It’s a bit pricier than other options.
- Walnut – If you want rich, warm tones, walnut is the way to go. It’s beautiful but can be pricey. I used it in my dining room, and it pairs perfectly with our dark wood table. Just be careful,walnut can dent more easily than oak.
- Maple – This is a great budget-friendly option that still looks high-end. It takes paint really well, so I used it in my craft room where I wanted a bright, clean look. The only thing to watch out for is that it can show scratches more easily than oak or walnut.
I’ve also experimented with reclaimed wood for a rustic look. It’s not as strong as new hardwood, so I’d only recommend it for lighter items like decor or plants. I used it in our entryway, and it’s become one of my favorite features.
Other Materials: When to Use Them
Wood isn’t your only option! Here are some other materials I’ve tried and when I’d recommend them.
- Glass – I used glass shelves in my bathroom to display my favorite soaps and lotions. They look sleek and modern, but they’re not as strong as wood. I’d only use them for lightweight items. I got mine from Wayfair, and they’ve held up well so far.
- Metal – For an industrial look, metal shelves are a great choice. I used them in my garage to hold tools and bins. They’re super sturdy but can be a bit cold-looking. I paired mine with wood crates to soften the look.
- Acrylic – If you want something lightweight and modern, acrylic is a good option. I used it in my teen daughter’s room for a floating makeup shelf. It’s not as strong as wood or metal, so I’d only use it for very light items.
No matter what material you choose, make sure it’s rated for the weight you plan to put on it. I learned that the hard way when a glass shelf I bought online cracked under the weight of my heavy ceramic mugs. Always check the weight capacity before you buy!
Corner Shelves: My Secret for Small Spaces
One of the biggest challenges in our apartment is making the most of every inch of space. That’s why I love corner shelves,they turn an often-wasted area into functional storage. Here’s what I’ve learned about installing them.
Designing Your Corner Shelf
Corner shelves come in all shapes and sizes. Here are a few ideas I’ve tried:
- Triangular shelves – These are my favorite for a clean, modern look. I used them in our living room to display a collection of vintage cameras. They fit perfectly in the corner and don’t take up much space.
- Curved shelves – If you want to soften the look of a sharp corner, a curved shelf is a great choice. I used one in my craft room to hold my yarn stash. It’s not as practical for heavy items, but it looks gorgeous.
- Asymmetrical shelves – For a more eclectic look, try shelves of different lengths. I did this in our entryway, and it’s become a great spot to display small plants and decor.
When I first tried installing a corner shelf, I made the mistake of not using a level. The result? A shelf that looked like it was sliding down the wall. Now I always use a magnetic level to make sure everything is perfectly aligned.
Installation Tips for Corners
Corner shelves require a little extra planning, but they’re totally doable. Here’s what I’ve learned:
- Use L-shaped brackets for a clean, invisible look. I like the ones from Ultrashelf because they’re strong and easy to install.
- If your walls aren’t perfectly square, use adjustable brackets. I had this issue in our bathroom, and the adjustable brackets saved the day.
- For heavy items, make sure to hit a stud on both walls. If you can’t, use heavy-duty wall anchors on both sides.
One thing I wish I’d known earlier: pre-drill your holes. I learned this the hard way when I tried to screw a bracket into a corner and the wood split. Now I always pre-drill, and it’s made a huge difference.
Styling Your Shelves (So They Look Like You Meant to Do That)
Now that your shelves are installed, it’s time for the fun part: styling them! This is where you can really make your space feel like home. Here’s how I style my shelves to make them look intentional and put-together.
Mixing Function and Decor
I like to follow the 80/20 rule when styling my shelves: 80% functional items and 20% decor. This keeps them looking lived-in but not cluttered.
For example, on my kitchen shelf:
- 80% functional: mugs, tea bags, and a small cutting board
- 20% decor: a small potted herb and a pretty ceramic bowl
On my living room shelf:
- 80% functional: books, a few favorite toys, and a small basket for remotes
- 20% decor: a framed photo of my kids, a small plant, and a candle
I also like to vary the heights of the items on my shelves. This creates visual interest and makes the display look more intentional. For example, I might put a tall plant at the back, a medium-sized book in the middle, and a small decor item at the front.
Color and Material Coordination
One of the things I love about floating shelves is how easy they are to match to your decor. Here are a few ideas I’ve tried:
- Match the wood tone to your furniture – In our living room, I used white oak shelves that match our coffee table. It creates a cohesive look that ties the room together.
- Paint the edges a different color – I did this in my craft room, painting the edges of my maple shelves a bright turquoise. It adds a pop of color and makes the shelves stand out.
- Add trim molding for a traditional look – In our dining room, I added trim molding around the edges of my shelves to give them a more finished look. It’s a small detail that makes a big difference.
I also like to group similar items together. For example, on my kitchen shelf, I grouped all the mugs together and all the tea bags together. It makes the shelf look more organized and intentional.
Final Tips from My DIY Journey
After installing floating shelves in just about every room of our home, I’ve learned a few key things that I wish I’d known from the start. Here are my top tips:
- Always use a level – I can’t stress this enough. A crooked shelf is one of the most obvious DIY mistakes, and it’s so easy to avoid with a simple level.
- Hit the studs when you can – It’s worth taking the extra time to find the studs. It’ll make your shelves much more secure in the long run.
- Don’t overcrowd your shelves – It’s tempting to put everything up there, but trust me, it’ll just look cluttered. Stick to the 80/20 rule I mentioned earlier.
- Use the right hardware – Don’t skimp on brackets or wall anchors. It’s not worth the risk of your shelf coming loose.
- Have fun with it! – Floating shelves are a great way to express your personality. Don’t be afraid to mix and match materials or try something new.
If you’re new to DIY, I also recommend checking out my post on essential tools every homeowner should have. It’ll help you build a toolkit that’s ready for projects like this.
And if you’re looking for more ways to add charm to your home, be sure to check out my guide on 5 DIY projects to instantly add charm to your home. Floating shelves are just the beginning!
Now it’s your turn. Grab your tools, pick a spot, and get started. I promise, once you see your first floating shelf installed, you’ll be hooked. And who knows? You might end up with shelves in every room, just like me!
Frequently Asked Questions
What’s the best way to ensure my wall-mounted storage holds heavy items?
If you’re planning to put heavy items on your shelves, follow these tips:
- Use hardwood like white oak or maple for the shelves. These materials are strong and won’t warp over time.
- Choose heavy-duty brackets rated for at least 50 lbs. I like the ones from Ultrashelf.
- Always screw into studs if possible. If you can’t hit a stud, use heavy-duty wall anchors like the TOGGL PLUS anchors.
- Distribute the weight evenly across the shelf. Don’t put all the heavy items on one side.
I once put a 30-pound ceramic planter on a shelf that wasn’t properly secured, and it pulled right off the wall. Learn from my mistake,always check the weight capacity and secure your shelves properly!
Can I install corner units without professional help?
Absolutely! Corner shelves are one of my favorite DIY projects because they’re so customizable. Here’s how I do it:
- Use a stud finder to locate studs on both walls. If you can’t hit a stud, use heavy-duty wall anchors.
- Pre-drill your holes to avoid splitting the wood. This is especially important for harder woods like walnut.
- Use a level to make sure your shelves are perfectly aligned. I can’t tell you how many times I’ve had to redo a shelf because it wasn’t level!
- For asymmetrical designs, sketch your layout on paper first. This helps you visualize how it’ll look before you start drilling.
I installed a corner shelf in our bathroom to hold towels and toiletries, and it’s one of my favorite features. It’s amazing how much extra storage you can create in a small space!
How do I choose between glass, metal, or wood for my decor?
Choosing the right material depends on your style and what you plan to put on your shelves. Here’s how I decide:
- Wood – If you want a warm, natural look, wood is the way to go. I use it in most of my shelves because it’s strong and versatile. For a rustic look, I love reclaimed wood. For a more modern look, I prefer white oak or maple.
- Glass – If you want a sleek, modern look, glass shelves are a great choice. I used them in my bathroom to display my favorite soaps and lotions. Just remember, they’re not as strong as wood, so stick to lightweight items.
- Metal – For an industrial look, metal shelves are perfect. I used them in my garage to hold tools and bins. They’re super sturdy but can be a bit cold-looking. I like to pair them with wood crates or other warm materials to soften the look.
No matter what material you choose, make sure it’s rated for the weight you plan to put on it. I learned that the hard way when a glass shelf I bought online cracked under the weight of my heavy ceramic mugs.
Do I need special tools to build custom shelving?
Not at all! You can build custom shelving with just a few basic tools. Here’s what I recommend:
- Measuring tape – A good measuring tape is essential. I like the Everbilt 16-foot tape from Home Depot.
- Level – A level is a must for making sure your shelves are straight. I use a magnetic level because it stays put while I work.
- Power drill – A cordless drill makes the job so much easier. I use a DeWalt drill and love it.
- Stud finder – This is a game-changer. I use a Franklin Sensors stud finder and it’s never let me down.
- Circular saw or miter saw – If you’re cutting your own wood, a saw is essential. I use a DeWalt miter saw for clean, precise cuts.
If you’re just starting out, don’t feel like you need to buy all these tools at once. I built up my toolkit over time, starting with just a drill and a level. As I took on more projects, I added to my collection.
Are there space-saving designs for small rooms?
Absolutely! Floating shelves are one of the best ways to maximize space in a small room. Here are a few ideas I’ve tried:
- Slim profiles – If you’re tight on space, go for narrower shelves. I used 1×12 maple boards in my craft room, and they fit perfectly in the small nook I created.
- Vertical storage – Instead of wide shelves, try stacking multiple narrow shelves vertically. This creates more storage space without taking up as much wall space.
- Corner shelves – Corners are often wasted space, but they’re perfect for floating shelves. I used them in our living room to display a collection of vintage cameras.
- Wall-mounted organizers – For a more functional look, try wall-mounted organizers. I used them in my pantry to hold spices and small cans.
I also love using floating shelves in bedrooms. They’re a great way to add storage without taking up floor space. I used them to hold books, jewelry, and small decor items.
How do I prevent sagging over time?
Sagging is one of the most common issues with floating shelves, but it’s easy to prevent if you follow these tips:
- Use kiln-dried hardwood like oak or maple. These materials are less likely to warp or sag over time.
- Choose heavy-duty brackets rated for the weight you plan to put on your shelves. I like the ones from Ultrashelf.
- Distribute the weight evenly across the shelf. Don’t put all the heavy items on one side.
- Use internal supports if you’re using longer shelves. I added a piece of wood across the back of my kitchen shelf to give it extra support.
- Avoid overloading your shelves. Check the weight capacity and stick to it. I learned this the hard way when a shelf I overloaded sagged in the middle.
If you do notice sagging, you can often fix it by adding more supports or redistributing the weight. But it’s always better to prevent it in the first place!
What’s the difference between oil-rubbed and matte finishes?
If you’re staining your wood shelves, you’ll need to choose between oil-rubbed and matte finishes. Here’s how I decide:
- Oil-rubbed finishes – These enhance the natural grain of the wood and give it a warm, rich look. I used an oil-rubbed finish on my walnut shelves in the dining room, and it looks gorgeous. Oil-rubbed finishes are also more durable and easier to touch up.
- Matte finishes – These give the wood a smooth, modern look. I used a matte finish on my maple shelves in the craft room, and it pairs well with the bright colors I used for the edges. Matte finishes are great for a more contemporary look, but they can show scratches more easily.
I like to use Minwax finishes because they’re easy to apply and come in a wide range of colors. If you’re not sure which finish to choose, I recommend starting with an oil-rubbed finish. It’s more forgiving and looks great on just about any wood.
Can I mix materials for a unique look?
Absolutely! Mixing materials is one of my favorite ways to add visual interest to my shelves. Here are a few combinations I’ve tried:
- Wood and metal – I used this combination in my garage. I paired wood shelves with metal brackets for an industrial look. It’s a great way to add some warmth to a space that can feel a bit cold.
- Glass and wood – In my bathroom, I used glass shelves with wood brackets. It’s a clean, modern look that works well in a small space.
- Acrylic and LED lighting – For a fun, modern look, I used acrylic shelves with LED lighting in my teen daughter’s room. It’s a great way to add some color and personality to a space.
When mixing materials, it’s important to choose a cohesive color palette. For example, if you’re mixing wood and metal, stick to a similar finish. I used a dark walnut wood with black metal brackets in my garage, and it looks amazing.
Don’t be afraid to experiment! Mixing materials is a great way to express your personality and create a unique look. And if you’re not sure where to start, check out my post on 5 DIY projects to instantly add charm to your home for more inspiration.