
Peel-and-Stick Wallpaper: My Real-Life Tips for a Flawless Finish
Let me tell you, I’ve tried my fair share of home decor projects,some successful, some… well, let’s just say I learned a lot. But one of the easiest and most rewarding upgrades I’ve done in my house? Peel-and-stick wallpaper. No glue, no steam, no permanent commitment. Just me, a squeegee, and a roll of wallpaper that can transform a room in under an hour.
I’ll be honest,I was skeptical at first. I’d seen those DIY fails online where wallpaper bubbles up or peels off after a week. But after my first attempt in my home office (a soft floral pattern that made me feel like I was working in a cozy Parisian café), I was hooked. Now? I’ve used it in my living room, bathroom, even the inside of my closet (yes, really,more on that later).
If you’re thinking about giving peel-and-stick wallpaper a try, I’m here to share what I’ve learned,including the mistakes I made so you don’t have to. No fluff, no fake “expert” quotes. Just real talk from one DIY mom to another.
Why I Chose Peel-and-Stick Wallpaper for My Home
I’ll cut to the chase: I was tired of my living room looking like it was stuck in 2010. Paint was out of the question,I didn’t want to deal with the fumes or the prep work (and let’s be real, my kids would’ve touched the walls before the paint dried). Traditional wallpaper? Too permanent, too messy, and way too expensive if I changed my mind in six months.
That’s when I stumbled upon peel-and-stick wallpaper at Home Depot. I grabbed a small sample of a geometric pattern,nothing too wild, just enough to add some personality,and tested it on a small section of my living room wall. It went up smoother than I expected, and when I needed to adjust it, I just peeled it back and repositioned it. No damage, no stress.
Now, I’ve used it in multiple rooms, and here’s what I love about it:
- It’s foolproof (mostly). I’ve hung it in my bathroom (yes, even in a high-moisture area,more on that later), my home office, and even as a backsplash in my kitchen. As long as you prep the wall properly, it stays put.
- It’s removable. I rented my first house for three years, and peel-and-stick wallpaper let me add personality without worrying about getting my security deposit back. Now that I own, I still love it because I can swap out designs when I get bored (which, let’s be honest, happens more often than I’d like to admit).
- It’s affordable. A full roll of high-quality peel-and-stick wallpaper from brands like Tempaper & Co. or even the budget-friendly options at Home Depot runs about $50–$100, depending on the size and design. That’s a fraction of the cost of paint or traditional wallpaper,and way less hassle.
Oh, and one more thing,I love that I can wipe it down. My kids have “decorated” my walls with crayons more times than I can count, and a quick wipe with a damp cloth brings the wallpaper back to life. No touch-ups, no repainting. Just easy cleanup.
If you’re on the fence, try a small accent wall first. I started with a single wall in my living room, and now? I’m hooked. It’s the easiest way to refresh a space without the commitment (or the mess) of paint.
Exploring Versatile Design Options
One of the best things about peel-and-stick wallpaper? The options. Whether you want bold and modern or soft and classic, there’s a design out there for you. And trust me, I’ve tested a few.
From Floral Patterns to Bold Graphics
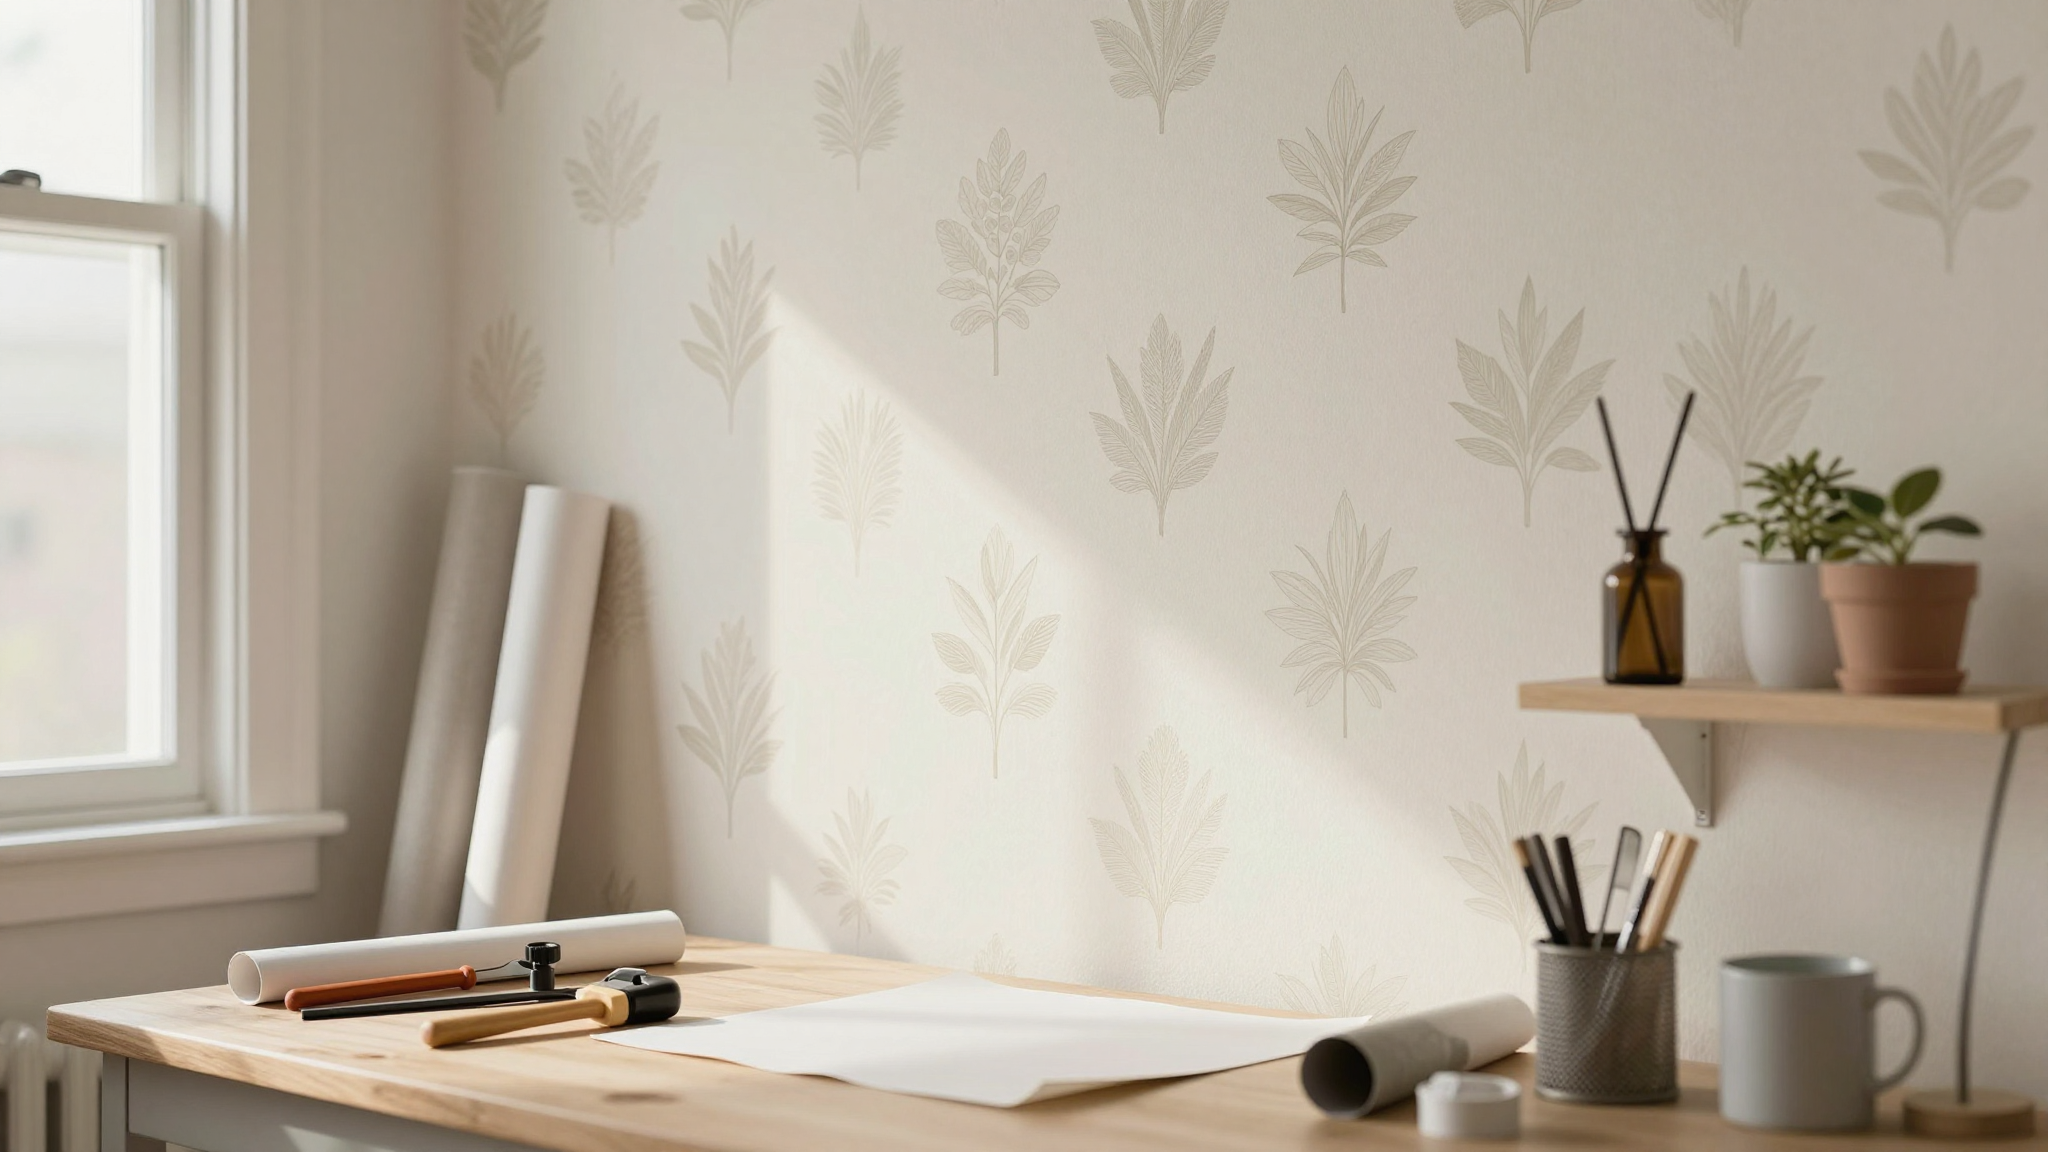
I’ll admit it,I’m a sucker for florals. There’s something so calming about a soft, botanical print, which is why I chose a delicate floral pattern for my home office. It’s feminine without being fussy, and it pairs perfectly with my neutral furniture. Plus, it makes me feel like I’m working in a garden (which is a nice escape when you’re staring at spreadsheets all day).
But florals aren’t the only game in town. If you want something with more personality, bold graphics are where it’s at. I used a geometric print in my living room, and it instantly gave the space a modern, artsy vibe. The best part? It’s so easy to mix and match. I paired the geometric wallpaper with neutral throw pillows and a rug in warm tones, and the whole room felt cohesive without being matchy-matchy.
Pro tip: If you’re new to patterns, start small. Hang peel-and-stick wallpaper on one accent wall instead of going full-room. That way, you can test the look without committing to a whole space. I did this in my guest bedroom with a subtle striped pattern, and it made the room feel larger and more intentional.
Mixing Colors and Textures for Impact
Color is everything in home decor. It sets the mood, ties the room together, and can even make a small space feel bigger (or a boring space feel exciting). With peel-and-stick wallpaper, you’ve got endless options,from soft pastels to deep jewel tones to bold, statement colors.
Here’s what I’ve learned about color:
- Warm colors (reds, oranges, yellows) make a room feel cozy and inviting. I used a warm terracotta print in my dining nook, and it instantly made the space feel like a hug. Perfect for winter!
- Cool colors (blues, greens, grays) create a calming, serene vibe. My bathroom has a soft seafoam-green wallpaper, and it feels like a spa every time I walk in.
- Neutrals (whites, beiges, blacks) are your best friend if you want a timeless look. I used a textured grasscloth wallpaper in my hallway, and it adds depth without overwhelming the space.
Texture is just as important as color. A smooth, glossy wallpaper will give a room a sleek, modern feel, while a textured option (like grasscloth or a metallic finish) adds warmth and dimension. I love using textured wallpaper in living areas because it makes the space feel more dynamic.
If you’re unsure where to start, here’s my advice:
- Pick a color that makes you happy. If you love it in a throw pillow, you’ll probably love it on a wall.
- Test small samples. I always buy a small sample roll first so I can see how the color and texture look in my lighting.
- Don’t be afraid to mix textures. Pair a smooth wallpaper with a textured rug or throw pillows for a layered look.
And if you’re still stuck? Look to your furniture and decor for inspiration. I matched the colors in my sofa to the wallpaper in my living room, and it tied the whole space together effortlessly.
Peel-and-Stick Wallpaper Product Roundup: My Top Picks
Not all peel-and-stick wallpaper is created equal. Some stick like a dream, while others peel off after a week (I’ve learned this the hard way). Here are the brands and designs I’ve tested and loved:
Patterns and Designs I’ve Tried (and Loved)
I’ve hung a lot of wallpaper in my house, and these are the designs that stood out:
- Geometric prints. I used a bold black-and-white geometric pattern in my living room, and it’s become my favorite accent wall. It’s modern, it’s fun, and it hides imperfections like a champ.
- Floral motifs. For my bedroom, I chose a soft, romantic floral print. It’s feminine but not overwhelming, and it pairs perfectly with my white bedding.
- Tropical prints. I went wild in my kitchen with a vibrant tropical print. It’s playful, it’s bold, and it makes me feel like I’m on vacation every time I cook.
- Grasscloth texture. I used this in my hallway for a natural, organic look. It’s subtle but adds so much depth to the space.
- Metallic finishes. For a touch of glam, I added a metallic wallpaper to my dining room. It’s perfect for special occasions and adds a little sparkle to everyday life.
Where do I buy it? I’ve had great luck with:
- Tempaper & Co. – Their designs are unique, and the quality is top-notch. I’ve used their grasscloth and metallic wallpapers, and they’ve held up beautifully.
- Home Depot – They’ve got a great selection of budget-friendly options, and I’ve found some hidden gems there.
- Amazon – Convenient, fast shipping, and plenty of reviews to help you decide. I’ve bought a few rolls from there, and they’ve all been easy to install.
Pro tip: If you’re buying online, always check the reviews. I once ordered a wallpaper that claimed to be “easy to remove,” but it left behind a sticky mess. Lesson learned,read the fine print!
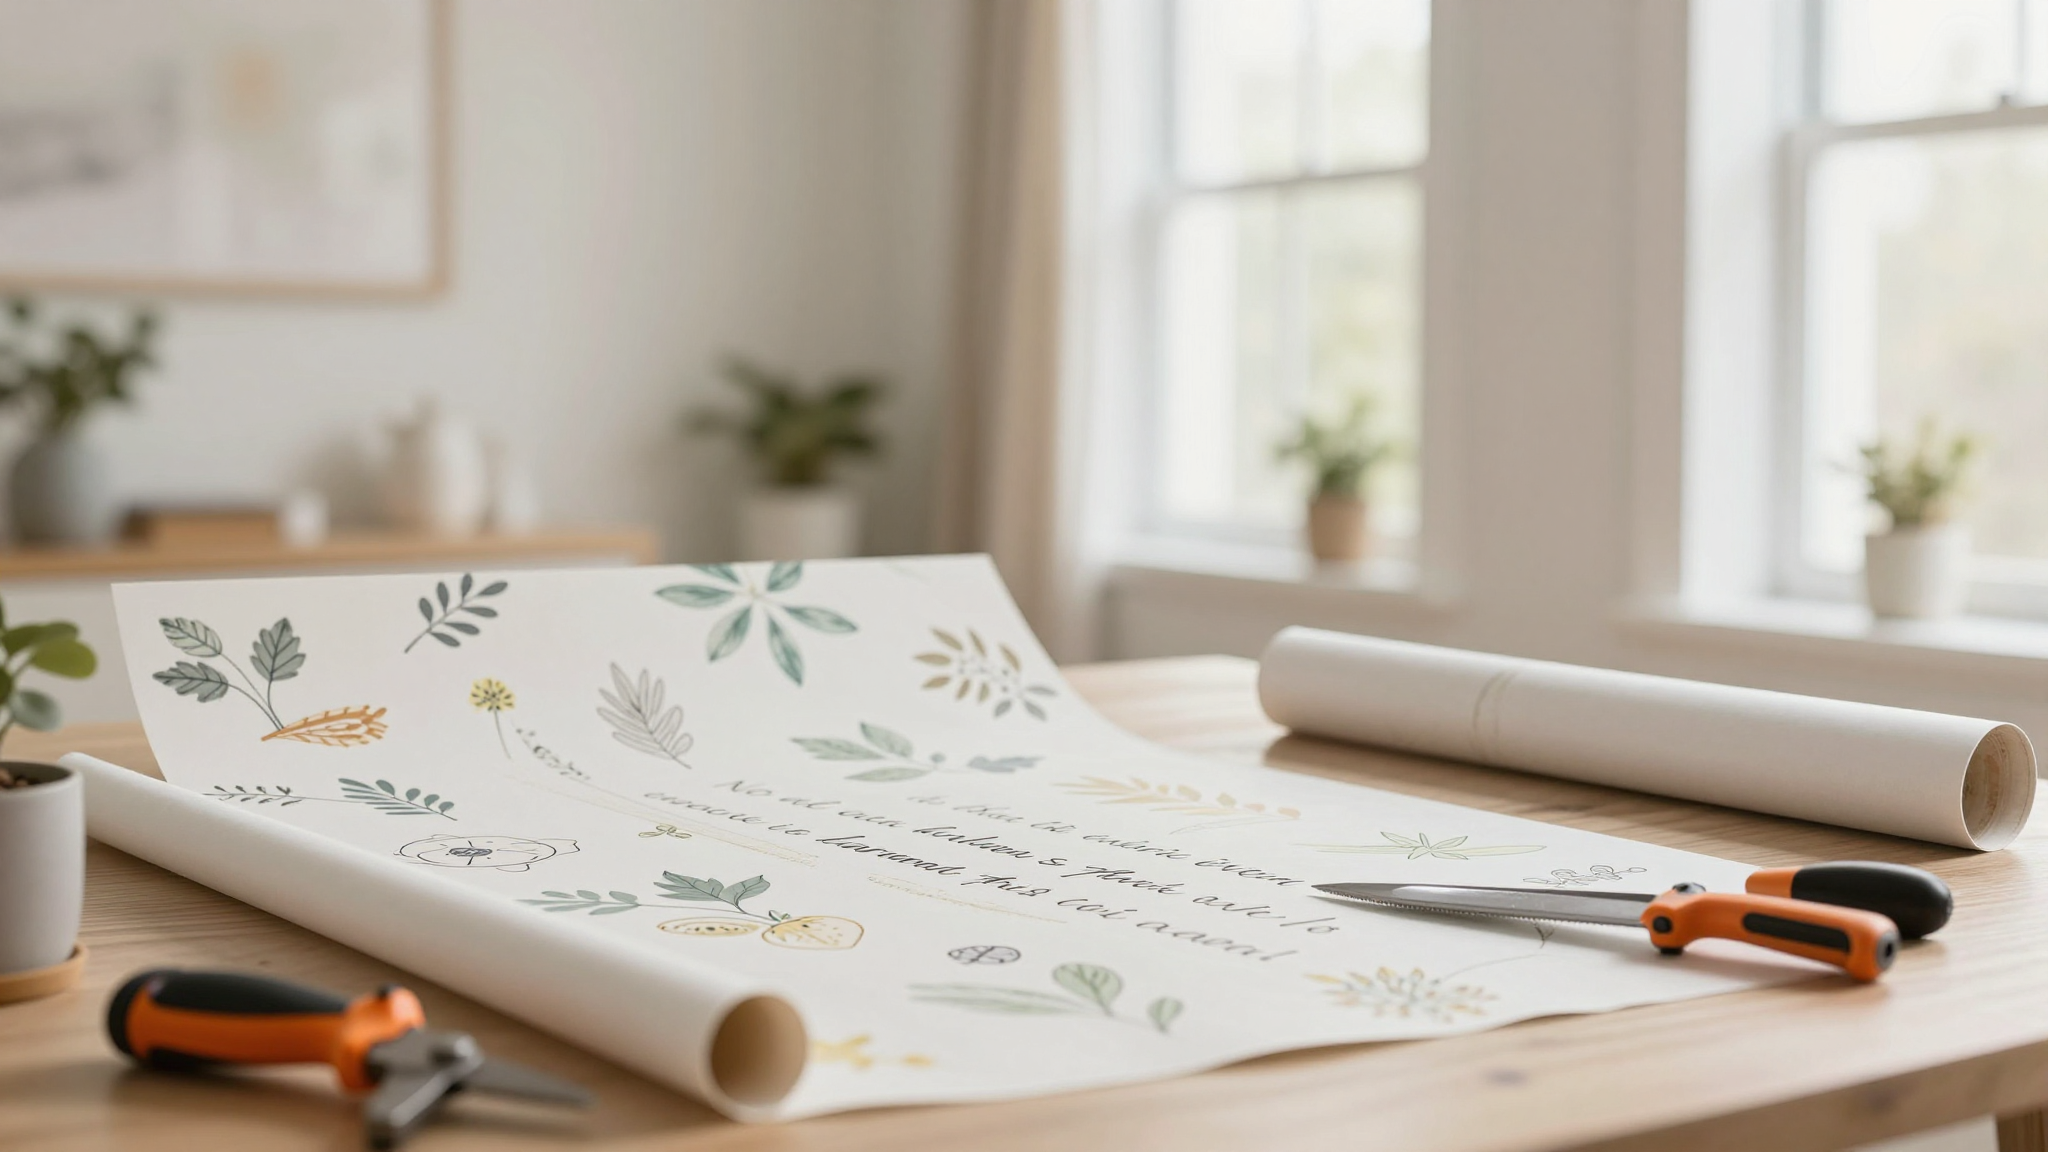
Simple Application: Tools, Techniques, and Tips
Alright, let’s talk about the fun part,hanging the wallpaper! I’ll walk you through my process, including the tools I use and the mistakes I’ve made (so you don’t have to).
Step-by-Step Installation Process
First, gather your tools. You don’t need anything fancy, but these are the essentials:
- A measuring tape (I use my favorite set from Home Depot,it’s durable and accurate).
- A utility knife (for cutting the wallpaper to size).
- A smoothing tool (I swear by a plastic squeegee,it’s cheap and does the job).
- A level (to make sure your first strip is straight).
- A pencil (for marking your starting point).
- Painter’s tape (to secure the edges while you smooth everything out).
Now, let’s get to work:
- Prep the wall. This is the most important step. Clean the wall with a damp cloth to remove dust and grime. If your wall is textured, you might want to sand it down slightly for a smoother finish. (I learned this the hard way when I tried to hang wallpaper over a bumpy drywall patch,it looked terrible.)
- Measure and cut. Measure the height of your wall and cut your wallpaper to size, leaving an extra inch or two at the top and bottom. I like to cut a few strips at once so I don’t have to keep stopping.
- Start at the top. Peel the backing off the first strip and align it with your pencil mark. Use your level to make sure it’s straight, then press it onto the wall, starting from the top and working your way down.
- Smooth it out. Use your squeegee to smooth the wallpaper from the center outward. This removes air bubbles and ensures a seamless finish. If you hit a bubble, don’t panic,just peel it back and re-stick it.
- Repeat. Line up the next strip with the pattern on the first one, peel the backing, and smooth it into place. Keep going until the wall is covered!
Oh, and one more thing,if you’re hanging wallpaper in a high-moisture area (like a bathroom or kitchen), give it 24 hours to fully adhere before you start using the space. I didn’t do this in my bathroom, and the wallpaper peeled at the edges after a few days. Live and learn!
Avoiding Common Pitfalls
I’ve made my fair share of mistakes with peel-and-stick wallpaper, and I’m here to save you from the same headaches. Here’s what I’ve learned:
- Don’t rush. I once tried to hang an entire wall in one afternoon and ended up with bubbles and misaligned patterns. Take your time,it’s worth it!
- Avoid stretching the wallpaper. If you pull it too tight, the pattern will distort. Just let it lay naturally against the wall.
- Don’t skip the level. I hung a strip without checking if it was straight, and I spent an hour trying to fix it. Always use a level for your first strip!
- Test a small section first. Before you commit to a whole wall, hang a small piece in a corner or behind a piece of furniture. This way, you can make sure you like the look (and that it sticks properly).
And if something goes wrong? Don’t panic. Peel-and-stick wallpaper is forgiving. If a strip doesn’t stick, just peel it off and try again. If you get a bubble, carefully lift the wallpaper and smooth it out. It’s not permanent, so take a deep breath and troubleshoot.
Creative Applications of Peel-and-Stick Wallpaper in Your Space
I’ll be honest,I’ve gotten a little too creative with peel-and-stick wallpaper. It’s not just for walls anymore. Here are some of the unexpected (but genius) ways I’ve used it in my home:
Unexpected Areas to Make Bold Statements
I’ll start with the weirdest one: my closet. Yes, you read that right. I lined the inside of my closet with a vibrant floral print, and it’s become my favorite part of my morning routine. Opening the doors feels like stepping into a secret garden. It’s a small detail, but it makes getting dressed so much more fun.
Another unexpected spot? My ceiling. I know, I know,it sounds crazy. But I hung a geometric print on the ceiling of my home office, and it instantly became a focal point. It’s bold, it’s unexpected, and it makes the room feel dynamic. Plus, it’s a great conversation starter!
If you’re feeling adventurous, try these ideas:
- Line the inside of a bookshelf for a pop of color.
- Cover the back of a headboard for a cozy, personalized touch.
- Add a patterned backsplash in your kitchen (just make sure it’s a moisture-resistant design!).
- Create an accent wall in a hallway or stairwell.
Moisture-Proof Spaces: Bathrooms and Kitchens
I was skeptical about using peel-and-stick wallpaper in my bathroom,what if it peeled? What if it got moldy? But after some research, I found a moisture-resistant option, and it’s been a game-changer. I hung a tropical print behind my vanity, and it’s transformed the space into a spa-like retreat.
Pro tip: If you’re using wallpaper in a bathroom or kitchen, look for a vinyl or PVC option. These materials are water-resistant and easy to clean. I wipe down my bathroom wallpaper with a damp cloth every few weeks, and it looks brand new.
In my kitchen, I used a sleek metallic wallpaper as a backsplash. It’s easy to wipe down (a must with three kids!) and adds a touch of glam to the space. Plus, it’s way cheaper than tile.
Grasscloth Texture Addition
If you want to add texture to a room without going overboard, grasscloth is your best friend. I used it on an accent wall in my living room, and it’s given the space a warm, organic feel. It pairs perfectly with modern furniture and adds depth without overwhelming the room.
I’ve also used grasscloth in my dining room, where it complements my mid-century modern table and chairs. It’s a great way to add a little nature to your decor without bringing in actual plants (which, let’s be honest, I kill within a week).
Unique Application Techniques
Peel-and-stick wallpaper isn’t just for walls. I’ve used it to:
- Update a plain dresser. I covered the drawers with a floral print, and it instantly looked custom-made.
- Refresh my bookshelves. A bold geometric pattern on the back of the shelves made them feel like a built-in feature.
- Add a pop of color to my desk. I lined the inside of the drawers with a bright print, and now opening them feels like a little surprise.
If you’re feeling stuck, think outside the box. Peel-and-stick wallpaper is a great way to add personality to unexpected spaces,just make sure whatever you’re covering is clean and smooth.
Adding Complementary Accessories to Elevate Your Space
Here’s the thing about peel-and-stick wallpaper: it’s not just about the wall. The real magic happens when you pair it with the right accessories. I’ve learned a few tricks over the years to make my wallpaper look even better.
Coordinating with Furniture and Décor
When I redid my living room with a bold geometric wallpaper, I was nervous it would clash with my existing furniture. But I took a deep breath and trusted my instincts. I kept the furniture neutral (a gray sofa, a wooden coffee table) and added a few pops of color with throw pillows and a rug. The result? A cohesive, stylish space that feels intentional.
Here’s how I do it:
- Pick a color from the wallpaper. If your wallpaper has a mix of colors, choose one dominant hue and build your accessories around it. In my living room, I pulled the blue from the geometric print and used it in my throw pillows.
- Keep furniture neutral. If your wallpaper is bold, let it be the star of the show. Neutral furniture (beige, gray, black) will let the wallpaper shine.
- Add texture. A chunky knit throw, a faux fur pillow, or a woven basket can add depth to the room and balance out a busy wallpaper.
And if you’re not sure where to start? Look to your wallpaper for inspiration. I once used a floral wallpaper in my bedroom and pulled the greens and pinks into my bedding and curtains. It tied the whole room together effortlessly.
Matching Color Schemes for a Cohesive Look
Color is everything in decor, and peel-and-stick wallpaper makes it easy to experiment. Here’s how I approach color schemes:
- Start with a color wheel. I keep a basic color wheel handy when I’m decorating. It helps me see which colors complement each other. For example, blue and orange are complementary, while red and green are analogous.
- Stick to a 3-color rule. Too many colors can feel overwhelming. I usually pick one dominant color (from the wallpaper), one secondary color (for accents), and one neutral (for balance).
- Add metallic touches. Gold, silver, or brass can elevate a space instantly. I added gold-framed mirrors to my living room, and it made the geometric wallpaper look even more luxurious.
Pro tip: If you’re unsure about a color, test it with a sample. I once bought a wallpaper in a deep teal, only to realize it was too dark for my space. I returned it and went with a softer shade instead. Always trust your gut!
Incorporating Texture and Pattern for a Unique Look
One of the things I love most about peel-and-stick wallpaper? It lets me play with texture and pattern in ways I never thought possible. Here’s how I’ve used it to add depth and personality to my home.
Pairing Grasscloth with Modern Prints
I’m obsessed with the way grasscloth and modern prints look together. The grasscloth adds a natural, organic texture, while the print brings in a bold, contemporary edge. In my living room, I used a grasscloth accent wall and paired it with geometric throw pillows. The contrast is stunning!
I’ve also done this in my dining room, where I combined grasscloth with a floral wallpaper. The result? A space that feels both modern and cozy. It’s the perfect balance of old and new.
Equilibrium of Design Components
Here’s what I’ve learned about balancing texture and pattern:
- Start with a neutral base. If you’re using a bold wallpaper, keep the rest of the room’s textures simple. A neutral sofa, a wooden coffee table, and a few textured pillows will keep things from feeling overwhelming.
- Use pattern in small doses. If your wallpaper is busy, keep other patterned items (like rugs or throw pillows) minimal. I once paired a floral wallpaper with a striped rug, and it looked like a circus tent. Lesson learned!
- Mix materials. Don’t be afraid to combine different textures,wood, metal, fabric, and wallpaper can all work together. In my bedroom, I paired a textured wallpaper with a wooden headboard and a metallic lamp. It’s a cozy, eclectic mix.
And if you’re still unsure? Start small. I hung a single strip of patterned wallpaper in my hallway as a test, and it gave me the confidence to go bigger in other rooms.
Maximizing Flexibility: Change Your Look Without Commitment
One of the best things about peel-and-stick wallpaper? I can change my mind. Want a new look for spring? Swap out the wallpaper. Tired of your kitchen backsplash? Peel it off and try something new. It’s the ultimate decor hack for someone who loves to refresh their space (like me!).
Mix and Match Trends for Seasonal Updates
I love switching up my decor with the seasons. In the spring, I go for soft florals and pastel colors. In the fall, I bring in warm tones and cozy textures. And in the winter? Bold patterns and metallic accents are my jam.
Here’s how I do it:
- Spring/Summer: Light florals, stripes, and breezy patterns. I used a soft floral wallpaper in my bedroom this past spring, and it made the whole room feel fresh.
- Fall/Winter: Rich colors, plaids, and metallic touches. This winter, I swapped in a deep red geometric print in my living room, and it’s given the space a cozy, festive feel.
Pro tip: If you’re not ready to commit to a full wall, try a peel-and-stick wallpaper border. I used one in my kitchen to define the space above the cabinets, and it’s a great way to test a trend without going all in.
Fast Upgrades Using White Accents and Bold Floral Prints
Sometimes, all you need is a quick refresh. I recently updated my bedroom by adding a bold floral wallpaper to one wall and pairing it with white bedding and curtains. It’s a simple change, but it made the whole room feel brighter and more intentional.
In my kitchen, I used a white peel-and-stick wallpaper as a backsplash and paired it with a subtle floral print on the adjacent wall. The contrast is clean and modern, and it’s easy to switch out when I get bored.
Preparing for Easy Updates
If you’re anything like me, you love a good decor refresh. Here’s how I make it easy:
- Start with a neutral base. I keep my furniture and large decor pieces neutral so I can easily swap out wallpaper or accessories. My sofa is gray, my curtains are white, and my rug is a simple jute. It’s the perfect backdrop for any wallpaper!
- Invest in removable decor. I use peel-and-stick wallpaper, removable wall hooks, and washable throw pillows. It makes updating my space a breeze.
- Plan ahead. I keep a mood board of my favorite wallpaper designs and color schemes. That way, when I’m ready for a change, I already know what I want.
And if you’re not sure where to start? Try a small project first. I hung peel-and-stick wallpaper on the inside of my pantry doors before I committed to a whole wall. It was a great way to test the look (and the durability) without a big investment.
Final Thoughts (and a Challenge for You!)
Peel-and-stick wallpaper has been a game-changer in my home. It’s easy to install, easy to remove, and,most importantly,it lets me express my style without the commitment of paint or traditional wallpaper. Whether I’m refreshing a whole room or just adding a pop of color to a small space, it’s my go-to decor hack.
So, here’s my challenge to you: Pick one wall in your home and give peel-and-stick wallpaper a try. Start small,maybe an accent wall in your bedroom or a backsplash in your kitchen. Trust me, once you see how easy it is, you’ll be hooked.
And if you’re feeling inspired, check out some of my other DIY projects:
- 5 DIY Projects to Instantly Add Charm to Your Home
- Easy DIY Projects to Give Your Bedroom a Makeover
- DIY Accent Walls: 10 Creative Ideas for Every Room
Happy decorating! And if you try peel-and-stick wallpaper, I’d love to see your results. Tag me on Instagram @christinaprojects,I love seeing how others get creative with their spaces.