
How I Built My Own Flower Box Planters (And Why You Should Too)
Last spring, I decided to tackle a project that had been on my mind for years: building my own flower box planters. I’d seen so many gorgeous ones in magazines and on Instagram, but I wanted something that was mine,something that matched our home’s farmhouse vibe while being functional enough to hold my herb garden and a few cheerful annuals. What started as a simple weekend project turned into a full-blown obsession, and now? I’ve got planters on my front porch, hanging by my kitchen window, and even a few stacked vertically in our tiny backyard. They’ve become one of my favorite parts of our home, and I’m here to tell you why you should try it too.
I’ll be honest,my first attempt was a disaster. I grabbed some cheap lumber from the discount bin at Home Depot, didn’t pre-drill my holes, and ended up with a splintered mess that looked like it belonged in a haunted house, not on my porch. But I learned from my mistakes, and now I’m sharing everything I wish I’d known from the start. Whether you’re looking to add a pop of color to your patio, bring some greenery into your apartment, or just want a fun DIY project to tackle this weekend, flower box planters are the way to go. They’re affordable, customizable, and,once you get the hang of it,surprisingly easy to build.
Oh, and if you’re anything like me, you’ll love that they’re a great way to upcycle materials. I’ve turned old wooden crates, pallets, and even a broken bookshelf into planters, and I’ll show you how to do it too. Plus, they’re a fantastic way to add character to your home without breaking the bank. If you’re ready to dive in, let’s get started!
Why I Fell in Love with DIY Flower Box Planters
I’ll admit it,I was skeptical at first. I mean, how hard could it be to buy a planter, right? But then I realized that store-bought options never quite matched what I had in mind. They were either too generic, too expensive, or just didn’t fit the aesthetic I was going for. That’s when I decided to take matters into my own hands.
One of the biggest perks of DIY planters? They’re crazy customizable. I wanted something that matched the rustic wood tones of our front porch, so I chose cedar planks from Home Depot (they’re naturally rot-resistant, which is a game-changer for outdoor projects). I also added a little extra depth to the box so I could fit my basil and tomato plants without them getting root-bound. The result? A planter that’s not only functional but also looks like it’s been part of our home forever.
And let’s talk about cost. I’ve seen some gorgeous planters at garden centers that cost upwards of $150. Meanwhile, my cedar box cost me about $40 in materials, and I had most of the tools already in my garage. Plus, I can make as many as I want without worrying about matching sets or limited sizes. If I want a taller planter for my sunflowers or a narrower one for my herbs, I can build it myself.
Durability is another huge plus. I’ve had planters crack in the winter because they weren’t weatherproof, or warp because they weren’t sealed properly. But when you build your own, you control the quality of the materials. I used outdoor-rated wood stain on my cedar boxes, and they’ve held up beautifully through two winters and one particularly brutal summer. No cracks, no warping,just happy plants and a porch that looks like it’s straight out of a magazine.
Oh, and here’s a little secret: DIY planters make amazing gifts. Last Christmas, I built a set of small herb planters for my sister, and she still talks about how much she loves them. They’re practical, personal, and way more meaningful than anything you’d find in a store.
If you’re still on the fence, think about this: planters aren’t just for flowers. I’ve used mine for everything from growing my own salad greens to creating a cozy nook for my cat to nap in (yes, she’s claimed one as her personal sunbathing spot). They add life to your space, improve air quality, and,let’s be real,make you feel like a total adult who’s got their life together. (Even if you’re just barely keeping your succulents alive, like me.)
If you’re ready to give it a try, stick around. I’ll walk you through exactly how I built my planters, share my favorite materials and tools, and even throw in a few styling tips to make your space look like a million bucks. And if you’re anything like I was at the start, don’t worry,I’ll also tell you about the mistakes I made (and how to avoid them).
My Top Picks for DIY Flower Box Planters
Before you start building, it’s worth taking a look at some of the best options out there,whether you’re buying pre-made planters or just gathering inspiration. I’ve tested a few over the years, and here are the ones that actually held up to my (sometimes brutal) gardening habits.
Best for Indoor Spaces: Self-Watering Planters from Crescent Garden
If you’re anything like me, you’ve killed more than a few plants because you forgot to water them. That’s why I love Crescent Garden’s self-watering planters. They’ve got a built-in reservoir that keeps your plants hydrated for up to a week, which is a lifesaver when life gets busy. I’ve got one on my kitchen windowsill, and my herbs have never been happier (or greener).
The best part? They come in a ton of styles, from sleek modern designs to rustic wooden ones. I went with a white ceramic planter for my kitchen because it matches my farmhouse sink, but they’ve got options for every decor style. And if you’re renting, these are perfect because they’re lightweight and easy to move when you’re ready to take your plants with you.
Best for Outdoor Spaces: Weatherproof Resin Pots from Home Depot
I’ll be honest,my first outdoor planters were a disaster. I bought a couple of cheap ceramic pots from a big-box store, and after one winter, they cracked right down the middle. Lesson learned: if you want something that lasts outside, you’ve got to invest in quality materials.
That’s why I now swear by Home Depot’s weatherproof resin pots. They’re lightweight, won’t crack in the cold, and come in a ton of colors. I’ve got a set of black resin pots on my back patio, and they’ve been holding up beautifully for two years now. No cracks, no fading,just happy plants and a porch that looks put-together.
Pro tip: If you’re going for a more natural look, pair these with some gravel or river rocks. It hides the plastic base (which can look a little cheap if you’re not careful) and adds a nice textural element to your planters.
Versatile Options: Stackable Cedar Boxes (My Personal Favorite)
If you’re short on space,like I am in my tiny backyard,stackable cedar boxes are a game-changer. I built a set of three different-sized boxes and stacked them against my fence, and now I’ve got a vertical garden that’s packed with herbs, flowers, and even a few veggies. It saves so much space and looks incredibly intentional.
I used cedar because it’s naturally rot-resistant, but you could also use pressure-treated pine if you’re on a budget. Just make sure to seal it with an outdoor wood stain to keep it looking fresh. And if you’re not into building, you can find pre-made cedar planters at places like Crescent Garden or even at your local hardware store.
Oh, and here’s a fun idea: if you’re feeling extra creative, you can add wheels to the bottom of your planters. I did this with one of my cedar boxes so I can move it around depending on the season. It’s been a lifesaver when I need to shift things for more sunlight.
How to Choose the Right Planter for Your Space
Alright, let’s talk about how to pick the perfect planter for your needs. I’ve made some questionable choices over the years (looking at you, tiny pot for my massive tomato plant), so I’ve learned a thing or two about what works and what doesn’t.
Size and Shape: Don’t Guess,Measure!
One of the biggest mistakes I made early on was underestimating how much space my plants would need. I bought a cute little 12-inch pot for my tomato plant, and by the end of the summer, it was root-bound and struggling. Now, I always follow the 2-inch rule: whatever the diameter of your plant’s root ball, add 2 inches to the pot’s size. That gives your plant room to grow without drowning in soil.
Shape matters too. Tall, narrow planters are great for vertical plants like snapdragons or herbs, while wide, shallow ones work better for spreading plants like lettuce or strawberries. And if you’re short on space, consider a vertical planter. I built one out of old pallets, and now I’ve got a thriving herb garden that takes up almost no room at all.
Pro tip: If you’re not sure what size to go with, think about where the planter will live. A balcony might need lightweight, shallow planters, while a patio can handle heavier, deeper ones. And if you’re growing veggies, go for something at least 12 inches deep,trust me, your tomatoes will thank you.
Color: Let Your Planter Do the Talking
I’ll be the first to admit that I have a serious weakness for colorful planters. My front porch is a rainbow of terracotta, white, and even a few bright blue pots I found at a flea market. But color isn’t just about aesthetics,it can totally transform the vibe of your space.
Here’s what I’ve learned:
- Bold colors (like red, blue, or yellow) make a statement and draw the eye. I used a bright red planter on my porch to create a focal point, and it instantly made the space feel more inviting.
- Neutral tones (white, gray, beige) blend seamlessly into any decor. They’re great if you want your plants to be the star of the show.
- Earthy tones (green, brown, black) give a natural, organic feel. I love these for my garden because they just belong there.
If you’re not sure what color to choose, grab a few swatches from your local hardware store and hold them up against your space. I did this before painting my cedar boxes, and it saved me from a very regrettable shade of teal.
Material Matters: What’s Worth the Investment?
Not all planters are created equal, and the material you choose can make or break your project. Here’s what I’ve found works best:
- Fiberglass: Lightweight, weather-resistant, and comes in a ton of colors. I’ve got a fiberglass planter on my back deck, and it’s held up beautifully through rain, snow, and even a hailstorm. It’s also great if you’re renting because it’s easy to move.
- Wood: Gives a natural, rustic look. Cedar is my top pick because it’s rot-resistant, but you can also use pressure-treated pine if you’re on a budget. Just make sure to seal it with an outdoor stain or paint.
- Metal: Super sleek and modern, but it can get very hot in the sun. I’ve got a black metal planter on my patio, and I had to add a layer of mulch to protect my plants’ roots from the heat.
- Ceramic: Gorgeous and stylish, but not the most durable. I learned this the hard way when one of my ceramic pots cracked in the first frost. If you love the look, go for it,but keep it indoors or in a sheltered spot.
Oh, and here’s a tip I wish I’d known sooner: drainage is non-negotiable. If your planter doesn’t have holes, your plants will drown, and nobody wants that. I’ve had to drill drainage holes into more than a few planters, so always check before you buy (or build!).
DIY Tips for Building Your Own Flower Box Planters
Alright, let’s get to the fun part: building your own planters! I’m going to walk you through exactly how I did it, including the tools I used, the mistakes I made (so you don’t have to), and a few tricks to make the process easier.
Tools You’ll Need (And Why I Love Mine)
Before you start, gather your tools. I’ve got a few favorites that make the process a breeze:
- Circular saw: This is a game-changer for cutting wood quickly and cleanly. I use a Skilsaw, and it’s been with me through countless projects. If you’re new to power tools, start with a smaller, more affordable model,you don’t need anything fancy for this project.
- Drill: You’ll need this for pre-drilling holes (trust me, it saves you from splintered wood). My DeWalt drill is my go-to,it’s powerful but lightweight, and the battery lasts forever.
- Sander: Sanding the edges of your planter is so important. Nobody wants a splinter from their flower box! I love my random orbit sander because it’s fast and leaves a smooth finish.
- Measuring tape and pencil: Duh, but I can’t tell you how many times I’ve skipped measuring and regretted it. Always double-check your measurements before cutting!
- Wood glue and screws: For a sturdy planter, you’ll want to use both. The glue adds extra strength, while the screws hold everything in place. I like Titebond III for wood projects,it’s waterproof and dries clear.
If you don’t already have these tools, don’t let that stop you! Home Depot and Lowe’s rent tools by the hour, and you can often find affordable starter kits online. I also recommend checking out your local Facebook Marketplace or community boards,people often sell gently used tools for a fraction of the price.
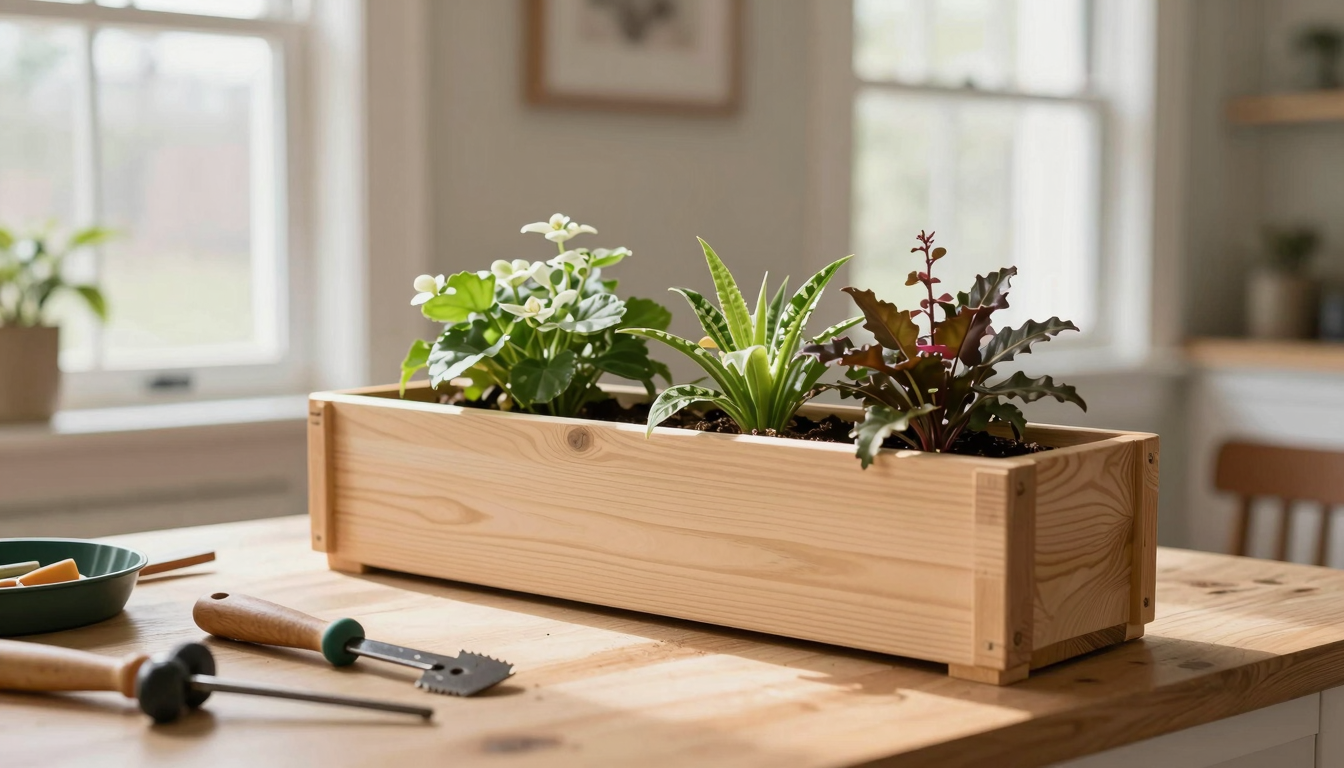
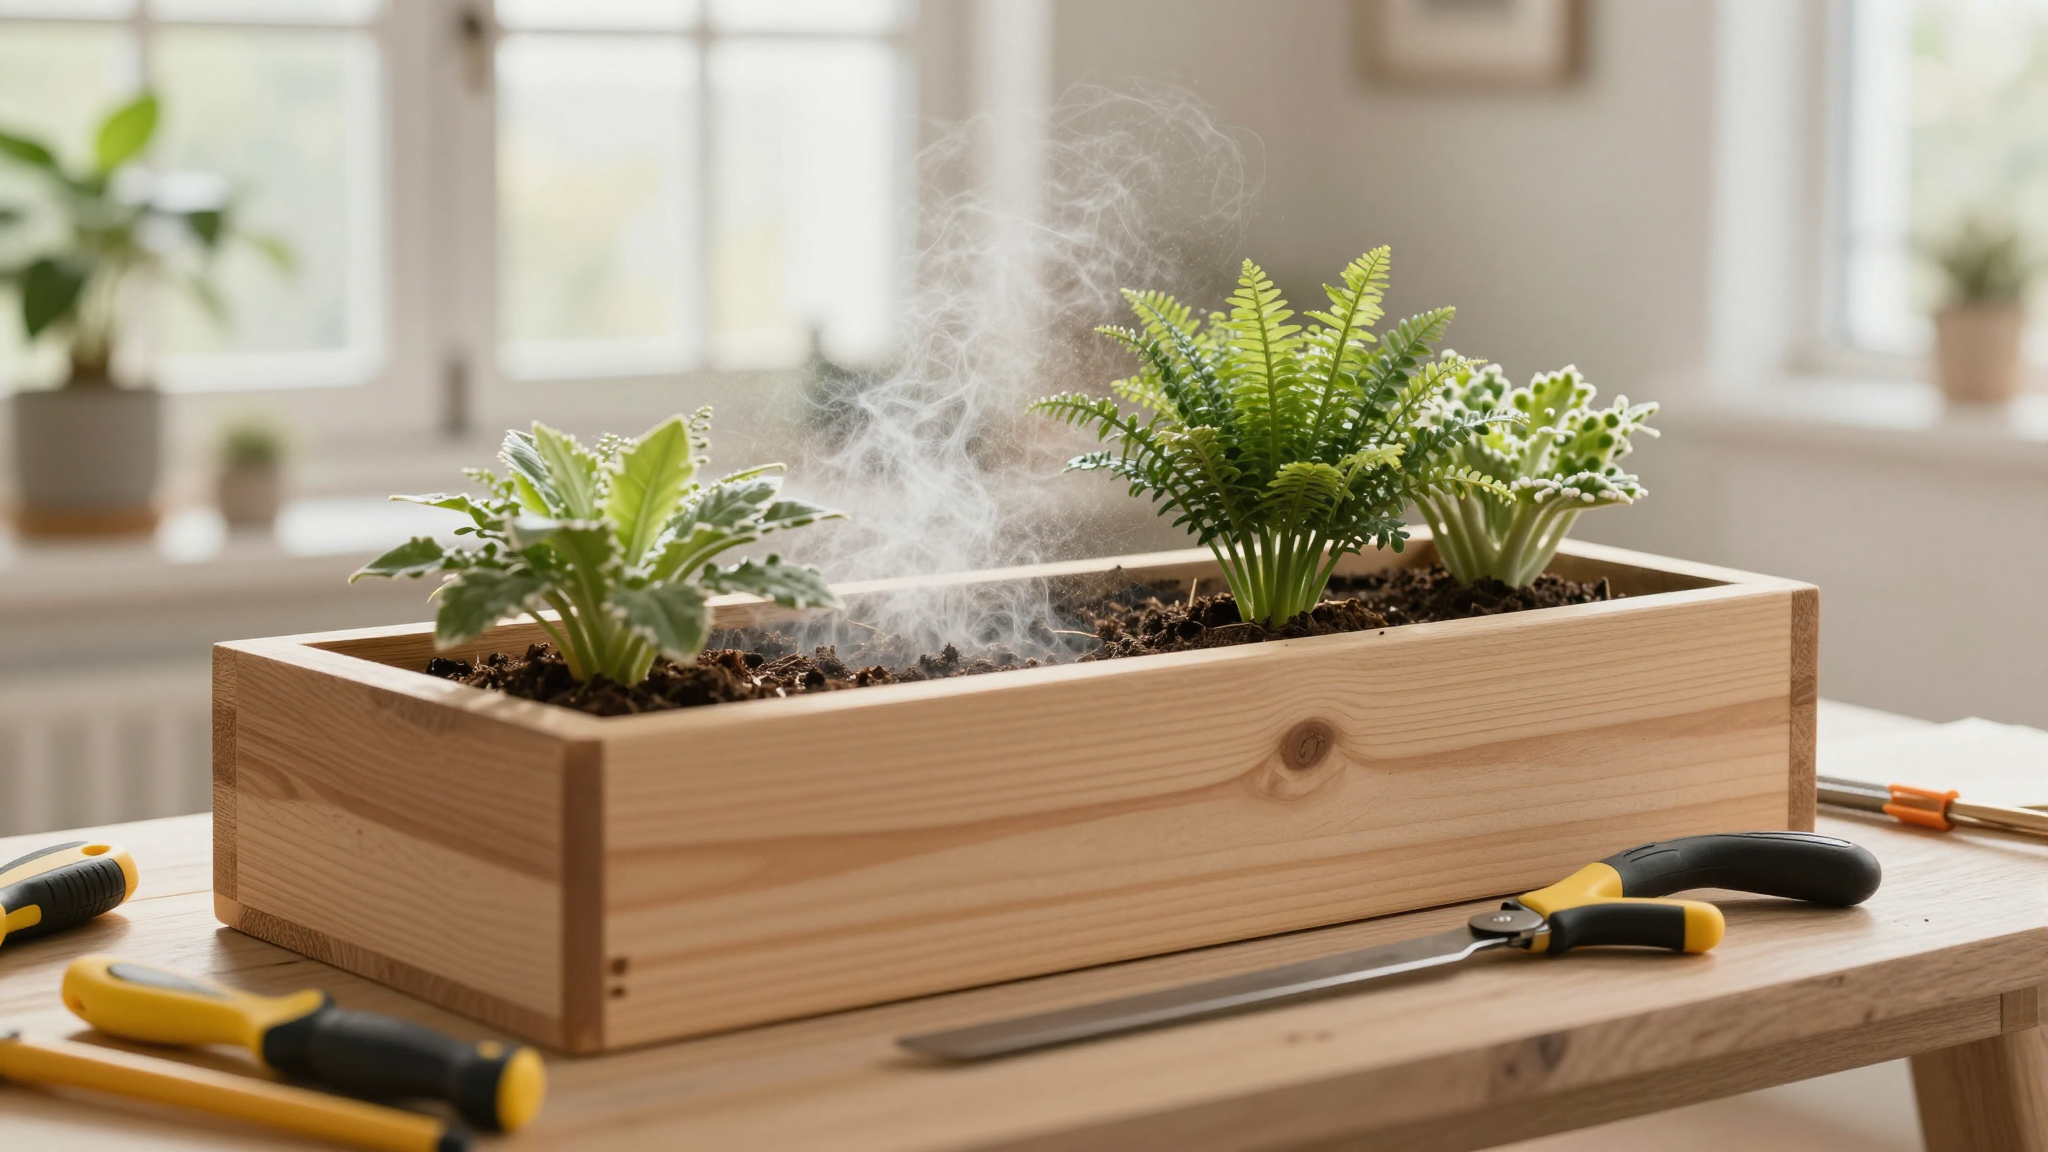
Building a Cedar Flower Box (Step by Step)
Alright, let’s build! This is the exact process I followed for my cedar planters, and it’s foolproof (as long as you measure twice and cut once, that is).
- Cut your wood to size. I used 1×6 cedar planks for my planters because they’re wide enough to hold soil but not too heavy. For a standard flower box, I cut four pieces: two at 36 inches (the length of my porch), and two at 12 inches (the depth). If you’re building a taller planter, adjust the depth accordingly.
- Pre-drill your holes. This is critical if you don’t want splintered wood. I used a 1/8-inch drill bit to pre-drill holes along the edges of the wood, about 1/2 inch in from the corners. This gives the screws a place to go without splitting the wood.
- Assemble the box. Lay out your pieces in a rectangle shape, and use wood glue along the edges before screwing them together. I used 2-inch deck screws for extra strength. Clamp the pieces together while the glue dries to keep everything aligned.
- Sand the edges. Trust me on this one,sanding makes a huge difference. I used 80-grit sandpaper to smooth out the rough edges, then switched to 120-grit for a finer finish. It’s tedious, but your hands (and your plants) will thank you.
- Add drainage holes. If your planter doesn’t have them, drill a few holes in the bottom. I used a 1/2-inch drill bit and spaced them about 4 inches apart. This keeps water from pooling and rotting your wood.
- Stain or paint (optional). If you want to protect your wood, I recommend sealing it with an outdoor wood stain. I used Behr Premium Wood Stain in a natural tone to keep the cedar’s grain visible. If you’re feeling bold, you can paint your planter instead,just make sure to use an outdoor-rated paint.
Pro tip: If you’re not into building from scratch, you can find pre-cut cedar planter kits at Home Depot. They’re a great middle ground if you want the look of a custom planter without the hassle of measuring and cutting.
Upcycling Old Materials (Because Waste is Waste)
If you’re anything like me, you love a good upcycling project. I’ve turned all sorts of random materials into planters, and I’m here to tell you it’s easier (and cheaper) than you think.
- Wooden crates: These are perfect for planters. I found a few at a flea market for a dollar each, sanded them down, and lined them with landscape fabric. Now they’re home to my favorite herbs. Just make sure to check for any chemical treatments if you’re using them for edible plants.
- Pallets: I know, I know,pallets can be hit or miss. But if you find a clean, untreated one, it’s a goldmine for DIY planters. I built a vertical pallet planter for my backyard, and it’s been a huge hit. Just make sure to sand it down and seal it with outdoor stain.
- Old bookshelves or dressers: If you’ve got a piece of furniture that’s seen better days, don’t toss it! I turned an old dresser into a planter by removing the drawers and lining the top with plastic. Now it’s home to my favorite succulents. You can also use bookshelves to create a tiered planter display.
Safety note: If you’re working with treated wood or materials you’re not sure about, wear gloves and a mask. I learned this the hard way when I got a rash from sanding a chemically treated pallet. Always better safe than sorry!
Finishing Touches: Making Your Planter Look Like a Million Bucks
Once your planter is built, it’s time to make it look amazing. Here are a few tricks I’ve picked up over the years:
- Add legs or wheels: If you want your planter to be movable, attach some caster wheels to the bottom. I did this with one of my cedar boxes so I can shift it around depending on the season. It’s a game-changer for small spaces!
- Paint or stain for a custom look: Don’t be afraid to get creative with color. I painted one of my planters a bright turquoise, and it’s become a conversation piece on my porch. Just make sure to use outdoor-rated paint or stain.
- Add a drip tray: If you’re worried about water damage, a drip tray is a must. I use plastic trays from the dollar store and line them with pebbles for a polished look.
Oh, and here’s a fun idea: if you’re feeling extra crafty, you can add a little personal touch. I carved my kids’ initials into one of my cedar planters, and it’s become a sweet keepsake. Just be careful not to carve too deep,you don’t want to weaken the wood.
Where to Buy Planters (If You’re Not Feeling DIY)
Look, I get it,sometimes you just want a planter now, and you don’t have the time (or energy) to build one. That’s totally fine! There are plenty of great options out there, whether you’re shopping online or in-store. Here’s where I’ve had the best luck:
Home Depot: The One-Stop Shop for Planters
Home Depot is my go-to for planters because they’ve got everything. I’ve found everything from sleek modern pots to rustic wooden planters, and their prices are hard to beat. Plus, their Garden Center has a ton of options for every style and budget.
Pro tip: If you’re buying multiple planters, ask about bulk discounts. I once bought six resin pots for a project, and the cashier gave me a 10% discount just for asking. It doesn’t hurt to try!
Crescent Garden: Custom Sizing and Premium Designs
If you want something truly unique, Crescent Garden is the way to go. They offer custom sizing, so you can get a planter that fits your exact space. I ordered a set of cedar planters from them for my backyard, and they arrived looking incredible. The craftsmanship is top-notch, and they’ve got a ton of styles to choose from.
Oh, and their self-watering planters are a lifesaver. I’ve got one on my kitchen windowsill, and my herbs have never been happier (or greener).
Specialty Nurseries: Unique Finds and Expert Advice
If you’re looking for something truly one-of-a-kind, check out your local nursery. I’ve found some gorgeous handmade planters at smaller shops, and the owners are usually more than happy to give you tips on how to care for your plants. Plus, supporting local businesses is always a win in my book.
Pro tip: Call ahead to see if they offer delivery or curbside pickup. I once ordered a huge planter from a local nursery, and they delivered it right to my doorstep,no hassle, no heavy lifting.
Online Retailers: Convenience at Your Fingertips
If you prefer shopping from home, online retailers like Amazon, Wayfair, and even Etsy have tons of planter options. I’ve found some great deals on Amazon, especially during their seasonal sales. Just make sure to read the reviews,some planters look amazing in photos but fall apart in real life.
Oh, and if you’re ordering multiple planters, keep an eye out for free shipping thresholds. I once saved $20 on a big order just by adding one more planter to my cart.
Customer Favorites: The Planters That Stole My Heart
After testing out a ton of planters over the years, these are the ones that actually held up to my (sometimes brutal) gardening habits. If you’re looking for inspiration, these are the ones I’d recommend:
Fiberglass Rectangle Planter (32″L x 16″W)
This is the planter that started it all. I bought it from Home Depot a few years ago, and it’s still going strong. It’s lightweight, weatherproof, and comes in a ton of colors. I chose a black one for my back patio, and it’s become the star of my outdoor space. The best part? It’s huge, so I can fit everything from tomatoes to petunias in there.
Pro tip: If you’re using this for veggies, add a layer of gravel at the bottom for better drainage. I learned this the hard way when my tomatoes got root rot.
Vertical Garden System (Perfect for Small Spaces)
If you’re short on space (like I am in my tiny backyard), a vertical garden system is a game-changer. I built one out of old pallets, but you can also find pre-made ones online. They’re perfect for herbs, succulents, or even small veggies. I’ve got mine mounted on my fence, and it’s become my favorite spot to sit and sip my coffee in the morning.
Oh, and here’s a fun idea: if you’re renting, you can use a vertical planter on your balcony. Just make sure it’s lightweight and has proper drainage.
Self-Watering Pot with Wick System
This is the planter that saved my sanity. I’m terrible at remembering to water my plants, so a self-watering pot was a total game-changer. I’ve got one on my kitchen windowsill, and my herbs have never been happier (or greener). The wick system keeps the soil moist for up to a week, which is a lifesaver when life gets busy.
Pro tip: If you’re using this for succulents, make sure to adjust the watering settings. They don’t like to sit in wet soil, so you might need to tweak the wick system a bit.
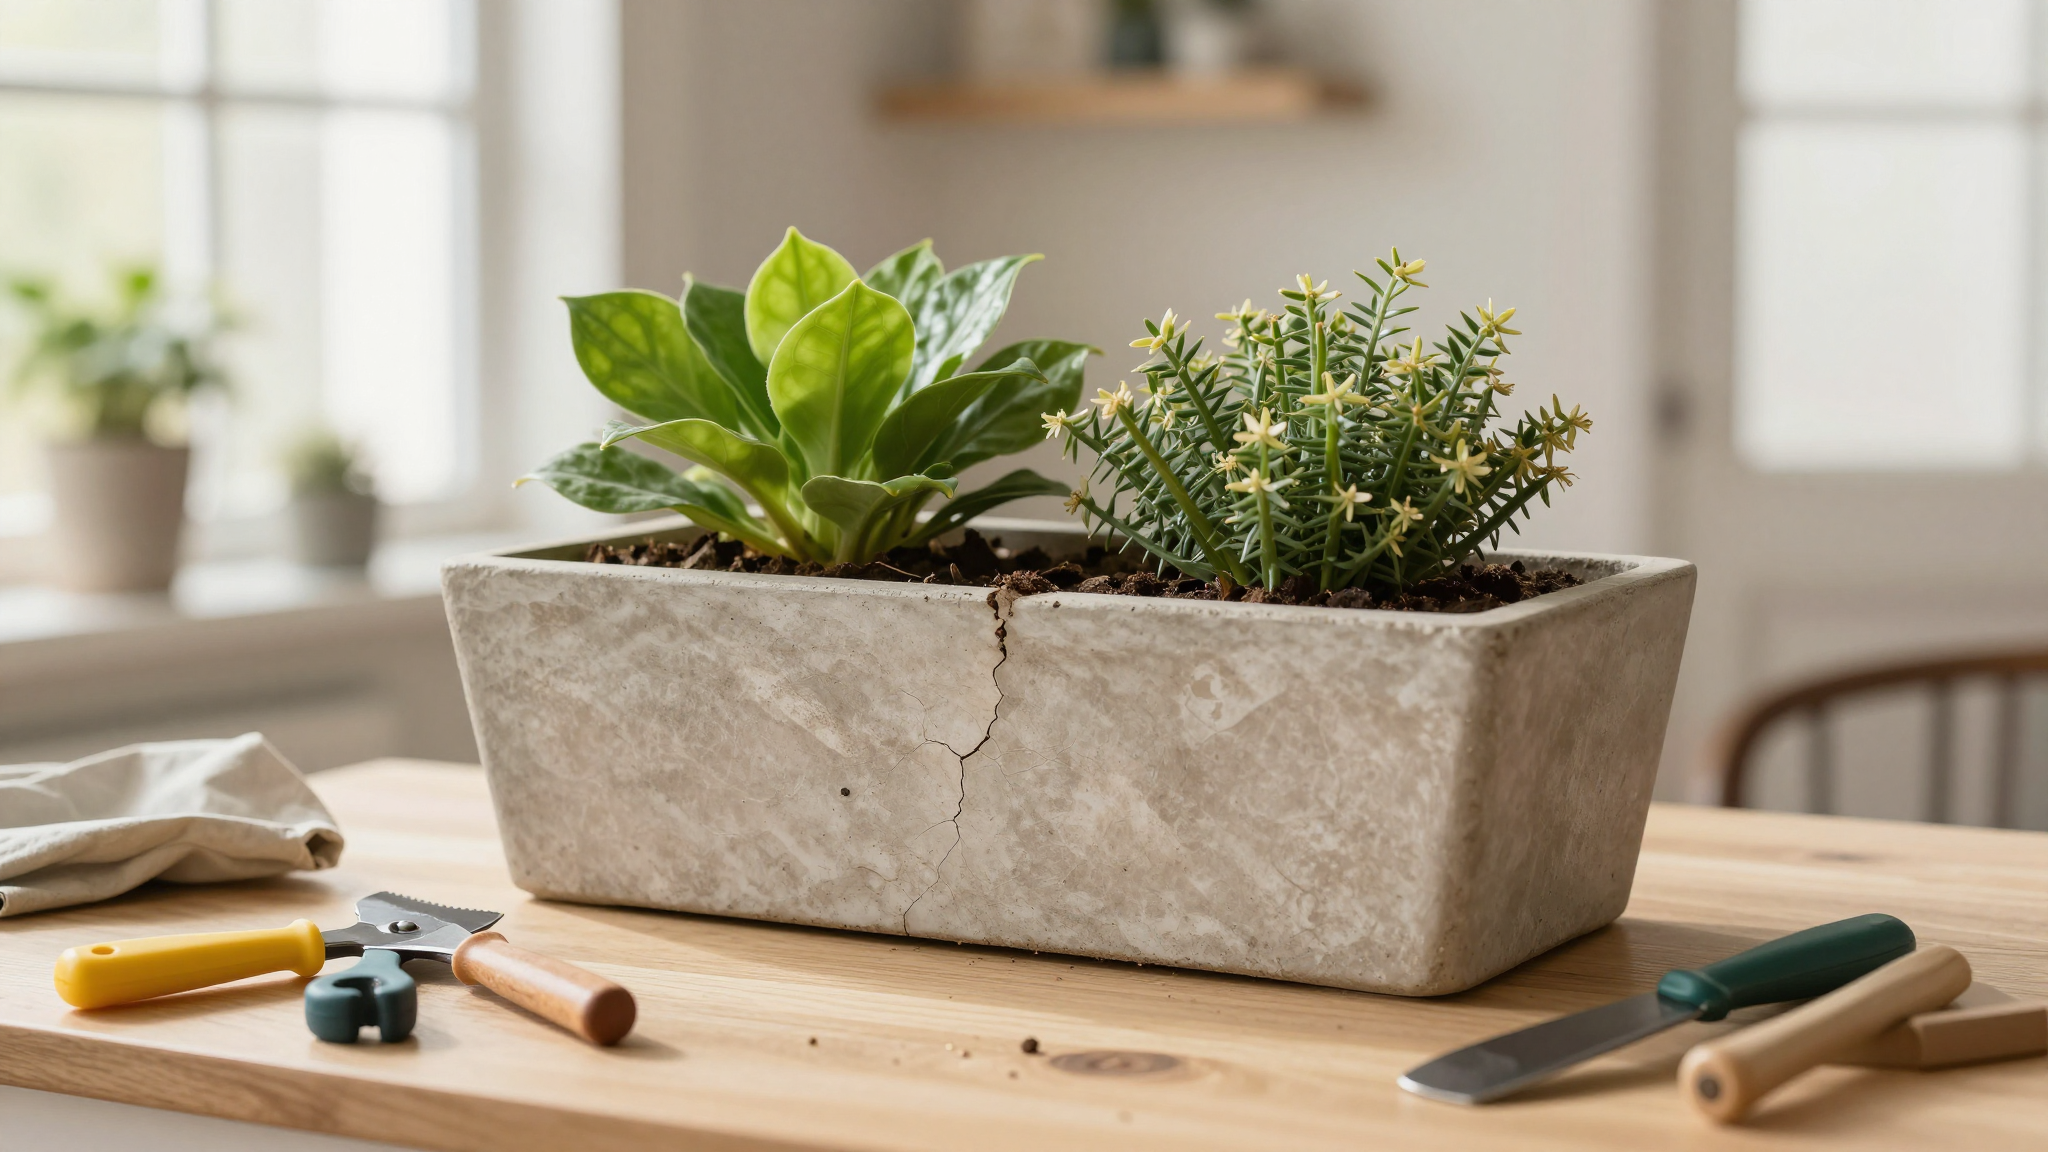
Geometric Cement Pots (For the Instagram-Worthy Look)
If you want your planters to look like they’re straight out of a magazine, geometric cement pots are the way to go. I’ve got a set of white ones on my front porch, and they look amazing with my potted geraniums. They’re a little more expensive, but they add such a polished touch to any space.
Oh, and here’s a tip: if you’re using these for outdoor plants, make sure to seal them with a waterproofing spray. Cement can absorb moisture, which can lead to cracks over time.
Heavy-Duty Trough Planters (For Commercial or High-Traffic Spaces)
If you’re looking for something super durable, heavy-duty trough planters are the way to go. I’ve seen these used in restaurants and hotels, and they’re perfect for high-traffic areas. They’re usually made of metal or thick plastic, so they can handle a lot of wear and tear.
Pro tip: If you’re using these for edible plants, make sure they’re food-safe. Some metals can leach chemicals into the soil, so always check the label.
Styling Ideas for Your New Planters
Alright, let’s talk about how to make your planters look incredible. I’ve spent way too much time (and money) on planters that just didn’t quite fit my space, so I’ve learned a thing or two about styling them right. Here are some of my favorite ideas:
Entryway Elegance: The Thriller-Filler-Spiller Rule
If you want your entryway to make a statement, follow the thriller-filler-spiller rule. It’s a classic gardening trick that works every time.
- Thriller: Choose a tall, eye-catching plant like a snapdragon or a small shrub. This is your focal point.
- Filler: Add medium-sized plants like petunias or coleus to fill in the gaps. These add color and texture.
- Spiller: Let trailing plants like ivy or sweet potato vine spill over the edges. This adds movement and softness.
I used this rule for my front porch, and it’s become one of my favorite spots in the house. The combination of heights and textures makes it feel so inviting.
Pro tip: If you’re using a wooden planter, add a layer of moss or pebbles on top of the soil. It hides the dirt and adds a polished touch.
Balcony Gardens: Maximizing Small Spaces
If you’re working with a tiny balcony (like I am), you’ve got to get creative. Vertical planters are a lifesaver because they save so much space. I built a set of cedar boxes and mounted them to the railing, and now I’ve got a thriving herb garden that takes up almost no room.
Here’s how I did it:
- Used lightweight planters (like fiberglass or plastic) to avoid overloading the railing.
- Chose compact plants like thyme, basil, and mint that don’t need a lot of space.
- Added a drip tray to protect the balcony floor from water damage.
Oh, and here’s a fun idea: if you’ve got a glass railing, you can hang planters from the bottom. I did this with a few small pots, and it looks so cool when the plants trail down.
Seasonal Rotations: Keeping Your Display Fresh
One of the best things about planters? You can totally refresh your display with the seasons. I swap out my summer blooms for fall foliage and winter greens, and it keeps my space feeling new and exciting.
Here’s my seasonal plan:
- Spring: Tulips, daffodils, and pansies for a pop of color.
- Summer: Petunias, geraniums, and basil for a vibrant, fragrant display.
- Fall: Mums, ornamental kale, and chrysanthemums for a cozy feel.
- Winter: Evergreens, pinecones, and holiday greenery for a festive touch.
Pro tip: If you’re not sure what to plant, check out your local nursery’s seasonal display. They always have great ideas for what’s in vogue.
Lighting: Making Your Planters Shine (Literally)
If you want your planters to look amazing at night, lighting is the way to go. I added some battery-operated string lights to my porch planters, and it totally transformed the space. Now it’s my favorite spot to sit and relax in the evening.
Here are a few ideas:
- Use spotlights to highlight your tallest plants.
- Wrap string lights around the edges of your planter for a soft glow.
- Add solar-powered lights for a low-maintenance option.
Oh, and here’s a tip: if you’re using fairy lights, make sure they’re waterproof. I learned this the hard way when my first set fried after a rainstorm.
Mixing Materials: Creating Texture and Depth
One of my favorite styling tricks is mixing different materials. I’ve got wooden, metal, and ceramic planters all over my porch, and the combination of textures makes the space feel so dynamic.
Here’s how I did it:
- Paired a rustic wooden planter with a sleek metal one for contrast.
- Added a ceramic pot for a pop of color.
- Used pebbles and moss to tie everything together.
Pro tip: If you’re not sure how to mix materials, start with a neutral base (like a wooden planter) and add in bolder elements (like a metal or ceramic pot). It’s a foolproof way to create a cohesive look.
Color Coordination: Making It All Work Together
Color is everything when it comes to styling planters. I’ve made some questionable choices over the years (looking at you, neon green planter), but I’ve learned a few tricks for making it all work.
- Match your planter to your decor: If your home is neutral, go for white or gray planters. If you’ve got bold colors, don’t be afraid to match them.
- Use color to create a focal point: A bright red or blue planter can draw the eye and make a statement.
- Stick to a color palette: If you’re using multiple planters, keep the colors cohesive. I used a mix of white, gray, and black on my porch, and it looks so put-together.
Pro tip: If you’re not sure what colors to choose, grab a few swatches from the paint store and hold them up against your planters. It’s a great way to test out different combinations.
Maintenance Tips for Long-Lasting Planters
Alright, let’s talk about how to keep your planters looking amazing for years to come. I’ve had planters crack, warp, and even melt (yes, really), so I’ve learned a thing or two about proper care. Here’s what works:
Cleaning: Keeping Your Planters Fresh
First things first: clean your planters regularly. I know, it’s not the most exciting task, but it makes a huge difference. Here’s how I do it:
- Fiberglass: Use mild soap and water. A soft brush helps get into the nooks and crannies.
- Wood: Scrub with a soft brush and a mix of water and vinegar. This helps prevent mold and mildew.
- Ceramic or cement: Use a vinegar solution to remove mineral buildup. It’s a natural cleaner and works like a charm.
Pro tip: If you’ve got stubborn stains, a paste of baking soda and water works wonders. Just apply it, let it sit for 10 minutes, and scrub away.
Winterizing: Protecting Your Planters from the Elements
If you live in a cold climate (like I do), winterizing your planters is non-negotiable. I’ve had planters crack, warp, and even explode (yes, really) because I didn’t take the time to protect them. Here’s what I do now:
- Move planters to a sheltered area, like a garage or covered porch.
- Wrap them in burlap or a heavy-duty plastic sheet to protect from frost.
- Drain all water to prevent cracking. I use a turkey baster to get every last drop out.
Pro tip: If you can’t move your planters, add a layer of insulation. I’ve seen people use old blankets or even foam padding to protect their planters from the cold.
Repairing Cracks: Saving Your Planters from Disaster
Even with the best care, planters can crack. I’ve had it happen more times than I’d like to admit, but I’ve learned how to fix them. Here’s what works:
- Small cracks: Use waterproof epoxy. I like J-B Weld because it’s strong and dries clear.
- Large cracks: If the crack is bigger than a quarter, you might need to reinforce it with a metal mesh or even replace the planter. I learned this the hard way when one of my ceramic pots split in half.
Pro tip: If you’re using epoxy, make sure the planter is completely dry before applying it. Any moisture will weaken the bond.
Preventing Mineral Buildup: Keeping Your Planters Looking New
If you’ve got hard water (like I do), mineral buildup can be a nightmare. It leaves ugly white stains on your planters and can even clog drainage holes. Here’s how I keep mine clean:
- Flush self-watering systems with a mix of water and vinegar. It cuts through the buildup like magic.
- Scrub ceramic and cement planters with a vinegar solution. It’s a natural cleaner and works great on mineral deposits.
- Use a water softener if you’re really struggling with hard water. It’s a game-changer for keeping your planters looking fresh.
Pro tip: If you’ve got stubborn buildup, a paste of baking soda and water can help. Just apply it, let it sit for 10 minutes, and scrub away.
Refreshing Colors: Making Your Planters Look Like New
Over time, the sun can fade the color of your planters. If yours are looking a little tired, it’s time for a refresh! Here’s what I do:
- Stain or paint: If you’ve got a wooden planter, a fresh coat of outdoor stain or paint can make it look like new. I like Behr Premium Wood Stain because it’s durable and dries fast.
- UV-resistant sealant: If you’ve got a ceramic or cement planter, a UV-resistant sealant can help protect it from sun damage. It’s a great way to restore the color and add a protective layer.
Pro tip: If you’re painting a planter, make sure to sand it lightly first. It helps the paint adhere better and gives you a smoother finish.
Why Planters Are a Smart Investment
Alright, let’s talk about the real benefits of investing in high-quality planters. I know what you’re thinking: “Christina, they’re just pots. How expensive can they be?” But trust me, the right planters are worth every penny. Here’s why:
Durability: Planters That Last for Years
I’ve had planters that lasted decades and others that fell apart after a single season. The difference? Quality. High-end planters are built to withstand the elements, whether it’s rain, snow, or scorching sun. I’ve got a set of fiberglass planters that I bought five years ago, and they still look brand new.
Here’s a quick cost comparison:
| Planter Type | Initial Cost | Lifespan | Cost Per Year |
|---|---|---|---|
| Cheap ceramic pots | $15 | 1-2 years | $7.50–$15 |
| Mid-range fiberglass planters | $50 | 5+ years | $10 |
| Premium cedar or resin planters | $100+ | 10+ years | $10 or less |
See what I mean? Cheap planters might save you money upfront, but you’ll end up replacing them more often. Premium planters, on the other hand, pay for themselves over time.
Curb Appeal: Making Your Home Stand Out
Here’s something I didn’t realize until I started DIY-ing my planters: they can actually increase your home’s value. A well-designed outdoor space with beautiful planters can make your home look more inviting and put-together. And in a competitive housing market, that’s a huge advantage.
I’ve seen it firsthand. A friend of mine listed her home with a freshly landscaped front yard, complete with custom planters. She got three offers over asking price, and the realtor said the planters were a major selling point. They made her home look like a magazine spread!
Pro tip: If you’re selling your home, focus on the front entryway. A few well-placed planters can make a huge difference in how buyers perceive your space.
Commercial Success: Planters That Bring in Customers
If you’ve ever eaten at a restaurant with a gorgeous patio, you know how much planters can elevate the space. I’ve seen restaurants and cafes use planters to create an inviting atmosphere, and it works. A case study I read (yes, I nerd out over this stuff) showed that a restaurant patio with well-designed planters saw a 15% increase in revenue after a makeover. Customers loved the cozy, green space, and they stayed longer, ordered more drinks, and even left better tips.
If you’re running a business, planters are a smart investment. They make your space look more professional, attract customers, and even encourage them to stay longer. And if you’re just looking to spruce up your home, they do the same thing,just for you!
Multi-Generational Design: Planters That Stand the Test of Time
One of the things I love most about DIY planters is that they’re built to last. I’ve got a set of cedar planters that my grandma used, and now I use them too. There’s something special about passing down a planter (or the knowledge to build one) to the next generation.
Plus, high-quality planters are often backed by warranties. I’ve got a few that came with a 10-year warranty, which gives me peace of mind knowing they’re built to last. And if something does go wrong, I’m covered.
Pro tip: If you’re buying planters, always check the warranty. It’s a great way to protect your investment.
Final Thoughts (And a Challenge for You!)
Alright, I’ve given you the goods,now it’s your turn. Whether you’re building your own planters, upcycling old materials, or just shopping for the perfect pre-made option, I hope this guide has inspired you to refresh your space with a little greenery.
Here’s my challenge to you: Pick one project from this post and try it this weekend. Whether it’s building a cedar planter, upcycling an old crate, or just styling your existing planters with a few new plants, I want to see what you create! Snap a photo and tag me on Instagram (@christinaprojects) so I can cheer you on.
And if you’re feeling overwhelmed, start small. My first planter was a simple wooden box, and it’s still one of my favorites. The key is to have fun, get creative, and don’t be afraid to make mistakes (trust me, I’ve made plenty!).
Now, go forth and make your space bloom! And if you need more inspiration, check out my other posts on adding charm to your home, updating your bedroom, or even upcycling furniture. Happy building!