
Halloween Decorations You Can Actually Make in a Weekend (No Fancy Store Trips Required)
Every year, I tell myself I’ll start decorating for Halloween earlier. And every year, I end up frantically cutting paper bats at 10 p.m. the night before trick-or-treaters arrive. But here’s the thing,I’ve learned that you don’t need a month (or a Pinterest-perfect budget) to make your home look like a haunted masterpiece. With a little creativity, some dollar-store finds, and maybe a few mistakes (like the time I glued my hand to a foam tombstone,don’t ask), you can transform your space in just 48 hours. These are the Halloween decorations I’ve tested, tweaked, and perfected over the years,some are simple enough for my 8-year-old to help with, and others are just spooky enough to make my husband jump when he walks in the door after dark.
Whether you’re going for outdoor décor that’ll make your neighbors jealous or indoor spooky crafts that’ll set the mood for your Halloween party, I’ve got you covered. And if you’re anything like me, you’ll want projects that don’t require a PhD in crafting,or a second mortgage. So let’s skip the fluff and get to the good stuff. Oh, and if you’re short on time, scroll down to the last-minute section,I’ve got your back.
Tools and Materials You’ll Actually Use (No Fancy Stuff)
Before we dive in, let’s talk about the basics. I used to think I needed a fully stocked craft room to make Halloween decorations, but the truth? Most of what I use is already sitting in my garage, junk drawer, or the dollar bin at Dollar Tree. Here’s what I grab every year:
- Paint and paintbrushes,I swear by Apple Barrel acrylic paint because it’s cheap, dries fast, and doesn’t smell like chemicals. (Pro tip: If you’re painting outdoor decorations, add a clear sealant like Mod Podge Outdoor to keep the rain from ruining your hard work.)
- Glue and scissors,A good craft glue (like Aleene’s Tacky Glue) and sharp scissors are non-negotiable. I learned this the hard way when I tried to cut cardboard with dull scissors and ended up with a jagged mess that looked like it was chewed by a zombie.
- Cardboard and paper,Old Amazon boxes, cereal boxes, and even the backs of notebooks work great. I save mine in a bin labeled “Future Crafts” because you never know when you’ll need a random piece of cardboard for a haunted cemetery prop.
- Fabric and felt,Scraps from old clothes or a cheap felt sheet from the craft store are perfect for adding texture to decorations. Last year, I used an old black T-shirt to make a spider web wreath, and it turned out way better than I expected.
- Safety gear,Gloves and a mask aren’t just for dramatic effect. Trust me, you do not want to inhale glue fumes while cutting 50 paper bats. (I speak from experience.)
Oh, and if you’re like me and tend to get carried away, keep a spot cleaner handy. Paint accidents happen, and you don’t want to explain to your spouse why the carpet now has a “bloodstain” from your “zombie attack” decorating session.
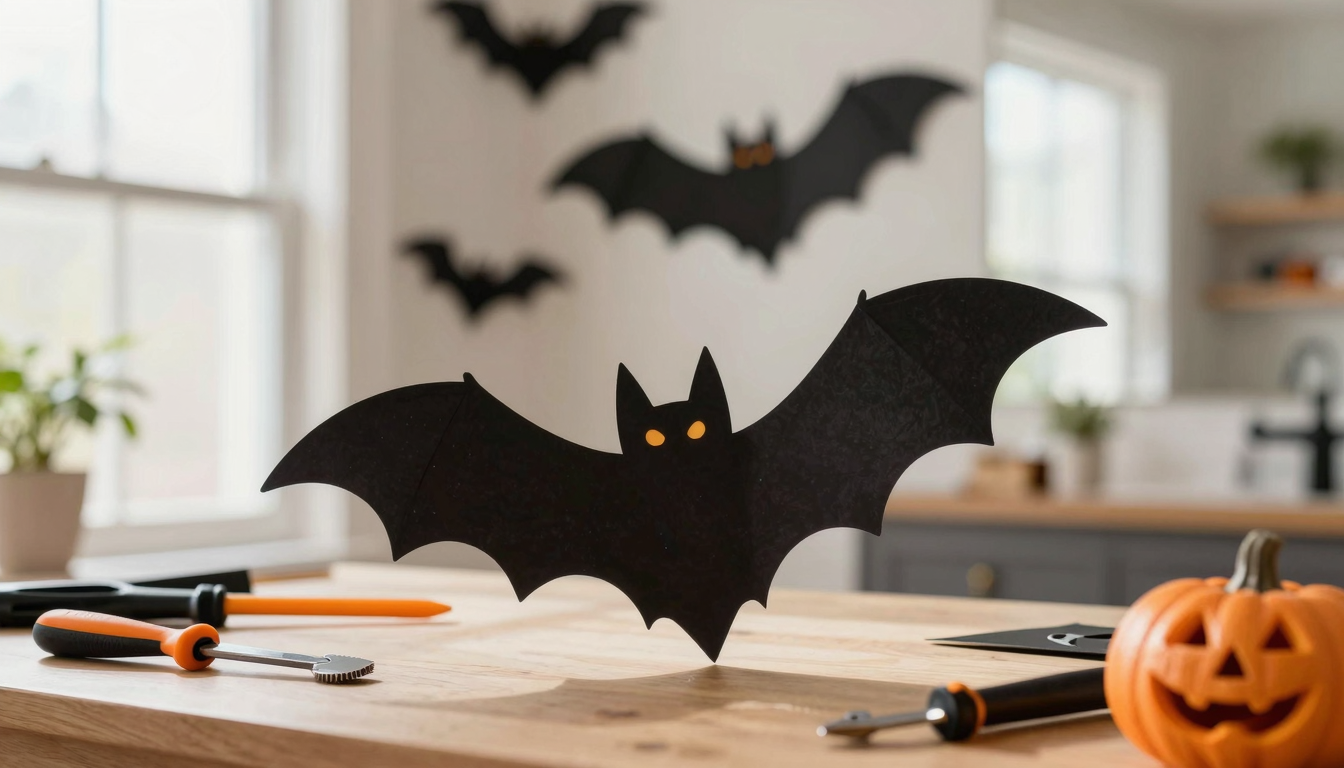
Quick Paper Halloween Decorations for Indoor Spaces
If you want to create a spooky atmosphere indoors without breaking the bank, paper is your best friend. It’s cheap, easy to work with, and,unlike my kids,it doesn’t argue when you tell it to stay still. Here are a few of my go-to projects that take less than an hour each:
One year, I decided to go all out and turned our living room into a “haunted library.” I hung paper bats from the ceiling, created a shadowy fog effect on the walls using black paper cutouts, and even made a paper ghost centerpiece for the dining table. The best part? It cost me less than $20 and took me two afternoons. The worst part? My cat, Mr. Whiskers, spent the entire night batting at the paper bats like they were his personal prey.
Here’s how to make it happen:
- Paper bats and ghosts,Cut out bat and ghost shapes from black and white paper, then hang them from the ceiling with fishing line. (I used a clear fishing line kit from Amazon so they’d be nearly invisible.) For extra creepiness, add googly eyes,because nothing says “haunted” like a bat with judgmental eyes.
- Shadowy wall art,Trace spooky shapes (like trees, monsters, or gravestones) onto black paper, cut them out, and tape them to your windows. When the sun shines through, they’ll cast eerie shadows on your walls. (This is also a great way to cover up that weird stain on your wall from when the kids tried to “paint” with ketchup.)
- Paper lanterns,Cover a plain paper lantern with orange and black tissue paper, then add cut-out shapes like jack-o’-lanterns or witches. Place a battery-operated tea light inside for a warm, spooky glow. (I made a bunch of these for my Halloween stair display last year, and they looked amazing.)
If you’re short on time, grab a roll of black crepe paper from the dollar store and drape it over doorways or furniture. Instant spooky vibes, zero effort.
Spooky Window Displays That’ll Make Your House the Talk of the Street
There’s nothing like walking past a house with spooky window displays that make you do a double-take. And the best part? These are some of the easiest decorations to make. Last year, I turned our front windows into a “haunted graveyard” using nothing but cardboard, paint, and a little creativity. My neighbor across the street actually asked if I’d hired a professional,until she saw me outside at 2 a.m. trying to adjust a crooked tombstone.
Here’s how to create window displays that’ll stop people in their tracks:
- Silhouette cutouts,Cut out shapes like bats, spiders, or witches from black cardboard and tape them to your windows. For extra effect, place a battery-operated candle behind them. (I used a IKEA DIGITALIS candle because it flickers and looks real,no fire hazard.)
- Window clings,If you don’t want to cut out shapes yourself, grab a pack of Halloween window clings from Michaels. They’re reusable, easy to apply, and,unlike my kids,they don’t peel off halfway through the night.
- Lighting effects,String lights, glow sticks, or even a projector light (like the one I got for $15 on Amazon) can turn your windows into a spooky spectacle. Last year, I projected a “haunted forest” scene onto our garage door, and it looked like something out of a horror movie. (My husband still won’t go out there alone at night.)
If you want to go the extra mile, create a 3D scene by attaching cardboard cutouts to the window frame. For example, I made a “graveyard” by cutting out tombstones and gluing them to the glass. Then, I placed a few plastic skeletons (from the dollar store) in front of them. The result? A window display that looked like it belonged in a Halloween movie.
Dollar Store Halloween Decorations: How to Turn Cheap Finds into Creepy Masterpieces
I don’t know about you, but I love a good dollar store haul. The key to making creative Halloween decorations on a budget? Think outside the box,or in this case, the dollar bin. Here are some of my favorite dollar-store hacks:
One year, I turned a haunted house scene into our front yard using nothing but a cardboard box, black paint, and a few plastic skeletons. I cut out windows and a door, painted it to look old and creepy, and placed the skeletons inside. Then, I added a “Caution: Haunted” sign made from a piece of wood and some spray paint. It cost me less than $10 and looked like it belonged in a Halloween movie. (Okay, fine, it looked like it belonged in a cheap Halloween movie, but it still got compliments from everyone who walked by.)
Here’s what to grab:
- Plastic bats and spiders,Hang them from trees, doorways, or ceilings with fishing line. For extra creepiness, add a few glow-in-the-dark paint dots to their eyes.
- Cardboard boxes,Turn them into a haunted house, a witch’s hut, or even a giant coffin. Paint them black or brown, add some details with markers or paint, and voila,instant outdoor decoration.
- Wire hangers and black ribbon,Straighten out a wire hanger, wrap it with black ribbon, and attach plastic spiders or bats. Hang it on your door for a spooky wreath that costs less than $5.
Pro tip: If you want your dollar-store decorations to last more than one Halloween, spray them with a clear sealant from Home Depot. It’ll keep the rain from ruining them and make them look a little more polished.
Weather-Resistant Outdoor Halloween Decorations (Because Rain Hates Your Decor)
Outdoor Halloween decorations are a must if you want your home to be the spookiest on the block. But let’s be real,if you live anywhere with weather (aka, not the desert), you need decorations that can handle a little rain, wind, or the occasional curious squirrel. I learned this the hard way when a sudden downpour turned my paper ghosts into a soggy mess. Never again.
Here’s how to make sure your decorations survive the elements:
- Use waterproof materials,If you’re painting outdoor decorations, use exterior acrylic paint and seal them with a clear outdoor sealant. For foam or cardboard props, spray them with a waterproofing spray from Lowe’s.
- Choose the right decorations,Skip anything that’s obviously indoor-only, like paper lanterns or fabric banners. Instead, opt for plastic, metal, or treated wood. (I love using foam board for tombstones because it’s lightweight, easy to paint, and holds up well in the rain.)
- Avoid fading,If you’re using bright colors, they’ll fade in the sun. Stick to darker shades like black, orange, and deep purple, or use UV-resistant paint.
For extra atmosphere, add outdoor lighting. I use a mix of solar-powered string lights, battery-operated lanterns, and a fog machine (yes, it’s a splurge, but it’s worth it). Last year, I set up a “haunted graveyard” in our backyard with tombstones, flickering lights, and a fog machine. It looked so real that one of my kids refused to go outside after dark for a week.
Entrance and Porch Makeover: Turn Your Door into a Haunted Hotspot
Your porch is the first thing people see when they walk up to your house, so why not make it the spookiest part of your Halloween décor? Last year, I turned our front porch into a “haunted asylum” complete with cobwebs, flickering lights, and a sign that said “Abandon Hope All Ye Who Enter Here.” (My husband thought it was a little too on-the-nose, but the kids loved it.)
Here’s how to make your entrance unforgettable:
- Cobwebs and spiders,Use synthetic cobwebs (they’re cheaper than real ones and don’t attract actual spiders, which is a plus). Drape them over railings, doorways, and bushes. Then, add a few plastic spiders for extra creepiness. (I like to hide a few in unexpected places,like on the doormat,just to mess with people.)
- Lighting,Flickering LED candles, string lights, or even a projector light can set the mood. I love using orange and purple lights for a haunted glow. (Pro tip: If you want to save money, wrap white string lights in orange or black cellophane for a colored effect.)
- DIY crafts,Make a spider twig wreath by gluing black pipe cleaners to a foam wreath form, or paint a wooden sign with a creepy message like “Beware” or “Enter at Your Own Risk.” Last year, I made a “bloody handprint” welcome mat using red paint and a stencil. It was messy, but it looked amazing.
If you want to go the extra mile, add some sound effects. I placed a small Bluetooth speaker near the door and played a loop of howling wind and creaking doors. (My husband jumped the first time he heard it,mission accomplished.)
DIY Haunted Cemetery Props: Because Every Halloween Needs a Graveyard
If you want to take your outdoor decorations to the next level, a haunted cemetery is the way to go. It’s easy to make, looks amazing, and,let’s be honest,it’s the kind of thing that’ll make your neighbors stop and stare. I’ve been building one in my backyard for the past three years, and it just keeps getting better.
Here’s what I’ve learned:
- Tombstones,Use foam board or cardboard to cut out tombstone shapes. Paint them gray or brown, then add names and dates with a black marker. For a weathered look, dab a little tea or coffee on them with a sponge. (Yes, really. It works.) I also like to add moss or cracks with green paint or a dry brush technique.
- Fog machines and lighting,A fog machine is a game-changer. Pair it with strobe lights or colored LED lights for a truly eerie effect. Last year, I added a sound effects player with howling wind and ghostly moans. It was so realistic that my dog hid under the couch the entire night.
- Zombies and other creepy creatures,Make zombies from old clothes stuffed with newspaper or foam. For a quick option, grab a few plastic skeletons from the dollar store and pose them in “zombie” positions. I also like to add spider webs made from cotton balls or synthetic webbing.
If you don’t have a lot of space, create a mini graveyard in a corner of your yard or even on your porch. I’ve seen people use flower pots as “tombstones” and fill them with dirt and plastic bones. It’s a great way to add a spooky touch without taking up much room.
Creepy Lighting Projects for Indoor and Outdoor Use
Lighting is everything when it comes to Halloween decorations. It can turn a simple decoration into something truly spooky. I’ve experimented with all kinds of lighting over the years, from string lights to glow sticks, and here’s what I’ve found works best:
One year, I turned our backyard into a “haunted forest” using nothing but LED lights and some black fabric. I hung the lights from trees, wrapped them around fence posts, and even placed a few on the ground to create a “glowing path.” Then, I draped black fabric over some bushes to make them look like twisted, gnarled trees. The result? A backyard that looked like it belonged in a horror movie. (My husband still won’t go out there alone at night.)
Here’s how to create creepy lighting effects:
- String lights,Wrap them around trees, railings, or doorways. For a colored effect, use orange or purple bulbs, or wrap white lights in colored cellophane. I like to add a few flickering LED candles for extra atmosphere.
- Glow sticks and glow-in-the-dark paint,Use them to create glowing eyes on your decorations or to outline shapes like bats or spiders. Last year, I painted a giant spiderweb on our garage door with glow-in-the-dark paint. It looked amazing at night!
- Strobe lights and color-changing lights,These are perfect for adding drama to your decorations. Place a strobe light behind a sheer curtain for a flickering effect, or use color-changing lights to make your yard look like it’s alive. (Just make sure to follow safety guidelines,you don’t want to blind your trick-or-treaters.)
If you want to get fancy, add a timer or remote control to your lights. That way, you can turn them on and off without having to crawl around in the dark. (Trust me, this is a lifesaver.)
Kid-Friendly Halloween Decoration Crafts (That Won’t End in Tears)
As a mom, I love involving my kids in Halloween decorations. It’s a great way to spend time together, and,bonus,it keeps them out of trouble for at least an hour. The key is to stick to safe, simple projects that won’t result in a meltdown (or a trip to the ER). Here are a few of our favorites:
Last year, my daughter and I made a paper bag lantern together. We cut out eyes and a mouth from black paper, glued them to the bag, and added a string handle. Then, we decorated it with markers and stickers. She was so proud of it that she insisted on carrying it around the house for a week. (I may or may not have taken 50 photos of her with it.)
Here are a few more kid-friendly ideas:
- Paper bag lanterns,As mentioned above, these are easy, fun, and customizable. Let your kids go wild with the decorations!
- DIY banners,Cut out letters or shapes from cardstock or construction paper and string them together to spell out “Happy Halloween” or “Boo!” It’s a great way to practice fine motor skills and creativity.
- Handprint ghosts,Trace your child’s hand on white paper, cut it out, and add eyes and a mouth. Then, string them up with fishing line for a cute (and slightly spooky) decoration.
If you’re working with little ones, keep these tips in mind:
- Use safe materials like paper, glue, and scissors with rounded tips.
- Always supervise,even if your kid is “responsible.” (Trust me, I’ve learned this the hard way.)
- Let them get creative. If their decoration doesn’t look like yours, that’s okay! The goal is to have fun, not to win a crafting competition.
If you’re short on time, grab a Halloween craft kit from Michaels. They’re affordable, easy to follow, and,most importantly,mess-free.
Last-Minute Halloween Decorations for Procrastinators (Like Me)
Let’s be real,sometimes life gets in the way, and you find yourself staring at an empty porch the night before Halloween. Don’t panic! You can still pull off some amazing DIY Halloween decorations in a few hours. Here’s what I do when I’m in a rush:
Last year, I waited until the day before Halloween to decorate. I had no time, no plan, and,thanks to a last-minute work project,no energy. But I still managed to turn our front yard into a spooky spectacle. Here’s how:
- Use what you have,Old jars? Turn them into lanterns. Cardboard boxes? Paint them black and cut out windows for a haunted house. Plastic containers? Fill them with dirt and plastic bones for a quick graveyard.
- Dollar store haul,Grab a few plastic bats, spiders, and glow sticks. Hang the bats from trees, place the spiders in webs (made from cotton balls), and scatter the glow sticks around for a quick lighting effect.
- Cardboard cutouts,Cut out shapes like bats, ghosts, or pumpkins from cardboard and tape them to your windows or walls. No time to paint? Use markers or stickers instead.
If you’re really short on time, hit up a party store for pre-made decorations. I’ve found some great pre-lit tombstones and inflatable ghosts at Party City that take less than 10 minutes to set up. They’re not as personal, but they’ll get the job done in a pinch.
Remember, the goal is to have fun and get into the Halloween spirit. Even if your decorations aren’t Pinterest-perfect, they’ll still look amazing,and your neighbors will never know you pulled it together in a few hours.
Halloween Decor Storage and Preservation Tips (So You Don’t Lose Half Your Stuff)
After Halloween, the real challenge begins: storing your decorations so they survive until next year. I used to just toss everything into a bin and hope for the best. Big mistake. Last year, I found a box of decorations that had been chewed by mice (thanks, Mr. Whiskers) and another that had been ruined by moisture. Never again.
Here’s how I store my decorations now:
- Clean everything first,Dust, dirt, and cobwebs (the real kind) can ruin your decorations if you don’t clean them before storing. Use a soft brush or damp cloth for most items, and a mild soap solution for fragile ones.
- Use the right containers,Hard plastic bins or cardboard boxes with lids work best. Avoid anything that might attract pests (like open cardboard boxes). I label each bin with its contents so I don’t have to dig through everything next year.
- Store in a dry, cool place,Avoid basements (unless they’re finished and dry) and attics that get too hot. I keep my decorations in a closet in the garage, where they’re safe from moisture and temperature swings.
If you have outdoor decorations, give them an extra layer of protection. Spray them with a waterproofing spray before storing, and consider wrapping them in bubble wrap or old towels to prevent scratches.
Pro tip: Take photos of how you set up your decorations each year. That way, you can recreate your favorite displays without having to reinvent the wheel. (I learned this the hard way after spending an entire afternoon trying to remember how I’d arranged my graveyard last year.)
Final Thoughts (And a Challenge for You)
There you have it,my tried-and-true Halloween decorations that you can make in a weekend. Some of them are simple enough for kids to help with, and others are just spooky enough to make your neighbors do a double-take. The best part? None of them require a fancy craft room or a huge budget.
So, which project are you going to try first? If you’re short on time, start with the last-minute section. If you want to go all out, dive into the haunted cemetery props or outdoor lighting ideas. And if you’re a parent like me, grab the kids and make some kid-friendly crafts together.
Oh, and one more thing,don’t forget to take before-and-after photos! I always do, and it’s amazing to look back at how much your home has transformed. Plus, it’s a great way to document your progress (and prove to your spouse that you didn’t just “waste money on craft supplies”).
Now, go forth and make your home the spookiest on the block. And if all else fails, just turn off the lights and hide. (Kidding. Mostly.)