
How to Clean Refrigerator Coils (And Actually Save on Energy Bills)
I’ll never forget the day I discovered my fridge was running like a marathoner after a Red Bull binge. It was humming nonstop, the motor sounded like a jet engine, and my energy bill had jumped $30 in a month. Turns out, my refrigerator coils were buried under a thick layer of dust, pet hair, and what I can only describe as “kitchen floor confetti.” After cleaning them, my fridge ran quieter, stayed colder, and my bill dropped by nearly $20 the next month. No joke.

Here’s the thing: clean refrigerator coils are one of the easiest ways to lower your energy bill without changing a thing about how you use your fridge. And the best part? It takes less than 30 minutes, requires no special skills, and won’t void your warranty if you do it right. I’ve cleaned coils in my rental apartment, my first home, and now in this fixer-upper we’re slowly making our own. Trust me, this is a habit worth keeping.
In this post, I’ll show you exactly where to find your coils, what tools to use (and what to avoid), and how to clean them without bending those delicate fins. I’ll also share the real signs your coils need attention,because let’s be honest, your fridge isn’t going to text you when it’s struggling.
If you’re short on time, here’s the quick version:
- Locate your coils (usually behind a kickplate, on the back, or under a top grille).
- Unplug the fridge and use a coil cleaning brush or vacuum with a brush attachment to remove dust.
- Work gently to avoid damaging the fins, then vacuum the floor underneath.
- Do this twice a year (or more often if you have pets or a dusty kitchen).
Now, let’s get into the details,because I’ve made enough mistakes (like bending fins with a leaf blower,never again) to save you from the same headaches.
Why Dirty Coils = Higher Energy Bills (And a Frustrated Fridge)
Your refrigerator’s coils are like the radiator in your car. Their job is to release heat so the fridge can stay cold without working overtime. When they’re clogged with dust, pet hair, or grease, the system has to work harder to do the same job. And just like your car would guzzle gas if its radiator were clogged, your fridge will guzzle electricity.
Here’s what happens when coils get dirty:
- The compressor runs longer and more often, which wears it out faster and costs more in electricity.
- Your fridge might not stay as cold, forcing it to run even more to compensate.
- In extreme cases, the extra strain can shorten the lifespan of your fridge, leading to costly repairs or an early replacement.
I learned this the hard way when my old fridge (a hand-me-down from my in-laws) started sounding like a lawnmower. I ignored it for months, thinking, “Eh, it’s just old.” Then the motor burned out, and I had to drop $600 on a replacement. Lesson learned: A little maintenance goes a long way.
If you have pets, this is especially important. Our golden retriever, Max, sheds like it’s his full-time job, and his fur loves clinging to the coils. I now clean them every three months instead of twice a year, and it’s made a noticeable difference in how often my fridge cycles on and off.
Pro tip: If you’re not sure whether your coils need cleaning, just peek behind the kickplate or at the back of your fridge. If you see more than a light dusting, it’s time to break out the brush.
How Often Should You Clean Refrigerator Coils?
I used to think, “Eh, I’ll do it when it looks bad.” But that’s like waiting for your car to run out of gas before checking the fuel gauge. Here’s my realistic schedule based on what’s worked (and what hasn’t) in my own home:
For Most Homes: Twice a Year
If you don’t have pets and your kitchen isn’t a dust magnet, aim for spring and fall. These are natural reminders,like when you’re deep-cleaning before guests arrive or prepping for winter. It’s easy to remember, and it keeps dust from building up to the point where your fridge starts sounding like a jet.
If You Have Pets: Every 3–4 Months
Pet hair is the worst for clogging coils. I speak from experience,Max’s fur gets everywhere, and it turns the coils into a furry nest if I don’t stay on top of it. If your pet sheds, set a reminder on your phone or tie it to another habit, like when you winterize your home or check your HVAC.
For Dusty or Busy Kitchens: Every 2–3 Months
If your kitchen is open to the rest of the house (like ours is), or if you cook a lot and generate grease, check your coils more often. I live in an old house with hardwood floors, and dust seems to materialize out of nowhere. I’ve had to clean the coils four times this year already, and it’s only July.
For Older Fridges or Models with Exposed Coils
If your fridge is over 10 years old or has coils on the back or bottom (instead of sealed inside), it’s more prone to dust buildup. I had an old fridge like this in my first apartment, and I had to clean the coils every two months just to keep it running efficiently. If your fridge is in this category, don’t wait for it to sound like a tractor,check it regularly.
Here’s a quick reference table to help you remember:
| Your Home Situation | Recommended Cleaning Schedule | Why? |
|---|---|---|
| Typical household (no pets, average dust) | Twice a year (spring and fall) | Prevents buildup before it becomes a problem. |
| Home with pets (especially heavy shedders) | Every 3–4 months | Pet hair clogs coils faster than dust. |
| Dusty or busy kitchen (open floor plan, lots of cooking) | Every 2–3 months | Grease and airborne debris build up quickly. |
| Older fridge or model with exposed coils | Every 3–4 months | Exposed designs collect dust faster. |
Pro tip: If you’re not sure where your coils are, don’t panic. I’ll show you exactly where to look in the next section. And if you’re worried about voiding your warranty, don’t be,cleaning the coils (when they’re supposed to be cleaned) is totally safe. Just avoid cracking any plastic tabs or forcing anything.
Tools and Safety: What You’ll Need (And What to Avoid)
Before you start, let’s talk tools,and what not to use. I’ve tried a few things over the years, and some were disasters.

Safety First: Unplug and Protect
This is non-negotiable. I learned this the hard way when I tried cleaning the coils on my old fridge while it was still plugged in. The second I touched the brush to the coils, the fridge clicked on, and I about jumped out of my skin. Now I always unplug the fridge (or turn off the circuit breaker if it’s a top-mounted model) before I even think about touching the coils.
Wear work gloves,the fins can be sharp, and you don’t want to cut your hands. Long sleeves are also a good idea, especially if you’re working with a top-mounted model where you might brush against the fridge body.
The Right Tools: Brush, Vacuum, and a Little Patience
You don’t need anything fancy, but the right tools make the job so much easier. Here’s what I use:
- Coil cleaning brush: This is my #1 tool. I love the FridgeCoilCleaner brush because it’s soft enough to avoid bending the fins but stiff enough to loosen stubborn dust. It’s only $10, and it’s lasted me years.
- Vacuum with a brush attachment: A shop vac or a regular vacuum with a brush attachment works great. I use my Shop-Vac because it’s powerful enough to suck up pet hair without clogging. If you don’t have a shop vac, a Dyson or any vacuum with a crevice tool will work.
- Compressed air: This is helpful for small spots or tight areas, but I don’t rely on it. I’ve seen people blast compressed air into their coils and end up pushing dust deeper into the fridge. If you use it, do so briefly and carefully.
- Flashlight: Coils are often in dark, tight spaces. A flashlight (or even the flashlight on your phone) helps you see what you’re doing.
- Screwdriver (if needed): Some fridges have screws holding the grille in place. I keep a Phillips-head screwdriver handy just in case.
What not to use:
- Leaf blower: I tried this once, and it bent half the fins on my fridge. The coils are delicate, and a leaf blower is way too powerful. Don’t do it.
- High-pressure air compressor: Same issue as the leaf blower. It can damage the fins and push dust into places you can’t reach.
- Water or steam cleaner: Never use water near electrical components. I know it might seem like a good idea, but it’s a bad one. Stick to dry methods.
Pro tip: If you’re cleaning the coils under your fridge, pull it out first. I used to try to reach under there without moving the fridge, and it was a nightmare. Just unplug it, grab a friend (or use a furniture slider if you’re alone), and pull it straight out. Don’t tilt it or yank the cord,just slide it out gently.
Where Are Your Refrigerator Coils? (And How to Find Them)
This is where a lot of people get stuck. Fridge coils aren’t always in the same place, and some models make them harder to access than others. Here’s how to find them in the most common U.S. fridge models:
Bottom-Coil Fridges (Most Common)
These are the easiest to access. Look at the front kickplate,that’s the little panel at the bottom of your fridge, right under the doors. It usually has a grille or vent covering the coils.
To access them:
- Unplug the fridge.
- Remove the kickplate. On most models, you can just pull it off. If it’s held in by screws, use a screwdriver to remove them (keep the screws in a safe place!).
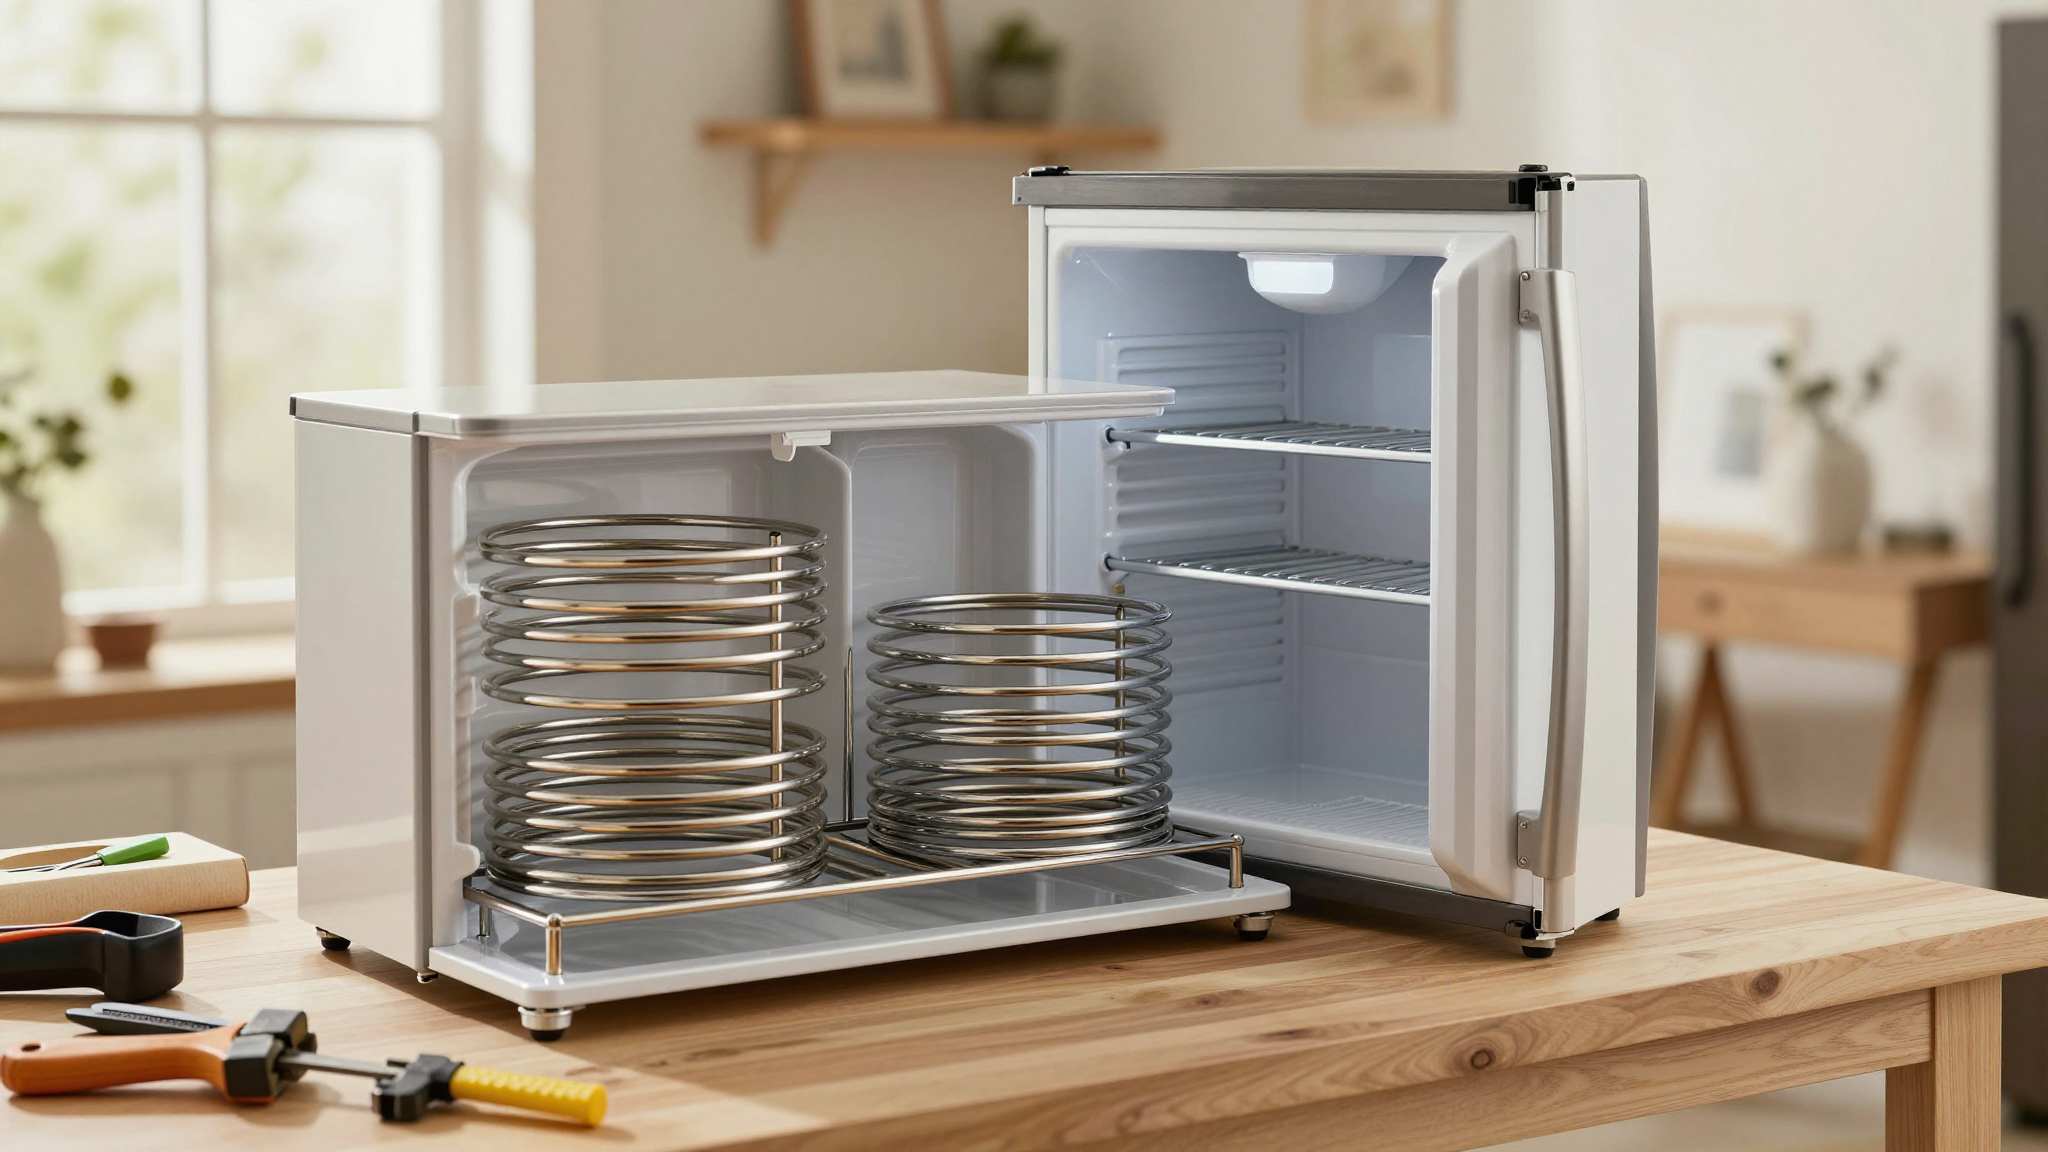
- You should see the coils,they look like a metal radiator with lots of thin fins.
Pro tip: If your kickplate has a filter (like some newer fridges do), check the manual to see if it’s washable. I had to replace mine after I accidentally ripped it while cleaning, and it was $20 I didn’t want to spend.
Rear-Coil Fridges (Older Models)
If your fridge has coils on the back, you’ll need to pull it out to access them. These are common in older models or fridges without a kickplate.
To access them:
- Unplug the fridge.
- Clear space behind it (you’ll need about 6–12 inches of room).
- Grab the sides (not the top or bottom) and pull it straight out. Don’t tilt it,you don’t want to kink the water line or strain the cord.
- The coils will be on the back, near the bottom. They look like a small radiator.
Pro tip: If your fridge is heavy, use a furniture dolly or ask someone to help you. I once tried to move my old fridge by myself and nearly dropped it on my foot. Not worth it.
Top-Coil Fridges (Less Common)
Some fridges (especially French door models) have coils at the top, behind a grille. These can be a little trickier to access, but they’re still doable.
To access them:
- Unplug the fridge and turn off the circuit breaker. Top coils are often near wiring, so it’s safer to cut power completely.
- Locate the grille at the top. It’s usually held in by screws or tabs.
- Remove the grille carefully. If it’s held by tabs, you might need to gently pry it off with a flathead screwdriver.
- The coils will be inside. Be careful,there might be wiring or other components nearby.
Pro tip: If you’re not comfortable working near the top of your fridge, consider calling a technician. I’ve seen people accidentally damage wiring by being too aggressive with the grille. It’s not worth the risk.
Check Your Manual!
Before you start disassembling anything, check your fridge’s manual. Some newer models (especially those with NeverClean™ coils) are designed to not be cleaned by the owner. If your manual says the coils are maintenance-free, don’t force it,you might void your warranty.
If you’ve lost your manual, you can usually find it online. Just Google your fridge’s make and model number (it’s usually on a sticker inside the fridge or on the back).
Step-by-Step: How to Clean Refrigerator Coils (Without Breaking Anything)
Now that you know where your coils are and what tools to use, let’s get to the actual cleaning. I’ll walk you through the process step by step, including the mistakes I’ve made so you can avoid them.
Step 1: Unplug and Prep
First, unplug your fridge. If it’s a top-coil model, turn off the circuit breaker for extra safety. Then:
- Clear space around the fridge so you can move it if needed.
- Put on your gloves and long sleeves.
- Gather your tools: coil brush, vacuum, flashlight, and screwdriver (if needed).
Pro tip: If you’re cleaning the coils under your fridge, place a towel or mat underneath. Dust and pet hair will fall everywhere, and you don’t want it all over your floor.
Step 2: Access the Coils
Now, remove the grille or panel covering the coils. If it’s held by screws, keep them in a small container (like a plastic baggie) so you don’t lose them.
If your fridge has coils on the back or top, you’ll need to move it. Remember:
- Pull it straight out,don’t tilt it.
- Keep the cord and water line (if applicable) slack so you don’t strain them.
- If it’s heavy, ask for help or use a dolly.
Step 3: Brush Off the Dust
This is where the coil cleaning brush comes in. Hold the brush so the bristles are parallel to the fins (not perpendicular,this is key!).
Gently brush the coils, working in small sections. Don’t press too hard,you don’t want to bend the fins. If you encounter stubborn dust or pet hair, go slower and let the brush do the work.
Pro tip: If you hit a spot where the dust is really packed in, don’t force it. Sometimes a little compressed air (used sparingly) can help loosen it, but be careful not to blow dust deeper into the fridge.
Step 4: Vacuum Up the Debris
Now, grab your vacuum with the brush attachment. Hold the attachment so the bristles are parallel to the fins (just like with the brush) and vacuum gently.
Start at the top of the coils and work your way down. This helps gravity do some of the work for you. If you see dust or pet hair falling, let the vacuum catch it before it hits the floor.
Pro tip: If your vacuum doesn’t have a brush attachment, a crevice tool works in a pinch. Just be extra gentle so you don’t bend the fins.
Step 5: Clean the Floor (Yes, Really)
This is the step most people skip, but it’s important. If you leave dust and pet hair on the floor under your fridge, it’ll just get sucked back into the coils the next time the fridge runs.
Use your vacuum to clean the area under and around the fridge. If you’re really thorough, you can even wipe it down with a damp cloth (but don’t let water get near the coils!).
Step 6: Reassemble and Restore Power
Now, put everything back together:
- Reinstall the grille or panel. If it’s held by screws, make sure they’re tight but not overtightened.
- If you moved the fridge, slide it back carefully. Double-check that the cord and water line aren’t kinked.
- Plug the fridge back in (or turn the circuit breaker back on).
Pro tip: After you plug it back in, listen for a minute. Your fridge should:
- Run for a short cycle (a few minutes) to cool back down.
- Sound quieter than before (if it was loud, the coils were probably clogged).
- Not run constantly,it should cycle on and off normally.
If your fridge is still running loudly or not cooling properly, there might be another issue (like a failing compressor). In that case, it’s time to call a technician.
How to Clean Coils in Different Fridge Locations
Now that you know the general process, here’s how to handle the three most common coil locations:
Bottom-Coil Fridges (Easiest!)
These are the simplest to clean because you don’t have to move the fridge.
- Unplug the fridge.
- Remove the kickplate or grille (usually just pull it off or unscrew it).
- Use the coil brush to loosen dust, then vacuum with the brush attachment.
- Vacuum the floor under the fridge to catch any fallen debris.
- Reinstall the grille and plug the fridge back in.
Pro tip: If your kickplate has a filter, check the manual to see if it’s washable. Some can be rinsed in warm, soapy water and air-dried.
Rear-Coil Fridges (A Little More Work)
These require moving the fridge, but it’s still doable.
- Unplug the fridge and clear space behind it.
- Pull the fridge straight out (don’t tilt it!).
- Use the coil brush to clean the coils on the back. Work from top to bottom so dust falls to the floor, not back into the fridge.
- Vacuum the coils, then vacuum the floor behind the fridge.
- Slide the fridge back carefully and plug it in.
Pro tip: If your fridge is on a carpet, it’ll be harder to slide. Use a furniture slider or a large, flat piece of cardboard to help it glide.
Top-Coil Fridges (Most Tricky)
These are the hardest to clean because you have to reach up and be careful near wiring.
- Unplug the fridge and turn off the circuit breaker for safety.
- Locate the grille at the top and remove it carefully (you might need a screwdriver).
- Use the coil brush to clean the coils. Be gentle,there might be wiring nearby.
- Vacuum the coils with the brush attachment, then vacuum any debris that fell onto the top of the fridge.
- Reinstall the grille and restore power.
Pro tip: If you’re not comfortable working near the top of your fridge, call a technician. It’s not worth risking damage to the wiring.
Signs Your Refrigerator Coils Need Cleaning (Right Now!)
How do you know when it’s time to clean your coils? Here are the real signs your fridge is struggling:
Your Fridge Sounds Like a Jet Engine
If your fridge is running constantly or sounds louder than usual, the coils are probably clogged. A clean fridge should cycle on and off every few minutes, not run nonstop.
I learned this the hard way when my old fridge started sounding like a lawnmower. I ignored it for weeks, and by the time I finally cleaned the coils, the motor was overheating. Lesson learned: Don’t ignore the noise.
Your Fridge Isn’t Staying Cold
If your food is warming up or you’re seeing more frost in the freezer than usual, the coils might be blocked. A clean fridge should maintain temperature without working overtime.
Pro tip: If your fridge is not cooling at all, there might be a bigger issue (like a failing compressor). In that case, it’s time to call a technician.
Your Energy Bill Just Took a Nose Dive (Upwards)
If your energy bill suddenly spikes with no other changes (like running the AC more), your fridge might be the culprit. A clogged fridge works harder, which means higher electricity use.
I noticed this after we got a new dog (yes, another shedder). Our energy bill went up by $40 a month until I realized the coils were buried in fur. After cleaning them, the bill dropped back down.
Your Fridge Feels Hot to the Touch
If the sides or back of your fridge feel warm, the coils are probably struggling to release heat. A clean fridge should stay cool to the touch (except for the motor, which might be warm).
You Can See Dust or Pet Hair Near the Coils
If you peek behind the kickplate or at the back of your fridge and see visible dust or pet hair, it’s time to clean. Don’t wait until it’s a thick layer,act now to save money and frustration.
Pro tip: If you’re not sure whether your coils need cleaning, just do it anyway. It takes less than 30 minutes, and you’ll save money in the long run.
Frequently Asked Questions
How do dirty condenser coils raise energy bills and strain my fridge?
Dirty coils act like a blanket around your fridge, trapping heat inside instead of letting it escape. This forces the compressor to run longer and harder to keep your food cold, which increases energy use and wears out the motor faster. Over time, this can lead to higher electricity bills and even premature fridge failure.
How often should I perform this maintenance for best efficiency?
For most homes, twice a year (spring and fall) is enough. If you have pets, check every three to four months because pet hair clogs coils faster. If your kitchen is dusty or you cook a lot, inspect the coils every two to three months. Older fridges or models with exposed coils may need cleaning every three to four months as well.
What safety steps should I take before starting?
Always unplug the fridge (or turn off the circuit breaker for top-coil models) before you start. Wear work gloves and long sleeves to protect your hands from sharp fins. Keep a flashlight handy for visibility, and use a dry cloth or compressed air for stubborn debris. Never use water or high-pressure air near the coils.
What tools work best: a coil brush or a vacuum brush attachment?
Both! Start with a coil cleaning brush to loosen dust and pet hair, then use a vacuum with a brush attachment to remove the debris. The brush helps dislodge stubborn grime, while the vacuum sucks it all up. If you don’t have a coil brush, a soft-bristle paintbrush works in a pinch.
Where are these parts usually located on common U.S. models?
Most fridges have coils in one of three places:
- Behind the kickplate (bottom-coil models,most common).
- On the back (rear-exposed models).
- Behind a top grille (top-coil models, less common).
Always check your owner’s manual before removing any panels. Some newer models have NeverClean™ coils that don’t require maintenance.
What’s the step-by-step method that avoids damage?
Here’s my foolproof method:
- Unplug the fridge (or turn off the circuit breaker for top-coil models).
- Remove the grille or panel covering the coils.
- Use a coil brush to loosen dust, working with the grain of the fins.
- Vacuum the coils with a brush attachment, following the fin direction.
- Vacuum the floor under the fridge to catch any fallen debris.
- Reinstall the grille and plug the fridge back in.
Pro tip: Never bend the fins. If you accidentally bend one, you can usually gently straighten it with a flathead screwdriver, but it’s better to avoid it in the first place.
How do I handle bottom, back, and top locations differently?
Bottom-coil fridges are the easiest,just remove the kickplate and clean. Rear-coil fridges require moving the fridge, so be careful not to kink the cord or water line. Top-coil fridges are the trickiest because you have to work near wiring, so turn off the circuit breaker for safety.
What are clear signs it’s time to service them now?
Clean your coils immediately if you notice any of these signs:
- The fridge runs constantly or loudly.
- Food isn’t staying cold enough.
- Your energy bill spikes unexpectedly.
- The fridge feels hot to the touch on the sides or back.
- You see visible dust or pet hair near the coils.
Pro tip: If your fridge is older than 10 years, it might be time for an upgrade if cleaning the coils doesn’t help. Older fridges are less efficient and more prone to breakdowns.
Will regular maintenance really lower my energy bills?
Yes! Cleaning your coils improves efficiency, which means your fridge doesn’t have to work as hard to stay cold. This can lower your energy bill by 5–25%, depending on how clogged the coils were. In my case, cleaning the coils saved me $20–$40 a month on my energy bill.
Can I use compressed air or a leaf blower instead of a brush?
You can use compressed air for small spots, but I don’t recommend it as your primary method. Compressed air can push dust deeper into the fridge or even damage the fins if used too aggressively. A leaf blower is a bad idea,it’s too powerful and will bend the fins. Stick to a coil brush and vacuum for the safest, most effective cleaning.
And that’s it! Now you know exactly how to clean your refrigerator coils like a pro. It’s one of those small tasks that make a big difference,like winterizing your home or maintaining your HVAC. It doesn’t take much time, but the savings add up.
If you’re feeling overwhelmed, start with a quick check every few months. Pull out the kickplate, take a peek, and if it looks dusty, grab your brush and vacuum. You’ll be glad you did when you see that lower energy bill!
Got questions? Drop them in the comments,I’m happy to help! And if you found this post helpful, share it with a friend who might need it. Happy cleaning!