
DIY Built-In Bookshelves: How I Added Character (and Finally Tamed the Clutter) in Our Living Room
Let me tell you about the time I tried to build built-in bookshelves without measuring twice. Spoiler alert: my husband still teases me about the “leaning tower of books” incident. But that was three projects ago, and now I’ve got the scars (and the skills) to prove these custom shelves are worth every minute of frustration.
Our family room used to look like a library exploded,books stacked on every surface, kids’ toys taking over the coffee table, and that one shelf that could only hold three paperbacks before collapsing. I knew we needed a better solution, but I wasn’t about to drop $15,000 on custom built-ins like some of those HGTV shows suggest. So I rolled up my sleeves, grabbed my trusty DeWalt drill, and got to work.
What I learned? Built-in bookshelves aren’t just about storage,they’re about creating a space that actually feels like home. They can be as simple or as elaborate as you want, and yes, you can absolutely do this yourself. I’ll walk you through exactly how I did it, including the mistakes I made (so you don’t have to) and the little tricks that made all the difference.
Why I Fell in Love with Built-In Bookshelves (and You Will Too)
Before we dive in, let me tell you why these shelves changed our living room for the better:
- The clutter disappeared,No more stacks of books on the floor or that precarious Jenga tower of board games. Everything has a home now.
- It actually looks intentional,I’ll be honest, our old bookshelves looked like we’d just shoved them against the wall. These built-ins? They look like they’ve always been there.
- We saved a ton of money,I spent about $800 on materials and tools, versus the $12,000 estimate I got from a local carpenter. (Yes, I double-checked that number.)
- It’s a conversation starter,Every time we have guests over, someone asks about the shelves. It’s become one of those little details that makes our house feel special.
But here’s the thing: built-ins aren’t just about looks. They’re about function. I needed a place to store our ever-growing book collection, my kids’ toys, and all the random decor I’ve accumulated over the years. And I needed it to actually hold everything without wobbling. (More on that later,trust me, I learned the hard way about using the right brackets.)
If you’re anything like I was, you’re probably thinking: “But I’m not a carpenter! I can barely hang a picture straight!” Good news: neither was I. I had to teach myself how to use a miter saw (after nearly taking my finger off,always use safety glasses), figure out how to find studs in our 1920s house, and learn the difference between crown molding and baseboard. But I made it through, and so will you.
Now, let’s get into the nitty-gritty of how I did it,including the tools I used, the mistakes I made, and the little details that made all the difference.
Planning Your Built-In Bookshelves: Where I Went Wrong (and How to Avoid It)
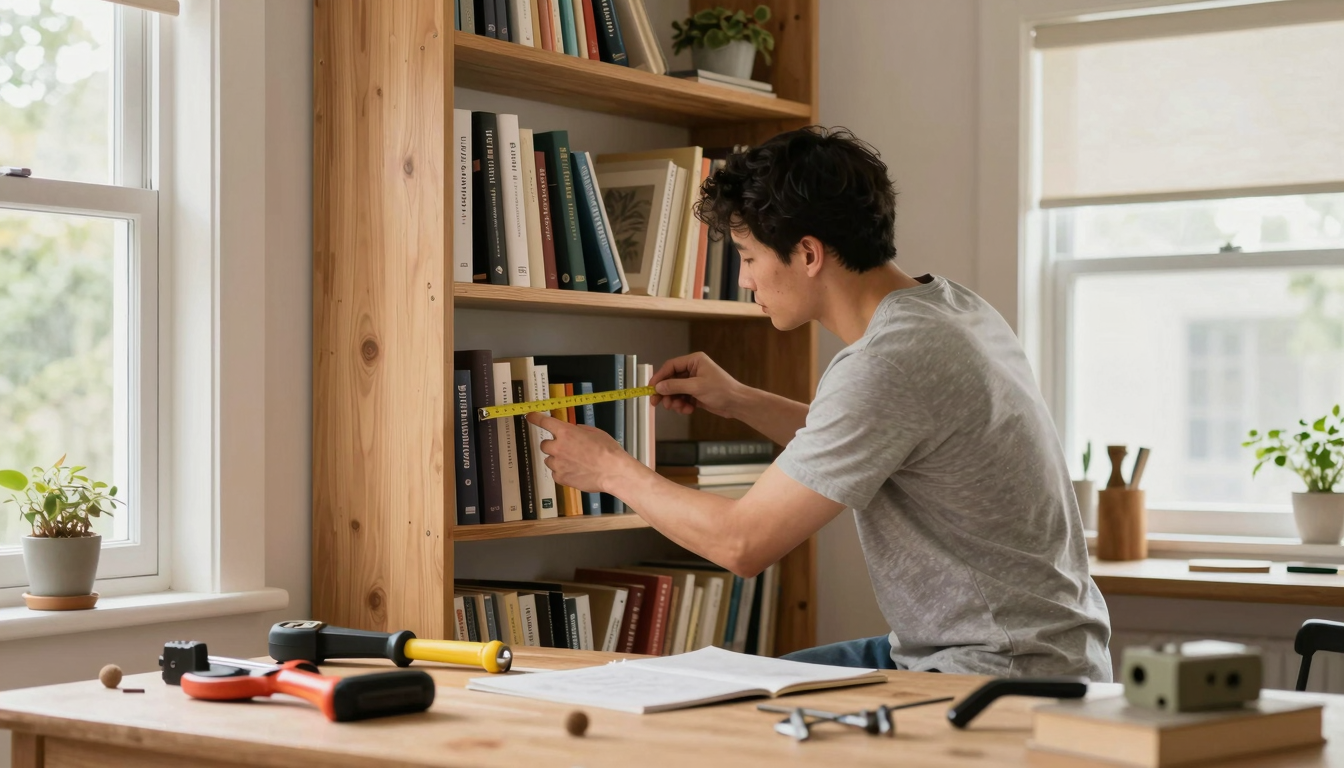
I’ll never forget the day I measured our living room wall for the first time. I was so excited, I grabbed my tape measure and just started marking lines everywhere. Big mistake. Here’s what I wish I’d known before I started:
- Measure everything,twice. I thought I was being thorough, but I missed accounting for the baseboard and the slight slope in our floor. (Old houses, am I right?) My first attempt was about an inch too short. An inch! It sounds small, but when you’re trying to make something look built-in, it makes a huge difference.
- Think about what you’re actually storing. I assumed all our books would fit on standard shelves, but I didn’t account for the oversized art books my husband collects. Now we have one shelf that’s basically just for those monstrosities.
- Consider the flow of the room. I placed the shelves right where we walk through to the kitchen. Genius, right? Wrong. Now I have to do this awkward side-step every time I’m carrying groceries. (Lesson learned: always walk through the space with your arms full before finalizing plans.)
Here’s how I should have planned it:
- Sketch it out first. I used graph paper to draw a rough layout of our living room. I marked where the couch, TV, and other furniture would go, then left space for the shelves. This helped me visualize how everything would fit together.
- Measure the wall,carefully. I used a laser level (a game-changer, by the way) to make sure I accounted for any unevenness. I also measured the height from the floor to the ceiling in multiple spots to check for slopes.
- Decide on your style early. I knew I wanted something that looked like it belonged in our home, not like it was just plopped there. So I spent a lot of time looking at accent wall ideas and other built-in projects to get inspiration.
- Plan for power and wiring. I didn’t think about where the outlets were until I was halfway through building. Now I have to be careful not to block them with books. (If I were doing it again, I’d plan the shelves around the existing outlets or add a power strip behind them.)
One thing that really helped me was using HomeStyler to create a 3D model of our room. It’s free, and it let me play around with different shelf heights and styles without committing to anything. I even sent the design to my husband to get his input before I started cutting wood.
Pro tip: If you’re not sure about colors or finishes, grab some paint samples and tape them to the wall where the shelves will go. Look at them in different lighting,morning sun, evening lamp light, even that weird fluorescent glow from the kids’ nightlight. You’d be surprised how different colors look in real life versus on a computer screen.
Design Ideas That Actually Work (and Ones to Avoid)
When I started this project, I had so many ideas. I wanted floor-to-ceiling shelves, hidden compartments, even a little ladder like in the movies. But I quickly learned that not all design ideas are created equal. Here’s what worked for me,and what I’d skip next time.
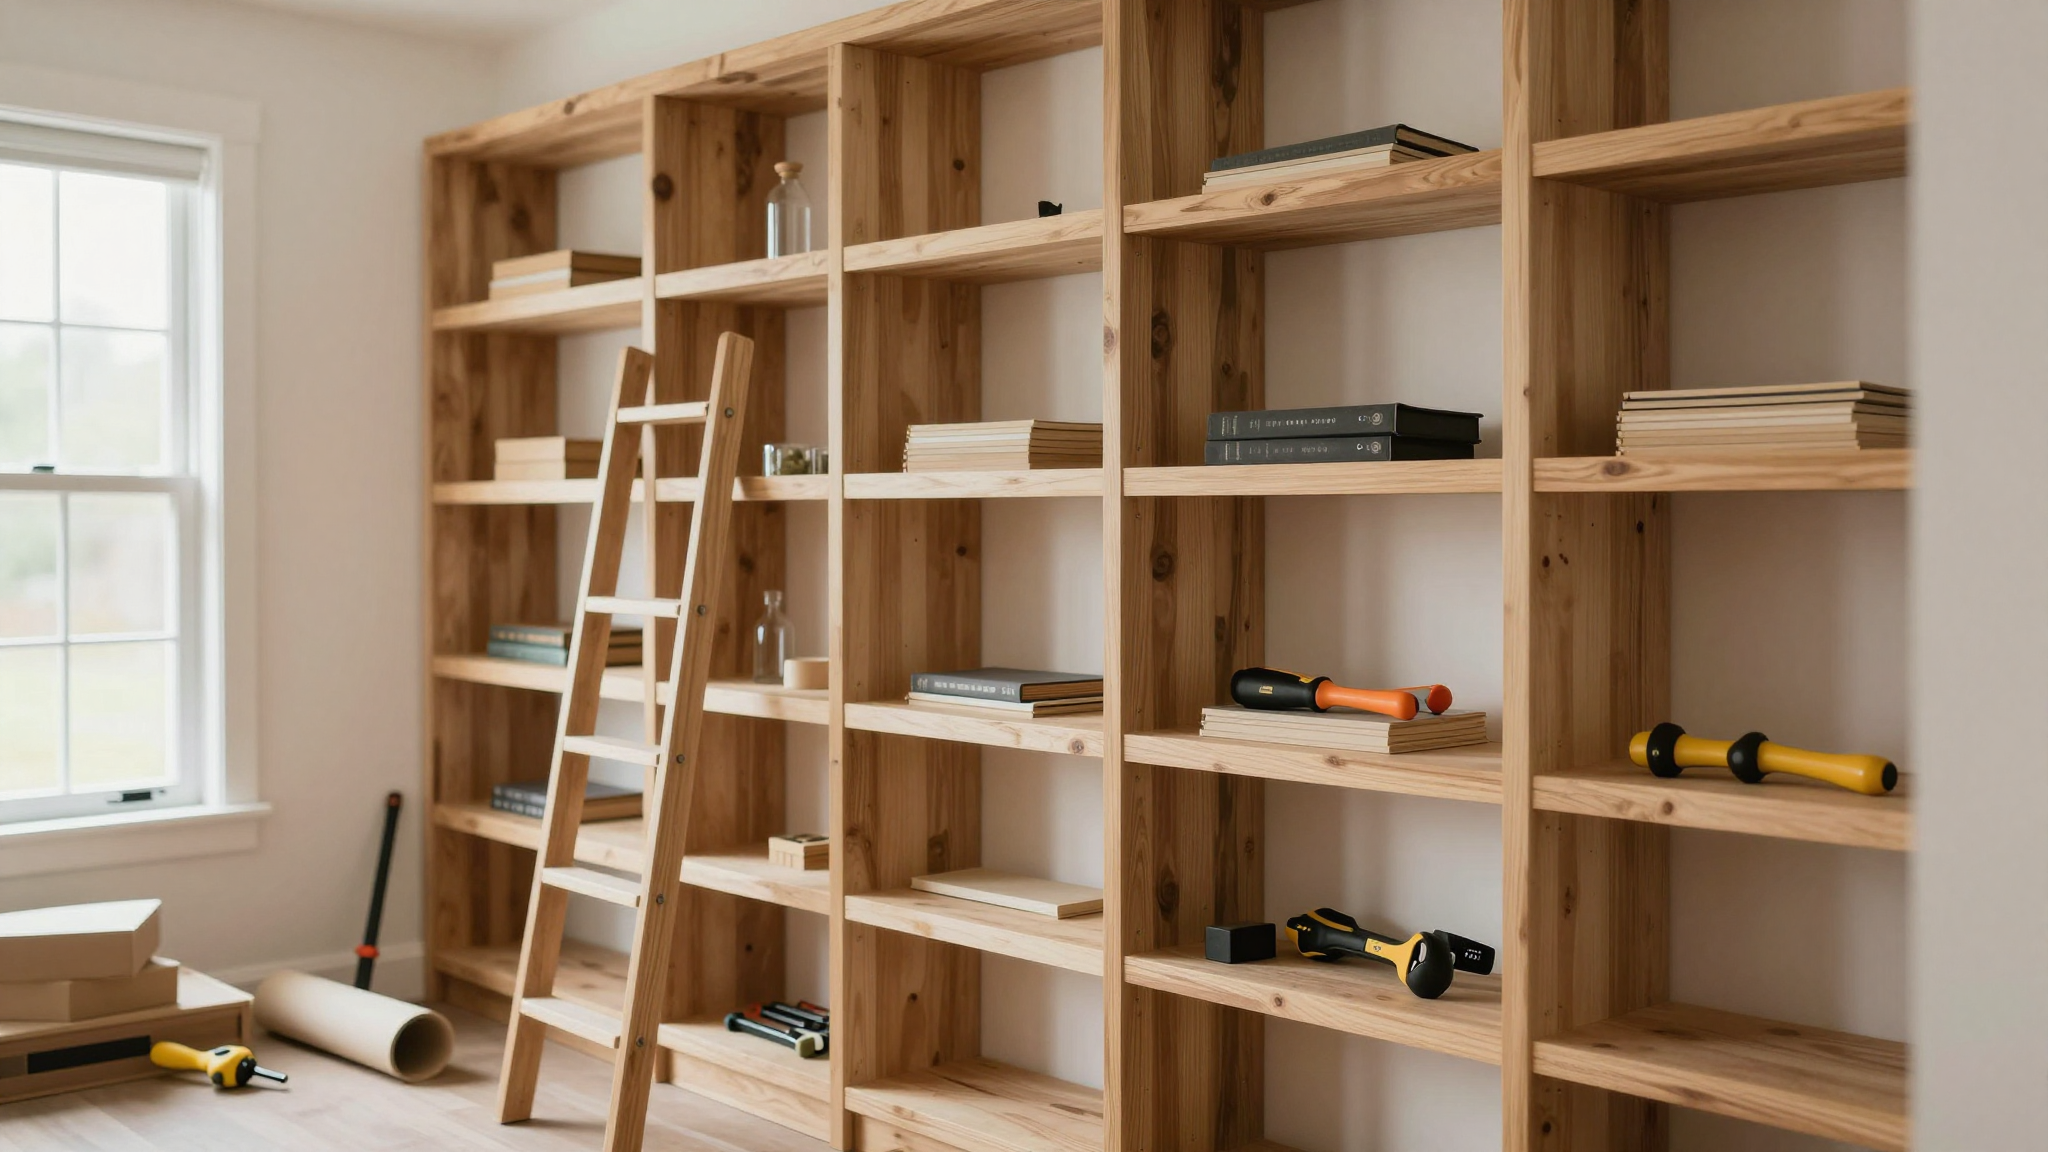
What Worked: Floor-to-Ceiling Shelves with a Twist
I went with floor-to-ceiling shelves because our living room has high ceilings, and I wanted to take advantage of that vertical space. But I made one key adjustment: I stopped the shelves about 6 inches from the ceiling. Here’s why:
- It creates a sense of airiness. Floor-to-ceiling can feel overwhelming, especially in a smaller room. The gap at the top makes the space feel bigger.
- It hides imperfections. Our ceiling isn’t perfectly straight, and the gap lets me hide that without having to do a ton of drywall work. (I did have to patch a few holes,more on that in a minute.)
- It gives me a place to add decor. Now I have a little ledge at the top where I can display some of my favorite vases or small plants. It’s like a mini accent shelf!
I also added a simple crown molding at the top to make it look more finished. I used leftover molding from another project, which saved me some money. It’s not perfect, but it looks a lot better than just leaving a raw edge.
What I’d Skip Next Time: Overcomplicating the Design
I had this grand idea to add a built-in desk and some super-complicated shelving units that would wrap around the fireplace. Sounded great in theory, but here’s what happened:
- It took forever to build. I spent way more time on the desk than I anticipated, and by the time I got to the shelves, I was ready to be done. If I were doing it again, I’d stick to a simpler design and save the fancy details for another project.
- It didn’t actually work for how we use the space. I thought the desk would be great for homework, but it’s in a weird spot where no one actually sits. Now it’s just collecting dust. (I use it as a display shelf for my kids’ art projects, but that’s not what I intended.)
- It was harder to keep clean. All those nooks and crannies? Dust magnets. I now spend way more time dusting than I ever did with our old bookshelves.
If I were starting over, I’d keep the design simple and focus on making sure it actually fits our lifestyle. For example, I’d add more closed storage for the kids’ toys so they’re not all out in the open. And I’d make sure any built-in desk is in a spot where someone would actually use it.
Little Details That Made a Big Difference
Here are the small things that took my shelves from “meh” to “wow”:
- LED lighting. I added battery-operated LED strips under each shelf. They’re not super bright, but they give just enough light to make the books and decor pop. Plus, they’re easy to install and don’t require any wiring.
- Contrasting paint on the back wall. I painted the wall behind the shelves a deep navy blue. It makes the white shelves stand out and gives the whole thing a cozy, library-like feel. (I used peel-and-stick wallpaper on the back of the top shelf for a little extra texture.)
- Mixing materials. I used a combination of wood and painted shelves. The wood gives it a warm, natural feel, while the painted shelves keep it from looking too heavy. I also added some metal brackets for a little industrial touch.
- Adjustable shelves. I used these little pins that let me adjust the shelf heights as needed. It’s been a game-changer for organizing our books and toys. I can move them up or down depending on what we need to store.
One thing I didn’t do that I wish I had? Added a little built-in bench or seating. I’ve seen some really cute designs where the bottom of the bookshelves has a bench with storage underneath. It would be perfect for our living room, especially since we don’t have a lot of extra seating. Maybe that’s a project for next summer!
Tools and Materials: What I Actually Used (and What You Can Skip)
Before I started, I went a little overboard buying tools. I thought I needed every single thing on the “essential tools” list. Spoiler: I didn’t. Here’s what I actually used,and what you can skip if you’re on a budget.
Tools I Couldn’t Live Without
- DeWalt drill/driver. This thing is a beast. I used it for just about everything,drilling holes, driving screws, even mixing paint. It’s worth the investment, especially if you’re going to be doing more DIY projects.
- Miter saw. I rented one for this project, but I’ve used it so much since then that I ended up buying my own. It’s a game-changer for cutting wood at precise angles. Just make sure you always use safety glasses!
- Stud finder. This little tool saved me so much time. Our walls are old and a little wonky, and the stud finder helped me locate the studs so I could secure the shelves properly. (More on that in a minute.)
- Level. I used a laser level, which was amazing for marking straight lines. But a regular bubble level would work just as well. Just make sure you check it often,trust me, walls aren’t always as straight as they look.
- Clamps. I used these to hold pieces in place while I was screwing them together. They’re not glamorous, but they’re essential for keeping everything aligned.
Tools I Thought I Needed (But Didn’t)
- Table saw. I considered buying one, but I realized I could do everything with my miter saw and a little extra time. If you’re doing a lot of cutting, it might be worth it, but for a one-time project, it’s not necessary.
- Router. I thought I’d use it for fancy edges, but in the end, I just used a sander to smooth everything out. It looks fine, and I saved myself a lot of hassle.
- Fancy paint sprayer. I was tempted to rent one for a smooth finish, but I ended up using a good brush and roller. It took a little more elbow grease, but it turned out great.
Materials That Made the Difference
Here’s what I used for the actual shelves, and why I chose each material:
- Plywood for the shelves. I used ¾-inch plywood because it’s sturdy and affordable. I sanded the edges so they’re smooth and won’t snag on books or clothes. I also used wood glue to reinforce the joints,it’s a small detail, but it makes a big difference in how sturdy everything feels.
- Pine boards for the frame. I used pine because it’s easy to work with and looks great with a little stain or paint. I stained it a dark walnut color to give it a little warmth, but you could also paint it any color you like.
- Crown molding. I used leftover crown molding from another project to finish the top of the shelves. It’s not perfect, but it looks a lot better than leaving a raw edge.
- L-brackets and screws. I used heavy-duty L-brackets to secure the shelves to the wall. I made sure to screw them into the studs, not just the drywall. This is critical for making sure the shelves are sturdy and won’t wobble.
- Wood filler and spackle. I used wood filler to patch any holes or imperfections in the wood, and spackle to fill any gaps in the drywall. It’s amazing how much smoother everything looks after a little filler and sanding.
One thing I wish I’d done differently? I used pre-cut shelves instead of building my own. It saved me a ton of time, but the shelves weren’t as deep as I wanted. If I were doing it again, I’d build custom shelves to fit our space perfectly.
Building the Shelves: Step by Step (With My Honest Mistakes)
Now for the fun part,actually building the shelves! I’ll walk you through the steps I took, including the mistakes I made and how I fixed them.
Step 1: Build the Frame
I started by building the frame for the shelves. I used 2x4s for the vertical supports and 1x3s for the horizontal pieces. Here’s where I went wrong:
- I didn’t pre-drill the holes. I thought I could just screw everything together, but the wood split in a few places. Lesson learned: always pre-drill holes, especially in pine.
- I didn’t use a level. I thought the walls were straight, but they weren’t. I had to adjust the frame after I realized it was crooked. (This is why I mentioned checking for level earlier!)
Here’s how I should have done it:
- Measure and mark the locations for the vertical supports on the wall. Use a level to make sure they’re straight.
- Pre-drill holes in the 2x4s for the screws. This will prevent the wood from splitting.
- Attach the vertical supports to the wall using screws and L-brackets. Make sure to screw into the studs, not just the drywall.
- Measure and cut the horizontal pieces to fit between the vertical supports. Use a miter saw for precise cuts.
- Attach the horizontal pieces to the vertical supports using screws and wood glue. This will give your frame extra strength.
Step 2: Add the Shelves
Once the frame was in place, I added the shelves. I used ¾-inch plywood for the shelves because it’s sturdy and affordable. Here’s what I did:
- Measure and mark the locations for the shelves on the vertical supports. I spaced them about 12 inches apart, but you can adjust this based on what you’re storing.
- Cut the plywood to size using a circular saw. I used painter’s tape to mark the cut lines, which helped prevent splintering.
- Sand the edges of the plywood to make them smooth. This is an important step,trust me, you don’t want splinters every time you pull out a book!
- Attach the shelves to the frame using screws and L-brackets. I made sure to screw into the studs for extra support.
One thing I wish I’d done differently? I didn’t add any support brackets under the shelves. Now, when I put heavy books on the top shelves, they sag a little. If I were doing it again, I’d add some brackets for extra support.
Step 3: Finish the Shelves
This is where I spent the most time,and where I made the most mistakes. Here’s what I did:
- Fill any holes or imperfections with wood filler. I used a putty knife to smooth it out, then let it dry overnight.
- Sand the shelves until they’re smooth. I used 120-grit sandpaper for the initial sanding, then 220-grit for the final sanding. This step is so important,it makes a huge difference in how the paint or stain looks.
- Prime the shelves. I used a stain-blocking primer because I was planning to paint them white. This helped prevent the wood grain from bleeding through.
- Paint the shelves. I used a satin paint because it’s durable and easy to clean. I applied two coats, letting each one dry completely before adding the next.
- Add the crown molding. I used a miter saw to cut the molding at a 45-degree angle, then attached it to the top of the shelves using finish nails and wood glue.
Here’s where I went wrong:
- I didn’t let the paint dry long enough between coats. I was in a hurry to finish, so I only waited a few hours between coats. Big mistake. The paint didn’t adhere properly, and I ended up with some streaky spots. Lesson learned: always follow the drying time on the paint can.
- I didn’t sand between coats of paint. I thought I could just paint over the first coat, but I should have sanded it lightly to create a smooth surface. This would have helped prevent the streaky spots.
- I didn’t use painter’s tape. I thought I could freehand the edges, but I ended up with some messy lines. If I were doing it again, I’d use painter’s tape to create clean edges.
Pro tip: If you’re painting, use a high-quality brush and roller. I used a Purdy angled sash brush for the edges and a 3/8-inch nap roller for the flat surfaces. It made a huge difference in the final finish.
Step 4: Add the Final Touches
Once the paint was dry, I added the final touches:
- Caulk the gaps between the shelves and the wall. I used a paintable caulk and a caulking gun. This helped create a seamless look.
- Add the LED lighting. I used battery-operated LED strips because they were easy to install and didn’t require any wiring. I stuck them to the underside of the top shelf and let them hang down a little for a soft glow.
- Organize the shelves. I started with the biggest, heaviest items on the bottom and worked my way up. I also grouped similar items together,books with books, decor with decor, etc.
One thing I wish I’d done differently? I didn’t add any storage baskets or bins to the shelves. Now, I have to dig through everything to find what I need. If I were doing it again, I’d add some baskets to keep things organized.
Making It Look Like a Pro (Even If You’re Not One)
Here’s the thing about DIY projects: the difference between something that looks homemade and something that looks like it was done by a pro often comes down to the little details. Here’s how I made my shelves look like they belonged in a magazine (even though I’m definitely not a pro).
Crown Molding: The Secret to Looking Built-In
I’ll be honest,I was skeptical about crown molding at first. I thought it was just a fancy way to cover up mistakes. But after I added it to the top of my shelves, I was blown away by how much it transformed the look.
Here’s how I did it:
- Measure the length of the top of the shelves. I used a tape measure and marked the molding every 12 inches.
- Cut the molding at a 45-degree angle using a miter saw. This creates a seamless joint when you attach the pieces together.
- Test-fit the molding before attaching it. This helps you make sure everything lines up correctly.
- Attach the molding using finish nails and wood glue. I used a nail gun for the nails, which made the job a lot faster.
- Fill the nail holes with wood filler and sand smooth. This helps create a seamless finish.
- Paint the molding to match the shelves. I used the same satin paint I used on the shelves for a cohesive look.
Pro tip: If you’re not sure how to cut the molding, practice on a scrap piece first. It’s easier than it looks, but it’s good to get the hang of it before you start on the real thing.
Paint and Finish: How to Avoid a DIY Disaster
I’ll never forget the first time I tried to paint a bookshelf. I used a cheap brush, didn’t prime the wood, and ended up with streaky, uneven paint that looked like a kindergartener did it. (Okay, maybe that’s a little dramatic, but it wasn’t pretty.) Here’s how I did it right the second time:
- Use a high-quality primer. I used a stain-blocking primer to prevent the wood grain from bleeding through the paint. This is especially important if you’re painting over stained wood.
- Sand the wood thoroughly. I used 120-grit sandpaper for the initial sanding, then 220-grit for the final sanding. This helps create a smooth surface for the paint to adhere to.
- Use a high-quality paint. I used a satin paint because it’s durable and easy to clean. I avoided flat paint because it’s harder to clean and can show every little imperfection.
- Use the right tools. I used a Purdy angled sash brush for the edges and a 3/8-inch nap roller for the flat surfaces. This helped me achieve a smooth, even finish.
- Apply two coats of paint. I let the first coat dry completely before applying the second coat. This helps prevent streaks and ensures even coverage.
- Sand lightly between coats. I used 220-grit sandpaper to sand lightly between coats. This helps create a smooth surface for the next coat of paint.
Pro tip: If you’re painting, work in a well-ventilated area and wear a mask. Paint fumes can be strong, and you don’t want to breathe them in.
Lighting: The Little Detail That Makes a Big Difference
I didn’t realize how much lighting would transform my shelves until I added it. Before, the shelves looked a little dark and dingy, especially in the evening. But after I added the LED strips, they looked bright and inviting.
Here’s how I did it:
- Choose the right lighting. I used battery-operated LED strips because they were easy to install and didn’t require any wiring. I also considered plug-in sconces, but I didn’t want to deal with the wiring.
- Plan the placement. I wanted the lighting to highlight the books and decor, so I placed the LED strips on the underside of the top shelf and let them hang down a little.
- Test the placement. I turned on the lights and moved them around until I found the perfect spot. This helped me make sure the lighting was even and didn’t cast any harsh shadows.
- Secure the lighting. I used double-sided tape to secure the LED strips to the underside of the shelf. This helped keep them in place and prevented them from moving around.
Pro tip: If you’re using LED strips, make sure they’re the right color temperature for your space. I used warm white lights because they create a cozy, inviting atmosphere. Cool white lights can look a little harsh in a living room.
Integrating Your Shelves with the Rest of Your Home
One of the things I love most about my built-in shelves is how well they fit into the rest of our home. They don’t just look like they belong,they feel like they’ve always been there. Here’s how I made that happen:
Flanking the Fireplace: A Classic Look
Our fireplace is the focal point of our living room, so I wanted the shelves to complement it. I flanked the fireplace with the shelves, creating a symmetrical, library-like look.
Here’s how I did it:
- Measure the width of the fireplace. I wanted the shelves to be the same width as the fireplace, so I measured the mantel and used that as a guide.
- Plan the placement. I wanted the shelves to be centered on either side of the fireplace, so I measured the distance from the fireplace to the walls and marked the locations for the shelves.
- Build the shelves to match the fireplace. I used the same wood and finish as the fireplace mantel to create a cohesive look. I also added crown molding to the top of the shelves to match the molding around the fireplace.
Pro tip: If your fireplace has a unique design, try to incorporate those elements into your shelves. For example, if your fireplace has a lot of detail work, you could add similar details to your shelves to create a cohesive look.
Working with TV Walls and Other Electronics
I also wanted to make sure the shelves worked with our TV and other electronics. Here’s how I did it:
- Plan for cord management. I didn’t want cords hanging down the back of the shelves, so I ran them through the back of the TV stand and tucked them out of sight.
- Leave space for the TV. I made sure the shelves didn’t block the TV or the view of the screen. I also left enough space around the TV for the soundbar and other accessories.
- Consider the height of the TV. I wanted the TV to be at eye level when we’re sitting on the couch, so I made sure the shelves didn’t block the view. I also added a small shelf above the TV to display some decor.
Pro tip: If you’re mounting a TV on the wall, make sure the shelves are secure and won’t interfere with the mounting brackets. You don’t want to have to move the shelves later!
Dealing with Low Ceilings and Vaulted Spaces
Our living room has a vaulted ceiling, which I wanted to take advantage of. Here’s how I made the shelves work with the ceiling:
- Measure the height of the ceiling. I wanted the shelves to reach as high as possible, so I measured the height of the ceiling in multiple spots to account for any slopes.
- Plan the placement. I wanted the shelves to follow the angle of the ceiling, so I marked the locations for the top of the shelves on the wall. I also left a small gap at the top to create a sense of airiness.
- Build the shelves to fit the ceiling. I used a miter saw to cut the top of the shelves at an angle to match the ceiling. I also added crown molding to the top to create a seamless transition.
Pro tip: If you have a vaulted ceiling, consider adding a small ledge or shelf at the top of the shelves. This can help create a sense of separation between the shelves and the ceiling, making the room feel more open.
Budget-Friendly Tips (Because We All Have to Save Somewhere)
I’ll be honest,I was a little nervous about the cost of this project. I’d seen some estimates online for custom built-ins, and they were way out of my budget. But I knew I could do it myself for a fraction of the cost. Here’s how I saved money without sacrificing quality.
IKEA Hacks: The Budget-Friendly Way to Custom Shelves
I’ve always been a fan of IKEA hacks, and this project was no exception. I used a combination of IKEA cabinets and custom-built shelves to create a cohesive look. Here’s how I did it:
- Use IKEA cabinets for the base. I used BRIMNES cabinets for the base of the shelves. They’re affordable, easy to assemble, and come in a variety of sizes. I also used BILLY bookcases for the upper shelves.
- Customize the IKEA pieces. I painted the BRIMNES cabinets and BILLY bookcases to match the rest of the shelves. I also added crown molding to the top of the BILLY bookcases to create a seamless look.
- Combine IKEA and custom pieces. I used the IKEA cabinets for the base and built custom shelves above them. This gave me the flexibility to create a unique design while keeping costs down.
Pro tip: If you’re using IKEA pieces, make sure you measure carefully. IKEA cabinets and bookcases come in standard sizes, so you’ll need to plan your design around those dimensions.
DIY vs. Custom: What’s the Real Difference?
I was curious about the difference in cost between DIY and custom built-ins, so I did a little research. Here’s what I found:
- DIY built-ins typically cost between $350 and $1,400 per linear foot, depending on the materials and complexity. My project cost about $800 for 10 linear feet, which is on the lower end of the spectrum.
- Custom built-ins from a carpenter or contractor typically cost between $1,500 and $3,000 per linear foot. That’s a huge difference! For my project, that would have been between $15,000 and $30,000.
Pro tip: If you’re on a tight budget, consider using reclaimed wood or other affordable materials. You can also save money by doing the work yourself and only hiring a professional for the parts you’re not comfortable with.
Where to Splurge and Where to Save
Here’s where I chose to splurge and where I saved money on my project:
- Splurge on:
- High-quality wood for the shelves. I used ¾-inch plywood because it’s sturdy and durable.
- Good paint and primer. I used a high-quality satin paint and a stain-blocking primer to ensure a smooth, even finish.
- LED lighting. I splurged on battery-operated LED strips because they were easy to install and didn’t require any wiring.
- Save on:
- Crown molding. I used leftover crown molding from another project to save money.
- Hardware. I used basic L-brackets and screws instead of fancy hardware.
- Tools. I rented some tools, like the miter saw, instead of buying them.
Pro tip: If you’re not sure where to splurge and where to save, start with the basics,like the wood and paint,and then add the extras as your budget allows.
Final Thoughts (and What I’d Do Differently Next Time)
So, what do I think about my built-in bookshelves now that they’re done? I love them. They’ve completely transformed our living room, and I’m so proud that I built them myself. But if I were doing it again, I’d make a few changes:
- I’d plan the design more carefully. I’d spend more time sketching out the design and making sure it fits our lifestyle. I’d also make sure to leave enough space for seating and other furniture.
- I’d add more storage. I’d include more closed storage, like drawers and cabinets, to keep things organized. I’d also add some baskets or bins to corral smaller items.
- I’d use better-quality hardware. I’d invest in better L-brackets and screws to make sure the shelves are extra sturdy. I’d also consider adding some decorative brackets for a little extra flair.
- I’d add a built-in bench or seating. I’d include a bench with storage underneath, or maybe even a window seat. It would be a great place to sit and read, and it would add even more functionality to the space.
But overall, I’m really happy with how the shelves turned out. They’ve added so much character to our living room, and I love how they’ve transformed our space. Plus, I’ve gained a ton of confidence in my DIY skills. Who knows? Maybe next I’ll tackle a built-in desk or a custom entertainment center!
If you’re thinking about building your own built-in bookshelves, I hope this guide has been helpful. Remember, it’s okay if your project isn’t perfect. The most important thing is that you’re creating something that you love,and that you did it yourself!
Now, if you’ll excuse me, I have some books to organize. And maybe a little dusting to do. (Okay, a lot of dusting.)
Frequently Asked Questions
How do I start planning for a DIY built-in bookshelf project?
Start by measuring your wall space and ceiling height. Think about what you want to store,books, decor, or electronics,and how much space you need. Sketch out a rough design, then use a 3D modeling tool like HomeStyler to play around with different layouts. Don’t forget to account for baseboards, crown molding, and any existing features like outlets or windows.
What are some popular design styles for custom bookcases?
You can go for a modern look with clean lines and minimal ornamentation, or a traditional style with crown molding and rich wood tones. Eclectic designs mix materials and shapes for a unique look. I went with a modern style for our living room, but I added some traditional details like crown molding to give it a little warmth.
Can I use pre-made cabinets as part of my built-in shelving?
Absolutely! I used IKEA BRIMNES cabinets for the base of my shelves and BILLY bookcases for the upper sections. I painted them to match the rest of the shelves and added crown molding to create a seamless look. It’s a great way to save money and time while still getting a custom look.
What tools are essential for building these shelves?
You’ll need a drill, miter saw, level, and measuring tools like a tape measure and square. Safety gear like goggles and a dust mask are a must. I also used clamps to hold pieces in place while I was assembling them. If you’re on a budget, you can rent some tools instead of buying them.
How can I make my DIY bookshelves look like a professional custom job?
Focus on the finishing touches. Add crown molding to the top of the shelves, use a high-quality paint or stain, and consider installing LED lighting. Caulk any gaps between the shelves and the wall, and sand everything smooth before painting. These little details make a big difference in how professional your shelves look.
What should I do if my walls or ceiling are uneven?
Use a laser level to mark straight lines on the wall. Account for any unevenness in your measurements and use shims behind the shelves to adjust for slopes. Caulk any gaps between the shelves and the wall to create a seamless look. If your ceiling is vaulted, consider following the angle or running shelves straight across for a unique look.
Are there smart storage ideas I can include?
Absolutely! Add drawers and cabinets to the lower half of your shelves for hidden storage. Use adjustable shelves to accommodate different items. Include baskets or bins to corral smaller items and keep things organized. I wish I’d added more storage to my shelves,I’m always digging through everything to find what I need!
How do I choose the right color and hardware?
Select a finish that complements your room’s existing design. I used a satin paint for a durable, easy-to-clean finish. For hardware, I chose simple L-brackets and screws. If you want to add a little extra flair, consider decorative brackets or pulls. Just make sure they match the style of your room.