
How I Transformed My Dull Laundry Room for Under $400 (And Why It Was Worth Every Penny)
Let me tell you about the day I finally opened my laundry room door and didn’t immediately want to close it again. For years, this space had been my personal shame closet – the one room I avoided showing to guests, where I’d shove in baskets of unfolded clothes and pretend it didn’t exist. The peeling paint, the flickering fluorescent light, the countertop covered in mystery stains… it was a disaster.
Then one Saturday morning, I decided enough was enough. I cleared out everything, scrubbed every surface, and started planning. What I didn’t realize was that this project would become one of my most rewarding DIY experiences – and it only cost me $387. Here’s exactly how I did it, including the mistakes I made along the way (because let’s be honest, there were a few).
If you’re staring at your own laundry room thinking “there’s no way this can be pretty,” I’m here to tell you: you’re wrong. With some smart planning and a little elbow grease, you can create a space that actually makes doing laundry feel less like a chore and more like… well, maybe not a vacation, but at least something tolerable.
I’ve included all the specific products I used, the exact colors that worked (and the ones that didn’t), and the storage hacks that finally made sense of my clutter. And if you’re worried about your budget, don’t be – I’ll show you how to stretch every dollar while still getting professional-looking results.
Ready to see the before and after? Let’s get started.
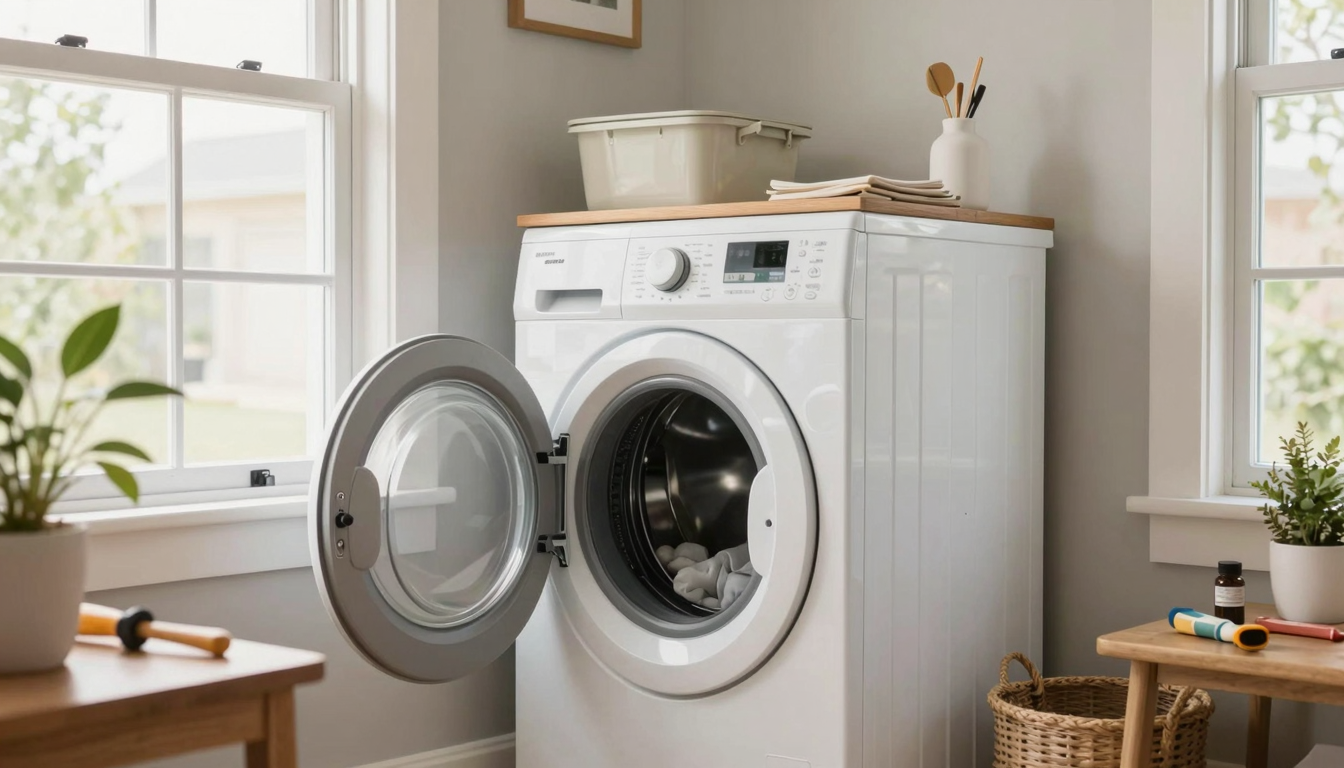
Before and After: My Real Laundry Room Transformation

The “before” – my laundry room in all its glory (or lack thereof)

The “after” – same space, completely different vibe
That’s right – the space on the right is the same one on the left. No, I didn’t hire a designer or spend thousands. I did this myself over three weekends, and I’ll walk you through every step so you can do it too.
Here’s what changed:
- Painted the walls and cabinets (using leftover paint from our bedroom project)
- Replaced the old fluorescent light with a modern fixture I found at Home Depot for $69
- Added butcher block countertops above the washer and dryer
- Installed new hardware on all cabinets and drawers
- Created custom storage solutions for all our laundry supplies
- Added personal touches like a gallery wall and decorative accents
And the best part? I didn’t have to replace any major appliances or do any structural work. Everything you see here was surface-level changes that made a huge difference.
Why This Project Was Worth Every Penny (And Hour)
Before I dive into the how-to, let me tell you why this project was so important to me. For years, I’d been putting off this room because I thought it would be too expensive or too complicated. But here’s what I learned:
- It actually saved me money in the long run. Before, I’d avoid doing laundry because the space was so unpleasant. Now I actually look forward to folding clothes in my pretty room. (Okay, maybe “look forward to” is stretching it, but I definitely don’t dread it anymore.)
- It made my daily life easier. Having proper storage for all my laundry supplies means I can actually find what I need when I need it. No more digging through baskets or forgetting where I put the stain remover.
- It increased my home’s value. While laundry rooms aren’t usually the first thing buyers notice, a well-designed one can be a major selling point. Plus, it just makes the whole house feel more put-together.
- It was a great creative outlet. This project let me experiment with colors and styles I might not have tried in other rooms. The coastal-inspired palette I chose actually ended up influencing other areas of our home.
And here’s the thing that surprised me most: I actually enjoyed the process. There’s something incredibly satisfying about taking a space that was purely functional and making it beautiful too. Plus, every time I walk in there now, I feel this little sense of pride knowing I did it myself.
Now, let’s get into the details so you can create your own laundry room transformation.
Planning Your Budget-Friendly Laundry Room Makeover
I’ll be honest – my first attempt at planning this project was a disaster. I walked into Home Depot with no real idea of what I wanted or how much I could spend, and I ended up buying three different colors of paint samples, a light fixture I couldn’t install, and some cabinet hardware that didn’t match anything. ($127 down the drain before I even started painting.)
So here’s what I wish I’d known from the beginning: planning is everything. A little upfront work saves you time, money, and a lot of frustration later. Here’s exactly how I approached it the second time around.
Step 1: Assess Your Space (And Be Brutally Honest)
I grabbed my phone and took about 50 photos of my laundry room from every angle. Then I sat down with my husband and we made a list of everything that was wrong with the space. No sugarcoating, no “it’s fine” – just raw, honest feedback.
Here’s what we came up with for our list (yours might be different, but this exercise is crucial):
- The fluorescent light was giving me headaches and making everything look yellow
- There was no counter space for folding clothes
- The cabinets were outdated and the hardware was falling off
- We had no good storage for laundry supplies
- The walls were scuffed and the paint was peeling in places
- There was no good place to hang air-drying clothes
We also thought about how we actually use the space. For example, I realized I always need a place to set my laundry basket while I’m sorting clothes, and my husband wanted somewhere to put his toolbox since it’s right outside the laundry room.
Pro tip: If you’re like me and tend to get overwhelmed, try the “5-minute brain dump” method. Set a timer for 5 minutes and just write down every single thing that bothers you about the space. Don’t edit, don’t second-guess – just get it all out. Then go back and circle the top 3-5 things you want to fix first.
Step 2: Set a Realistic Budget (With a Little Buffer)
This is where I went wrong the first time. I thought “oh, I’ll just spend $200” and then ended up over budget before I even started. Here’s how I did it right the second time:
- Decide on your total budget. I knew I wanted to keep it under $500, so that’s what I aimed for.
- Break it down by categories. I made a simple spreadsheet with these categories:
| Category | My Budget | What I Actually Spent | Money-Saving Tips |
|---|---|---|---|
| Paint & Supplies | $50 | $38 (used leftover paint from bedroom) | Check your garage/basement for leftover paint first! |
| Lighting Fixture | $100 | $69 (found on sale at Home Depot) | Look for clearance items or wait for sales |
| Storage Solutions | $80 | $72 (used baskets from Target and IKEA) | Repurpose items you already own first |
| Countertop | $120 | $115 (butcher block from Home Depot) | Measure carefully to avoid waste |
| Decorative Accents | $50 | $45 (thrift store finds + DIY projects) | Thrift stores are goldmines for cheap decor |
| Miscellaneous/Buffer | $93 | $58 (had leftover in other categories) | Always have a buffer for unexpected costs! |
I also added a 20% buffer to my total budget (which ended up being $93 in this case) for any unexpected costs. This is where I put the money I saved by using leftover paint and finding sales.
Lesson learned: Don’t skimp on quality for things that will get heavy use. I splurged on the butcher block countertop and the light fixture, and I’m so glad I did. They’ve held up beautifully and actually make the space feel more expensive.
Step 3: Choose Your Color Palette (And Test It First!)
This is where I made my biggest mistake the first time around. I picked a beautiful deep blue color for the walls that I loved in the store… but when I got it home and painted a test patch, it looked completely different in the natural light of my laundry room. It was way too dark and made the space feel smaller.
Here’s how I did it right the second time:
- Gather inspiration. I created a Pinterest board with laundry room colors I liked. I also looked at photos of rooms I loved and noted the color schemes.
- Get samples. I bought samples of 5 different colors I was considering and painted large patches on the wall (not just small strips!).
- Test in different lights. I looked at the samples in the morning, afternoon, and evening to see how the light changed the color.
- Live with it for a few days. I didn’t make a final decision right away. I let the samples sit on the wall for a few days so I could get used to seeing them.
- Pick your winner. I chose Sherwin-Williams “Sea Salt” for the walls (a soft blue-gray) and “Pure White” for the trim. The combination made the space feel bright and airy.
Pro tip: If you’re not sure about a color, try this trick: buy a small piece of fabric or wallpaper in the color you’re considering and live with it in the room for a week. This helps you see how it really works with your existing decor.
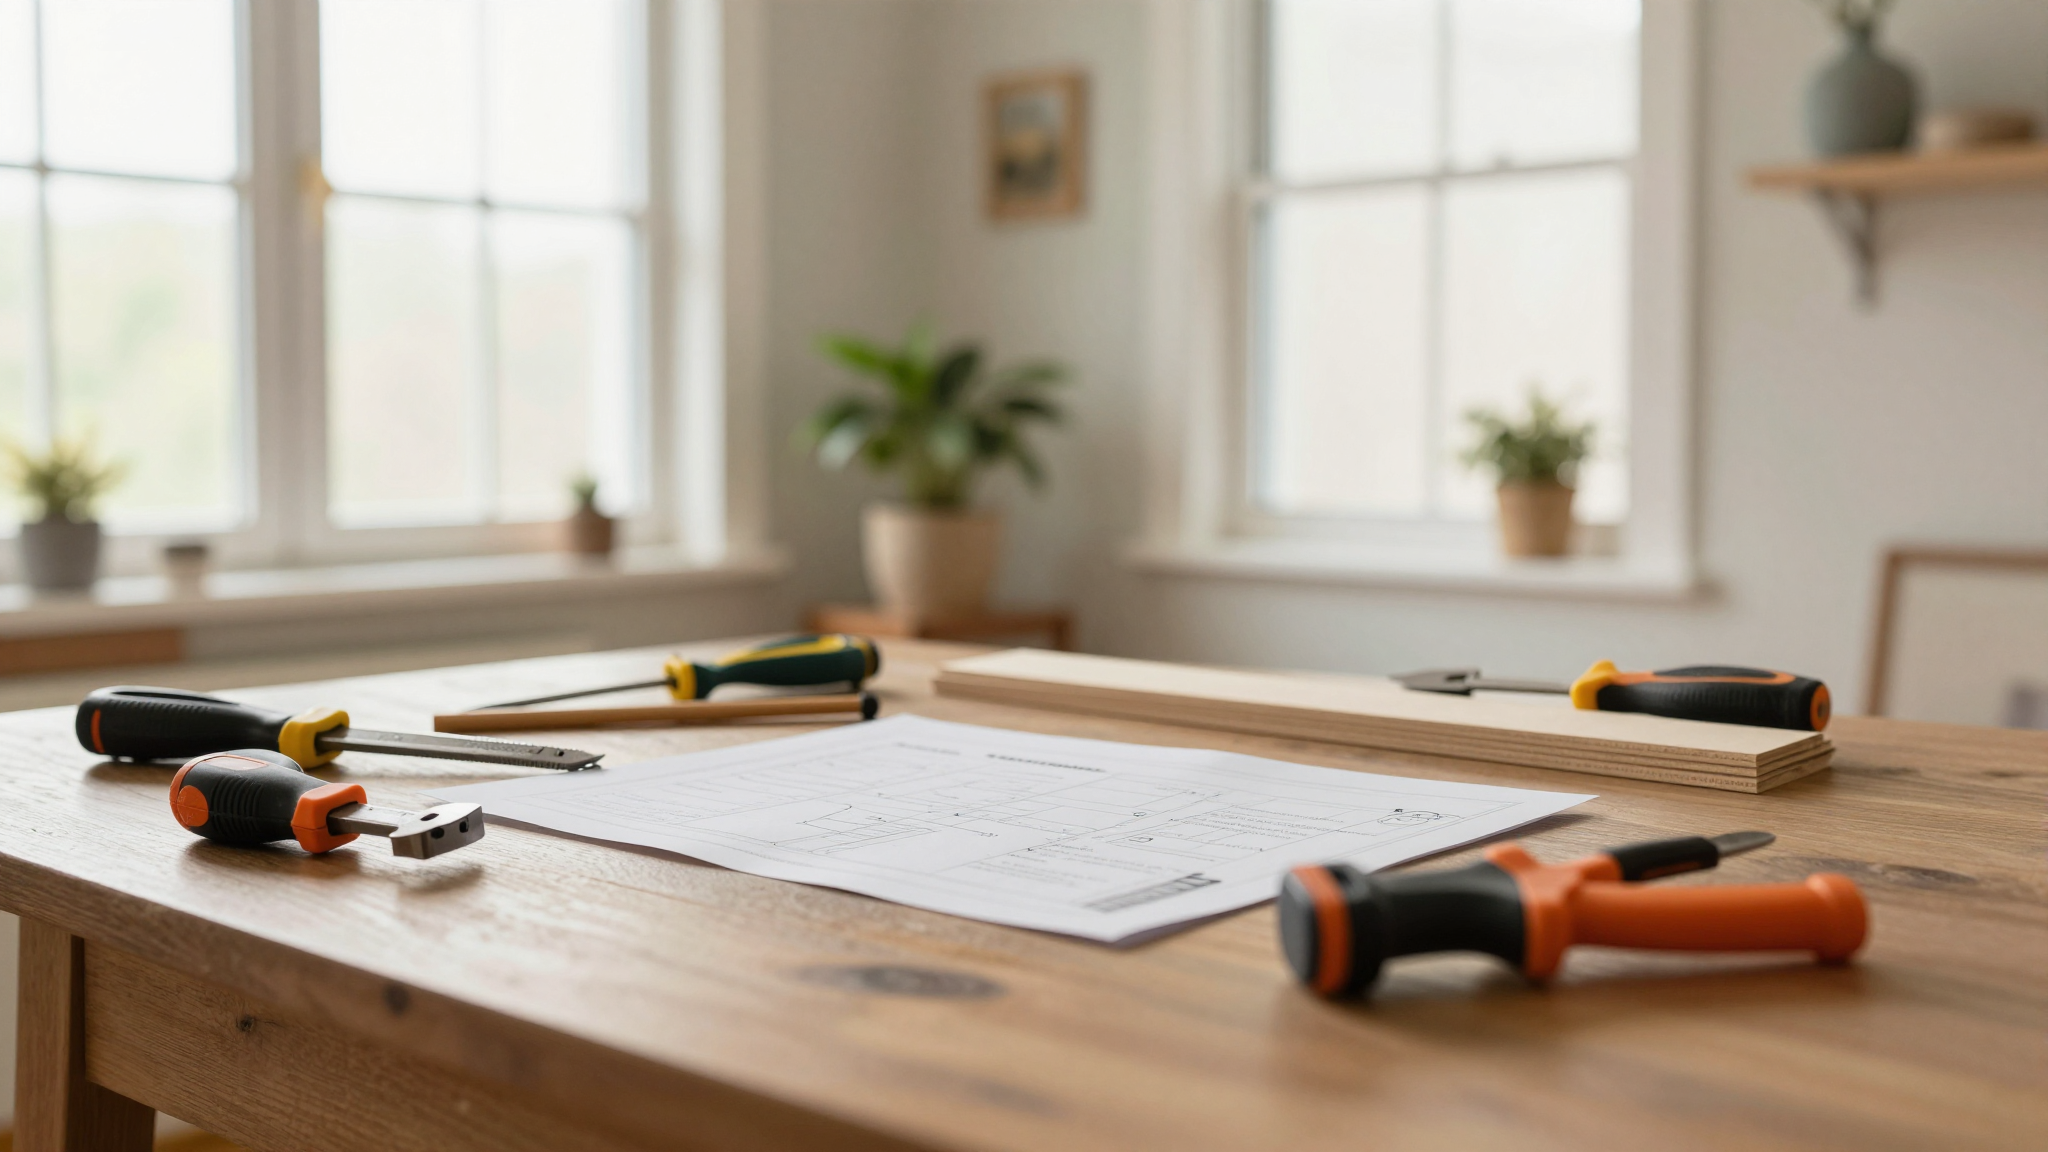
Gathering Your Tools and Materials
Before I could start any actual work, I needed to make sure I had all the right tools. And let me tell you, this is where I learned the hard way that you can’t just wing it. I tried to paint the cabinets without proper prep, and it was a disaster. The paint peeled off within a week.
Here’s my complete tool and material list for this project. I’ve included links to the specific products I used so you can find them easily:
Essential Tools
- Paint roller and tray set – I used a 3/8″ nap roller for smooth walls
- Angled paintbrush (2-2.5″) for cutting in and details
- Painter’s tape (FrogTape is my favorite – it doesn’t bleed)
- Drop cloths (I used canvas ones that I already had)
- Sandpaper (I used 120 and 220 grit for different surfaces)
- Screwdriver set (for removing old hardware)
- Stud finder (if you’re hanging anything on walls)
- Measuring tape (a good 25-foot one is essential)
- Level (for hanging shelves and fixtures straight)
- Safety glasses and dust mask (trust me, you’ll be glad you have these!)
For the cabinet painting, I also used:
- Deglosser (to remove the shiny finish from the cabinets)
- High-adhesion primer (I used Sherwin-Williams ProBlock)
- Paint tray liner (for easy cleanup)
Lesson learned: Don’t skip the prep work! I thought I could just paint over the old cabinets without sanding or priming, and it was a complete failure. The paint chipped off within a week. Proper prep takes time but saves you from having to redo the work later.
Step-by-Step: How I Transformed My Laundry Room
Now for the fun part – the actual transformation! I’ll walk you through each step in the order I did them, including the mistakes I made (so you don’t have to make them too).
Step 1: Clear Out the Space (And Don’t Be Afraid to Toss Stuff)
I started by completely emptying the laundry room. This meant:
- Moving the washer and dryer out (with my husband’s help – these things are heavy!)
- Taking down everything from the walls
- Emptying all the cabinets and drawers
- Sorting through years of accumulated clutter
Here’s what I found in that process:
- 3 half-empty bottles of detergent (I kept one, tossed the others)
- A stash of old rags that had seen better days
- Several empty spray bottles that had dried up
- A mystery stain on the floor that turned out to be from a leaked fabric softener bottle
- My daughter’s old art projects that had somehow ended up in the laundry room
I filled two large trash bags just with stuff I was throwing away. It was amazing how much clutter had accumulated in there over the years.
Pro tip: If you’re like me and tend to keep “just in case” items, try the “one-year rule”: if you haven’t used it in the past year, you probably don’t need it. I applied this rule and was shocked at how much I could toss.
Step 2: Deep Clean Everything
Before I could start painting or making any improvements, I needed to get the space completely clean. Here’s what I did:
- Vacuum and sweep. I used my Shop-Vac to get all the dust and lint out of the corners and along the baseboards.
- Wipe down all surfaces. I used a mix of warm water and vinegar to clean the cabinets, counters, and walls. For the floor, I used a degreaser to cut through the built-up grime.
- Clean the appliances. I took the front panels off the washer and dryer and cleaned behind them. You’d be surprised how much dust and lint builds up back there!
- Scrub the sink. If you have a laundry sink, give it a good scrub with baking soda and vinegar. Mine had some pretty stubborn stains that took some elbow grease to remove.
I also took this opportunity to check for any repairs that needed to be done. I found a small hole in the drywall that I patched using this method I learned.
Lesson learned: Don’t skip this step! I thought I could just paint over the dirty walls, but the dirt showed through the paint. A good cleaning makes a huge difference in the final result.
Step 3: Paint the Walls (And Cabinets!)
This was the part I was most excited about – giving the walls a fresh coat of paint. But I also knew from past experience that painting cabinets could be tricky, so I wanted to get it right.
Painting the Walls
I chose Sherwin-Williams “Sea Salt” for the walls, which is a soft blue-gray that looks amazing in natural light. Here’s how I did it:
- Tape off the trim. I used FrogTape to protect the baseboards and any other areas I didn’t want to paint.
- Cut in with a brush. I used an angled brush to paint along the edges where the walls meet the ceiling and trim.
- Roll on the paint. I used a 3/8″ nap roller for a smooth finish. I worked in small sections, keeping a “wet edge” to avoid lap marks.
- Let it dry. I let the first coat dry completely (about 4 hours) before applying a second coat.
- Touch up as needed. Once both coats were dry, I touched up any missed spots.
I also painted the ceiling the same color as the walls (called “ceiling paint” in the same color family). This made the space feel more cohesive and modern.
Painting the Cabinets
This is where I made my first big mistake. I tried to paint the cabinets without properly prepping them, and the paint peeled off within a week. Here’s how I did it right the second time:
- Remove all hardware. I took off all the knobs and pulls and set them aside.
- Clean the cabinets thoroughly. I wiped them down with a degreaser to remove any wax or grime.
- Sand the surface. I used 120-grit sandpaper to scuff up the surface and remove the shiny finish.
- Wipe off dust. I used a tack cloth to remove all the sanding dust.
- Apply primer. I used Sherwin-Williams ProBlock primer, which is specifically designed for cabinets. I applied it with a high-quality brush, letting it dry completely between coats.
- Paint the cabinets. I used the same “Sea Salt” color as the walls, but in a satin finish for durability. I applied two thin coats, letting each dry completely.
- Reattach hardware. Once the paint was completely dry, I put the cabinets back together and reinstalled the hardware (more on that below!).
Pro tip: If you’re painting cabinets, consider using a cabinet refinishing kit. They come with everything you need and often include helpful instructions.
Step 4: Upgrade the Lighting
This was one of the biggest improvements to my laundry room. The old fluorescent light was giving me headaches and making everything look yellow. I replaced it with a modern fixture that actually makes the space feel inviting.
Choosing a New Fixture
I wanted something that:
- Provided good, even lighting (no more harsh fluorescents!)
- Fitted the style of my space (I wanted something coastal and modern)
- Was easy to install (I’m not an electrician!)
- Was within my budget
I found the perfect fixture at Home Depot – a rattan flush mount light that was on sale for $69. It has three bulbs, which gives plenty of light, and the rattan material fits perfectly with my coastal theme.
Installing the New Fixture
Now, I’ll be honest – I was nervous about this part. I’ve never worked with electrical before, but I followed these steps carefully:
- Turn off the power. I went to the circuit breaker and turned off the power to the laundry room. I double-checked by testing the light switch.
- Remove the old fixture. I unscrewed the old fluorescent light and carefully disconnected the wires. I took a photo of how they were connected so I could replicate it.
- Install the new fixture. I followed the manufacturer’s instructions to connect the wires to the new light. I used wire nuts to secure the connections.
- Attach the fixture. I screwed the new light into the electrical box and attached the rattan shade.
- Turn the power back on. I flipped the circuit breaker back on and tested the light. It worked perfectly!
Important safety note: If you’re not comfortable working with electricity, hire an electrician. It’s not worth the risk of electrical shock or fire.
I also added a plug-in LED light under the new countertop. This gives me task lighting when I’m folding clothes, and it looks really pretty at night.
Step 5: Add Storage Solutions
This was the part that made the biggest difference in how I use my laundry room. Before, I had no good place to store anything, so supplies were scattered everywhere. Now, everything has a home, and I can actually find what I need when I need it.
Custom Shelving Above the Washer and Dryer
I wanted to add some open shelving for decorative items and frequently used supplies. Here’s how I did it:
- Measure the space. I measured the width of the area above my washer and dryer.
- Choose shelves. I found some IKEA Lack shelves that were the perfect size. They’re simple to assemble and come in a white color that matches my cabinets.
- Find studs. I used a stud finder to locate the studs in the wall. I marked their locations with a pencil.
- Install the shelves. I used L-brackets to mount the shelves to the studs. I made sure they were level before screwing them in.
- Style the shelves. I arranged my laundry supplies on the top shelf and added some decorative items on the bottom shelf, like a small plant and a pretty basket.
Pro tip: If you don’t have studs where you want to mount shelves, use toggle bolts. They distribute the weight more evenly and can hold heavier items.
Rolling Cart for Extra Storage
I found a rolling cart at Target that fits perfectly between my washer and dryer. It gives me extra storage for detergent, stain remover, and other supplies. Plus, I can roll it out of the way when I need to move the appliances.
I styled it with:
- A pretty basket for dryer sheets and fabric softener
- Glass jars for detergent and bleach (I labeled them with chalkboard tags)
- A small tray for coins and quarters (for the laundry machines)
Over-the-Door Organizer
I installed an over-the-door organizer on the back of the laundry room door. It’s perfect for storing cleaning supplies, sponges, and other small items. I also keep a lint roller and a stain stick in there for quick access.
Step 6: Add a Countertop
This was one of my favorite upgrades. Before, I had no place to fold clothes, so I was always trying to balance the basket on the washer or dryer. Now I have a proper folding surface that also gives me extra storage.
Choosing a Countertop
I wanted something durable, easy to clean, and stylish. I decided on a butcher block countertop because:
- It’s beautiful and adds warmth to the space
- It’s durable and can handle daily use
- It’s easy to clean (just wipe with a damp cloth)
- It gives me extra storage space underneath
I found a pre-cut butcher block top at Home Depot that was the perfect size for my space. It cost $115, which was within my budget.
Installing the Countertop
I followed these steps to install it:
- Measure the space. I measured the width of the area above my washer and dryer.
- Cut the butcher block to size. I used a jigsaw to cut the butcher block to the exact size I needed. (I had my husband help with this part!)
- Sand the edges. I sanded the edges smooth with 120-grit sandpaper.
- Apply contact cement. I used contact cement to attach the butcher block to a piece of plywood for support.
- Mount the countertop. I used L-brackets to secure the countertop to the wall. I made sure it was level before screwing it in.
- Add finishing touches. I applied a food-safe mineral oil to the butcher block to protect it and make it easier to clean.
Underneath the countertop, I added a IKEA Kallax shelf for extra storage. I keep my ironing board and a small vacuum in there, so they’re out of the way but still accessible.
Step 7: Upgrade the Hardware
This was one of the easiest and most impactful changes I made. New hardware instantly made my cabinets look expensive and put-together.
Choosing New Hardware
I wanted hardware that:
- Fitted the style of my space (coastal and modern)
- Was easy to install
- Was within my budget
I found a set of brass cabinet pulls at Wayfair that were perfect. They cost $24 for a 10-pack, which was a great value. I also added some brass knobs for the drawers.
Installing the New Hardware
This was super easy! Here’s what I did:
- Remove the old hardware. I used a screwdriver to take off all the old knobs and pulls.
- Mark the new holes. I held the new hardware in place and marked where the screws would go.
- Drill new holes (if needed). If the new hardware didn’t line up with the old holes, I used a drill to make new ones.
- Attach the new hardware. I screwed the new pulls and knobs into place.
Pro tip: If you’re not sure where to place the new hardware, try the “measure twice, cut once” rule. Measure the distance from the edge of the cabinet to the center of the old hole, then use that measurement to mark the new hole.
Step 8: Add Decorative Accents
This is where I really had fun making the space feel like “me.” I added personal touches that make the laundry room feel inviting and reflect my style.
Gallery Wall
I created a simple gallery wall using frames I already had and some new ones I found at a thrift store. I mixed different sizes and styles for an eclectic look.
Here’s what I included in my gallery wall:
- Family photos in mismatched frames
- A vintage laundry advertisement I found at a flea market
- A small mirror to reflect light
- A handwritten quote about “fresh starts” (because let’s be honest, laundry is a fresh start for our clothes!)
I used command strips to hang the frames so I didn’t have to worry about damaging the walls.
Area Rug
I added a flatweave rug from Ruggable to define the space and add some color. It’s machine-washable, which is perfect for a laundry room! I chose a rug with a nautical stripe pattern to tie in with my coastal theme.
The rug also serves a practical purpose – it covers up some of the old vinyl flooring that I didn’t have the budget to replace. Plus, it’s nice to stand on when I’m folding clothes!
Plants
I added a few plants to bring some life to the space. I chose:
- A snake plant (it’s nearly indestructible and thrives in low light)
- A pothos in a hanging planter (it adds a pop of green and trails down nicely)
- A small succulent garden on one of the shelves
Plants not only look nice, but they also help purify the air. And let’s be honest – anything that makes doing laundry feel a little less like a chore is a win!
DIY Decor
I made a few simple DIY projects to add personal touches:
- Painted wooden signs. I found some plain wood slices at a craft store and painted them with inspirational quotes. I used Annie Sloan Chalk Paint in “Paris Grey” for a vintage look.
- Stenciled baskets. I stenciled a simple wave pattern on some woven baskets I already had. It gave them a fresh, coastal look.
- DIY laundry hamper. I painted an old plastic hamper with the same “Sea Salt” color as my walls. Now it matches the space perfectly!
Final Touches and Lessons Learned
After all the hard work, it was time for the final touches. Here’s what I did to put it all together:
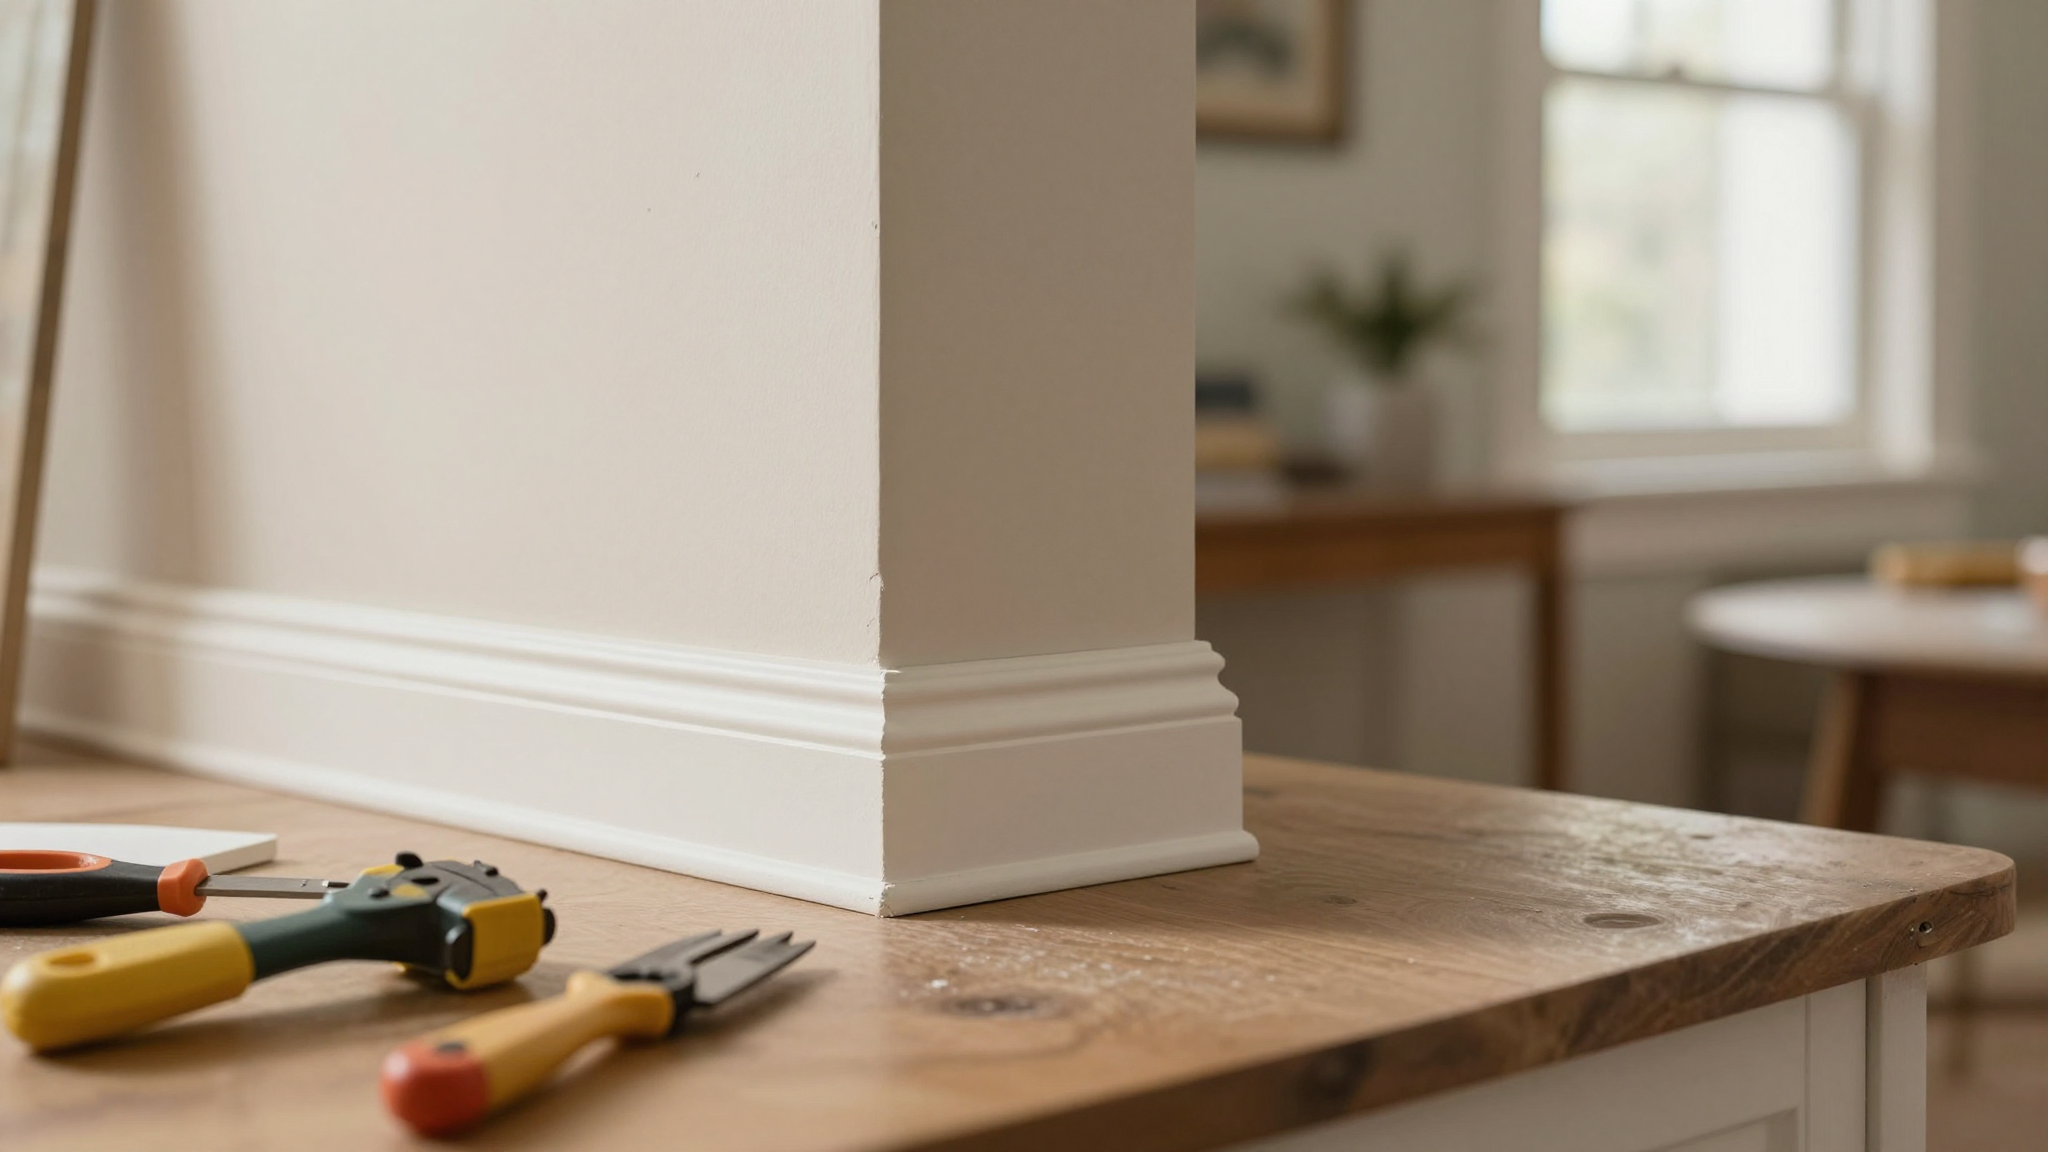
Add Quarter Round and Baseboard Trim
I wanted to give the space a more finished look, so I added quarter round trim around the base of the walls. I used pre-primed MDF trim that I painted to match the walls.
I also added some simple baseboard trim where it was missing. This made the space feel more polished and complete.
Reinstall the Doors
I had taken the doors off the cabinets to paint them. Now it was time to put them back on. I made sure they were aligned properly and that the hinges were tight.
Do a Final Walkthrough
I did a final walkthrough to make sure everything was in place and looked good. I also:
- Tested all the drawers and doors to make sure they opened and closed smoothly
- Checked that all the lights worked
- Made sure everything was clean and free of dust
- Added a few final decorative touches (like a small vase of fresh flowers)
Lessons I Learned (So You Don’t Have to Make the Same Mistakes!)
Here are some things I wish I’d known before starting this project:
- Measure twice, cut once. I made a few cutting mistakes because I was in a hurry. Always double-check your measurements before cutting anything!
- Proper prep is everything. I thought I could skip sanding the cabinets, and the paint peeled off within a week. Always follow the proper prep steps for the best results.
- Work in good light. I tried to paint in the evening when the natural light was gone, and I ended up with uneven coverage. Always work in natural light when possible.
- Take breaks. I got so focused on finishing that I didn’t take breaks, and I ended up with a sore back. Step away from the project every hour or so to stretch and rest your eyes.
- Don’t rush. I wanted to finish quickly, but rushing led to mistakes. Take your time and enjoy the process!
Maintaining Your Beautiful Laundry Room
Now that your laundry room is transformed, you’ll want to keep it looking its best. Here are some tips for maintaining your beautiful space:
Cleaning and Upkeep
To keep your laundry room looking fresh:
- Dust regularly. Use a microfiber cloth to dust shelves and surfaces weekly.
- Wipe down walls and cabinets. A damp cloth with a little vinegar will keep them looking clean.
- Vacuum the floor. Use a vacuum with a brush attachment to get into corners and along baseboards.
- Clean the appliances. Wipe down your washer and dryer regularly to prevent lint buildup.
- Spot clean stains. If you spill something on the countertop or floor, clean it up immediately to prevent stains.
For the butcher block countertop, I use a food-safe mineral oil to keep it looking its best. I apply it every few months to protect the wood and keep it from drying out.
Touch-Up Paint
Keep a small amount of your wall paint and cabinet paint on hand for touch-ups. If you notice any chips or scuffs, touch them up right away to keep your space looking fresh.
I also keep a small can of touch-up paint in a neutral color for quick fixes on the walls.
Organizing Systems
To keep your laundry room organized:
- Do a monthly declutter. Set a reminder to go through your laundry supplies and toss anything you don’t use.
- Use labels. Label your storage bins and baskets so you can find what you need quickly.
- Keep a donation bin. Have a bin for old towels, clothes, and other items you want to donate. When it’s full, take it to a donation center.
- Make a shopping list. Keep a list of laundry supplies you need to buy. This prevents you from buying duplicates or forgetting essentials.
Final Thoughts and Next Steps
There you have it – my complete guide to transforming a dull, cluttered laundry room into a space I actually enjoy using. It took me three weekends and $387, but the results were worth every penny (and every hour of elbow grease!).
If you’re feeling overwhelmed by your own laundry room project, remember:
- Start small. You don’t have to do everything at once. Even just painting the walls and adding new hardware can make a huge difference.
- Take your time. Rushing leads to mistakes. Enjoy the process of creating a space that’s uniquely yours.
- Don’t be afraid to ask for help. If you’re not comfortable with a particular task (like electrical work), hire a professional.
- Make it personal. Add your own touches – whether it’s family photos, DIY decor, or plants. This is your space, so make it reflect you!
Now, I want to hear from you! What’s the first thing you’re going to tackle in your laundry room? Are you leaning toward a color scheme, or do you need storage solutions first? Let me know in the comments – I’d love to hear your plans!
And if you found this guide helpful, please share it with a friend who needs a laundry room makeover. You can also check out my other DIY projects for more inspiration:
- 5 DIY Projects to Instantly Add Charm to Your Home
- Easy DIY Projects to Give Your Bedroom a Makeover
- Upcycling Furniture Tips for a Professional-Looking Finish
- Essential Tools Every Homeowner Should Have
Happy transforming! And remember, every expert was once a beginner. You’ve got this!
Frequently Asked Questions
What’s the most budget-friendly way to start my laundry space transformation?
If you’re working with a tight budget, start with these affordable updates that make a big impact:
- Paint the walls and cabinets. A fresh coat of paint is one of the most cost-effective ways to transform any space. Use leftover paint from other projects to save money.
- Add new hardware. Replacing old cabinet knobs and pulls with modern ones can instantly update the look of your laundry room. You can often find affordable sets at home improvement stores.
- Organize your supplies. Use baskets, bins, and shelves you already own to create better storage. This doesn’t cost anything but makes a huge difference in functionality.
- Update the lighting. If your current light fixture is outdated, look for affordable options at discount stores or online. Even a simple flush mount light can make a big difference.
- Add personal touches. Frame inspirational quotes, hang family photos, or add a small plant. These personal touches make the space feel like yours without breaking the bank.
I started with just painting my cabinets and adding new hardware, and it made such a difference that I was motivated to do more!
How can I add style without installing new cabinets?
You don’t need to replace your cabinets to give them a fresh, stylish look. Here are some budget-friendly ways to update them:
- Paint them a new color. Choose a color that complements your wall color. I used the same color as my walls for a cohesive look, but you could also go with a contrasting color for drama.
- Update the hardware. New knobs and pulls can completely transform the look of your cabinets. Look for sets that match your style – whether it’s modern, farmhouse, or coastal.
- Add peel-and-stick wallpaper to cabinet doors. This is a great way to add pattern and color without committing to a permanent change. You can find affordable wallpaper at home improvement stores.
- Create open shelving. If your cabinets are in good condition but just look dated, consider removing the doors to create open shelving. This makes the space feel more open and modern.
- Add decorative molding. Use trim paint to add molding or beadboard to your cabinets. This gives them a custom, built-in look.
I painted my cabinets the same color as my walls and added new brass hardware. The combination made them look like expensive custom cabinets!
What are some clever storage ideas for a small space?
When space is limited, you need to think vertically and get creative with storage solutions. Here are some of my favorite ideas for small laundry rooms:
- Wall-mounted drying racks. These fold away when not in use but provide plenty of space for air-drying clothes. I love the retractable ones that fit in tight spaces.
- Over-the-door organizers. These are perfect for storing cleaning supplies, sponges, and other small items. They’re inexpensive and easy to install.
- Rolling carts. A narrow rolling cart fits between appliances and provides extra storage for detergent, stain remover, and other supplies. Plus, you can roll it out of the way when needed.
- Floating shelves. Install shelves above your washer and dryer for extra storage. Use them for laundry supplies, decorative items, or even a small TV if you have the space.
- Magnetic strips. Install a magnetic strip on the wall to hold metal tools like scissors, spray nozzles, and clothespins. This keeps them organized and easily accessible.
- Hanging baskets. Hang baskets on the wall or from the ceiling to store items like dryer sheets, fabric softener, and lint rollers.
- Under-sink storage. If you have a laundry sink, use the space underneath for extra storage. Add small bins or baskets to keep items organized.
In my laundry room, I added a rolling cart between the washer and dryer, installed an over-the-door organizer, and created floating shelves above the appliances. These simple additions made a huge difference in my storage!
Where can I find affordable light fixtures and wall art?
You don’t need to spend a fortune to find stylish light fixtures and wall art for your laundry room. Here are some of my favorite places to shop:
- Home improvement stores. Stores like Home Depot, Lowe’s, and IKEA often have affordable light fixtures in their clearance sections. I found my rattan flush mount light on sale at Home Depot for just $69.
- Discount home decor stores. Stores like HomeGoods, TJ Maxx, and Marshalls often have unique light fixtures and wall art at discounted prices. I’ve found some amazing pieces there!
- Thrift stores and flea markets. You can find unique light fixtures, frames, and decor at thrift stores for a fraction of the retail price. I’ve found some beautiful vintage pieces that I’ve painted or updated to fit my style.
- Online marketplaces. Websites like Amazon, Wayfair, and Etsy offer a wide variety of affordable light fixtures and wall art. I’ve found some great deals on Etsy for custom pieces.
- DIY projects. Create your own wall art using frames you already have, thrifted items, or simple materials like wood slices and chalk paint. I made some of my favorite decor pieces using items I already had at home.
For my laundry room, I found the light fixture at Home Depot, the wall art at a thrift store, and I made the DIY decor pieces myself. It’s amazing what you can create when you get a little creative!
Can I update my flooring on a budget?
Yes! You don’t need to replace your entire floor to give it a fresh, updated look. Here are some budget-friendly flooring ideas:
- Peel-and-stick vinyl tiles. These are easy to install and come in a variety of styles, including realistic wood and stone looks. I used SnapStone tiles in my laundry room, and they look amazing!
- Interlocking floor tiles. These click-together tiles are easy to install and can be removed if you need to. They come in a variety of colors and styles.
- Area rugs. A large area rug can cover up old flooring and add color and texture to your space. I used a flatweave rug from Ruggable to define the space and add a pop of color.
- Paint. If your floor is in good condition but just looks dated, consider painting it. Use a durable floor paint designed for concrete or tile.
- Floor cloths. These are large, washable vinyl sheets that you can cut to fit your space. They’re easy to install and can be removed if needed.
I used SnapStone tiles in my laundry room, and they made such a difference! The installation was easy, and the tiles look just like real porcelain. Plus, they’re durable and easy to clean.