
DIY Leather Drawer Pulls: How I Gave Our Kitchen Cabinets a Luxe Makeover
Let me tell you about the time I swapped out our boring kitchen cabinet handles for leather pulls,and how it completely transformed our space. I’ll be honest, I was skeptical at first. “Leather on cabinets? Really?” But after seeing how these simple changes elevated our entire kitchen (and how much easier they were to install than I expected), I’m now a total convert. If you’re looking for a weekend project that makes a big impact without the hassle of a full remodel, this is it.
I’ve been doing DIY projects around our house for years,from adding charm to our living room to updating our bedroom,but this leather pull project might be my favorite so far. It’s one of those small changes that makes you wonder why you didn’t do it sooner. And the best part? No professional skills required. Just a drill, some patience, and a willingness to embrace the satisfaction of a job well done.
Now, I’m not going to lie,when I first started researching leather drawer pulls, I was overwhelmed by all the options. There are so many materials, sizes, and styles to choose from. But after making a few mistakes (and learning from them), I figured out exactly what works best for a home like ours. If you’re just starting out, let me walk you through what I’ve learned,so you can skip the trial and error and get straight to the satisfying part.
Why I Chose Leather Drawer Pulls (And Why You Might Too)
Our kitchen cabinets had the same basic metal handles they came with when we bought our house five years ago. They were functional, sure, but they were also… well, boring. The kind of boring that makes you sigh every time you open a drawer. I wanted something that would add character to our space without requiring a full kitchen remodel (because, let’s be real, our budget doesn’t have room for that right now).
That’s when I stumbled upon leather drawer pulls. I’ll admit, I was a little hesitant at first. “Won’t leather get dirty?” I wondered. “What if the kids grab them with sticky fingers?” But after doing some research,and talking to a few friends who had already made the switch,I realized leather was actually a really practical choice. It’s durable, easy to clean (you’d be surprised how simple it is), and it develops this beautiful patina over time that makes your cabinets look even more expensive.
Here’s what sold me on leather:
- It adds warmth to any space. Our kitchen had started to feel a little cold and sterile, and the leather pulls brought in this organic, cozy element that made the whole room feel more inviting.
- It’s surprisingly durable. I was worried about wear and tear, especially with three kids in the house, but the full-grain leather I chose has held up incredibly well. It’s not some cheap synthetic material,it’s the real deal, and it shows.
- It feels good to touch. This might sound silly, but there’s something really satisfying about opening a drawer and feeling the soft, smooth leather under your fingers. It’s a small detail, but it makes a big difference in how you interact with your space every day.
- It ages beautifully. Unlike metal or plastic, leather develops a rich patina over time. Our pulls have been on the cabinets for over a year now, and they look even better than they did when we first installed them. The natural variations in the leather have softened, and the brass fittings have developed a subtle sheen. It’s like they’ve become part of the cabinet itself.
And here’s a little secret: leather pulls are way easier to install than you might think. I was fully prepared to struggle with this project,maybe even call my husband in to help,but I ended up doing it all myself in one afternoon. No cursing, no tears, just a satisfying “done” at the end of the day. If I can do it, so can you.
What You’ll Need to Get Started
Before you dive in, let’s talk about the tools and materials you’ll need. I’ll be honest,I didn’t have everything on this list when I started, and I had to make a quick run to the hardware store. But once I had everything, the project moved along smoothly.
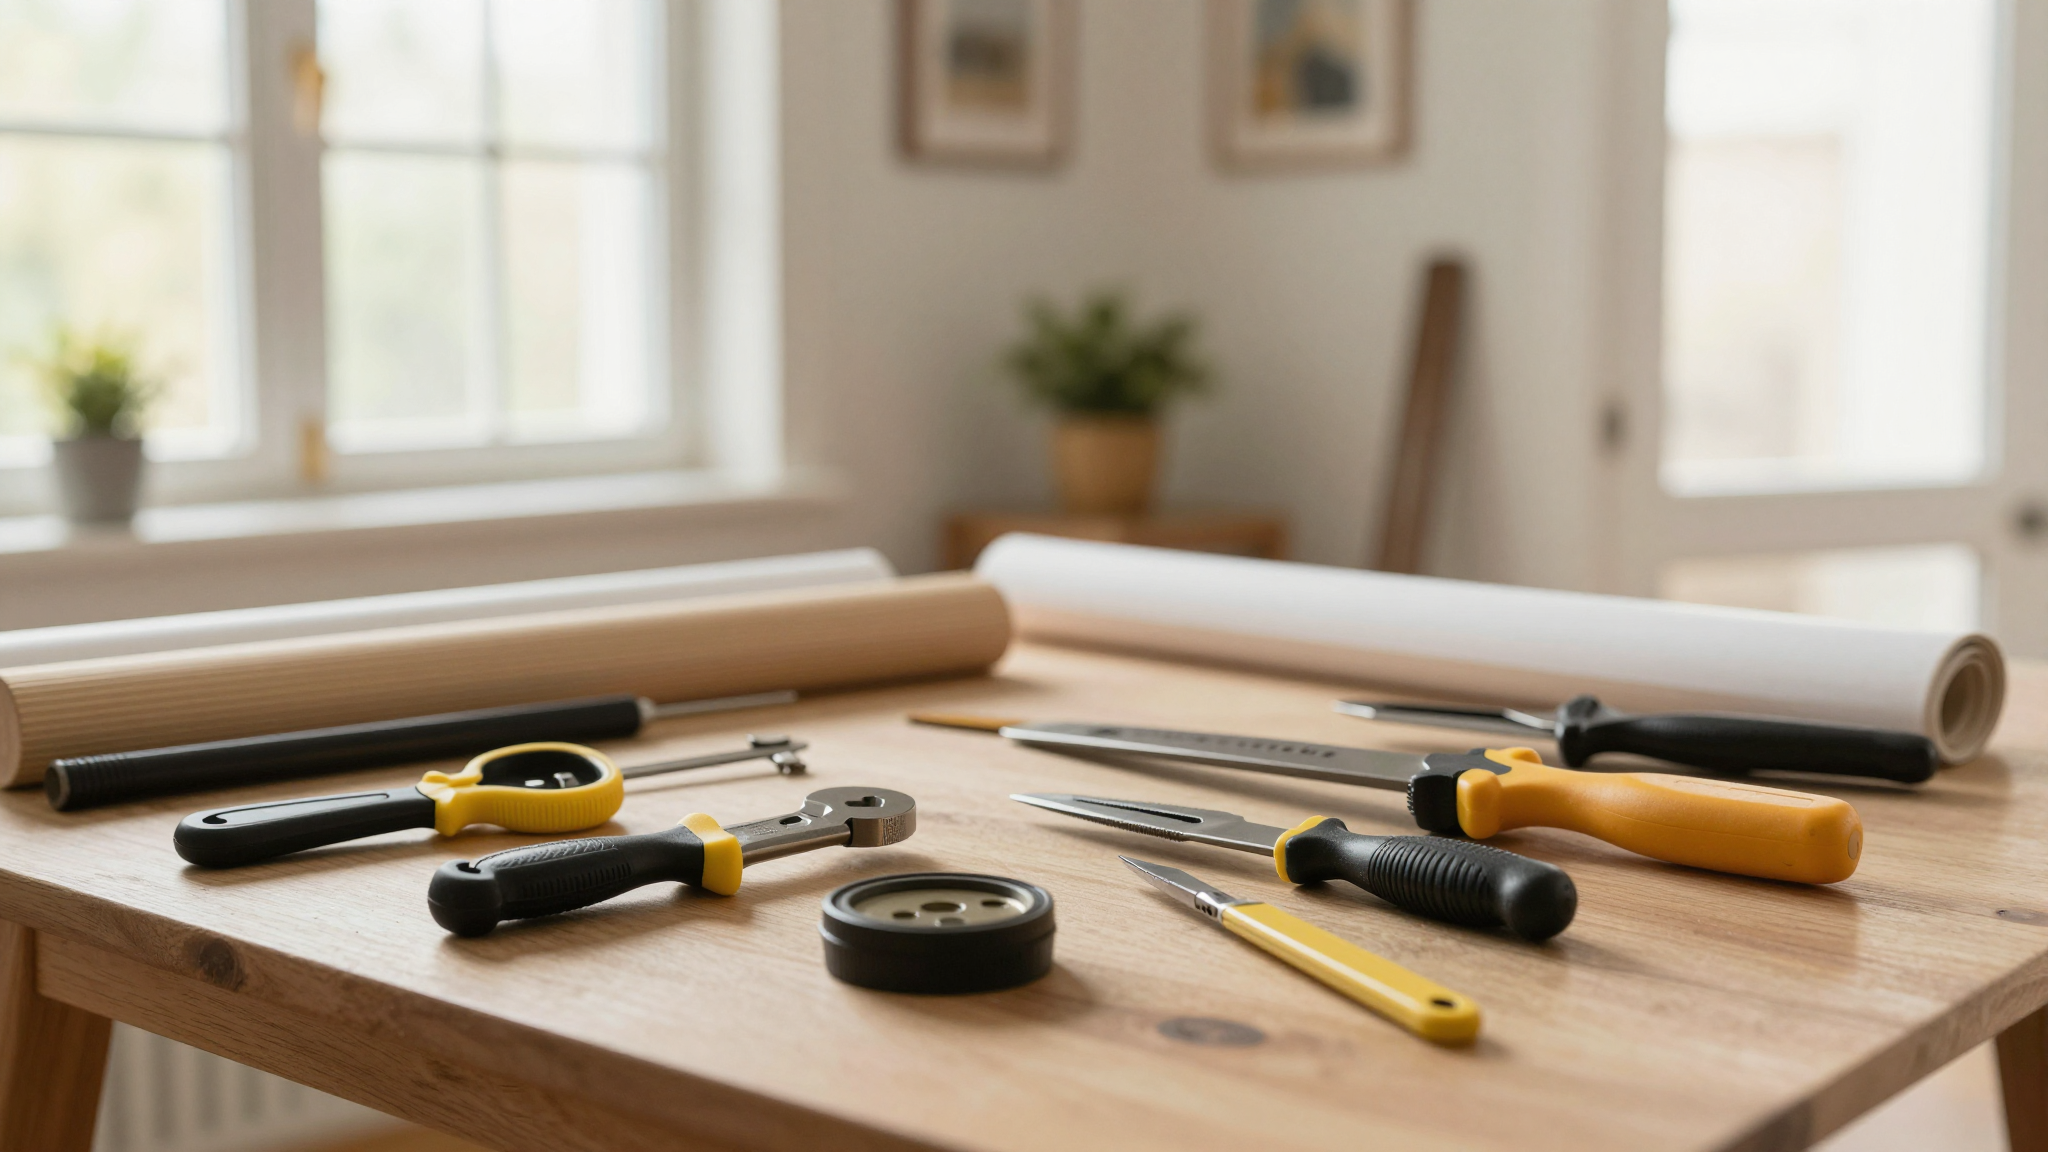
The Tools I Actually Used (And One I Didn’t)
Here’s what I gathered before starting:
- A power drill with a 6mm (1/4″) bit. This is non-negotiable,don’t even think about using a screwdriver for this. I tried at first (because, let’s face it, I’m stubborn), and it was a disaster. The drill makes quick work of the pilot holes, and trust me, you want those holes to be perfect.
- A cross-head screwdriver. I used my favorite magnetic screwdriver from my toolkit, and it made securing the hardware so much easier. No dropped screws, no fumbling,just smooth, efficient work.
- A measuring tape and a pencil. This might seem obvious, but I can’t tell you how many times I’ve skipped measuring something only to regret it later. Measure twice, cut once (or in this case, drill once).
- A soft cloth. This isn’t something I thought about beforehand, but it came in handy for wiping down the cabinets before installation. A little extra prep work goes a long way.
Oh, and one more thing: patience. This isn’t a project you want to rush. Take your time measuring, drilling, and securing each pull. It’s worth it to get it right the first time.
The Leather Drawer Pulls Themselves
Now, let’s talk about the stars of the show: the leather drawer pulls. I ended up ordering mine from a small company in Oregon that specializes in handcrafted leather goods. I was a little nervous about ordering online,what if they didn’t fit? what if the color was off?,but I’m so glad I took the leap. Here’s what I learned about choosing the right pulls for your space:
Size Matters (More Than I Thought)
When I first started looking at leather pulls, I assumed they’d all be pretty much the same size. Boy, was I wrong. The size of your pulls can make a huge difference in how they look on your cabinets. Here’s what I wish I’d known from the start:
- Measure your existing hardware. Before you even think about ordering, grab a measuring tape and check the width and height of your current pulls. I made the mistake of assuming the new pulls would fit the same holes, but they didn’t,and I had to do some extra drilling to make them work. Don’t make my mistake!
- Consider the scale of your cabinets. Our kitchen cabinets are on the larger side, so I went with the bigger pulls (40mm x 95mm). If your cabinets are smaller or more delicate, you might want to go with the smaller size (37mm x 85mm). It’s all about proportion.
- Check the thickness of your cabinet doors. Most leather pulls work with doors that are between 18mm and 20mm thick. Ours were right in that range, but if yours are different, you might need to look for a custom option. I called the company I ordered from, and they were able to help me find the right fit.
Pro tip: If you’re not sure about the size, order a sample first. Some companies offer this, and it’s a great way to make sure you’re happy with the look and feel before committing to a full set.
Color and Material: What I Chose (And Why)
I spent way too much time staring at color swatches before deciding on the perfect shade for our kitchen. In the end, I went with a rich cognac color that complemented our wood cabinets and stainless steel appliances. But the material was just as important as the color. Here’s what I learned:
- Full-grain leather is worth the investment. I considered some cheaper synthetic options at first, but I’m so glad I splurged on the real deal. Full-grain leather is durable, develops a beautiful patina, and just feels better. It’s like the difference between fast fashion and a well-made coat,you can tell the quality just by touching it.
- Vegetable-tanned leather is better for your home. Most of the leather pulls I looked at were vegetable-tanned, which means they’re treated with natural tannins instead of harsh chemicals. This makes them safer for your home (and better for the environment). Plus, they develop that gorgeous patina over time.
- The hardware matters too. I chose pulls with solid brass hardware because I knew they’d hold up over time. Brass doesn’t corrode or tarnish like some other metals, and it looks amazing with leather. If you’re going for a more modern look, you might want to consider nickel or black hardware instead.
One thing I didn’t expect? The natural variations in the leather. I thought all the pulls would look exactly the same, but each one has its own unique texture and color. It’s part of what makes them so special,they’re not mass-produced; they’re handcrafted. And that’s what gives them their character.
Step-by-Step: How I Installed My Leather Drawer Pulls
Alright, let’s get to the good stuff,the actual installation. I’ll walk you through exactly how I did it, including the mistakes I made (so you can avoid them) and the tips that made the process smoother.
Step 1: Remove the Old Hardware (And Keep It Handy)
Before you do anything else, take off your old cabinet handles. I used my trusty magnetic screwdriver to make quick work of the screws. But here’s a tip: don’t toss those old handles just yet. I kept mine in a bag in case I needed to reference the mounting holes later. (Spoiler: I did.)
Pro tip: If your old handles are really stubborn, try spraying a little WD-40 on the screws before unscrewing them. It’ll make the job a lot easier.
Step 2: Measure and Mark (Twice)
This is where I almost made a big mistake. I measured the distance between the old holes and assumed the new pulls would fit in the same spots. But when I tried to line them up, they were off by a few millimeters. Not a huge deal, but enough to make the cabinets look a little wonky.
Here’s what I should have done (and what I did the second time around):
- Measure the distance between the existing holes on your cabinet door or drawer front. Write this number down.
- Check the distance between the mounting holes on your new leather pulls. If they don’t match, you’ll need to adjust.
- Use a pencil to mark where the new holes should go. I like to use a light pencil so I can erase any mistakes easily.
- Double-check your measurements before drilling. Yes, I know it’s tedious, but trust me, it’s worth it.
I also made sure to mark the center of each hole with a tiny dot. This gave me a clear target when I was drilling, and it made the whole process a lot easier.
Step 3: Drill the Pilot Holes (Carefully!)
This is where the drill comes in. I used a 6mm bit, which matched the size of the mounting holes on my leather pulls. Here’s how I did it:
- Set your drill to a medium speed. You don’t want to go too fast, or you might splinter the wood.
- Place the drill bit on your marked dot and press gently. Don’t force it,let the drill do the work.
- Drill straight down until the bit goes all the way through the cabinet door. You should see light on the other side.
- Repeat for all the holes. Take your time,rushing here can lead to mistakes.
Mistake I made: I drilled one hole a little off-center because I wasn’t paying close enough attention. It wasn’t a huge deal, but it threw off the alignment of the pulls. If you make a mistake like this, don’t panic,just adjust the next hole to compensate. It’s not the end of the world.
Step 4: Attach the Leather Pulls
This is the fun part,the part where you start to see the transformation happen. Here’s how I attached the pulls:
- Insert the brass post of the leather pull through the hole from the front of the cabinet door.
- Align the pull so it’s straight and centered. This is where those marks you made earlier come in handy.
- Flip the cabinet door over and secure the pull from the back. Most pulls come with a screw or rivet that you’ll need to tighten. I used my cross-head screwdriver for this, and it went in smoothly.
- Repeat for all the pulls. Work methodically, and don’t skip the double-checking step. It’s easy to get lazy toward the end, but that’s when mistakes happen.
Pro tip: If you’re working on a drawer front, it’s easier to remove the drawer first and lay it flat on a table. This gives you better access to the back of the pull for securing it. I wish I’d thought of this sooner,it would have saved me a lot of contorting!
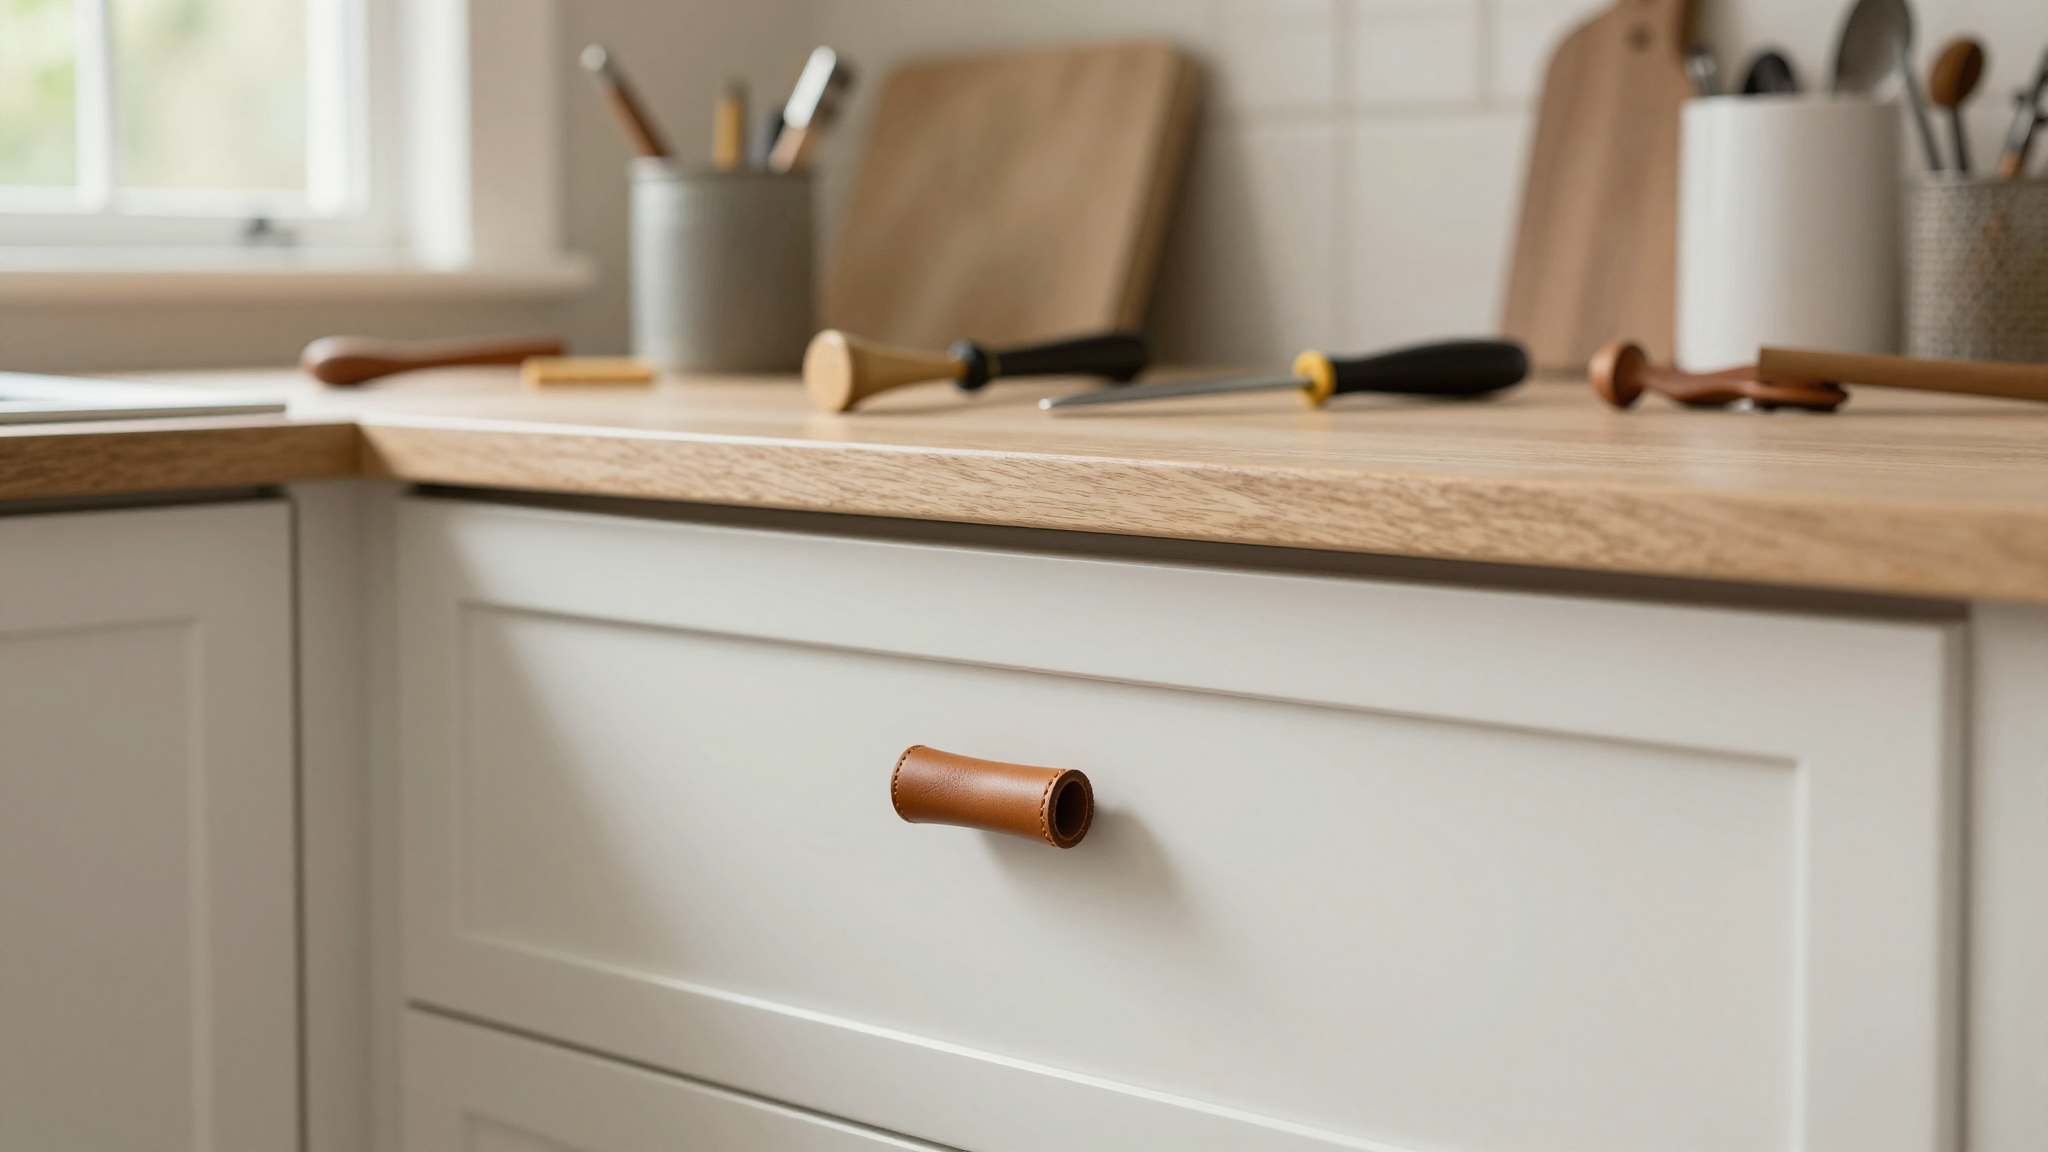
Step 5: Step Back and Admire Your Work
And that’s it! Once all the pulls are secured, step back and take a look at your handiwork. I’ll admit, I was a little nervous when I first saw the leather pulls on our cabinets. “Did I do it right?” I wondered. “Do they look as good as I hoped?”
But then I opened a drawer. The pull felt smooth and sturdy under my fingers. I slid the drawer out effortlessly. And when I looked at the cabinets as a whole, I realized something: they looked expensive. Like, “I hired a designer to do this” expensive. And I’d done it myself in an afternoon.
That’s the magic of a good DIY project,it’s not just about the end result. It’s about the satisfaction of knowing you did it yourself, that you took something ordinary and made it extraordinary. And that’s exactly how I felt standing in our kitchen that day.
Where to Use Leather Drawer Pulls (Beyond the Kitchen)
Now that you’ve seen how I transformed our kitchen cabinets, you might be wondering: where else can I use leather drawer pulls? The answer? Just about anywhere. Here are a few ideas I’ve tried (and a few I’m planning to try next).
1. Bedroom Dressers and Nightstands
Leather pulls look amazing on bedroom furniture. They add a touch of luxury that makes your dresser feel like something you’d find in a high-end hotel. I replaced the handles on our bedroom dresser, and it instantly elevated the whole room. The soft leather feels great under your fingers first thing in the morning, and it’s just the little detail that makes getting ready feel a little more special.
Pro tip: If you’re using leather pulls on a dresser with a lot of drawers, consider mixing sizes for a more dynamic look. I did this on our dresser, and it turned out even better than I expected.
2. Bathroom Vanities
Leather pulls work surprisingly well in bathrooms. I was worried they might get damaged by moisture, but as long as you treat them properly (more on that in a minute), they hold up just fine. They add a warm, organic element to a space that can sometimes feel too sterile.
I used a darker cognac color in our bathroom to match the wood vanity, and it looks stunning. The contrast between the leather and the white subway tile is just the right amount of warmth and sophistication.
3. Office and Home Desks
If you have a desk at home, leather pulls can give it a custom, high-end look. I’ve seen them used on everything from simple IKEA desks to custom-built pieces, and they always look great. They add a touch of professionalism to your workspace, which is especially nice if you work from home.
Pro tip: If you’re using leather pulls on a desk, consider going with a smaller size. They’ll look more proportional and won’t overwhelm the piece.
4. Outdoor Furniture (Yes, Really!)
Here’s something I didn’t expect: leather pulls work great on outdoor furniture too. I replaced the handles on our patio storage bench with leather pulls, and they’ve held up beautifully. The vegetable-tanned leather is actually more resistant to the elements than you might think, and the brass hardware doesn’t corrode.
Just make sure to treat the leather with a waterproofing spray before you install it outside. I used a product called Frye’s Leather Conditioner, and it’s worked like a charm. Our pulls have been outside for over a year now, and they look as good as new.
How to Keep Your Leather Drawer Pulls Looking Their Best
One of the things I love about leather drawer pulls is how low-maintenance they are. But that doesn’t mean you can just install them and forget about them. Here’s how I keep ours looking their best:
Cleaning and Maintenance
Leather is surprisingly easy to clean. Here’s what I do:
- Dust regularly. I use a soft microfiber cloth to wipe down the pulls every few weeks. This keeps dust and dirt from building up.
- Wipe down with a damp cloth. If the pulls get dirty, I just wipe them down with a damp cloth and a little mild soap. I avoid anything harsh, like bleach or ammonia, because it can damage the leather.
- Condition occasionally. Every few months, I treat the leather with a conditioner. This keeps it soft and prevents it from drying out. I use the same Frye’s Leather Conditioner I mentioned earlier, and it works great.
Pro tip: If you have kids (or pets, like I do), you might need to clean the pulls a little more often. Sticky fingers and muddy paws happen, but a quick wipe with a damp cloth usually takes care of it.
Dealing with Scratches and Wear
Leather is durable, but it’s not indestructible. Over time, you might notice some scratches or wear. Here’s how I handle it:
- Minor scratches can usually be buffed out with a soft cloth. I’ve found that a little bit of conditioner and some gentle rubbing can make them disappear.
- Deeper scratches might need a little more attention. I’ve used a leather dye to touch up any areas that look too worn. It’s a small tube of color that you apply with a cotton swab, and it works like a charm.
- If the leather starts to look dull, a little conditioner will bring back its shine. It’s like giving your pulls a little spa treatment.
One thing I love about leather is that it develops a patina over time. Those little scratches and marks? They’re just proof that your pulls are well-loved. And honestly, I think they make them look even better.
Final Thoughts (And What I’d Do Differently Next Time)
If you’ve made it this far, you’re probably ready to grab your drill and get started. But before you do, let me share a few final thoughts,and a couple of things I’d do differently if I were doing this project again.
First, don’t be afraid to ask for help. When I was researching leather pulls, I had so many questions. Should I go with a lighter or darker color? What size would look best on our cabinets? Would the leather hold up in our kitchen? I ended up calling the company I ordered from, and they were incredibly helpful. They answered all my questions and even gave me some tips I hadn’t thought of. Don’t hesitate to reach out if you’re unsure about something. Most companies are happy to help.
Second, take your time with the measurements. I can’t stress this enough. I was in a hurry to get started, and I ended up with a few pulls that weren’t perfectly aligned. It’s not a huge deal, but it’s something I’d do differently next time. Measure twice, drill once.
And finally, enjoy the process. I know it sounds cheesy, but I really mean it. DIY projects aren’t just about the end result,they’re about the journey. They’re about learning new skills, making mistakes, and figuring out how to fix them. They’re about the satisfaction of creating something with your own two hands. So take your time, enjoy the process, and don’t be too hard on yourself if something doesn’t go perfectly.
Now, if you’ll excuse me, I think I’m going to go admire our kitchen cabinets one more time. And maybe start brainstorming my next DIY project,because once you get a taste for this kind of transformation, it’s hard to stop!
Frequently Asked Questions
What materials are used in these leather drawer pulls?
The leather drawer pulls I used are made from full-grain vegetable-tanned Italian leather. This means they’re made from the highest-quality leather, treated with natural tannins instead of harsh chemicals. The hardware is solid brass, which ensures durability and a beautiful finish. I love that these materials are both high-quality and eco-friendly, which is important to me as a mom trying to make more sustainable choices in our home.
How do I know what size to order for my furniture?
Sizing is crucial, and I learned this the hard way! First, measure the distance between the existing mounting holes on your cabinet or drawer front. Then, check the dimensions of the leather pulls you’re considering. Most companies list the width and height of their pulls, so you can compare them to your measurements. If you’re unsure, don’t hesitate to contact the company,most are happy to help you find the right fit. I also recommend ordering a sample if you’re not confident about the size.
Are these handles difficult to install?
Not at all! I was surprised at how easy the installation was. The hardest part is usually the measuring and marking, but once you’ve got that down, the actual installation is a breeze. You’ll need a drill with a 6mm bit and a screwdriver, and that’s about it. I did the entire kitchen in one afternoon, and I’m not even what you’d call a “handy” person. Just take your time, follow the steps, and you’ll be fine. And if you make a mistake? Don’t worry,most mistakes can be fixed with a little extra drilling or a bit of wood filler.
Can I customize the color or add engraving?
Absolutely! One of the things I love about leather drawer pulls is how customizable they are. Many companies offer a range of colors, from classic black to rich cognac to natural tan. I went with cognac for our kitchen because it complemented our wood cabinets so well. Some companies also offer engraving services, so you can add monograms, dates, or even little symbols to your pulls. It’s a great way to make them truly unique to your home. Just keep in mind that customization might take a little extra time, so plan accordingly.
How durable are leather cabinet pulls?
Very durable! I was worried at first that the leather would wear out quickly, especially with three kids in the house. But after over a year of use, our pulls look just as good as they did when we installed them. The full-grain leather is thick and sturdy, and the brass hardware doesn’t corrode or tarnish. I’ve even used them on our outdoor storage bench, and they’ve held up beautifully. Just make sure to treat them occasionally with a leather conditioner, and they’ll last for years.
What is the typical price range for these products?
The price can vary depending on the size, material, and level of customization. When I ordered ours, I paid around $20-$30 per pull, which I thought was a great value given the quality. Prices can range from as low as $15 for simpler designs to $50 or more for highly customized or large pulls. I always recommend checking a few different companies to compare prices and options. And if you’re ordering a lot of pulls, ask about bulk discounts,some companies offer them, and it can save you a significant amount.
Can I install these on IKEA furniture?
Yes! I’ve actually installed leather pulls on a few of our IKEA pieces, and they look amazing. IKEA furniture is designed to be customizable, so the mounting holes are usually standard sizes. Just make sure to measure carefully and check the dimensions of the pulls you’re considering. I installed them on our IKEA coffee table and our bedroom dresser, and they turned out even better than I expected. It’s a great way to give IKEA furniture a high-end, custom look without spending a fortune.