
Outdoor Planters You Can Build with Basic Tools (And Actually Enjoy Making)
Let me tell you something I learned the hard way: buying expensive planters is a surefire way to drain your wallet without getting exactly what you want. Last summer, I spent $120 on “rustic” wooden planters from a big-box store, only to have them warp in the rain after two weeks. That’s when I grabbed my drill, some cedar scraps from the hardware store, and built my own,turns out, they’re still standing strong two years later.
What I love about DIY planters is that they let you match your garden’s vibe without breaking the bank. Whether you’re growing herbs on a balcony, veggies in a raised bed, or just adding some greenery to your patio, these projects are designed for real people with real tools. No fancy equipment required,just basic woodworking skills and a willingness to embrace the occasional splinter.
I’ve made enough mistakes (and learned from them) to know what actually works. Like the time I forgot drainage holes in my first planter box and ended up with a sad, waterlogged mess of basil. Or when I discovered that cedar doesn’t just look good,it actually lasts through our brutal Midwest winters. These projects aren’t just about building something; they’re about creating spaces that make your outdoor time more enjoyable.
In this guide, I’ll walk you through everything from selecting materials to adding those little personal touches that make your planters uniquely yours. We’ll cover wood projects, upcycled ideas, and even some creative painting techniques that’ll have your neighbors asking where you bought them (and you’ll just smile knowingly).
Why DIY Planters Are Worth the Effort
I used to think buying planters was the easy way out,until I realized how much more satisfying (and customizable) it is to build my own. There’s something special about growing your favorite plants in something you made with your own hands. Plus, it’s way more budget-friendly than you’d think.
Take cedar, for example. It’s naturally resistant to rot and insects, which means your planters will last for years without needing constant repairs. I found some beautiful cedar planks at my local hardware store for just $15,enough to build two large planter boxes. And the best part? I could customize the size to fit perfectly in my small backyard.
What I love most about DIY planters is the creative freedom. Want a modern geometric design? Go for it. Prefer a rustic, weathered look? That’s easy too. You’re not limited by what’s available in stores,you can create exactly what you envision. And if you make a mistake? That’s part of the process. My first attempt at a raised bed had crooked corners, but I just told everyone it was “artisanal charm.”
I’ve seen so many people get discouraged when their first DIY project doesn’t turn out perfect. But here’s what I’ve learned: the “imperfections” are what make handmade things special. That slightly uneven cut? It shows you put in the effort. That paint splatter? It’s proof you were having fun. Embrace the process, and your planters will be all the more meaningful.
What You’ll Need to Get Started
You don’t need a fancy workshop to build great planters. Here’s what I keep in my garage for these projects:
- Basic tools: A circular saw (I use my Skil 5280-01,it’s been with me through countless projects), a cordless drill, measuring tape, safety glasses, and work gloves. Don’t skimp on the gloves,trust me, splinters in your fingers are no fun.
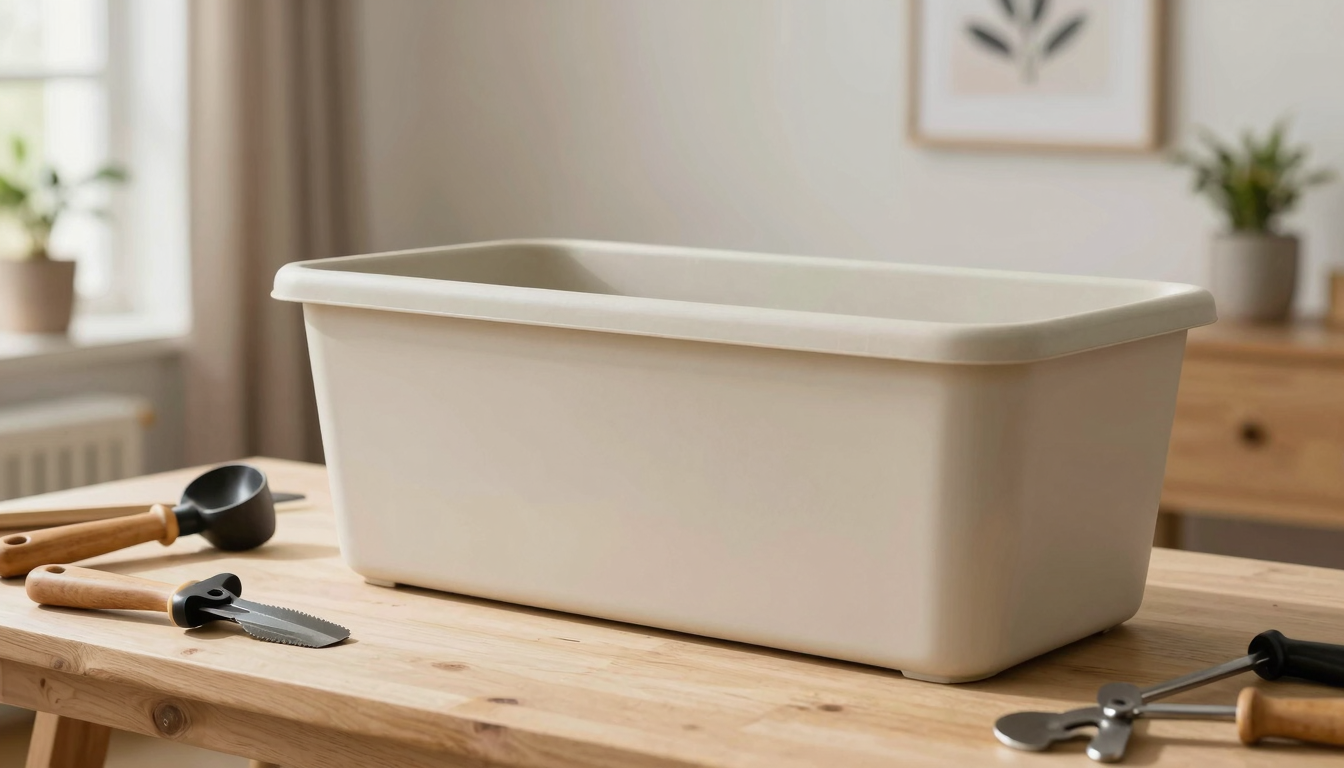
- Materials: Cedar or redwood for outdoor projects (they resist rot better than pine), exterior screws, wood glue, and sandpaper. For upcycled projects, I’ve used everything from old wine crates to metal buckets I found at thrift stores.
- Extras: Exterior paint or stain, a paintbrush, and some landscape fabric if you’re building raised beds.
Pro tip: If you’re new to woodworking, start with pine to practice your cuts and assembly. It’s cheaper than cedar, and you’ll learn a lot about your tools and techniques without worrying about wasting expensive materials.
Planning Your DIY Planter Project
Before you start cutting wood or painting containers, take some time to plan. This is where I used to skip steps and end up with planters that didn’t quite fit my space. Now, I always sketch a quick design and make a cut list first. It saves time, money, and frustration.
Sketching Your Design
Grab a piece of paper and draw your planter. Don’t worry about it being perfect,this is just to visualize the size and shape. For my herb garden, I sketched a simple rectangular box that would fit on my kitchen windowsill. I made sure to leave room for drainage holes and considered how I’d attach it to the windowsill if needed.
I also like to think about how the planter will look in my space. Will it be the focal point, or will it blend in with my existing decor? This helps me decide on colors and finishes. For my first project, I went with a natural wood finish to complement my farmhouse-style patio.
Making a Cut List
Once you have your design, make a detailed cut list. This is where I used to make mistakes,like cutting all my boards the same length without double-checking. Now, I measure twice and write everything down. For a simple rectangular planter box, you’ll need:
| Component | Length | Quantity |
|---|---|---|
| Side panels | 24″ | 2 |
| Front/back panels | 12″ | 2 |
| Base slats | 22.5″ | 4 |
I label each piece with painter’s tape before cutting. It might seem like overkill, but it saves so much confusion later. And if you’re like me and tend to get distracted, it’s a good way to keep track of what you’ve cut and what’s left to do.
Choosing the Right Materials
Not all wood is created equal when it comes to outdoor projects. I learned this the hard way when my first attempt at a planter box used untreated pine. After one summer, it was warping and showing signs of rot. Now, I only use cedar or redwood for outdoor projects,they’re naturally resistant to moisture and insects.
For indoor projects, you have more options. I’ve used everything from reclaimed barn wood to simple pine boards painted in fun colors. The key is to choose materials that match your space and your plants’ needs. For example, succulents do well in terra cotta pots because the material allows for good drainage, while tropical plants prefer moisture-retentive materials like plastic or glazed ceramic.
If you’re upcycling materials, make sure they’re clean and free from any chemicals that could harm your plants. I once used an old whiskey barrel for a planter, but I had to scrub it thoroughly with soapy water and let it dry in the sun for a week before filling it with soil.
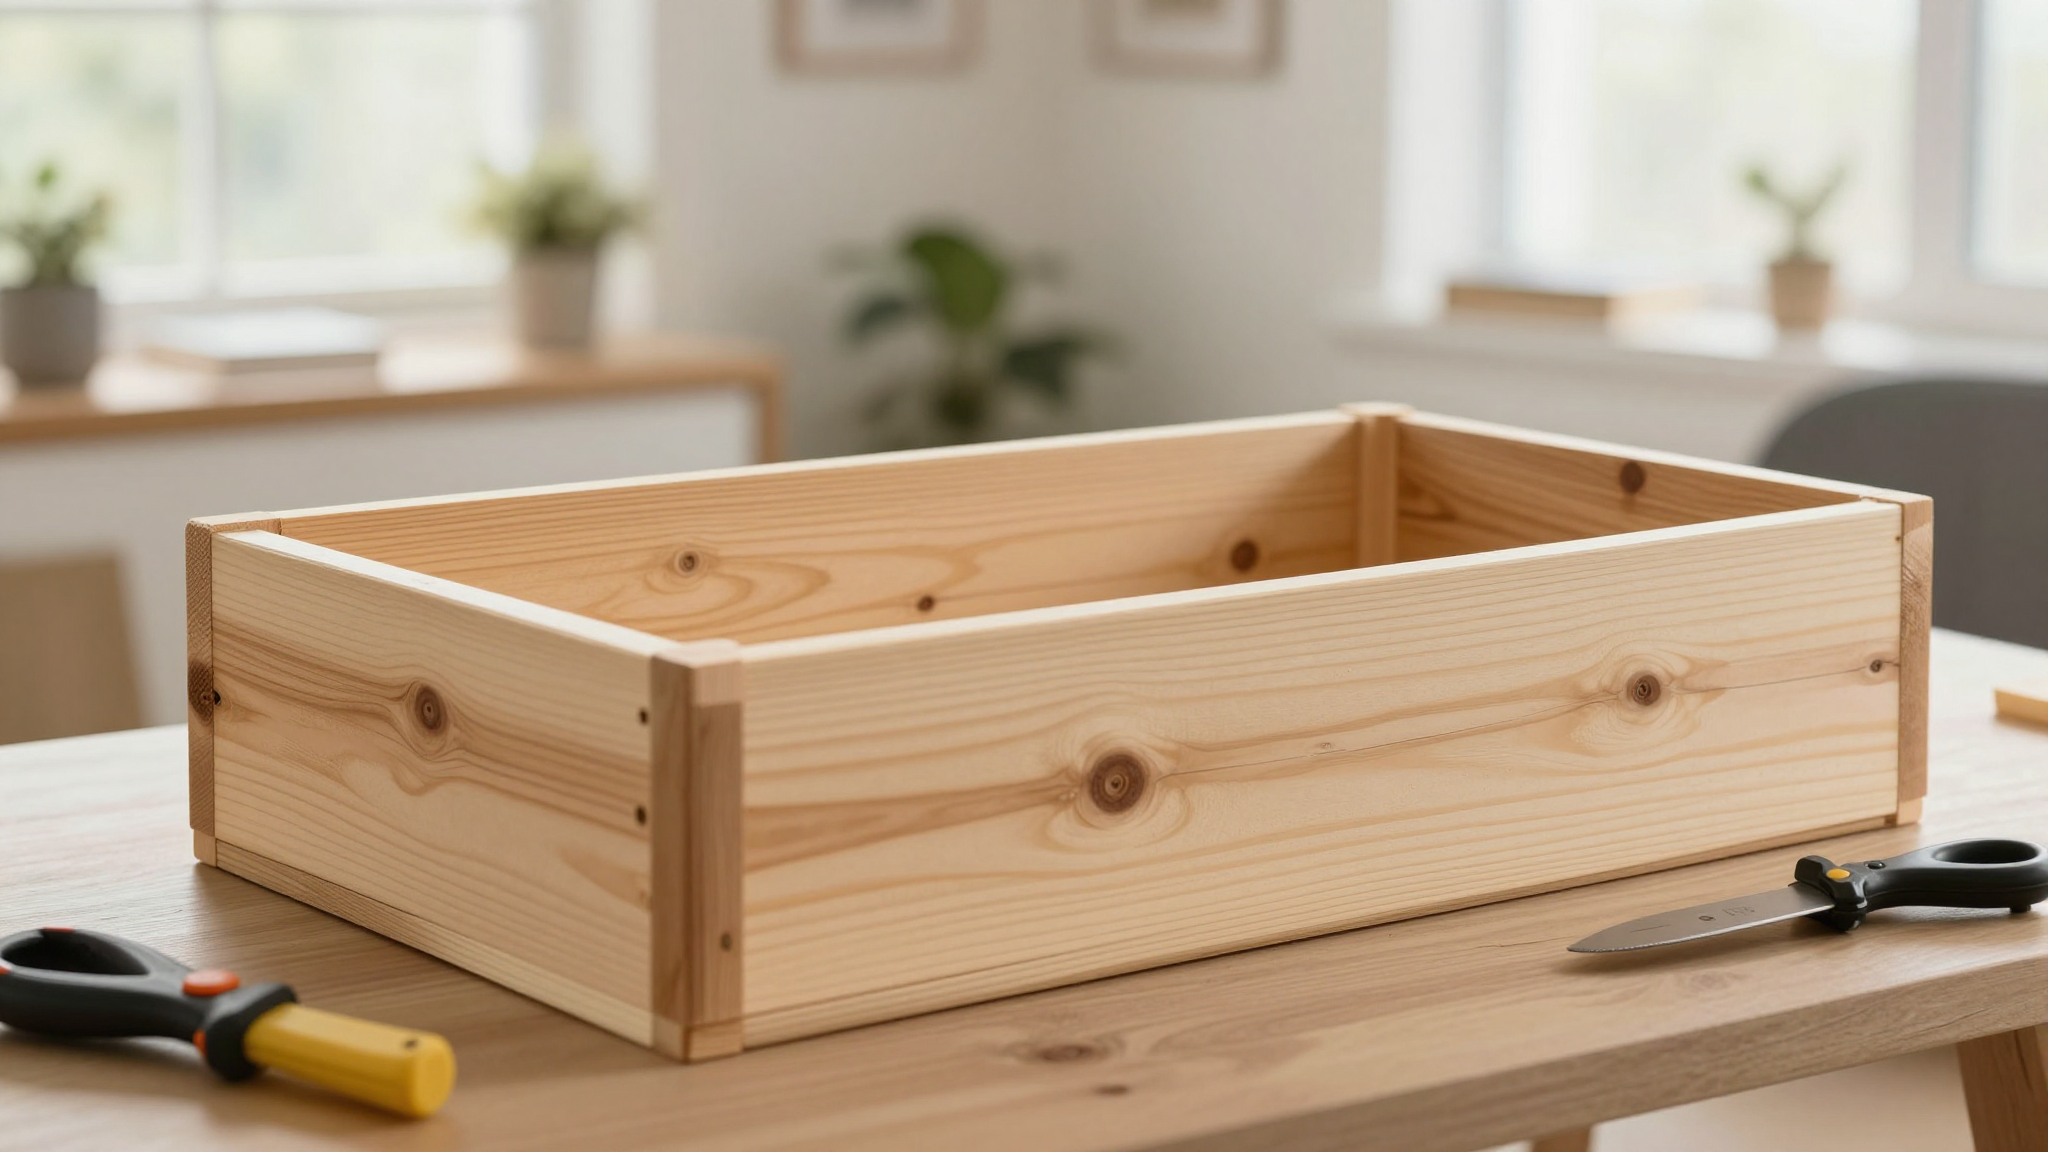
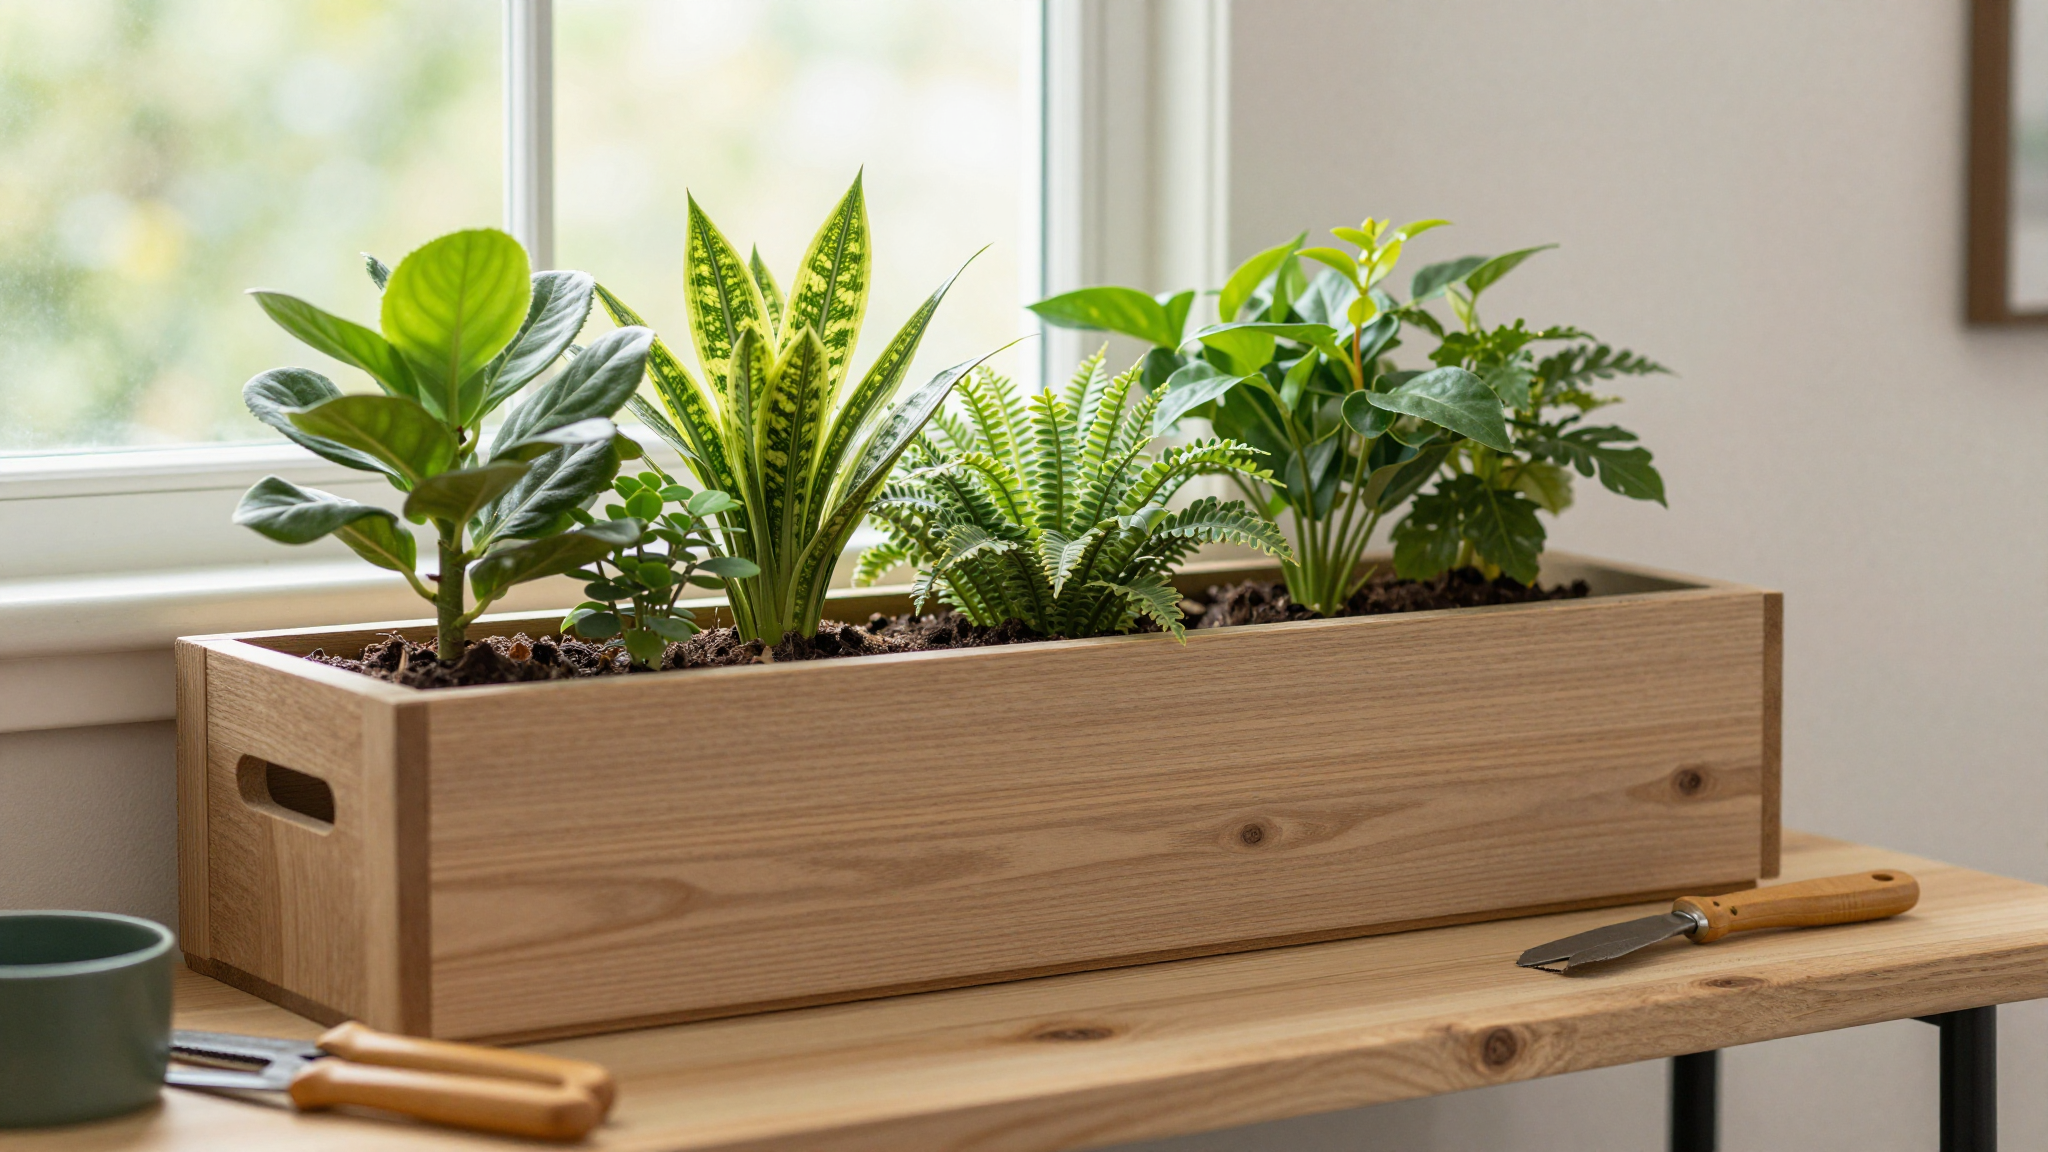
Building Your First Wooden Planter Box
Building a wooden planter box is one of the most rewarding DIY projects I’ve done. It’s simple enough for beginners but sturdy enough to last for years. Here’s how I built mine, step by step.
Cutting the Wood
Start by cutting your wood to the lengths specified in your cut list. I use a circular saw for this, but a handsaw works just as well if you don’t have power tools. Make sure to wear your safety glasses and gloves,splinters are a real hazard, especially with rough-cut wood.
When cutting, I like to make a small test cut first to ensure my saw is set at the right depth. This prevents me from accidentally cutting too deep and ruining a board. And always measure twice before making your final cuts. I can’t tell you how many times I’ve wished I could undo a cut that was just a fraction of an inch too short.
Assembling the Frame
Lay out your cut pieces on a flat surface. I use my garage floor, but a workbench or even a clean patio works too. Arrange the side panels, front, and back pieces to form a rectangle. Make sure the corners are square,this is crucial for a stable planter.
To check for squareness, measure the diagonals from corner to corner. If both measurements are equal, your rectangle is square. If not, adjust the pieces until they are. This step is worth taking the time to do right,it’ll make a huge difference in how stable your planter is.
Once your pieces are aligned, it’s time to attach them. I like to use exterior screws for this,they’re designed to withstand outdoor conditions. Pre-drill holes to prevent the wood from splitting, especially near the edges. Then, drive the screws in at a slight angle for a stronger hold.
Pro tip: If you don’t have a drill, you can use a hammer and nails, but screws are much stronger and less likely to come loose over time. And if you’re working with softwood like pine, pre-drilling is a must to avoid splitting.
Adding the Base and Drainage
Now it’s time to add the base. I like to use slats for the base instead of a solid board,this allows for better drainage and airflow to the roots. Cut four slats to the length of your planter box (minus about an inch on each end to leave gaps for drainage).
Attach the slats to the bottom of the frame using screws. Make sure to leave about a quarter-inch gap between each slat for drainage. Then, drill additional drainage holes in the base slats,about five or six holes should be enough for a small to medium-sized planter.
Once the base is attached, it’s time to sand. I use an 80-grit sandpaper to smooth out any rough edges and splinters. This step is important for two reasons: it makes your planter look more professional, and it prevents splinters when you’re handling it. Trust me, you don’t want to be picking splinters out of your hands every time you water your plants.
After sanding, I like to give my planter box a coat of exterior paint or stain. This not only makes it look nice but also helps protect the wood from the elements. I used a semi-transparent stain on my first planter box, and I love how it lets the natural grain of the wood show through while still providing protection.
Upcycling Everyday Items into Unique Planters
Not every planter needs to be built from scratch. Some of my favorite planters are made from upcycled materials I found around the house or at thrift stores. It’s a great way to save money and add a personal touch to your garden.
Transforming Tin Cans and Paper Bags
One of my favorite upcycled planters is made from tin cans. I collected a bunch of empty cans (cleaned them thoroughly, of course) and turned them into individual herb planters. Here’s how I did it:
- Remove any labels and clean the cans with soapy water.
- Use a hammer and nail to punch drainage holes in the bottom of each can.
- Spray-paint the cans in fun colors. I used a matte black for a modern look, but you can use any color you like.
- Let the paint dry completely, then fill the cans with potting soil and your favorite herbs.
I arranged my painted cans on a wooden tray and added a layer of pebbles for drainage. Now I have a cute, functional herb garden that fits perfectly on my kitchen windowsill. My kids love helping me water the plants, and it’s so satisfying to use fresh herbs in our cooking.
Another easy upcycled planter is made from paper bags. I’ve used these for starting seedlings in the spring. Here’s how:
- Fold the top of a sturdy paper bag down to create a rim.
- Line the inside of the bag with plastic to help retain moisture.
- Fill the bag with potting soil and plant your seeds.
- Water gently and place the bag in a sunny spot.
When it’s time to transplant your seedlings, you can simply tear away the paper bag and plant the whole thing in the ground. The paper will decompose, and your plants will have a gentle transition to their new home.
Creative Uses for Vintage Containers
Thrift stores and flea markets are treasure troves for upcycled planters. I’ve found everything from old teapots to wooden crates that make unique homes for my plants. Here are a few of my favorite finds:
- Vintage teapots: These make charming homes for small succulents or air plants. I found a beautiful floral teapot at a thrift store for just $2. I drilled a few drainage holes in the bottom and filled it with soil. Now it’s the centerpiece of my living room plant display.
- Wooden crates: These are perfect for creating raised planters or vertical gardens. I sanded down an old apple crate I found at a farm stand and lined it with landscape fabric. Now it’s home to a thriving collection of strawberries.
- Galvanized buckets: These are great for larger plants like tomatoes or peppers. I spray-painted mine a bright red for a pop of color in my garden. They’re also easy to move around if you need to rearrange your plants for sunlight.
When upcycling, it’s important to consider the needs of your plants. Make sure your container has proper drainage, and choose materials that won’t leach harmful chemicals into the soil. For example, I avoid using containers that have been treated with pesticides or other chemicals.
One of my favorite upcycled planters is a old dresser drawer I found at a garage sale. I sanded it down, painted it a soft gray, and lined it with plastic. Now it’s home to a collection of ferns and ivy. It’s the perfect size for my small balcony, and I love how it adds a touch of vintage charm to my outdoor space.
Painting and Decorating Your Planters
Painting your planters is one of the most fun parts of the DIY process. It’s your chance to add some personality to your garden and make your planters truly unique. I’ve experimented with all kinds of techniques, from simple solid colors to intricate stencils. Here are a few of my favorites:
Simple Paint Techniques for Beginners
If you’re new to painting planters, start with something simple like a solid color or a two-tone design. I used to be intimidated by painting, but I’ve learned that it’s all about having fun and not worrying too much about perfection.
For my first painted planter, I used a can of exterior spray paint in a soft sage green. I gave the planter a light sanding first to help the paint adhere better. Then I laid out some newspaper in my garage and sprayed the planter in light, even coats. I let it dry completely between coats, and after three coats, it looked like a store-bought planter!
If you want to add some interest, try a two-tone design. I painted the top half of a wooden crate white and the bottom half a deep blue. It looks so much more interesting than a single color, and it was super easy to do. Just use painter’s tape to create a clean line between the colors.
Advanced Techniques for More Dramatic Results
Once you’re comfortable with basic painting, you can try more advanced techniques like stenciling or ombré. I love using stencils to add geometric patterns to my planters. It’s a great way to make simple containers look more sophisticated.
For my ombré planter, I used three shades of blue paint. I started with the darkest color at the bottom and gradually lightened the color as I moved up the planter. I used a sponge to blend the colors together for a smooth transition. It took a few tries to get it right, but I love how it turned out!
Pro tip: If you’re using spray paint, work in a well-ventilated area and wear a mask. The fumes can be strong, and you don’t want to inhale them. Also, always let your paint dry completely between coats. Rushing this step can lead to smudges and an uneven finish.
Adding Personal Touches
What I love most about DIY planters is that they’re a blank canvas for your creativity. You can add all kinds of personal touches to make your planters truly one-of-a-kind. Here are a few ideas I’ve tried:
- House numbers: I painted my house number on a large planter box. Now it’s not just a functional container,it’s also a conversation piece for my front porch.
- Mosaic tiles: I used broken tiles to create a mosaic design on a concrete planter. It’s a great way to upcycle old tiles and add some color to your garden.
- Twine-wrapped handles: I wrapped twine around the handles of some metal buckets to give them a rustic, farmhouse look. It’s a simple touch that makes a big difference.
Don’t be afraid to experiment with different materials and techniques. Your planters should reflect your personality and your style. And remember, there’s no wrong way to do it,it’s all about what you love.
Maintaining Your DIY Planters
Once you’ve built and decorated your planters, the real work begins,keeping them looking great and your plants thriving. I’ve learned a few tricks over the years to make maintenance easier and more effective.
Keeping Wood Planters in Good Condition
Wood planters need a little extra care to keep them looking their best. Here’s what I do to maintain mine:
- Clean regularly: I use a mixture of warm water and mild soap to clean my wood planters. This helps remove dirt and debris that can build up over time. I avoid using harsh chemicals, as they can damage the wood and harm your plants.
- Seal annually: I apply a water-based sealant to my wood planters every spring. This helps protect the wood from moisture and UV damage. I like to use a clear sealant so it doesn’t change the natural look of the wood.
- Check for damage: I inspect my planters regularly for signs of wear or damage. If I see any cracks or splinters, I sand them down and touch up the paint or sealant as needed.
One year, I noticed that the bottom of one of my planters was starting to rot. I sanded away the damaged wood and applied a wood preservative to prevent further damage. It’s a simple fix that can extend the life of your planters significantly.
Preventing Common Problems
No matter what type of planter you have, there are a few common problems to watch out for. Here’s how I deal with them:
- Drainage issues: If you notice that water is pooling in your planter, it’s a sign that your drainage holes are clogged. I use a wire brush to clean out the holes and ensure proper drainage. I also add a layer of gravel to the bottom of my planters to help with drainage and prevent soil from washing out.
- Pest problems: Sometimes, pests like slugs or snails can become a nuisance in your planters. I use a mixture of coffee grounds and diatomaceous earth to keep them away. It’s a natural and effective solution that won’t harm your plants.
- Paint chipping: If the paint on your planter starts to chip, it’s important to touch it up as soon as possible. I keep a small can of matching paint on hand for quick repairs. This helps protect the wood and keeps your planter looking its best.
Regular maintenance is key to keeping your DIY planters in good condition. It might seem like a lot of work, but it’s really just a few simple steps that make a big difference. And trust me, it’s worth it to keep your planters looking great and your plants thriving.
Inspiration for Your Next DIY Planter Project
If you’re looking for more inspiration, I’ve got a few ideas to get your creative juices flowing. These projects are all beginner-friendly and use materials you can find around the house or at your local hardware store.
Easy DIY Planter Ideas to Try
Here are a few of my favorite easy DIY planter projects:
- Painted terra cotta pots: Grab some inexpensive terra cotta pots from your local garden center and give them a fresh coat of paint. I used chalk paint for a matte finish that hides imperfections. You can paint simple patterns or go for a solid color,it’s up to you!
- Vertical pallet garden: If you have an old wooden pallet lying around, you can turn it into a vertical garden. I sanded down my pallet and lined each compartment with landscape fabric. Now it’s home to a thriving collection of herbs and flowers.
- Upcycled tin can cluster: Collect some empty tin cans and turn them into individual planters. I painted mine in bright colors and arranged them on a wooden tray. They’re perfect for growing herbs on a sunny windowsill.
I also love creating seasonal displays with my planters. In the spring, I fill them with bright flowers, and in the fall, I switch to pumpkins and mums. It’s a great way to keep your outdoor space looking fresh and inviting year-round.
Where to Find More Inspiration
If you’re looking for more DIY planter ideas, I recommend checking out these resources:
- 5 DIY Projects to Instantly Add Charm to Your Home: This post has some great ideas for adding personality to your outdoor space.
- Upcycling Furniture Tips for a Professional-Looking Finish: You’ll find some helpful tips for giving old materials a fresh new look.
- Essential Tools Every Homeowner Should Have: This post has a great list of tools to help you tackle your DIY projects with confidence.
And don’t forget to check out my other DIY projects for more inspiration. I’m always adding new ideas, so there’s always something fun to try.
Final Thoughts and Tips for Success
Building your own planters is one of the most rewarding DIY projects you can tackle. It’s a great way to add personality to your outdoor space while saving money and getting creative. And the best part? You don’t need to be an expert woodworker or painter to make beautiful planters.
Start with a simple project like a wooden planter box or a painted terra cotta pot. As you gain confidence, you can try more advanced techniques like stenciling or upcycling vintage containers. Don’t be afraid to make mistakes,it’s all part of the learning process.
Here are a few final tips to help you succeed:
- Start small. Don’t tackle a complex project if you’re new to DIY. Build your skills with simpler projects first.
- Use the right materials. Cedar and redwood are great for outdoor projects, while terra cotta and ceramic work well for indoor planters.
- Take your time. Rushing through a project can lead to mistakes and frustration. Enjoy the process and don’t be afraid to ask for help if you need it.
- Personalize your planters. Add your own unique touch with paint, stencils, or upcycled materials. Your planters should reflect your personality and style.
- Maintain your planters. Regular cleaning and sealing will keep your planters looking great and your plants thriving.
Remember, the goal is to have fun and create something you love. Your planters don’t have to be perfect,they just have to be yours. And who knows? You might just discover a new hobby that brings you joy for years to come.
Now, grab your tools and get started on your next DIY planter project. And if you try any of these ideas, I’d love to see how they turn out. Share your photos with me on Instagram or tag me in your posts. I can’t wait to see what you create!