
Why I Decided to Tackle My Kitchen Cabinets (And What I Learned)
If you have ever stood in your kitchen with a cup of coffee, staring at dated honey oak cabinets and wondering if you can transform them yourself, you are not alone. When I started researching how to paint kitchen cabinets, professional contractor quotes came in between $4,000 and $7,000, while a full remodel was way out of our family budget. I knew that with patience, the right supplies, and a clear plan, I could do it myself for under $400.
The biggest worry most homeowners have is ending up with visible brush strokes, sticky doors, or peeling paint when the kids grab snacks. Over at Christina Projects, I have tested countless DIY methods, and getting a factory-smooth finish without an expensive spray booth is completely doable with standard rollers and brushes. It all comes down to choosing the right enamel, prepping properly, and using thin coats.
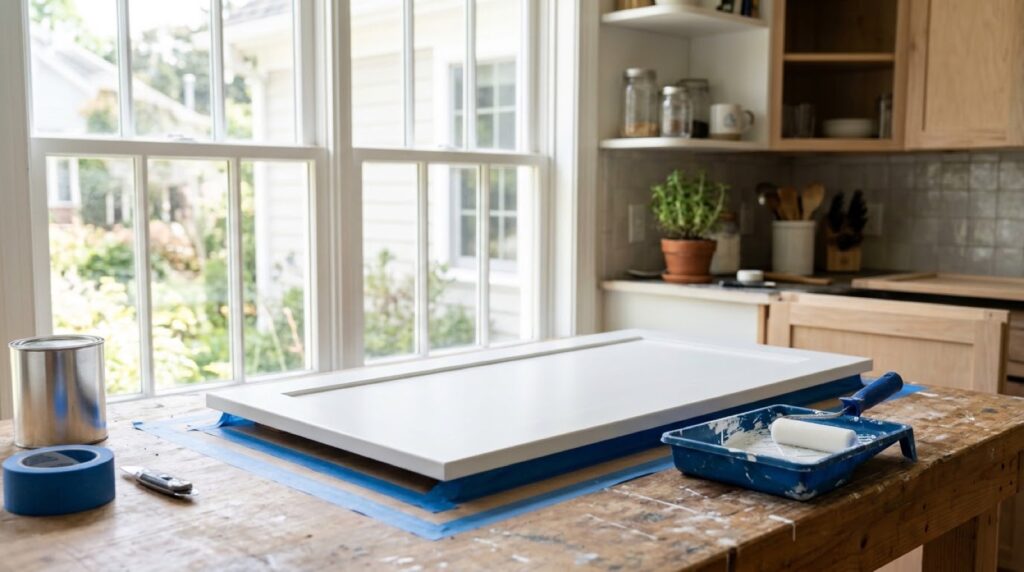
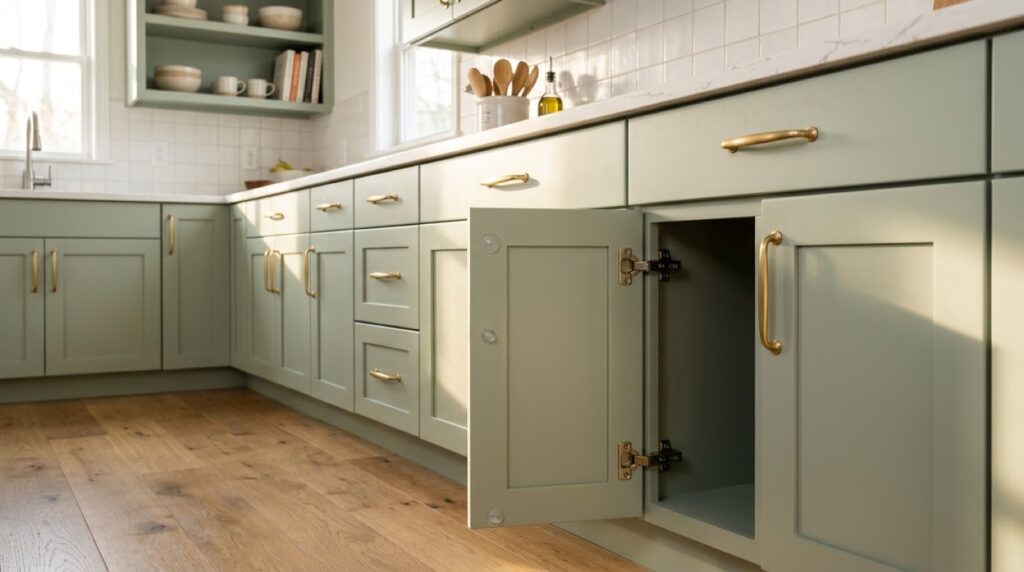
In this guide, I am sharing the exact step-by-step process I used to transform our kitchen, along with the honest mistakes I made so you can avoid them. Whether your cabinets are solid wood, stained oak, or laminate, this method will give you durable, glass-smooth results that last.
The Secret to No Brush Marks: Paint Chemistry Matters
Before buying paint, it helps to understand why so many DIY cabinet projects end up with brush ridges and roller stipple. Standard latex wall paint dries quickly on porous drywall, meaning it skins over before brush marks can level out. On smooth cabinet doors, that fast dry time leaves permanent ridges behind.
For kitchen cabinets, you need a waterborne alkyd or urethane-alkyd enamel. These hybrid formulas combine the easy water cleanup and low odor of latex with the self-leveling flow and rock-hard durability of traditional oil paint. The paint stays open just long enough for surface tension to flatten out brush strokes into a smooth, seamless finish.
Two top-tier choices are Benjamin Moore Advance and Sherwin-Williams Emerald Urethane Trim Enamel. Both cure to a washable shell that resists grease, moisture, and daily hand oils. A single gallon is usually plenty to cover a standard kitchen with two durable coats.
| Paint Type | Self-Leveling Ability | Cleanup | Recoat Time | Cabinet Durability |
|---|---|---|---|---|
| Standard Wall Latex | Poor (leaves ridges) | Soap and water | 2 to 4 hours | Low (chips easily) |
| Traditional Oil-Based | Excellent (very smooth) | Mineral spirits | 16 to 24 hours | High (yellows over time) |
| Urethane-Alkyd Enamel | Superior (flattens out) | Soap and water | 4 to 16 hours | Superior (hard, non-yellowing) |
Gathering Your Supplies and Setting Up Your Workspace
Setting up an organized workspace is half the battle when learning how to paint kitchen cabinets. You will need flat surface area to lay out doors and drawer fronts while they dry. Our garage and dining room were taken over by folding tables and plastic drop cloths, but flat drying prevented paint runs.
Gather your screwdrivers, painter’s tape, and zip-top bags for hardware. If you are rounding out your DIY toolkit, check our guide to essential tools every homeowner should have before getting started.
Safety matters during prep. Keep your space well-ventilated with open windows and box fans when cleaning and priming. If your kitchen refresh requires moving heavy appliances, disconnect them carefully. Whenever you need to unhook gas cooktop lines or modify hardwired electrical outlets, always call a licensed professional plumber or electrician.
Step-by-Step: How to Paint Kitchen Cabinets for a Flawless Finish
Follow these steps in order without skipping the cleaning or priming stages. Proper prep accounts for eighty percent of your final finish quality, ensuring your hard work holds up to daily family life.
Step 1: Remove Doors, Drawers, and Hardware
Never paint cabinet doors while they are hanging. You will get paint drips around the hinges, uneven edges, and stuck doors. Remove all doors, drawer fronts, hinges, and handles. If you want hardware inspiration, check out our favorite 5 easy ways to modernize outdated kitchen cabinets.
Create a simple numbering map of your kitchen on cardboard. Assign each door a number (like U1 for upper cabinet 1, L1 for lower cabinet 1). Place numbered painter’s tape inside the hinge cup hole of each door, and store matching hinges and screws in numbered zip-top bags.
Step 2: Deep Clean and Degrease with TSP Substitute
Cabinets collect an invisible film of cooking oil, steam, and hand grease. Painting over grease prevents primer from bonding, causing paint to peel. Mix a solution of heavy-duty TSP substitute with warm water in a bucket.
Scrub every door, drawer front, and cabinet face frame thoroughly with a coarse microfiber cloth. Wipe all surfaces down with a clean, damp cloth to remove cleaner residue, then let everything dry completely.
Step 3: Scuff Sand All Surfaces
You do not need to sand down to bare wood, but you must remove the glossy clear coat. Scuff sanding creates microscopic texture so your primer can form a mechanical bond. Use 150-grit sandpaper or a medium sanding sponge on all flat panels, grooves, and frame edges.
Sand with the wood grain until the shine turns matte. Vacuum loose dust with a brush attachment, then wipe every surface with a fresh tack cloth to grab remaining dust particles.
Step 4: Apply a Dedicated Bonding Primer
A bonding primer is essential for cabinet painting. Standard wall primer will not grip slick factory finishes or stop oak tannins from bleeding through light paint. High-adhesion primers like Insl-x Stix or shellac-based Zinsser BIN provide maximum grip and stain blocking.
Use a 2-inch angled sash brush to coat recessed panel profiles and corners first. Immediately follow with a 4-inch high-density foam mini roller across the flat panels and outer stiles. Apply a thin, even coat without worrying about full color coverage, since primer is built for adhesion.
Step 5: Sand Between Coats for Smoothness
Once your primer dries (typically 3 to 4 hours), inspect the surface under good lighting. You will likely feel tiny raised wood fibers or dust nibs on the primed surface.
Glide 220-grit sandpaper lightly over all primed surfaces with gentle pressure. You are only knocking down rough texture until it feels silky smooth. Vacuum away dust and wipe thoroughly with a tack cloth.
Step 6: Applying the Finish Enamel (The Brush and Roll Technique)
Now apply your urethane-alkyd enamel. The secret to a brush-mark-free finish is pairing a soft brush, a high-density foam roller, and light pressure. Work on one flat door at a time.
Dip the lower third of your angled brush into the paint and coat inner panel details and tight corners. Next, load your 4-inch high-density foam roller and roll the flat center panel, followed by outer rails and stiles. Finish with a gentle rolling pass in one direction. Once laid off, leave the door alone so the enamel can self-level undisturbed.
Step 7: Applying the Second Coat
Allow the first coat to dry fully according to can directions. For paints like Benjamin Moore Advance, wait 16 hours before recoating; for Sherwin-Williams Emerald Urethane, wait 4 to 6 hours. Rushing this step can trap solvents and wrinkle the finish.
Scuff lightly with 220-grit sandpaper, wipe with a tack cloth, and apply your second thin coat using the same technique. Two thin coats level better and cure harder than one thick layer.
Dry Time vs Curing Time: What Every DIYer Must Know
A common pitfall when learning how to paint kitchen cabinets is confusing dry time with cure time. Knowing the difference protects your hard work from early scratches.
Dry time is how quickly liquid evaporates, making doors dry to the touch so you can handle them. Curing time is the chemical process where resins cross-link into a rock-hard shield. While cabinets feel dry within hours, full curing takes 21 to 30 days.
Treat your cabinets gently during the first month. Avoid harsh cleaners, skip abrasive scrub pads, and open doors using hardware. While waiting for the cure, take time to organize your drawers using our favorite DIY kitchen organization hacks that actually work.
Reassembling Your Cabinets and Adding Hardware
After your final coat dries for 48 to 72 hours, you can begin reassembling your kitchen. Lay out your numbered bags of hinges and match each door to its spot using your cardboard kitchen map.
Attach hinges to doors first, then mount them to the face frames. Use hinge adjustment screws to align doors and level the gaps. If you want to carry this refresh further, our beginner’s guide to installing a tile backsplash is a great companion project for next weekend.
Place clear soft-close silicone bumpers on the inside corners of every door and drawer front. These small cushions soften closing impacts and stop fresh enamel from sticking or chipping against the frame.
5 Cabinet Painting Mistakes I Made (And How to Avoid Them)
Every DIY journey involves a few lessons. Here are five real mistakes I made on early projects so you can skip the frustration:
- Skipping the hinge labeling system: On my first trial run, I threw all hinges into one bucket. The doors were misaligned and took hours of guesswork to fix. Always number doors and bag hardware individually.
- Overloading the roller: Trying to speed things up, I put too much paint on an upper door. The paint sagged into heavy drips along the lower edge that required extra sanding. Stick to thin coats.
- Overworking tacky paint: I spotted a small roller mark five minutes after rolling and tried to fix it. The paint had started setting, creating a rough patch. Let the self-leveling paint do its work.
- Skimping on degreaser near the stove: A quick wipe-down near our range hood was not enough. The primer bubbled over grease residue. Thorough degreasing with TSP substitute is essential.
- Rehanging doors too early: Reinstalling doors after only 24 hours led to an accidental dent when a grocery box bumped a lower cabinet. Give doors two to three full days of flat drying before reassembly.
Our Top 10 Picks for Kitchen Cabinet Painting Supplies
- TSP Substitute Heavy Duty Degreaser: This no-rinse degreaser cuts through baked-on cooking oil and hand grime without leaving chalky residue. It is the essential first step for proper primer bonding. Typical price range: $10 to $18 per quart.
- Flexible Sanding Sponges (Medium and Fine Grit): Foam sanding sponges bend around routed edges and detailed moldings where flat sanding blocks cannot fit. They provide uniform scuffing without gouging wood. Typical price range: $6 to $14 for a multi-pack.
- Beeswax Treated Tack Cloths: Specially treated cotton cloths grab fine sanding dust from corners and recessed panels before priming. Using them between coats prevents dust nibs in your finish. Typical price range: $8 to $15 for a 12-pack.
- Delicate Surface Painter’s Tape: Provides gentle adhesion that seals edges against paint bleed without pulling off wall paint during removal. It peels away cleanly with no gummy residue. Typical price range: $7 to $12 per roll.
- Insl-x Stix Waterborne Bonding Primer: A heavy-duty bonding primer engineered to grip slick factory finishes, laminate, lacquer, and varnished wood. It creates a solid base that prevents chipping. Typical price range: $26 to $34 per quart ($65 to $80 per gallon).
- Benjamin Moore Advance Waterborne Alkyd Enamel: A premium hybrid cabinet paint that flows out like oil paint to erase brush marks while cleaning up with water. It cures to a hard, furniture-grade finish. Typical price range: $32 to $42 per quart ($75 to $95 per gallon).
- High-Density Foam Mini Paint Rollers (4-Inch): Closed-cell foam rollers distribute enamel in an ultra-smooth, even film without shedding lint or creating orange peel texture. They deliver a spray-like finish with hand tools. Typical price range: $10 to $18 for a roller and refill pack.
- Purdy Nylox Angled Sash Paint Brush (2-Inch): Handcrafted with soft nylon bristles designed to apply waterborne alkyds with precision. Its angled tip provides total control in corners and molding details. Typical price range: $14 to $22.
- Painter’s Pyramids Staging Stands: Non-stick triangular stands elevate cabinet doors above drop cloths so you can paint edges and flat panels cleanly with minimal contact marks. Typical price range: $12 to $18 for a set of 20.
- Clear Soft-Close Silicone Cabinet Bumpers: Self-adhesive dampening dots placed on door and drawer corners cushion closing impacts and stop fresh paint from sticking or chipping against frames. Typical price range: $6 to $12 for a 100-pack.
Frequently Asked Questions
Is it better to spray or roll kitchen cabinets?
Both methods produce great results when done right. An HVLP paint sprayer gives the fastest, smoothest finish, but it requires masking your entire kitchen with plastic sheeting and involves a steep learning curve. Using a high-density foam roller with self-leveling urethane enamel creates a finish that is ninety-five percent as smooth as spraying, with far less mess, zero overspray risk, and easy cleanup.
Do I really need to sand my cabinets before painting?
Yes, scuff sanding is an essential step you should never skip. While you do not need to sand down to bare wood, light sanding with 150-grit sandpaper dulls the glossy topcoat and creates tooth for bonding primer to grip. Skipping this step is the primary cause of cabinet paint chipping within the first year.
What is the best paint finish for kitchen cabinets?
A satin or semi-gloss finish is ideal for cabinets. Satin offers a soft luster that hides minor wood imperfections while remaining easy to wipe down. Semi-gloss provides slightly higher moisture resistance and sheen. Avoid matte paints that absorb grease, as well as high-gloss paints that highlight every surface flaw.
How long does a DIY cabinet paint job actually last?
When prepped properly with degreasing, scuff sanding, a bonding primer, and two coats of urethane-alkyd enamel, a painted cabinet finish typically lasts eight to ten years under normal family use. Touching up minor wear around handles keeps them looking fresh for even longer.
Can I paint laminate or thermofoil kitchen cabinets without them peeling?
Yes, you can paint laminate and thermofoil cabinets if the existing coating is securely bonded. The key is using a specialty bonding primer (like Insl-x Stix or Zinsser BIN shellac primer) after scuff sanding with 150-grit sandpaper. The primer creates a chemical bridge between slick laminate and the enamel topcoat so paint will not peel.
Final Thoughts: A Fresh Kitchen on a Real-Life Budget
Painting your kitchen cabinets is a rewarding project that takes a weekend or two of effort, but the payoff is huge. Walking into your kitchen and seeing bright, smooth cabinets that you painted yourself is one of the best feelings in DIY home improvement.
Take your time with prep, choose a quality urethane-alkyd enamel, and allow proper time for doors to cure. You do not need thousands of dollars or contractor gear to create a kitchen you love. Grab your sanding sponge, put on some music, and happy painting!