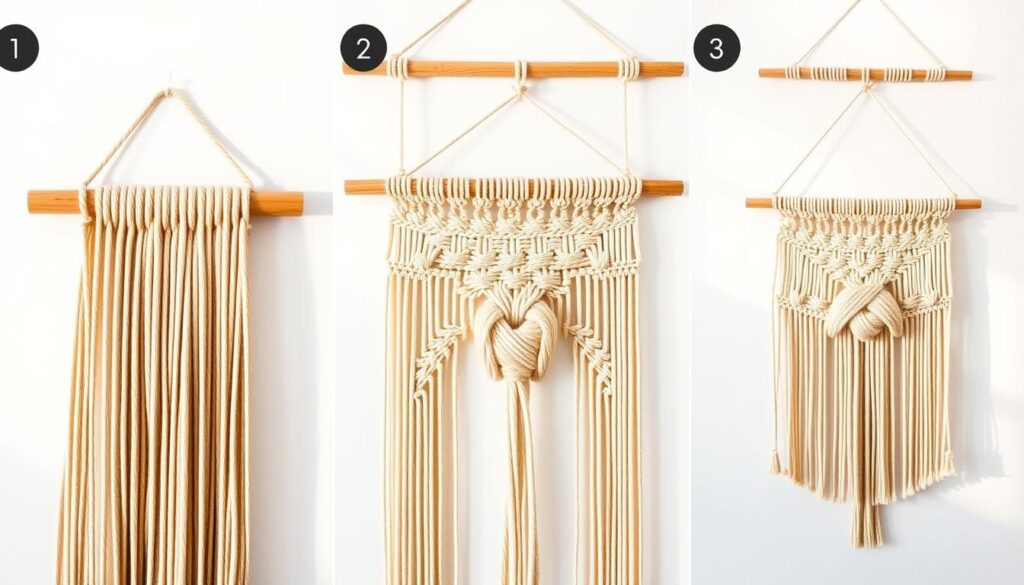
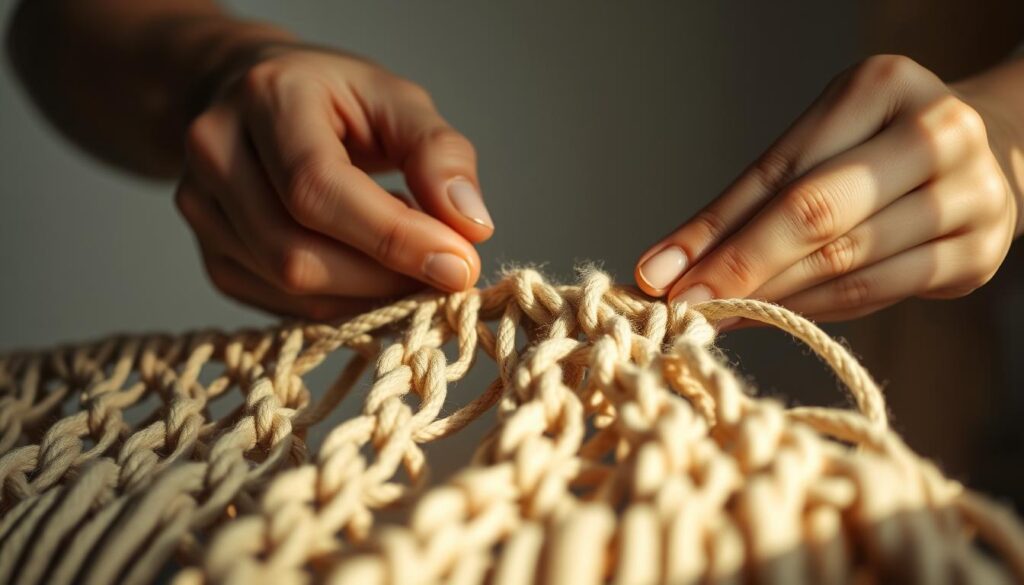
Imagine turning a few strands of rope into stunning decor that breathes life into any room. Knot-based art has been around for centuries, with roots in ancient Arabic and Chinese textiles. Today, this craft, known as macrame, is back in style, blending vintage charm with modern minimalism.
Wall hangings are a favorite for crafters because they’re simple to create yet make a bold statement. You’ll need just a handful of supplies: cotton cord, scissors, a dowel, and patience. Even better, most of these items are likely already in your home!
This guide breaks down the basics for absolute beginners. We’ll start with foundational knots like the square knot and half hitch, then build up to designing your first piece. Whether you’re aiming for a boho-chic look or a sleek geometric pattern, the possibilities are endless.
Key Takeaways
- Macrame has ancient origins but fits perfectly in contemporary home decor.
- Basic supplies are affordable and easy to find at craft stores or online.
- Mastering the square knot is essential for most wall hanging projects.
- Wall art projects can be customized to match any interior design style.
- Beginners can achieve professional-looking results with simple techniques.
Introduction to Macramé and Wall Hangings
What began as functional maritime knots now dangles elegantly above contemporary couches. Early Arabic weavers first crafted intricate macrame patterns using twisted cords in the 13th century. These methods spread across Europe, becoming popular in Victorian-era decor before fading into obscurity.
Today’s crafters use the same principles to design stunning wall hangings with just a few basic knots. The square knot and half hitch form the backbone of most projects. Once mastered, these knots let you build complex patterns that look expert-level.
This art form bridges generations—ancient traditions meet modern minimalism. Whether you’re making bohemian wall art or functional plant hangers, macrame remains refreshingly simple. All you need is cord, patience, and a willingness to experiment.
Our guide walks you through each step, from creating your first place loop to finishing touches. Even complete beginners can achieve professional results with clear, step-by-step instructions. Let’s turn those twists into treasures!
Essential Supplies and Tools for Your Macramé Project
Gathering the right tools transforms tangled threads into polished art pieces. Start with three core elements: quality cord, sturdy anchors, and basic workspace tools. These components work together to turn simple knots into showstopping designs.
Choosing the Right Cord and Materials
Cotton reigns supreme for beginners—it’s soft, holds knots well, and comes in various thicknesses. Opt for 3mm-5mm cords for wall hangings. Jute adds rustic texture but can fray, while hemp offers durability for outdoor projects.
Consider your design’s style when picking colors. Neutral tones blend with most decor, but don’t shy from bold hues for statement pieces. Pro tip: Always buy extra cord. You’ll need about four times your project’s finished length when folding cord half for lark head knots.
Selecting Anchors and Work Surfaces
Your anchor determines the project’s shape and stability. Dowel rods create horizontal wall pieces, while metal rings suit circular designs. For large works, secure cords to a foam board using sewing pins—this keeps patterns aligned as you knot.
Household items make great starter tools:
- Safety pins for marking knot positions
- Masking tape to secure cords temporarily
- Old towels to protect tables from dye transfer
Proper preparation prevents tangled frustrations. Measure cords precisely, organize them by length, and double-check your anchor’s weight capacity. As one crafter puts it: “A well-planned project lets your creativity flow without tripping over loose ends.”
Basic Macramé Knots Every Beginner Should Know
Unlocking the art of knot-based crafting starts with four foundational techniques. These versatile knots form the building blocks for everything from simple wall hangings to intricate plant holders. Let’s dive into the essentials that’ll turn your cord into art.
Square Knot: The Cornerstone of Patterns
The square knot is your new best friend. Here’s how to master it:
- Take four cords – left (A), middle (B/C), and right (D)
- Cross A over B/C, then D over A
- Pull tight to create the first half
- Repeat mirrored to complete the square
This double-layered knot creates flat, stable rows perfect for geometric designs. Fun fact: Historical sailors used similar knots to secure cargo!
Spirals Start With Half Knots
Twist ordinary half knots into eye-catching spirals:
- Tie consecutive half knots without reversing direction
- The cords naturally twist into a corkscrew shape
- Adjust tightness to control spiral density
“Half knots are the secret sauce for dynamic texture. Six repeats usually kickstart the twist.”
| Knot Type | Best For | Tension Tip |
|---|---|---|
| Lark’s Head | Starting projects | Fold cord in half before looping |
| Reverse Lark’s Head | Alternate textures | Twist loop clockwise before securing |
| Square Knot | Flat surfaces | Keep middle cords straight |
| Half Knot | 3D elements | Pull diagonally for even twist |
Anchor your work securely with the lark head knot. Simply fold cord in half, loop over your dowel, and pull ends through. Flip it for a reverse lark head to add visual variety. Pair these with the square knot to create stunning creative gallery wall ideas that showcase your new skills.
Consistent tension separates good knots from great ones. Practice on short cords first, keeping pulls firm but not strained. Remember: Perfect knots come from patience, not force!
Step-by-Step Guide to Creating Your Wall Hanging
Transform your living space with handmade charm by crafting your first knotted masterpiece. Start by clearing a flat surface and gathering supplies within arm’s reach. Secure your dowel or anchor between heavy books or clamp it to a table edge using rubber bands.

Workspace Setup & Anchor Preparation
Cut cords twice your desired length using the fold cord method. Attach them to the anchor with reverse lark head knots for visual interest. Space strands 1-2 inches apart to prevent crowding. Pro tip: Label groups with colored tape if using multiple knot patterns.
Knotting Sequence & Pattern Building
Begin with a row of square knots across all cords:
- Divide cords into sets of four
- Use outer strands to tie over the center two
- Repeat mirrored to complete each knot
Alternate with half knots every third row to create subtle spirals. Keep tension consistent by pulling diagonally away from the anchor. Notice a mistake? Undo 2-3 knots and rework them before continuing.
| Common Issue | Quick Fix | Prevention Tip |
|---|---|---|
| Uneven edges | Add filler knots | Measure cord lengths twice |
| Loose center cords | Twist while tightening | Use sewing pins as guides |
| Knots sliding | Apply clear glue | Maintain steady tension |
For detailed visual guidance, explore this macrame wall hanging for beginners tutorial. Complete your design by trimming ends at angles or adding wooden beads. Hang your creation using a simple lark head loop – step back and admire your new statement piece!
Tips and Tricks for a Flawless Macramé Experience
Crafting smooth, professional knots requires more than just technique—it’s about rhythm. Like tying shoelaces, consistent tension separates messy tangles from crisp patterns. Keep your pulls firm but flexible, letting cords glide through your fingers without straining.
Adjustments matter more than you think. If a clove hitch looks uneven, gently twist the cord right while pulling the cord left diagonally. For half knot square patterns, experts recommend completing three knots before tightening—this lets you balance spacing naturally.
“Your workspace is your partner. Anchor projects to a dowel with lark head knots, and check alignment after every row.”
Use these tension hacks:
- Pinch cords 1 inch below your working area to prevent slippage
- Rotate your project 180 degrees periodically to spot inconsistencies
- Mark problem areas with washi tape for quick fixes
Sturdy anchors make all the difference. Secure your dowel between heavy books or clamp it to a table edge. This stabilizes cords while you work, especially for complex clove hitch sequences. Need more guidance? This macrame for beginners guide shares proven tension tricks.
Remember: Perfect knots come through practice, not perfectionism. Start with scrap cord to test new techniques before committing to your main project. Your hands will soon develop the perfect pressure memory!
Troubleshooting Common Macramé Mistakes
Even seasoned crafters encounter snags when working with knots. Spotting errors early saves time and frustration. Watch for these telltale signs: loops that sag unevenly, patterns drifting sideways, or anchors that wobble mid-project.

Uneven tension tops the list of common issues. If your square knots look lopsided, gently tug adjacent cords to redistribute tightness. For persistent slack, insert a sewing pin below the problem area as you retie.
| Issue | Quick Fix | Prevention |
|---|---|---|
| Loose clove hitch | Twist cord clockwise before tightening | Practice on scrap cord first |
| Misaligned knots | Use washable marker to grid your anchor | Check alignment every 3 rows |
| Fraying ends | Apply clear nail polish | Choose twisted over braided cords |
Half hitch spirals gone wild? Undo 2-3 knots and rework them with consistent diagonal pulls. Keep a crochet hook nearby to nudge stray threads into place without unraveling entire sections.
Most errors stem from rushing the process. Build regular check-ins into your workflow—pause every 15 minutes to inspect knots from multiple angles. Store works-in-progress in a clean, dry home space to prevent accidental tugs.
Remember: Every tangled thread teaches something new. As one textile artist notes, “The beauty of knots lies in their forgiveness—a simple twist often transforms mistakes into design features.”
Embracing Creativity: Customizing Your Macramé Designs
Once you’ve mastered foundational techniques, your cord becomes a canvas for innovation. Mixing knot styles and materials lets you craft pieces that reflect your personal style. This is where the real magic happens—transforming basic patterns into signature art.
Mix & Match Knot Sequences
Try pairing square knots with half knot spirals for dynamic textures. Alternate rows of reverse lark head knots with classic lark head knots to create striking borders. For geometric flair, arrange square knots diagonally across your dowel rod.
Breathe new life into projects with these ideas:
- Weave wooden beads between half knots for bohemian accents
- Use colored cords in specific sections to highlight patterns
- Combine thick and thin threads for dimensional contrast
| Knot Combo | Visual Effect | Skill Level |
|---|---|---|
| Square + Spiral | Modern waves | Beginner |
| Reverse Lark’s Head + Half Hitch | Textured fringe | Intermediate |
| Alternating Square Knots | Chevron patterns | Advanced |
Don’t hesitate to break rules. One crafter’s “mistake” often becomes tomorrow’s trending technique. As you gain experience, you’ll develop instinctive ways to twist, loop, and layer cords. Keep a sketchbook nearby—doodle ideas while they’re fresh!
Remember: Every macrame project is a chance to grow. Start small with plant hanger experiments before tackling wall pieces. Your unique artistic voice will emerge stitch by satisfying stitch.
Conclusion
Every knot you tie weaves a story of patience and creativity. This guide has shown how basic supplies like cords and dowels transform into striking wall hangings through simple techniques. From selecting materials to mastering the square knot, you’ve built skills that open doors to endless projects.
Remember: Those first half knots and lark head loops form the foundation. As your confidence grows, mix patterns or add beads for personal flair. Mistakes? They’re just unexpected design twists waiting to happen.
Your home deserves art that reflects your journey. Whether crafting bohemian fringe or clean geometric shapes, each piece proves how ordinary materials become extraordinary. Keep your cords close and creativity closer—every new knot is a step toward unique decor.
Now grab those scissors and start looping. The world needs more handmade beauty, one twist at a time.

