
Maintaining Exterior Paint: When to Touch Up vs. Repaint (From a DIY Mom Who’s Learned the Hard Way)
Let me tell you,nothing makes your house look as neglected as peeling paint. I learned that the hard way after ignoring a few small chips on our front door trim. By the time I finally got around to fixing them, half the door needed sanding and repainting. Exterior paint isn’t just about looks; it’s your home’s first line of defense against water, sun, and pests. A good coat can last a decade or more if you take care of it. But how do you know when to grab the touch-up brush versus when to break out the scaffolding and start from scratch?
I’ve spent years (and more than a few paint-stained shirts) figuring out the difference between a quick fix and a full repaint. Here’s what I’ve learned,including the mistakes I made so you don’t have to.
Why Exterior Paint Actually Matters (Beyond Curb Appeal)
I used to think paint was just about making the house look nice. Then I had to replace a rotted section of siding because water seeped in through a tiny crack near the gutter. That $200 repair could’ve been avoided with a little preventative maintenance. Here’s why keeping your exterior paint in good shape is worth the effort:
It Keeps Water Out (And Saves You from Costly Repairs)
Water is the enemy of your home’s siding and trim. I found this out the hard way when a leaky gutter caused a soft spot in our vinyl siding. By the time I noticed, the wood underneath was starting to rot. A fresh coat of paint acts like a waterproof barrier, but only if it’s intact. Once it starts peeling or cracking, moisture gets in, and that’s when problems begin.
Pro tip: I now check our gutters and downspouts every spring before the rainy season hits. A little caulking and sealing goes a long way in preventing water damage. (If you need a refresher on gutters, check out my post on winterizing your home,some of those tips apply year-round!)
It Protects Against Sun Damage (And Saves You from Fading Nightmares)
Sunlight fades paint faster than you’d think. Our south-facing bedroom windowsill was a disaster after just three years,chalky, peeling, and an eyesore. I thought I’d picked a “durable” paint, but I didn’t realize how much UV exposure would take its toll. Lighter colors reflect heat and slow fading, but no paint is completely immune. That’s why I now use a high-quality exterior paint with UV blockers, like Sherwin-Williams Duration, for sun-exposed areas.
It Boosts Curb Appeal (And Your Home’s Resale Value)
First impressions matter. I remember when we were house hunting and pulled up to a home with fresh, crisp paint,it looked well cared for, even if the interior needed work. Buyers notice these details. A fresh coat of paint signals that the homeowner maintains the property, which can make a big difference in how much someone is willing to pay.
Even if you’re not planning to sell, a well-maintained exterior just feels like a home you’re proud of. And trust me, after a long day of DIY projects, that pride is worth it.
How to Inspect Your Painted Surfaces (Like a Pro Who’s Seen It All)
I used to grab my paintbrush and start touching up whatever looked bad. Then I realized I was missing half the problems because I wasn’t inspecting systematically. Now, I walk the perimeter of our house at least twice a year,once in spring and once in fall,to catch issues early. Here’s how I do it:
What Those Ugly Paint Problems Really Mean
Peeling, cracking, and bubbling aren’t just unsightly,they’re warning signs. Here’s what each one usually means:
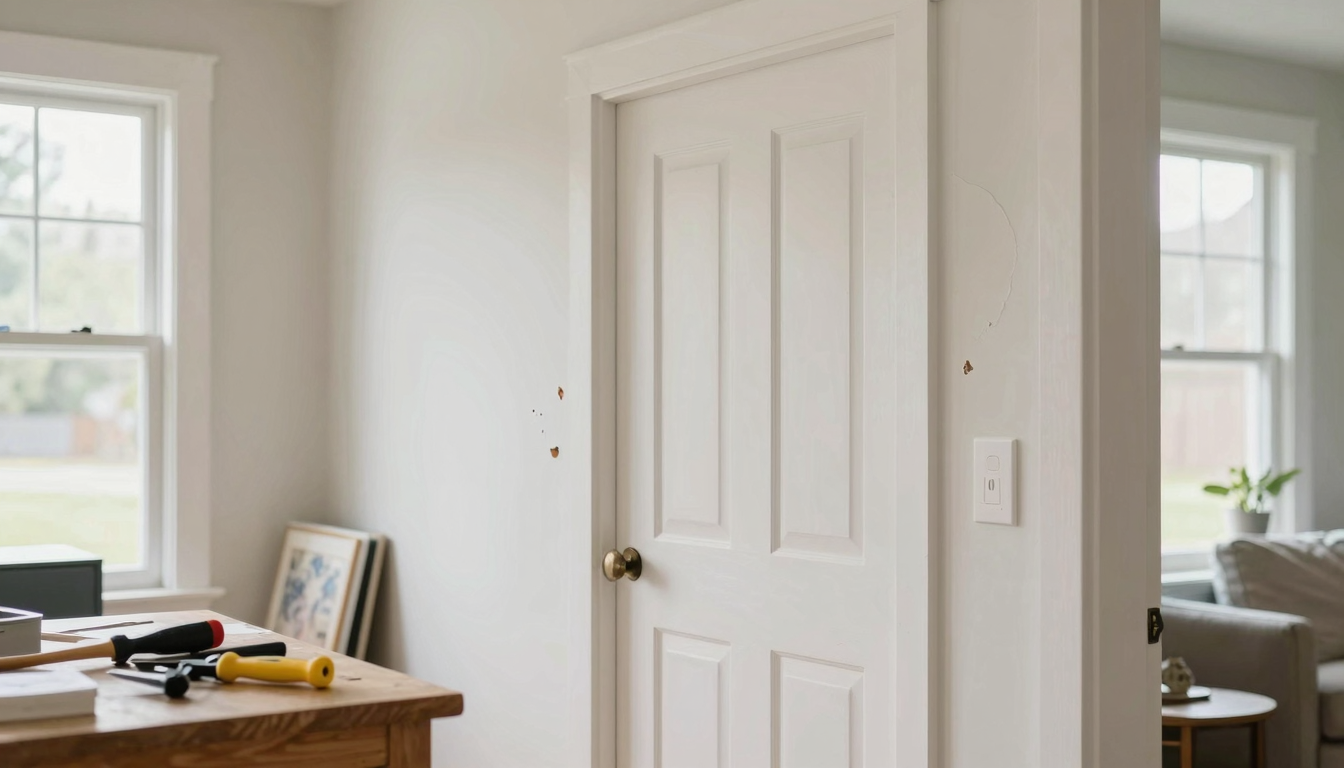
- Peeling: This almost always means moisture is trapped underneath. I learned this the hard way when I peeled back a section of paint on our garage door and found the wood underneath was soft and spongy. Not good.
- Cracking: This can happen as the house settles or if the paint film is too rigid. Our older farmhouse has some cracking near the roofline because the wood moves with temperature changes.
- Bubbling: This is a surefire sign of trapped moisture or poor adhesion. I once had a whole section of siding bubble up because I didn’t sand it properly before repainting.
- Mildew: If it wipes off with a bleach solution, it’s surface-level. But if it keeps coming back, you’ve got a moisture problem,usually from poor drainage or overhanging trees.
Pro tip: I keep a small notebook in my toolbox to jot down where I see issues. Last year, I noticed the same spot on our back porch kept peeling, so I knew it needed more than just a touch-up,it needed a proper repair.
The High-Risk Zones (Where Problems Always Start)
Not all areas of your home wear paint at the same rate. Windows, doors, trim, and siding edges are the first to show signs of trouble. Here’s where I always check first:
- Windows and doors: Caulking dries out and cracks over time, letting water seep in. I replace the caulk around our windows every few years,it’s a cheap fix that prevents big problems.
- Siding seams: If the edges are lifting or the paint is chipping, moisture is getting in. I had to replace a section of our vinyl siding last summer because I ignored a small lift for too long.
- Gutters and downspouts: If they’re clogged or directing water toward the house, your paint job is doomed. I clean our gutters twice a year now,once in spring and once in fall.
Mildew vs. Mold: How to Tell the Difference
This is where I used to get confused. Mildew is usually just a surface issue,it wipes off with a little bleach and water. Mold, on the other hand, is deeper and often means there’s a moisture problem. If the wood underneath feels soft or the mildew keeps coming back, you’ve got a bigger issue.
Last year, I thought I had mildew on our north-facing wall, but after scrubbing it a few times, it kept returning. Turns out, our roof was leaking, and water was seeping into the siding. We had to replace a section of roofing before repainting,otherwise, the new paint would’ve peeled within months.
If you’re dealing with stubborn mildew, check out my post on prepping surfaces,some of those tips apply to exterior paint too.
Your Exterior Paint Maintenance Routine (That Actually Works)
I used to think exterior paint maintenance was just “wash it when it looks dirty.” Then I realized that regular cleaning and inspections are the key to making your paint last. Here’s the routine I follow now:
Cleaning: The Secret to Making Paint Last Longer
Dirt, pollen, and pollution build up on your paint over time, and that grime actually wears down the finish. I clean our house’s exterior at least once a year,more often if we’ve had a lot of pollen or storms.
I used to use a pressure washer, but I learned the hard way that too much pressure can damage paint. Now, I stick to a soft wash method:
- Mix a gallon of warm water with a few drops of Dawn dish soap (yes, the same stuff you use for dishes!).
- Use a soft-bristle brush or a microfiber cloth to gently scrub the siding.
- Rinse from top to bottom with a garden hose to avoid trapping water behind the siding.
For stubborn grime, I’ll use a pressure washer on the lowest setting, but I always keep the nozzle at least a foot away from the surface. If you’re not comfortable with a pressure washer, hire a pro,it’s worth it for peace of mind.
Dealing with Mildew (Without Ruining Your Paint)
Mildew is inevitable if you live in a humid climate (looking at you, Southeast!). Here’s how I tackle it:
- Mix 1 part bleach to 3 parts water in a spray bottle.
- Spray the mildew and let it sit for 10 minutes.
- Scrub gently with a soft brush.
- Rinse thoroughly with water to avoid bleach spots.
Pro tip: Always test the bleach solution on a small, hidden area first,some paints can react to bleach. I learned this when I accidentally bleached a section of our trim white!
Landscaping Hacks to Protect Your Paint
I used to let our shrubs grow right up against the house because I thought it looked cozy. Then I realized that overgrown plants trap moisture against the siding and scratch the paint when they rub against it.
Now, I trim back any bushes or trees that get within a foot of the house. Better airflow means the siding dries faster, which reduces mildew and paint damage. Plus, it’s one less thing for me to worry about during inspection time!
When a Touch-Up Is Enough (And When It’s Not)
Not every paint problem requires a full repaint. I’ve saved myself hours of work (and money) by knowing when a quick touch-up will do the trick. Here’s how I decide:
Signs a Touch-Up Will Work
A touch-up is a good fix if:
- The damage is isolated,like a few chips near a door handle or a small scrape from moving furniture.
- The surrounding paint is still in good shape (no peeling, cracking, or fading).
- The area is small,less than 10-15% of a surface.
Last summer, our kids’ bikes scraped the paint near the garage door. Instead of repainting the whole door, I just touched up the chips. It took 20 minutes and cost less than $10 in paint.
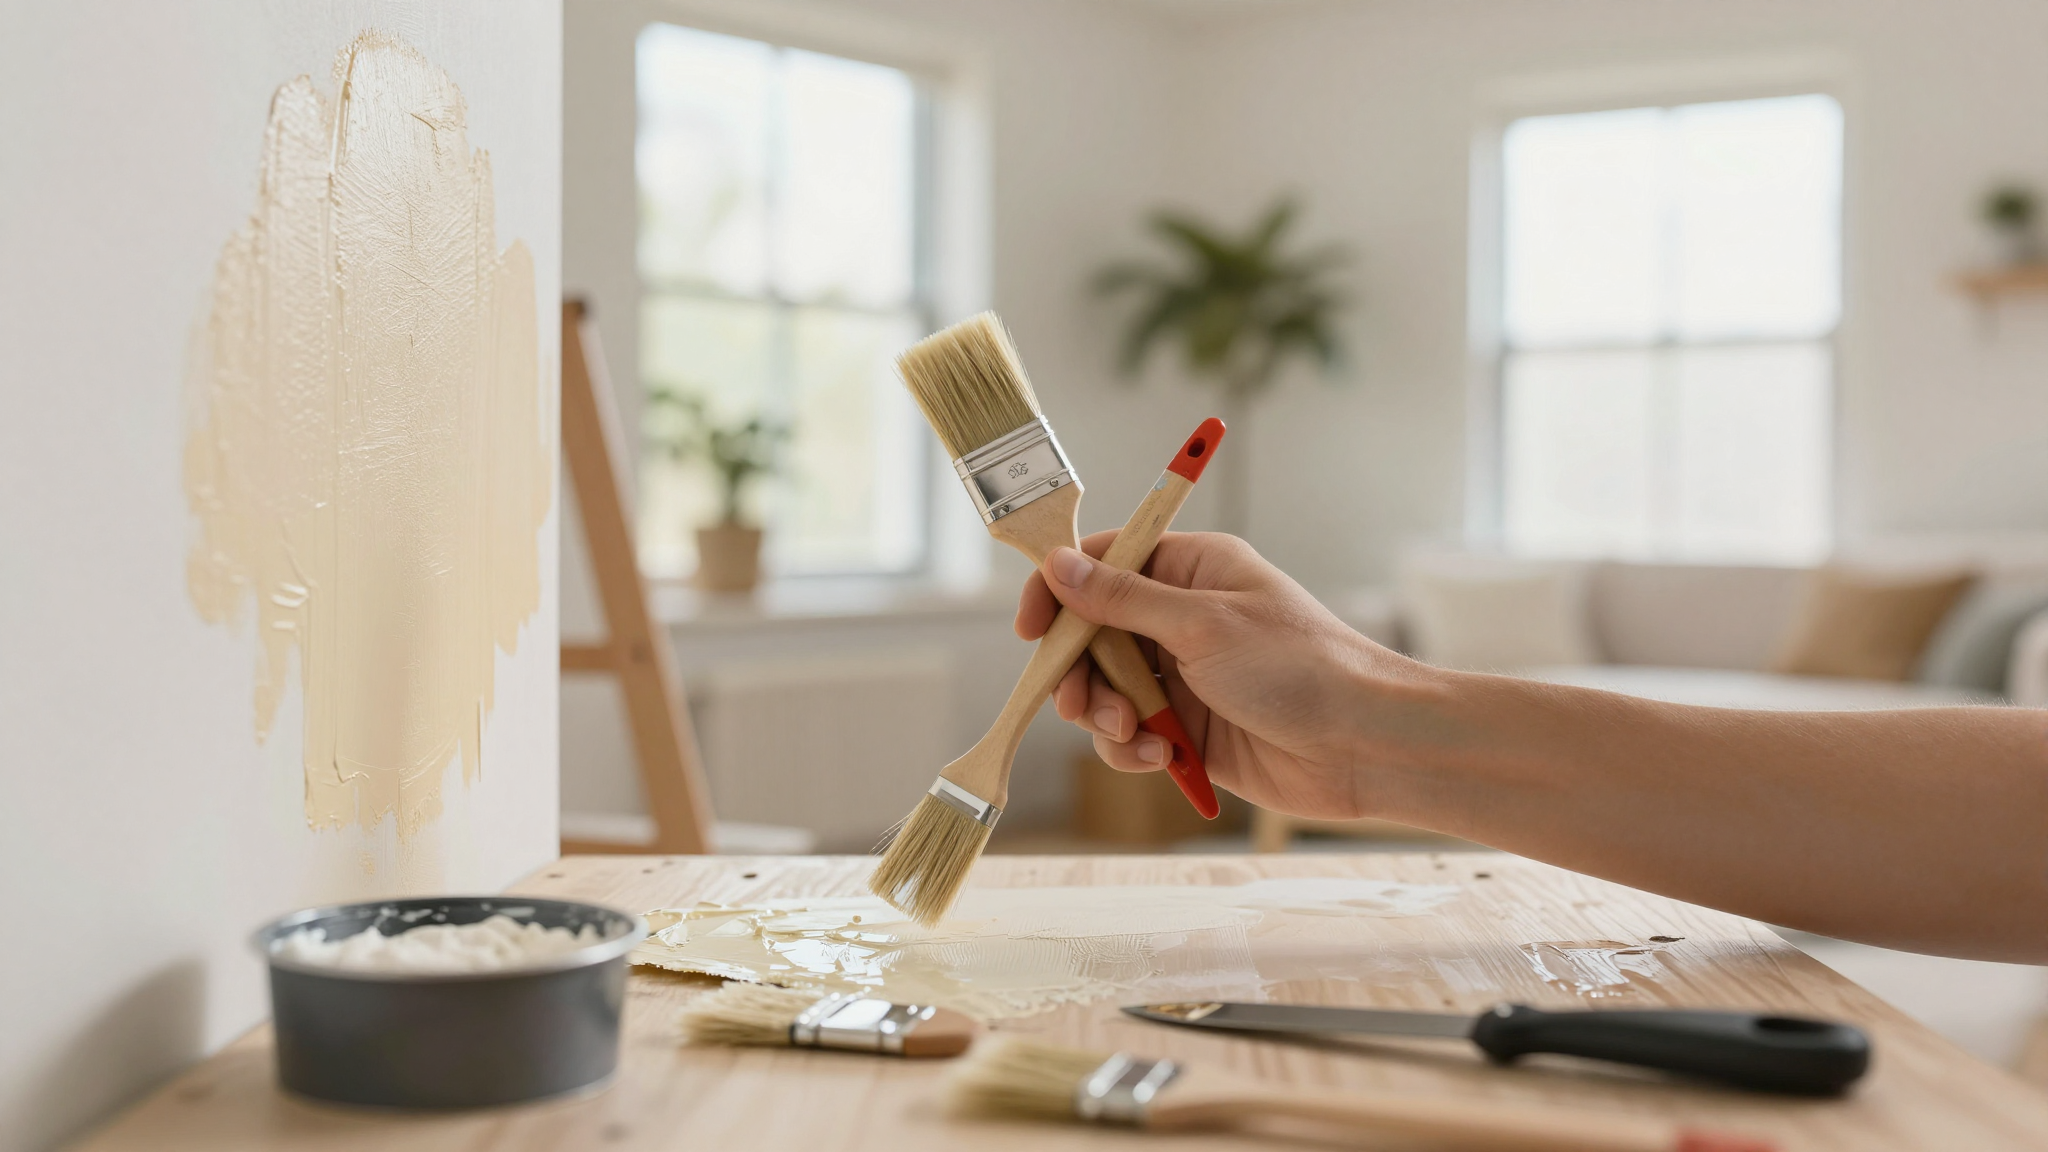
How to Do a Touch-Up That Actually Lasts
I used to just slap some paint on a chip and call it a day. Then I’d come back a few months later and find the touch-up peeling. Here’s what I do now to make sure it sticks:
- Scrape off any loose or peeling paint. Use a putty knife to get rid of flaky bits,this gives the new paint something to grip onto.
- Sand the edges smooth. I use 120-grit sandpaper to feather the edges so the touch-up blends in.
- Prime bare spots. If the wood is exposed, I always use a high-quality primer like PPG’s Stainless. It seals the wood and helps the new paint adhere.
- Paint and let it cure. I use the same paint as the original (if I have leftover) and let it dry for at least 24 hours before touching it.
Pro tip: If you don’t have leftover paint, take a small sample to the hardware store for a color match. I’ve had mixed results with paint matches, so I always test the new color in a hidden spot first.
Matching Color and Sheen (So It Doesn’t Look Obvious)
Nothing looks worse than a touch-up that stands out like a sore thumb. Here’s how I make sure my repairs blend in:
- Match the sheen. Glossy paint next to flat paint will flash in the sunlight and look obvious. I always check the label on the original paint can to make sure I’m using the same sheen.
- Stir the paint well. Color can settle in the can, so I always stir for a few minutes before painting. If I’m using a new can, I let it sit overnight first so the pigment mixes properly.
- Test the color in a hidden spot. Sunlight changes how paint looks, so I always test a touch-up in a spot that’s not visible from the street.
I once touched up our front door without testing the color first. It looked great in the store, but when it dried, it was noticeably darker than the rest of the door. I had to repaint the whole thing!
When It’s Time to Repaint the Whole House (And How to Do It Right)
There comes a point when touch-ups just aren’t enough. If you’re spending more time (and money) on repairs than you would on a full repaint, it’s time to bite the bullet and start from scratch. Here’s how I know it’s time:
Signs You Need a Full Repaint
It’s time for a full repaint if you see:
- Widespread fading. If most of the house has lost its color, a touch-up won’t cut it. I repainted our whole house two years ago because the south side had faded to a completely different shade.
- Repeated peeling or lifting. If paint keeps peeling in multiple spots, the underlying layers are failing. A full repaint (with proper prep) is the only fix.
- Multiple coats failing. If you’ve got paint peeling off in layers, moisture or poor adhesion is the culprit. You’ll need to strip, repair, and repaint.
Prep Work: The Most Important Step (That Most People Skip)
I used to think prep was just sanding and cleaning. Then I repainted our back porch and skipped priming the bare wood. Within six months, the new paint was peeling. Now, I know that prep is where you either save or waste money.
Here’s what I do now:
- Clean the surfaces. I pressure wash (gently!) or soft wash the whole house to remove dirt and mildew.
- Sand and feather edges. I use 120-grit sandpaper to smooth rough spots and feather the edges of peeling paint.
- Caulk gaps. I seal around windows, doors, and siding seams with Osborne’s 100% silicone caulk,it stays flexible and doesn’t crack.
- Prime bare spots. I always use a high-quality primer like Benjamin Moore’s Fresh Start on bare wood or patched areas.
Pro tip: If you’ve got rotten wood, replace it before painting. I had to replace a section of our porch railing last year because the wood was soft and spongy. Painting over rot is a waste of time,the problem will just come back.
Choosing the Right Paint for Your Climate
Not all exterior paints are created equal. I live in a humid climate, so I need paint that resists mildew and moisture. Here’s what I look for:
- Mildewcide additives. Paints like Behr’s Premium Plus have mildew-resistant formulas, which are a lifesaver in my area.
- UV resistance. If your house gets a lot of sun, look for paints with UV blockers to slow fading.
- Flexibility. Paint that can expand and contract with temperature changes lasts longer. I’ve had better luck with acrylic latex paints than oil-based ones.
When to Call a Pro (And When to DIY)
I’m a DIYer at heart, but even I know when to call in reinforcements. Here’s when I hire a pro:
- Multi-story work. I tried painting our two-story house myself and nearly fell off the ladder. Now, I hire a pro for anything above the first floor.
- Lead paint. If your home was built before 1978, it might have lead paint. Hire a certified pro to test and remove it safely.
- Extensive repairs. If you’ve got rotten wood, structural issues, or complex prep work, a pro can handle it faster and better.
That said, I do DIY smaller repaints,like our garage or porch,if the prep work is minimal. It saves us a ton of money, and I love the satisfaction of doing it myself.
Final Thoughts (And What to Do Next)
Exterior paint maintenance isn’t glamorous, but it’s one of the best ways to protect your home and save money in the long run. Start with small touch-ups and regular cleaning, but don’t ignore the warning signs. If you see peeling, cracking, or widespread fading, it’s time to repaint,before the problem gets worse.
Here’s your action plan:
- Inspect your home’s exterior,walk the perimeter and note any issues. Use my DIY inspection checklist to stay organized.
- Clean your siding with a soft wash or gentle pressure wash. If you’re not comfortable, hire a pro.
- Touch up small chips and scratches with matching paint and primer. Don’t skip the prep work!
- Plan for a full repaint if you see widespread damage. Start saving now,it’s cheaper than constant repairs.
- Schedule regular maintenance,clean annually, inspect after storms, and fix issues as soon as you see them.
And if you’re feeling overwhelmed, start small. Last year, I repainted just our front door and trim. It made a huge difference in our home’s curb appeal,and it gave me the confidence to tackle bigger projects later.
Now, go grab that paintbrush. Your house (and your wallet) will thank you.