
DIY Sensory Boards That Actually Work (And How I Built One for My Toddler)
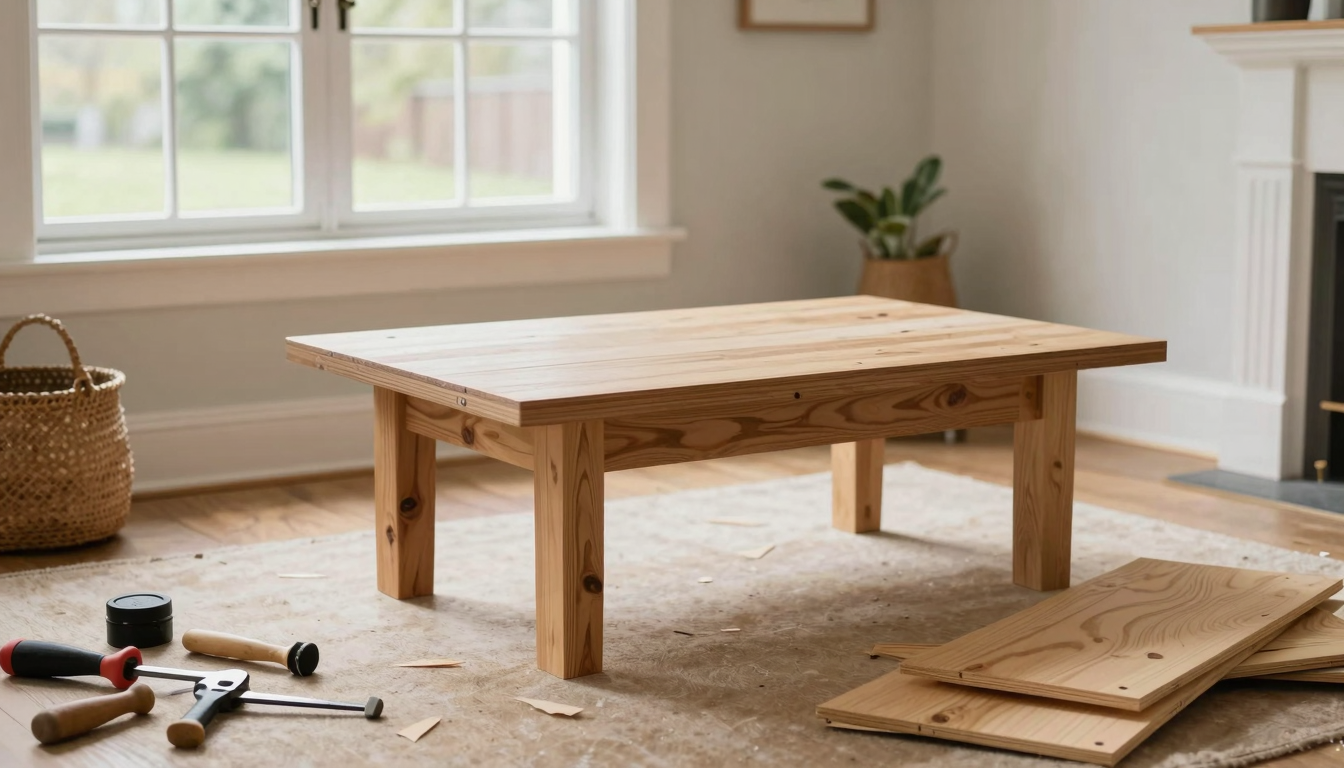
Last spring, I found myself staring at a pile of leftover plywood from my farmhouse coffee table project,the one where I learned the hard way that pre-drilling holes saves your sanity. My then-18-month-old, Noah, was at that phase where he’d grab anything within reach (including my coffee mug, which I still mourn) and shove it into his mouth. I needed something that would keep him engaged and not end up in the ER.
That’s how I ended up building a sensory board. Not because I’m some crafting genius, but because I was desperate for something that would buy me 10 minutes of peace while I sipped my (now secure) coffee. Turns out, it became one of his favorite toys,and a project I’ve since tweaked for my friend’s autistic nephew. (Spoiler: The crinkly fabric section is a hit.)
If you’re here because your toddler has also discovered the joy of emptying your toolbox or because you’re looking for a way to make screen time less appealing, stick around. I’ll walk you through exactly how I built a safe, engaging sensory board,plus the mistakes I made so you don’t have to.
Why a DIY Sensory Board (And Not Just a Store-Bought One)
I’ll admit, I considered buying one of those fancy wooden activity panels from Melissa & Doug. But at $80 a pop, I figured I could build something similar for a fraction of the cost,and customize it to Noah’s obsessions (currently: anything that makes noise or has a zipper).
Here’s what I love about DIY sensory boards:
- They grow with your kid. Noah’s board started with big, chunky knobs he could grasp. Now, six months later, it’s got smaller latches and a zipper he’s determined to master (my poor jeans are collateral damage).
- You control the materials. No cheap plastic that might break into tiny, choking hazards. No questionable adhesives. Just stuff I trust,like the non-toxic wood glue I already had in my garage.
- It’s a stealth learning tool. While Noah thinks he’s just “playing,” he’s actually working on fine motor skills (twisting, pulling, zipping), sensory processing (textures, sounds), and even early math (sorting shapes). And yes, I do sound like a mom now.
- It’s cheaper than therapy toys. I spent about $30 total, mostly on knobs and fabric scraps from Joann Fabrics. The plywood was free (thanks, coffee table fail).
That said, if you’re not feeling DIY, I get it. But if you’re curious, let’s talk materials,and how to avoid the many ways I almost turned this into a hazard.
Materials and Safety Tips (Or: How Not to Send Your Kid to the ER)
Before we dive in, a word of warning: safety first, creativity second. I learned this the hard way when Noah nearly swallowed a loose screw from my drywall patching project. (Yes, I cried. No, I didn’t tell my husband.)

Here’s what you’ll need, along with the specific brands and tools I used (and why):
Your Shopping List (Hardware Store Edition)
I hit up Home Depot with a list and a mission. Here’s what made the cut:
- Base material: A sanded piece of ½-inch plywood (I used the leftover scrap from my coffee table, but you can grab a small sheet for under $10). Pro tip: Sand the edges yourself,even “pre-sanded” wood can have splinters waiting to happen.
- Fasteners: Black+Decker 20V drill (lightweight, easy for beginners) + #8 wood screws (shorter than the plywood thickness so they don’t poke through). I also grabbed a box of square-head screws,they’re easier for little hands to turn.
- Textures and sounds:
- Felt scraps (I raided my craft stash from that time I tried making throw pillows).
- Rubber drawer liners (from the hardware aisle,grippy and fun).
- Old keys or jingle bells (Noah’s favorite,he calls them “ding-dings”).
- Zipper pulls or carabiners (I found these in the camping section).
- Adhesives: Gorilla Wood Glue (non-toxic, dries clear) and 3M VHB tape (for fabric,way stronger than regular glue).
- Extras:
- Painter’s tape (for planning layouts,more on this later).
- Dremel (for smoothing edges,trust me, you’ll need it).
- Child-safe paint (I used Behr Premium in bright colors).
Safety Checks (Or: How to Avoid a Trip to the Pediatrician)
This is where I almost messed up. My first attempt had a loose knob that Noah immediately tried to yank off. Here’s how to avoid my mistakes:
- Test every screw. After drilling, I’d wiggle each knob like a maniac. If it moved more than ¼ inch, I’d add a dab of wood glue inside the screw hole (not on the knob,glue can get gummy and gross).
- Sand everything. I used my Dremel with a sanding drum to smooth the edges. Noah has a habit of mouthing things, and I wasn’t taking chances. (I also kept a toilet brush nearby for when he inevitably dropped something on the floor.)
- Avoid small parts. No tiny beads or buttons. If it can fit through a toilet paper roll, it’s a no-go.
- Secure fabric with VHB tape and stitches. I learned this after a felt square peeled off during a particularly enthusiastic tug-of-war. Now I use tape plus a few stitches with heavy-duty thread.
If you’re nervous about DIY safety, check out this guide on secure adhesives I wrote after my wallpaper disaster. (Spoiler: Peel-and-stick is not toddler-proof.)
Step-by-Step: Building a Sensory Board That Won’t Fall Apart
Alright, let’s build this thing. I’ll walk you through my process, including the part where I cried over a misaligned screw hole (it happens to the best of us).
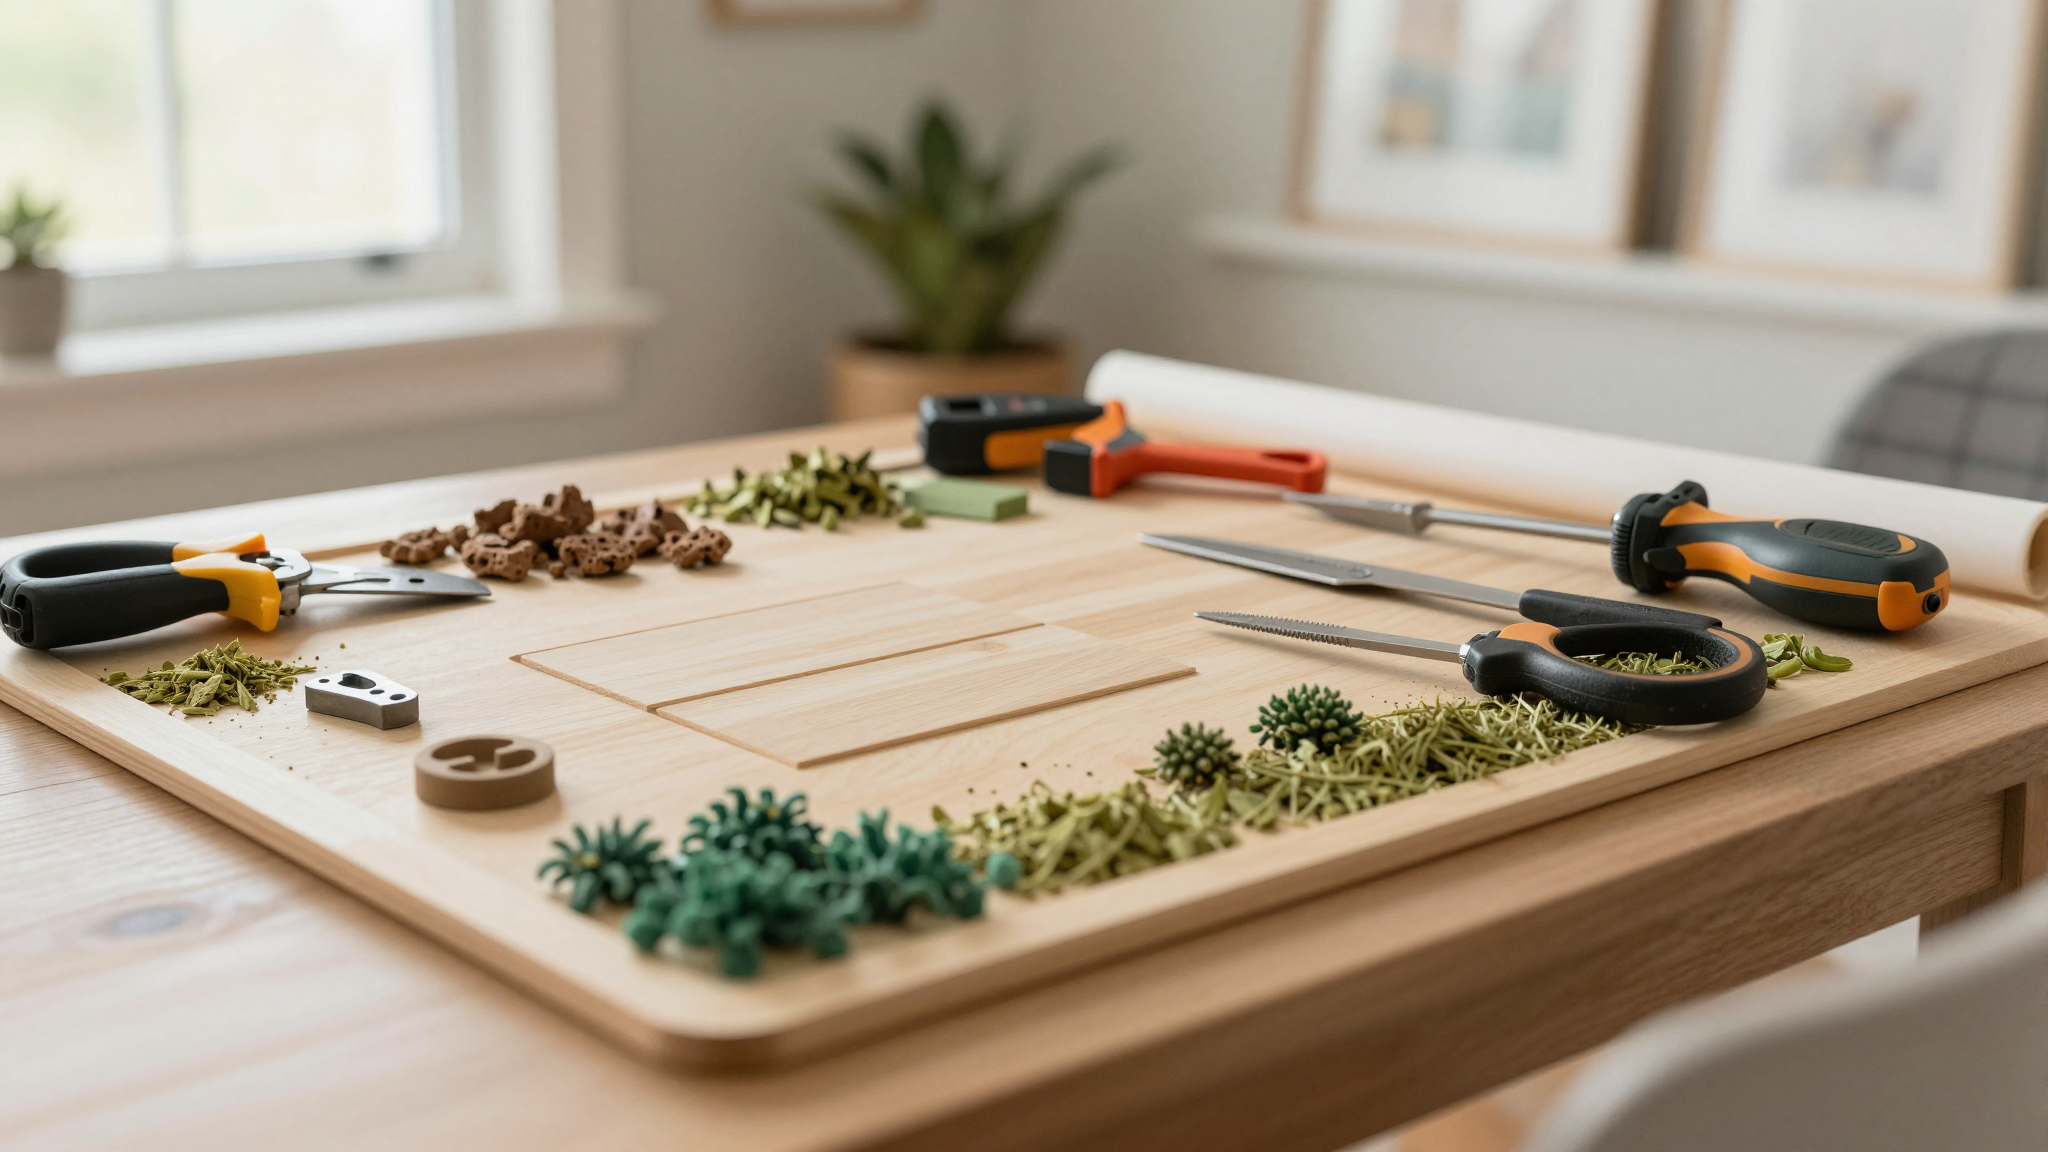
Step 1: Plan Your Layout (Or: Why I Regret Skipping the Painter’s Tape)
Lay your plywood on a clean surface (I used my refinished stairs,they’re sturdy and easy to clean). Then, grab your painter’s tape and start mapping sections:
- Textured zones: Smooth (felt), bumpy (rubber), soft (fabric).
- Moving parts: Knobs, zippers, latches. (Noah’s favorite is a KeySmart I repurposed,he calls it his “treasure board.”)
- Sound elements: Jingle bells, crinkly fabric, a mini xylophone (I found one at Target for $5).
My mistake: I skipped taping the layout first and ended up with a zipper section that was way too close to the knobs. Noah kept getting his fingers pinched. Lesson learned: Plan like you’re designing a gallery wall,measure twice, tape once.
Step 2: Drill and Secure (Or: Why Pre-Drilling Saves Your Sanity)
Here’s where my coffee table project finally paid off. I pre-drilled all my screw holes to avoid splitting the wood. Then, I:
- Attached knobs and latches with screws (I used a magnetic drill bit to hold screws in place,game changer).
- Glued and taped fabric sections (I used VHB tape on the back, then stitched around the edges with a simple sewing machine).
- Added sound elements last (I hot-glued the jingle bells to a small wooden plate first, then screwed the plate down).
Pro tip: If you’re not comfortable with a drill, grab a pre-drilled wooden panel from the hardware store. They’re usually cheap and save you from my pre-drilling panic.
Step 3: Test Like a Maniac (Or: How I Became a Sensory Board Ninja)
Before Noah touched it, I:
- Wiggled every single part. If it moved, I reinforced it.
- Let my husband (the “tough guy” of the family) try to break it. (He failed, but not for lack of trying.)
- Checked for sharp edges with my hands and a 220-grit sanding sponge.
Only after all that did I let Noah loose on it. And you know what? He loved it. So much that I’ve since built a second one for my friend’s nephew,this time with tile samples for a different texture.
Engaging Activities to Make the Most of Your Sensory Board
Now that you’ve built it, how do you actually use it? Here’s how I turned Noah’s sensory board into a (mostly) structured activity,because let’s be real, some days it’s just a distraction while I chug my coffee.
Textures, Sounds, and “What’s This?” Games
Noah’s board has five main sections, and each one sparks a different kind of play:
- The “Crinkle Zone”: Crinkly fabric and mylar sheets. Noah calls this the “noise maker.” We play “find the crinkle” where he has to close his eyes and guess which section I’m touching.
- The “Zipper Challenge”: A repurposed jacket zipper. He’s obsessed with zipping and unzipping it (and unzipping everything else in the house, but that’s a different story).
- The “Ding-Ding Corner”: Jingle bells and a mini xylophone. We “compose songs” (read: he bangs on it while I pretend it’s Mozart).
- The “Bumpy Road”: Rubber drawer liner and sandpaper squares. He loves dragging his fingers across them and describing them as “rough” or “smooth.”
- The “Color Hunt”: Brightly painted knobs and buttons. I’ll say, “Find the red one!” and he’ll go to town.
These activities aren’t just fun,they’re work. Noah’s been practicing:
- Fine motor skills (twisting, zipping, grasping).
- Sensory processing (telling the difference between textures and sounds).
- Language (naming colors, describing what he feels).
- Problem-solving (figuring out how to open a latch).
And the best part? He doesn’t even realize he’s learning. Neither does he realize that while he’s playing, I’m winterizing the house or finally getting to that HVAC maintenance I’ve been putting off.
Rotating Elements to Keep It Fresh
After a few weeks, Noah started losing interest. So I did what any desperate mom would do: I reorganized. I swapped out the jingle bells for a Melissa & Doug texture board (yes, I caved and bought one), added a new zipper, and painted a few knobs with Liquidpaint (glow-in-the-dark, because why not?).
Now, I rotate elements every few weeks. Seasonal swaps work great:
- Fall: Add textured leaves or a mini pumpkin with a rattle inside.
- Winter: Swap in jingle bells or a “snow” section with fake fur.
- Spring: Use pastel fabrics or a flower-shaped knob.
It’s like giving him a new toy without the guilt of buying something else. Win-win.
FAQ: Your Sensory Board Questions, Answered
Where can I find affordable materials?
Hit up your local Home Depot, Lowe’s, or Joann Fabrics. I’ve also raided my upcycling stash for old zippers, keys, and fabric scraps. Thrift stores are goldmines for cheap knobs and latches,just clean them first!
How do I make sure it’s safe?
Here’s my safety checklist:
- No small parts (toilet paper roll test!).
- All screws and adhesives are non-toxic (I double-check labels).
- Edges are sanded smooth (I run my fingers along them to test).
- Fabric is securely attached (I use VHB tape and stitches).
- I supervise the first few uses (Noah once tried to eat a knob. Kids are wild.).
Can this work for Montessori learning?
Absolutely! Montessori is all about hands-on, sensory-rich activities. A DIY board checks all the boxes:
- Fine motor skills (twisting, zipping, grasping).
- Sensory exploration (textures, sounds, colors).
- Problem-solving (figuring out how things work).
- Independence (Noah loves showing off his “skills” to visitors).
If you want to go full Montessori, add elements like:
- Latches (great for “opening” skills).
- Sorting trays (I used a muffin tin with different-sized buttons).
- Nature items (pinecones, smooth stones,just supervise closely!).
What tools do I actually need?
You don’t need a full workshop. Here’s my minimalist toolkit:
- Drill/driver (for screws).
- Dremel (for sanding edges).
- Measuring tape and pencil (for marking).
- Painter’s tape (for planning layouts).
- Safety goggles (trust me, splinters are no fun).
If you’re nervous about power tools, grab a pre-drilled panel and use a hand screwdriver. No shame in keeping it simple!
How do I track my toddler’s progress?
I keep a BabySparks app on my phone, but you don’t need anything fancy. Just jot down notes like:
- “Noah zipped the zipper by himself today!” (March 10)
- “Recognized red knob without prompting.” (April 5)
- “Stacked three blocks on the board.” (May 1)
Or, if you’re like me, just take a million videos and send them to your mom. She’ll appreciate the updates (and the distraction from her own grandkid antics).
How do I add sound elements?
Easy! Here are my favorite no-fail sound ideas:
- Jingle bells (hot-glued to a wooden base).
- Crinkly fabric or mylar sheets (taped down).
- Mini xylophone (I found one at Target for $5).
- Rattles or maracas (secured with screws).
- Recording of your voice (I hid a cheap voice recorder under a fabric square,Noah loses it every time he hears my voice say “Hello!”).
Ready to build your own? Grab that plywood, a drill, and whatever textured odds and ends you have lying around. And if you end up with a sensory board that’s half masterpiece, half “what was I thinking?”,welcome to the club. We’ve all been there.
Now, if you’ll excuse me, I need to go supervise Noah before he turns the board into a “drum set.” Again.