
5 Simple Plumbing Fixes You Can Actually Do Yourself
Let me tell you,learning to fix my own plumbing has saved me thousands of dollars over the years. There was that time my kitchen sink started leaking right before Thanksgiving, and instead of panicking about finding a plumber (who would’ve charged me $150 just to show up), I grabbed my tools and fixed it myself in 20 minutes. That’s the kind of confidence DIY plumbing gives you.
Now, I’m not saying you should attempt to reroute your entire plumbing system after reading this (please don’t,call a professional for that). But the little things? The dripping faucets, clogged drains, running toilets? Those are totally within your reach. All you need are the right tools, a little patience, and the willingness to get your hands wet. I’ve messed up plenty along the way,like the time I overtightened a pipe and cracked it,but those mistakes taught me more than any tutorial ever could.
If you’re ready to take control of your home’s plumbing (and save some money while you’re at it), let’s get started. These are the fixes I turn to most often in my own house, and I’ll walk you through exactly how I do them,warts and all.
Why Bother Learning Basic Plumbing?
I used to think plumbing was one of those mysterious homeowner skills,something only licensed professionals could handle. Then I had my first major leak under the bathroom sink. The plumber quoted me $300 just to come out, and that was before any actual repairs. That’s when I realized: if I could learn to do a few basic repairs, I’d save money, avoid last-minute emergencies, and feel a whole lot more capable in my own home.
Here’s what I’ve learned from years of trial and error:
- You’ll save hundreds (or thousands) on repair bills. Even a simple fix like replacing a toilet flapper can save you $100+ in a plumber’s visit. Over time, those little savings add up.
- You’ll catch problems early. When you know what to look for, you’ll spot leaks, slow drains, and other issues before they turn into expensive disasters.
- You’ll feel more confident in your home. There’s nothing like the satisfaction of fixing something yourself,especially when it’s something that was stressing you out.
- You won’t be at the mercy of scheduling. Need a repair done on a weekend? No problem. You’re your own plumber now.
That said, I’ll be the first to admit: some jobs are better left to the pros. If you’re dealing with major pipe replacements, sewer line issues, or anything that involves your home’s main water supply, pick up the phone and call a licensed plumber. But for the day-to-day stuff? You’ve got this.
Your DIY Plumbing Starter Kit
Before you dive into any repairs, you’ll need the right tools. I keep mine in a bright red toolbox under my kitchen sink (yes, the one I’ve fixed twice now). Here’s what I consider essential:
- Adjustable wrench – My go-to is a Harbor Freight 10-inch. It’s cheap but surprisingly sturdy, and I’ve used it for everything from faucets to pipe fittings.
- Basin wrench – This weird-looking tool is a game-changer for tight spaces under sinks. I bought mine for $12 and it’s paid for itself a dozen times over.
- Channel-lock pliers – Great for gripping slippery pipes. I have a pair with rubber-coated handles because, let’s be honest, you’re going to drop them in water at some point.
- Plunger – A good-quality plunger (like the Oatey Classic) makes all the difference for tough clogs. Don’t skimp on this.
- Drain snake – I keep a 25-foot Ridgid drain snake in my garage. It’s saved me from calling a plumber more times than I can count.
- Pipe wrench – For those times when you need serious torque. Mine has a broken handle from overuse, but it still works.
- Teflon tape – A must-have for sealing pipe threads. I keep a roll in my toolbox and another in the bathroom vanity.
- Bucket and towels – Because you will make a mess. Trust me on this.
Pro tip: If you don’t already have these, grab them at your local hardware store. I prefer Home Depot for their tool selection, but Lowe’s often has better prices on basics. And if you’re anything like me, you’ll want to build your tool collection gradually,don’t try to buy everything at once!
Safety First: How to Avoid a Plumbing Disaster
Here’s something I learned the hard way: water and electricity don’t mix. A few years ago, I was trying to fix a leak under my bathroom sink and accidentally sprayed water everywhere,including onto the outlet behind the vanity. Let’s just say I had to call an electrician and a plumber that day. Since then, I’ve made safety a non-negotiable part of every DIY plumbing project.
Here’s my safety checklist before I even touch a wrench:
- Turn off the water. Always. No exceptions. Find your main shutoff valve (mine’s in the basement, and I keep a flashlight handy because it’s dark down there) and turn it off before you start. If you’re working on a specific fixture, like a sink or toilet, turn off the water supply valve for just that fixture if possible.
- Wear gloves. I use nitrile exam gloves because they’re cheap, durable, and protect against sharp edges and gross stuff in drains.
- Protect your eyes. I keep a pair of DEWALT safety glasses in my toolbox. You’d be surprised how often little bits of debris fly up when you’re working.
- Know where your shutoff valves are. I have a little diagram taped inside my toolbox showing the location of every shutoff valve in my house. It’s saved me from panicking more than once.
- Keep a plumber on speed dial. Even if you’re confident, sometimes you hit a snag. I have a local plumber I trust, and I’ve called him a few times when a job turned out to be more complicated than I expected. There’s no shame in that!
Oh, and one more thing: if you’re working in a tight space (like under a sink), prop the cabinet door open with a wooden block or something sturdy. I learned this after getting my fingers pinched really badly when a door slammed shut on me.
Unclogging Drains the Natural Way
Clogged drains are the bane of my existence. Between my kids’ hair, my husband’s beard trimmings, and the occasional “oops” when I drop something down the sink, I’m always dealing with slow drains. But I’ve found that you don’t need harsh chemicals to clear them,those stuff is terrible for your pipes and the environment.
Here’s my step-by-step method for unclogging drains without the nasty chemicals:
- Try a plunger first. Fill the sink or tub with enough water to cover the plunger’s cup. Then, pump vigorously for about 30 seconds. I like to do this a few times in quick succession,sometimes it takes a little muscle to break up the clog.
- Boiling water + baking soda + vinegar. If the plunger doesn’t work, I pour a pot of boiling water down the drain, followed by ½ cup of baking soda. Let it sit for 10 minutes, then pour ½ cup of vinegar down the drain. Cover the drain and let it fizz for another 10 minutes. Finish with another pot of boiling water. This combo has saved me countless times.
- Break out the drain snake. For tough clogs (like hair balls in the shower), I use my drain snake. It’s a little gross, but it works. I feed the snake down the drain until I feel resistance, then twist and pull to break up the clog. I keep a small trash can nearby for the… results.
Prevention is key, though. I’ve started keeping drain strainers in every sink and shower. They’re cheap, easy to clean, and save me from dealing with clogs in the first place. I also try to avoid pouring grease or food scraps down the drain,those are the worst offenders when it comes to clogs.
If you’re dealing with a sewer line clog, though, that’s a different story. Those require professional equipment, and I always call a plumber for those. But for your average kitchen or bathroom drain? You’ve got this.
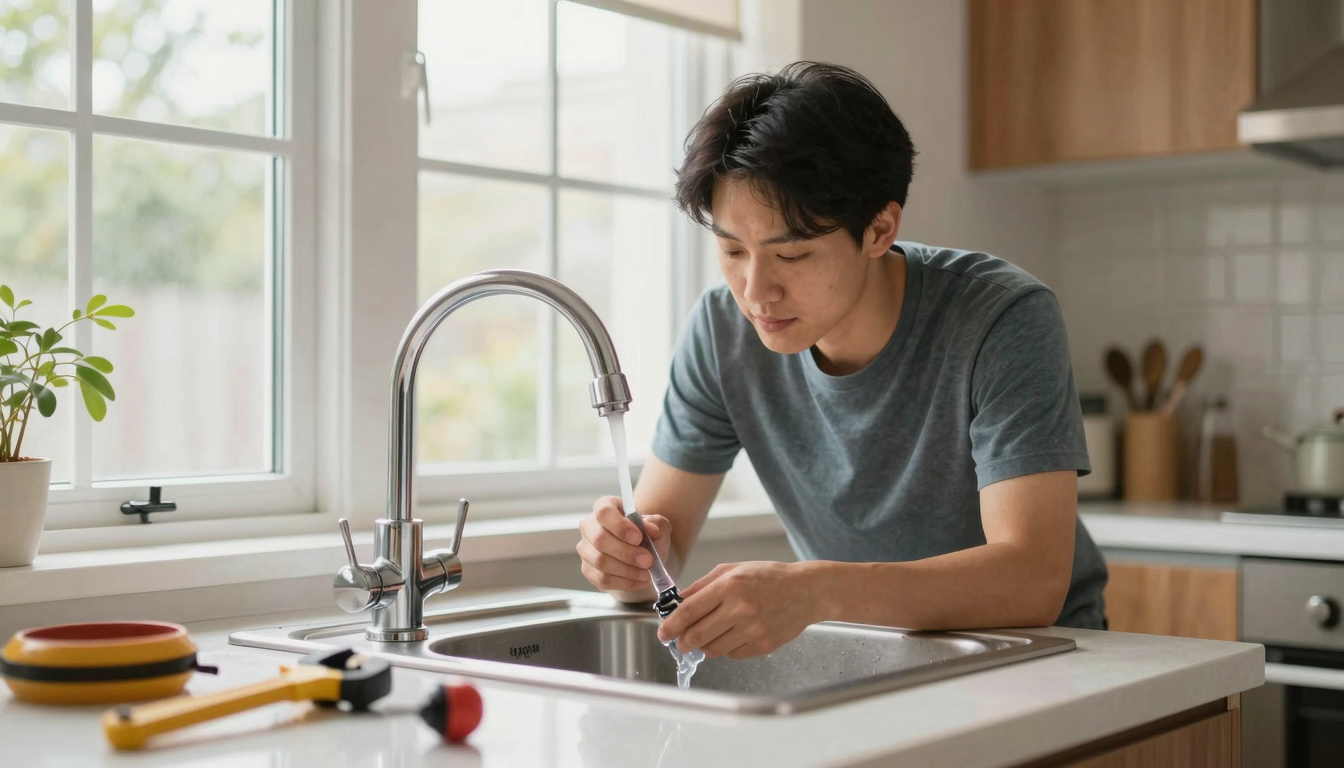
Fixing a Dripping Faucet (Without Losing Your Mind)
Dripping faucets are the most annoying little problem in the world. That constant drip… drip… drip… drives me crazy, and it wastes a ton of water (and money) over time. The good news? They’re almost always easy to fix. The bad news? There are about a million different types of faucets, so you’ll need to figure out which one you have first.
Here’s how I diagnose and fix a dripping faucet:
- Identify your faucet type. Most faucets fall into one of these categories:
- Compression faucets – These have separate handles for hot and cold water. They’re older and tend to drip more often.
- Cartridge faucets – These have a single handle that moves side to side or up and down. They’re common in kitchens and bathrooms.
- Ball faucets – These have a single handle that moves in a circular motion. Delta faucets are a common example.
- Ceramic-disk faucets – These are newer and tend to be more durable. They have a single handle that moves side to side.
I usually can tell what type I’m dealing with just by looking, but if I’m not sure, I’ll take a photo and Google it. There are tons of resources out there for identifying faucets.
- Turn off the water. This is non-negotiable. Find the shutoff valve under the sink (or the main shutoff if there isn’t one under the sink) and turn it off. Then, turn on the faucet to release any remaining water in the pipes.
- Disassemble the faucet. This is where it gets a little tricky, depending on your faucet type. For most cartridge or ball faucets, you’ll need to:
- Remove the handle (usually by unscrewing a set screw or prying it off with a flathead screwdriver).
- Take off the decorative cap (if there is one) and unscrew the retaining nut.
- Pull out the cartridge or ball assembly.
I keep a small bowl nearby to catch any loose parts. Trust me, you will drop something.
- Inspect and replace parts. Once the faucet is disassembled, look for worn or damaged parts. Common culprits include:
- Worn O-rings or washers
- Corroded valve seats
- Cracked cartridges or balls
I usually replace everything just to be safe. You can find replacement kits at any hardware store, or you can order parts online if you know your faucet model. I keep a faucet repair kit in my toolbox for emergencies.
- Reassemble and test. Put everything back together (double-check that all parts are in the right place!) and turn the water back on. Test the faucet to make sure it’s not dripping anymore. If it is, you’ll need to disassemble it again and check your work.
Pro tip: If you’re not sure what parts you need, take the old cartridge or ball to the hardware store. They can usually match it for you. And if you’re really stuck, I’ve got a step-by-step guide for fixing a dripping faucet that walks you through the process with photos.
Oh, and one more thing,if your faucet is really old and corroded, it might be time to replace it entirely. I replaced the faucet in my guest bathroom a few years ago, and it was such a relief to have something new and leak-free. If you’re thinking about upgrading, check out my post on refreshing your bathroom with small updates,a new faucet can make a big difference!
Stopping a Running Toilet (Before It Drives You Crazy)
A running toilet is one of the most frustrating (and wasteful) plumbing problems. I remember the first time I had one,it sounded like a tiny waterfall in the middle of the night, and my water bill skyrocketed. Turns out, it was an easy fix, but I didn’t know that at the time. Now? I can fix a running toilet in under 10 minutes.
Here’s how I do it:
- Turn off the water. There’s usually a shutoff valve behind the toilet (it looks like a little knob or lever). Turn it clockwise to shut off the water. Then, flush the toilet to empty the tank.
- Inspect the flapper. The flapper is that little rubber thing at the bottom of the tank. If it’s worn, cracked, or not sealing properly, it can cause the toilet to run. I usually replace it if it looks old or damaged. Flappers are cheap (I keep a few on hand) and easy to install.
- Check the fill valve. The fill valve is the tall plastic or metal thing in the tank that fills it with water after you flush. If it’s set too high, it can cause the toilet to overflow or run constantly. I adjust it by bending the little arm at the top (or replacing the valve if it’s old).
- Look for mineral buildup. Hard water can leave mineral deposits on the tank and bowl, which can cause leaks. I clean mine with a mix of vinegar and baking soda once a year. It’s a little messy, but it keeps everything running smoothly.
- Test and adjust. Turn the water back on and let the tank fill. If the toilet is still running, I check the chain that connects the flapper to the flush handle,it might be too tight or too loose. I adjust it so there’s just a little slack.
If none of these fixes work, the problem might be with the toilet itself. I had to replace an old toilet in my basement a few years ago, and it was a lot easier than I expected. If you’re thinking about upgrading, check out my post on refreshing your bathroom with small updates,a new toilet can make a big difference in both function and style.
Oh, and one more thing,if your toilet is constantly running, it’s wasting a lot of water. I calculated that a running toilet can waste up to 200 gallons of water a day! Fixing it is a great way to save money and help the environment.
Fixing Under-Sink Leaks (Before They Ruin Your Floor)
Leaks under the sink are sneaky. They start small,a little dampness, a weird smell,and before you know it, you’ve got water damage, mold, and a huge repair bill. I learned this the hard way when a slow leak under my kitchen sink went unnoticed for a few weeks. By the time I caught it, I had to replace a section of the cabinet and the floor underneath. Ugh.
Here’s how I handle under-sink leaks now:
- Turn off the water. Always the first step! Find the shutoff valve under the sink (or the main shutoff if there isn’t one) and turn it off. Then, place a bucket or towel underneath to catch any remaining water.
- Identify the source of the leak. Put on your gloves and inspect the pipes, connections, and fittings. Common culprits include:
- Loose connections (usually where the pipes meet the faucet or drain)
- Cracked or corroded pipes
- Worn-out washers or gaskets
I use a flashlight to get a good look,it’s amazing how much easier it is to spot problems with a little light.
- Temporary fix (if needed). If the leak is small and you can’t fix it right away, you can use:
- Epoxy putty – Great for small cracks or holes. I keep a tube of Devcon 5-Minute Epoxy in my toolbox.
- Pipe clamps – These can temporarily seal a leak while you figure out a permanent solution.
- Teflon tape – If the leak is at a threaded connection, wrap some Teflon tape around the threads before reassembling.
These are just temporary fixes, though,don’t leave them in place for long!
- Permanent fix. If the pipe is cracked or the fitting is damaged, you’ll need to replace it. This is where having the right tools (and a little patience) comes in handy. I usually:
- Cut out the damaged section with a pipe cutter.
- Measure the replacement pipe and cut it to size.
- Use pipe joints or couplings to connect the new pipe to the existing ones.
- Seal everything with Teflon tape and test for leaks.
If you’re not comfortable with this, it’s okay to call a plumber. Some jobs are better left to the pros!
- Prevent future leaks. Once you’ve fixed the leak, take steps to prevent it from happening again:
- Inspect your pipes regularly for signs of corrosion or wear.
- Keep the area under the sink clean and dry.
- Install a water filtration system to reduce mineral buildup.
- Insulate your pipes if you live in a cold climate (I’ll talk more about that in a bit!).
Pro tip: If you’re dealing with a slab leak (a leak in the pipe under your foundation), that’s a whole different ball game. Those require professional equipment and expertise. If you suspect a slab leak, call a plumber immediately,they can often detect them with specialized tools.
Checking and Adjusting Your Water Pressure
Water pressure is one of those things you don’t think about until it’s a problem. Too low, and your shower feels like a drizzle. Too high, and your pipes are at risk of bursting. I learned this the hard way when I moved into my current house and the water pressure was so high, it kept blowing out the seals in my faucets. After a few frustrating repairs, I installed a pressure-reducing valve, and it made a huge difference.
Here’s how I check and adjust my water pressure:
- Test your water pressure. You can buy a water pressure gauge at any hardware store for a few bucks. Attach it to an outdoor spigot and turn on the water. The ideal pressure is between 40 and 60 PSI. If yours is higher or lower, you’ll need to adjust it.
- Check for leaks. High water pressure can sometimes be caused by a leak in your system. I check my water meter (the one on the street) to see if it’s running when all the water is turned off in the house. If it is, there’s a leak somewhere.
- Adjust the pressure. If your pressure is too high, you’ll need to install a pressure-reducing valve. If it’s too low, you might have a clogged pipe or a failing well pump (if you have one). I had to replace a section of pipe in my basement a few years ago because the pressure was so low,turns out, the pipe was partially collapsed!
- Inspect your pipes. Low water pressure can also be caused by mineral buildup in your pipes. I clean mine with a mix of vinegar and baking soda once a year. It’s a little messy, but it keeps everything running smoothly.
Pro tip: If you’re not sure what’s causing your water pressure issues, it’s okay to call a plumber. Sometimes, the problem is more complex than it seems, and a pro can save you a lot of time and frustration.
Insulating Your Pipes to Save Money and Prevent Freezes
Pipe insulation is one of those things I wish I’d known about sooner. A few years ago, we had a brutal winter, and my pipes froze twice. The first time, I was lucky,I caught it early and thawed them out with a hairdryer. The second time? Not so much. I came home to a burst pipe and a flooded basement. Let’s just say I learned my lesson.
Now, I insulate my pipes every fall, and I haven’t had a freeze since. Here’s how I do it:
- Identify the pipes that need insulation. Focus on exposed pipes in unheated areas like basements, garages, crawl spaces, and attics. I also insulate the pipes under my kitchen sink and in the bathroom because they’re on an exterior wall.
- Choose your insulation. There are a few options, but I like:
- Foam pipe insulation – This is what I use for most of my pipes. It’s cheap, easy to install, and comes in different sizes to fit standard pipe diameters. I buy the Arctic Foam brand because it’s durable and stays put.
- Fiberglass wrap – This is better for larger pipes or odd shapes. It’s a little more expensive, but it’s more effective in extreme cold.
- Reflective insulation – I use this for pipes in my attic because it reflects heat back toward the pipe.
- Measure and cut the insulation. Use a tape measure to determine how much insulation you need. I cut the foam insulation with a utility knife,it’s surprisingly easy!
- Install the insulation. Slide the insulation over the pipes and secure it with the adhesive strips that come with it. For fiberglass wrap, I use metal tape or wire to hold it in place. Make sure the insulation is snug but not too tight,you don’t want to damage the pipes.
- Seal the seams. If you’re using foam insulation, I like to seal the seams with painter’s tape to keep out drafts. It’s a small detail, but it makes a difference.
Pro tip: If you have pipes in a crawl space or basement, consider adding a heat tape for extra protection. I wrapped heat tape around my most vulnerable pipes after that second freeze, and it’s given me peace of mind ever since.
Oh, and one more thing,if you’re insulating pipes in a tight space, like under a sink, use foam pipe sleeves instead of wrap. They’re easier to install and stay put better.
When to Call a Pro (And Why It’s Okay)
Look, I’m all for DIY. But there are some plumbing problems that are better left to the professionals. Here are the red flags that tell me it’s time to pick up the phone:
- Water damage or mold. If you see brown stains on walls or ceilings, or if you smell musty odors, there’s likely a hidden leak. I learned this the hard way when I ignored a small stain in my guest bathroom,by the time I fixed it, I had to replace a section of drywall. Drywall repair is one of my least favorite tasks, so I don’t mess around with water damage anymore.
- Weird noises. If you hear banging, clanking, or gurgling sounds in your pipes, that’s a sign of a serious problem. I once had a pipe vibrate so hard it cracked,turns out, it was due to a faulty water heater. A plumber fixed it, and I learned to listen for those noises.
- Fluctuating water pressure. If your water pressure is all over the place,sometimes too high, sometimes too low,that can indicate a problem with your main water line or pressure regulator. I had this happen after a major storm, and it turned out a tree root had punctured my main line. Not fun.
- Sewer line issues. If you have a clog that won’t budge, or if you notice sewage backing up into your drains, that’s a sewer line problem. I tried to fix a sewer clog once with a drain snake, and all I did was make it worse. Lesson learned!
- Gas lines. If you smell gas or suspect a gas leak, get out of the house and call 911 immediately. This is not a DIY job. I had a gas line issue once, and the plumber told me I was lucky I didn’t blow up the house. Scary stuff.
Here’s the thing: calling a plumber doesn’t mean you’ve failed. It means you’re being smart about your home and your safety. I’ve called plumbers plenty of times, and I’m always glad I did. Plus, knowing when to call a pro means you can focus on the DIY jobs you can handle,and that’s a win in my book.
Your DIY Plumbing Maintenance Schedule
One of the best things I’ve done for my home is create a plumbing maintenance schedule. It’s not glamorous, but it saves me money and headaches in the long run. Here’s what I check on a regular basis:
- Monthly:
- Inspect pipes under sinks and appliances for leaks or corrosion.
- Check faucets and showerheads for drips or low water pressure.
- Test toilets for proper flushing and water levels.
- Clean aerators on faucets to improve water flow.
- Every 6 months:
- Check the water heater for proper temperature (120°F is ideal) and drain the tank to remove sediment.
- Inspect the water filtration system (if you have one) and replace filters as needed.
- Test all shutoff valves to make sure they’re working properly.
- Check the sump pump (if you have one) to ensure it’s functioning.
- Annually:
- Insulate exposed pipes if you live in a cold climate.
- Check the main water shutoff valve to make sure it’s accessible and working.
- Inspect the garage and basement for signs of leaks or water damage.
- Flush the water heater to remove buildup.
I keep a little notebook in my toolbox where I jot down what I’ve checked and when. It’s not fancy, but it helps me stay on top of things. And if I notice something that needs attention, I add it to my home maintenance to-do list so I don’t forget about it.
Oh, and one more thing,if you’re like me, you’ll want to set reminders on your phone for these tasks. I have one for the first of every month that says, “Check pipes!” It’s a simple reminder, but it’s saved me from a lot of headaches.
Final Thoughts (And a Little Encouragement)
Look, I get it,plumbing can be intimidating. There’s nothing fun about crawling under a sink or dealing with a clogged toilet. But here’s what I’ve learned: most plumbing problems are fixable, and once you’ve done a few repairs, you’ll feel a lot more confident. I still remember the first time I fixed a leaky pipe by myself. I was so proud I texted my husband a photo of the “before and after” (yes, I’m that person).
Start small. Pick one of the fixes in this post and try it out. If you mess up? That’s okay. I’ve replaced the wrong part more times than I can count. The key is to keep trying. And if you get stuck, there are tons of resources out there,including my tool guide and step-by-step tutorials.
So grab your tools, turn off the water, and give it a shot. You’ve got this. And if you run into trouble? Well, that’s what plumbers are for. But I bet you’ll surprise yourself.
Now, go fix something!